
So, we decided to build a yurt.
In Spring 2022, the idea of building an off-grid yurt suddenly appeared in our collective conscious. The source of this inspiriation is still not really clear, but visions of augmenting our business plan with a short-term rental farm stay program, having an alternative place for friends and family to stay at the farm, a place for seasonal workers to stay to help tend and harvest the crops were all featured in our discussions in the planning stage. From the start, we wanted this to be a project that was “From the farm, for the farm”. As a result, we took a very DIY view and used local sources for the materials. This includes foraging for the rafters from our woods and building materials from our local sawmill less than 5 miles away.
We did a lot of research before taking on this project, most of which came from Two Girls Farm based in Acworth, NH. I cannot say enough good things about Ken Gagnon and his family - they really know how to build yurts and their website has detailed instructions on how to build one from start to finish. We opted to buy our cover and some hard to find materials for our build, but the rest of the project was done by us, according to their instructions.
This project is still a work in progress, but we have come a long way in the past several years. You can follow our progress with the chronological gallery below. We hope to have it be a fully functional space by early 2026.

Foraging for rafters in the woods

Saplings for rafters collected and ready for processing
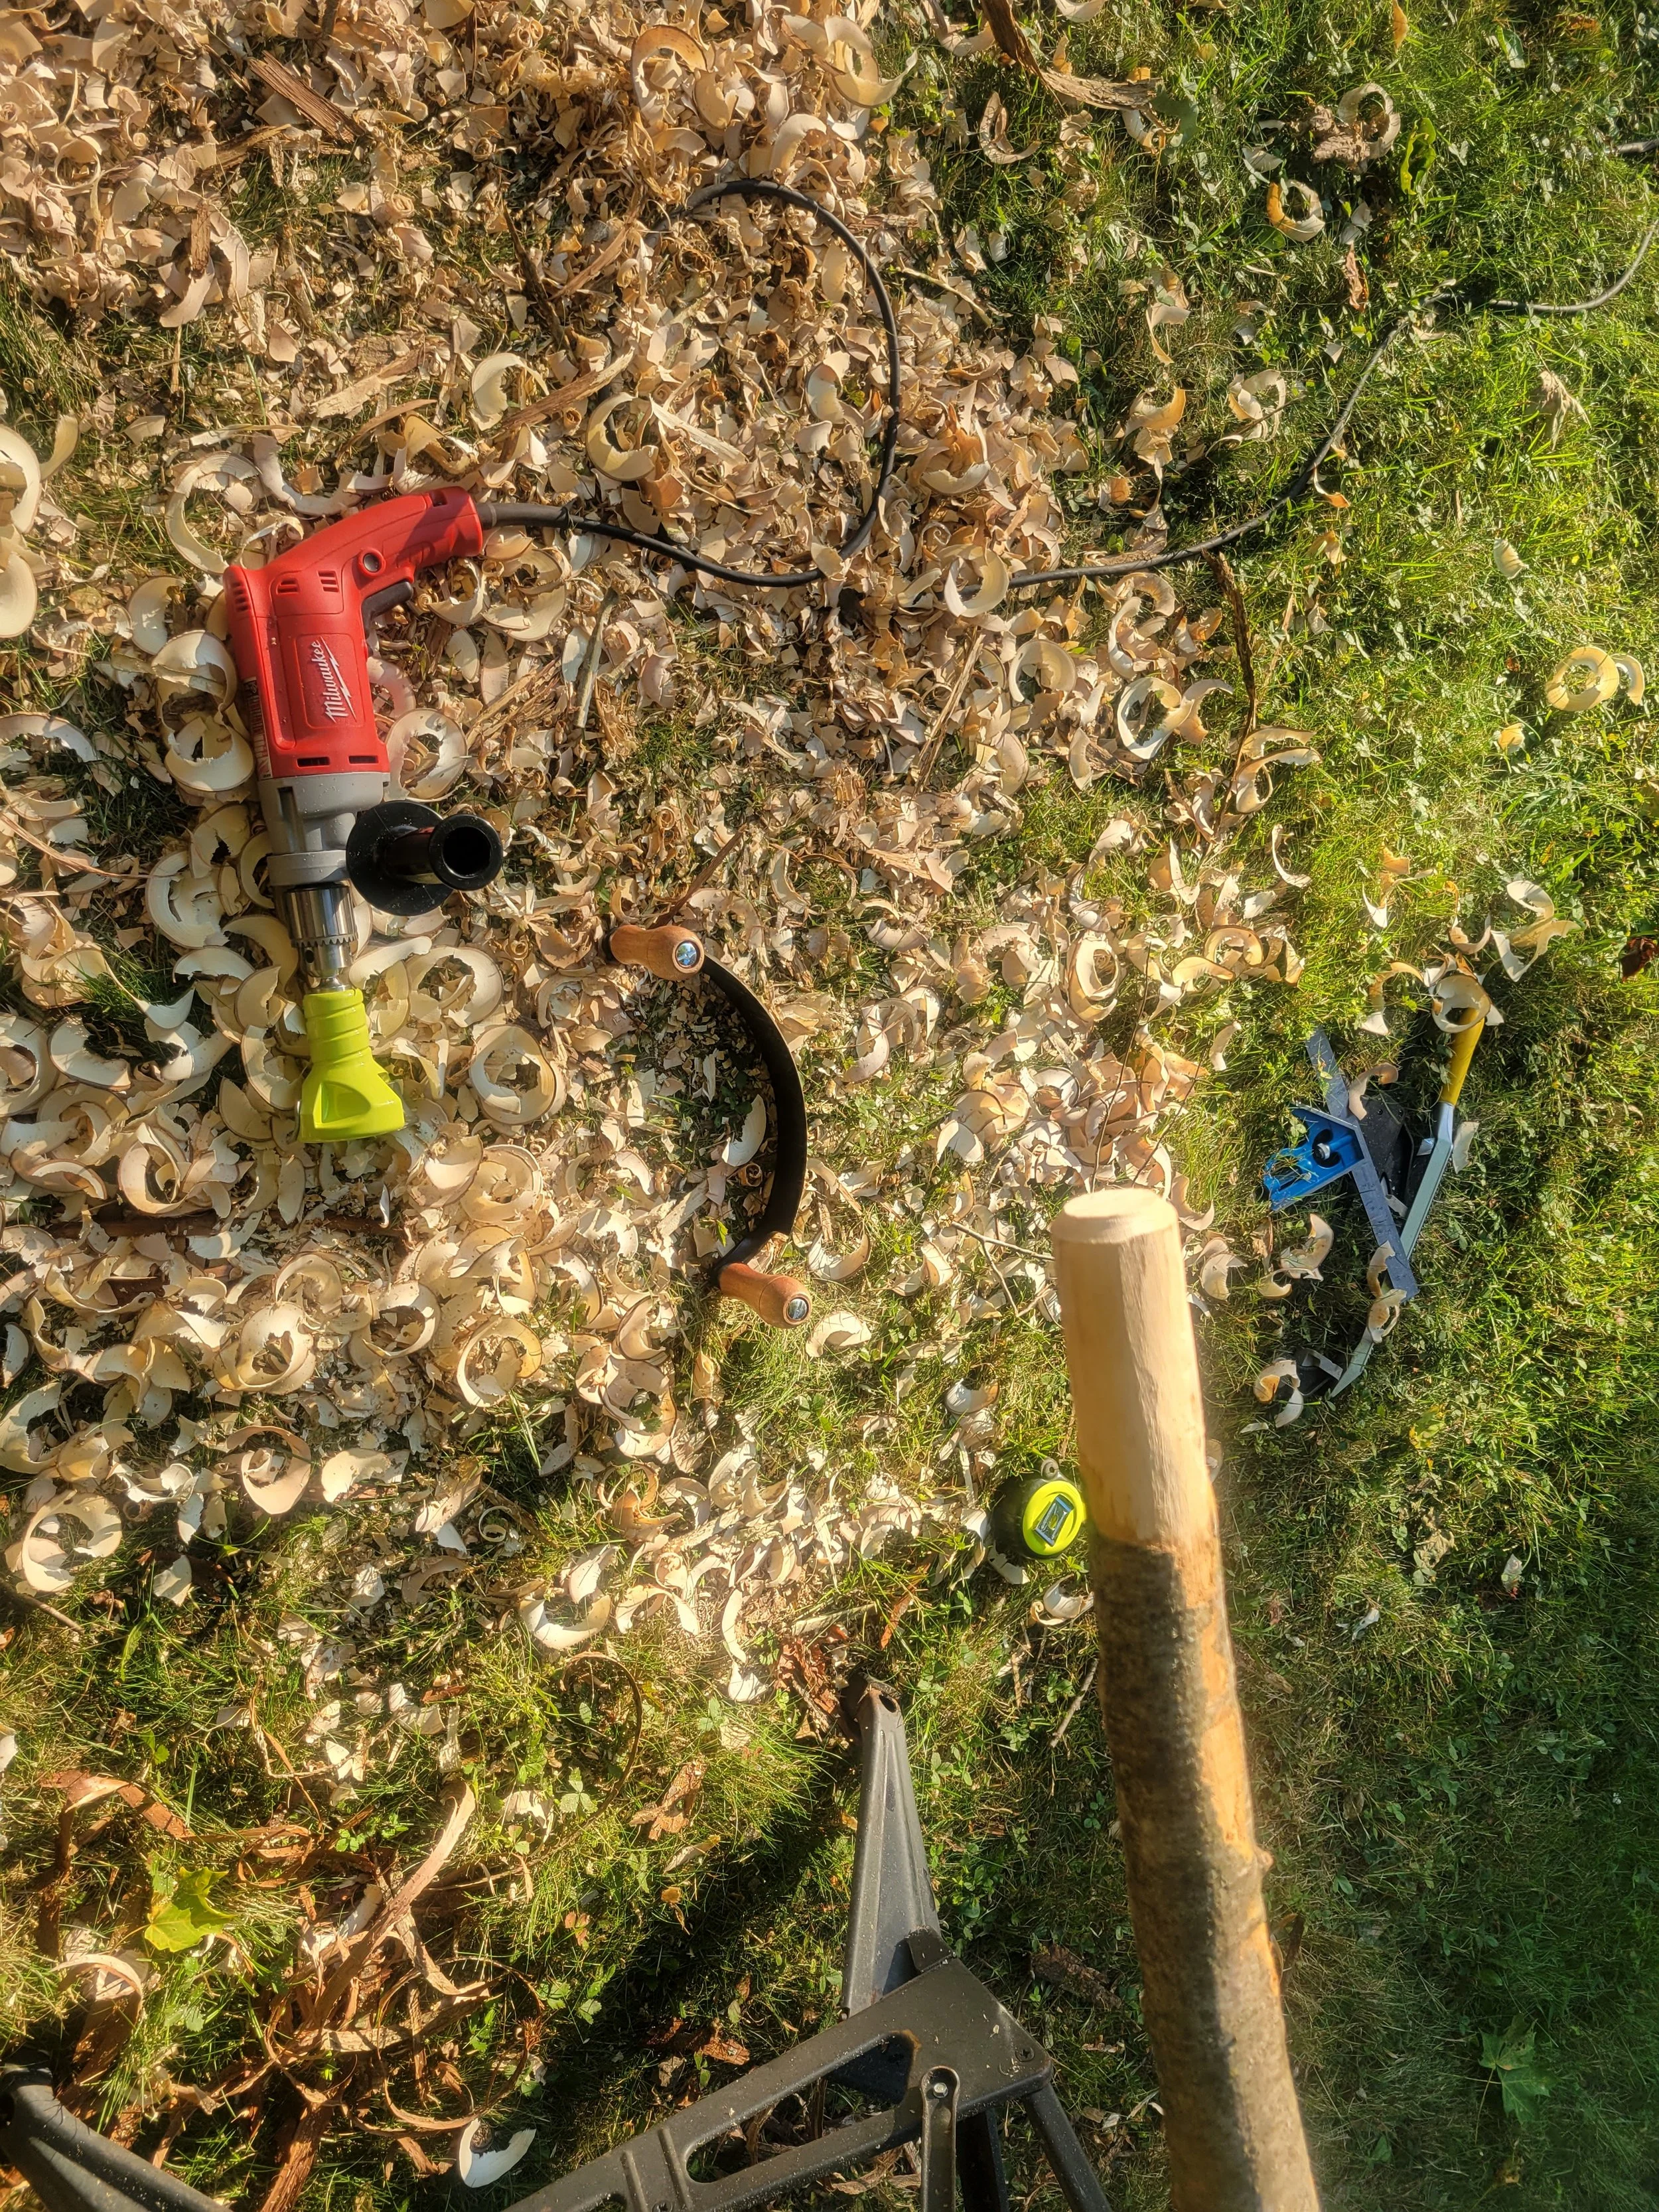
Cutting tenons in rafters. The drill attachment acts like a large pencil sharpener.
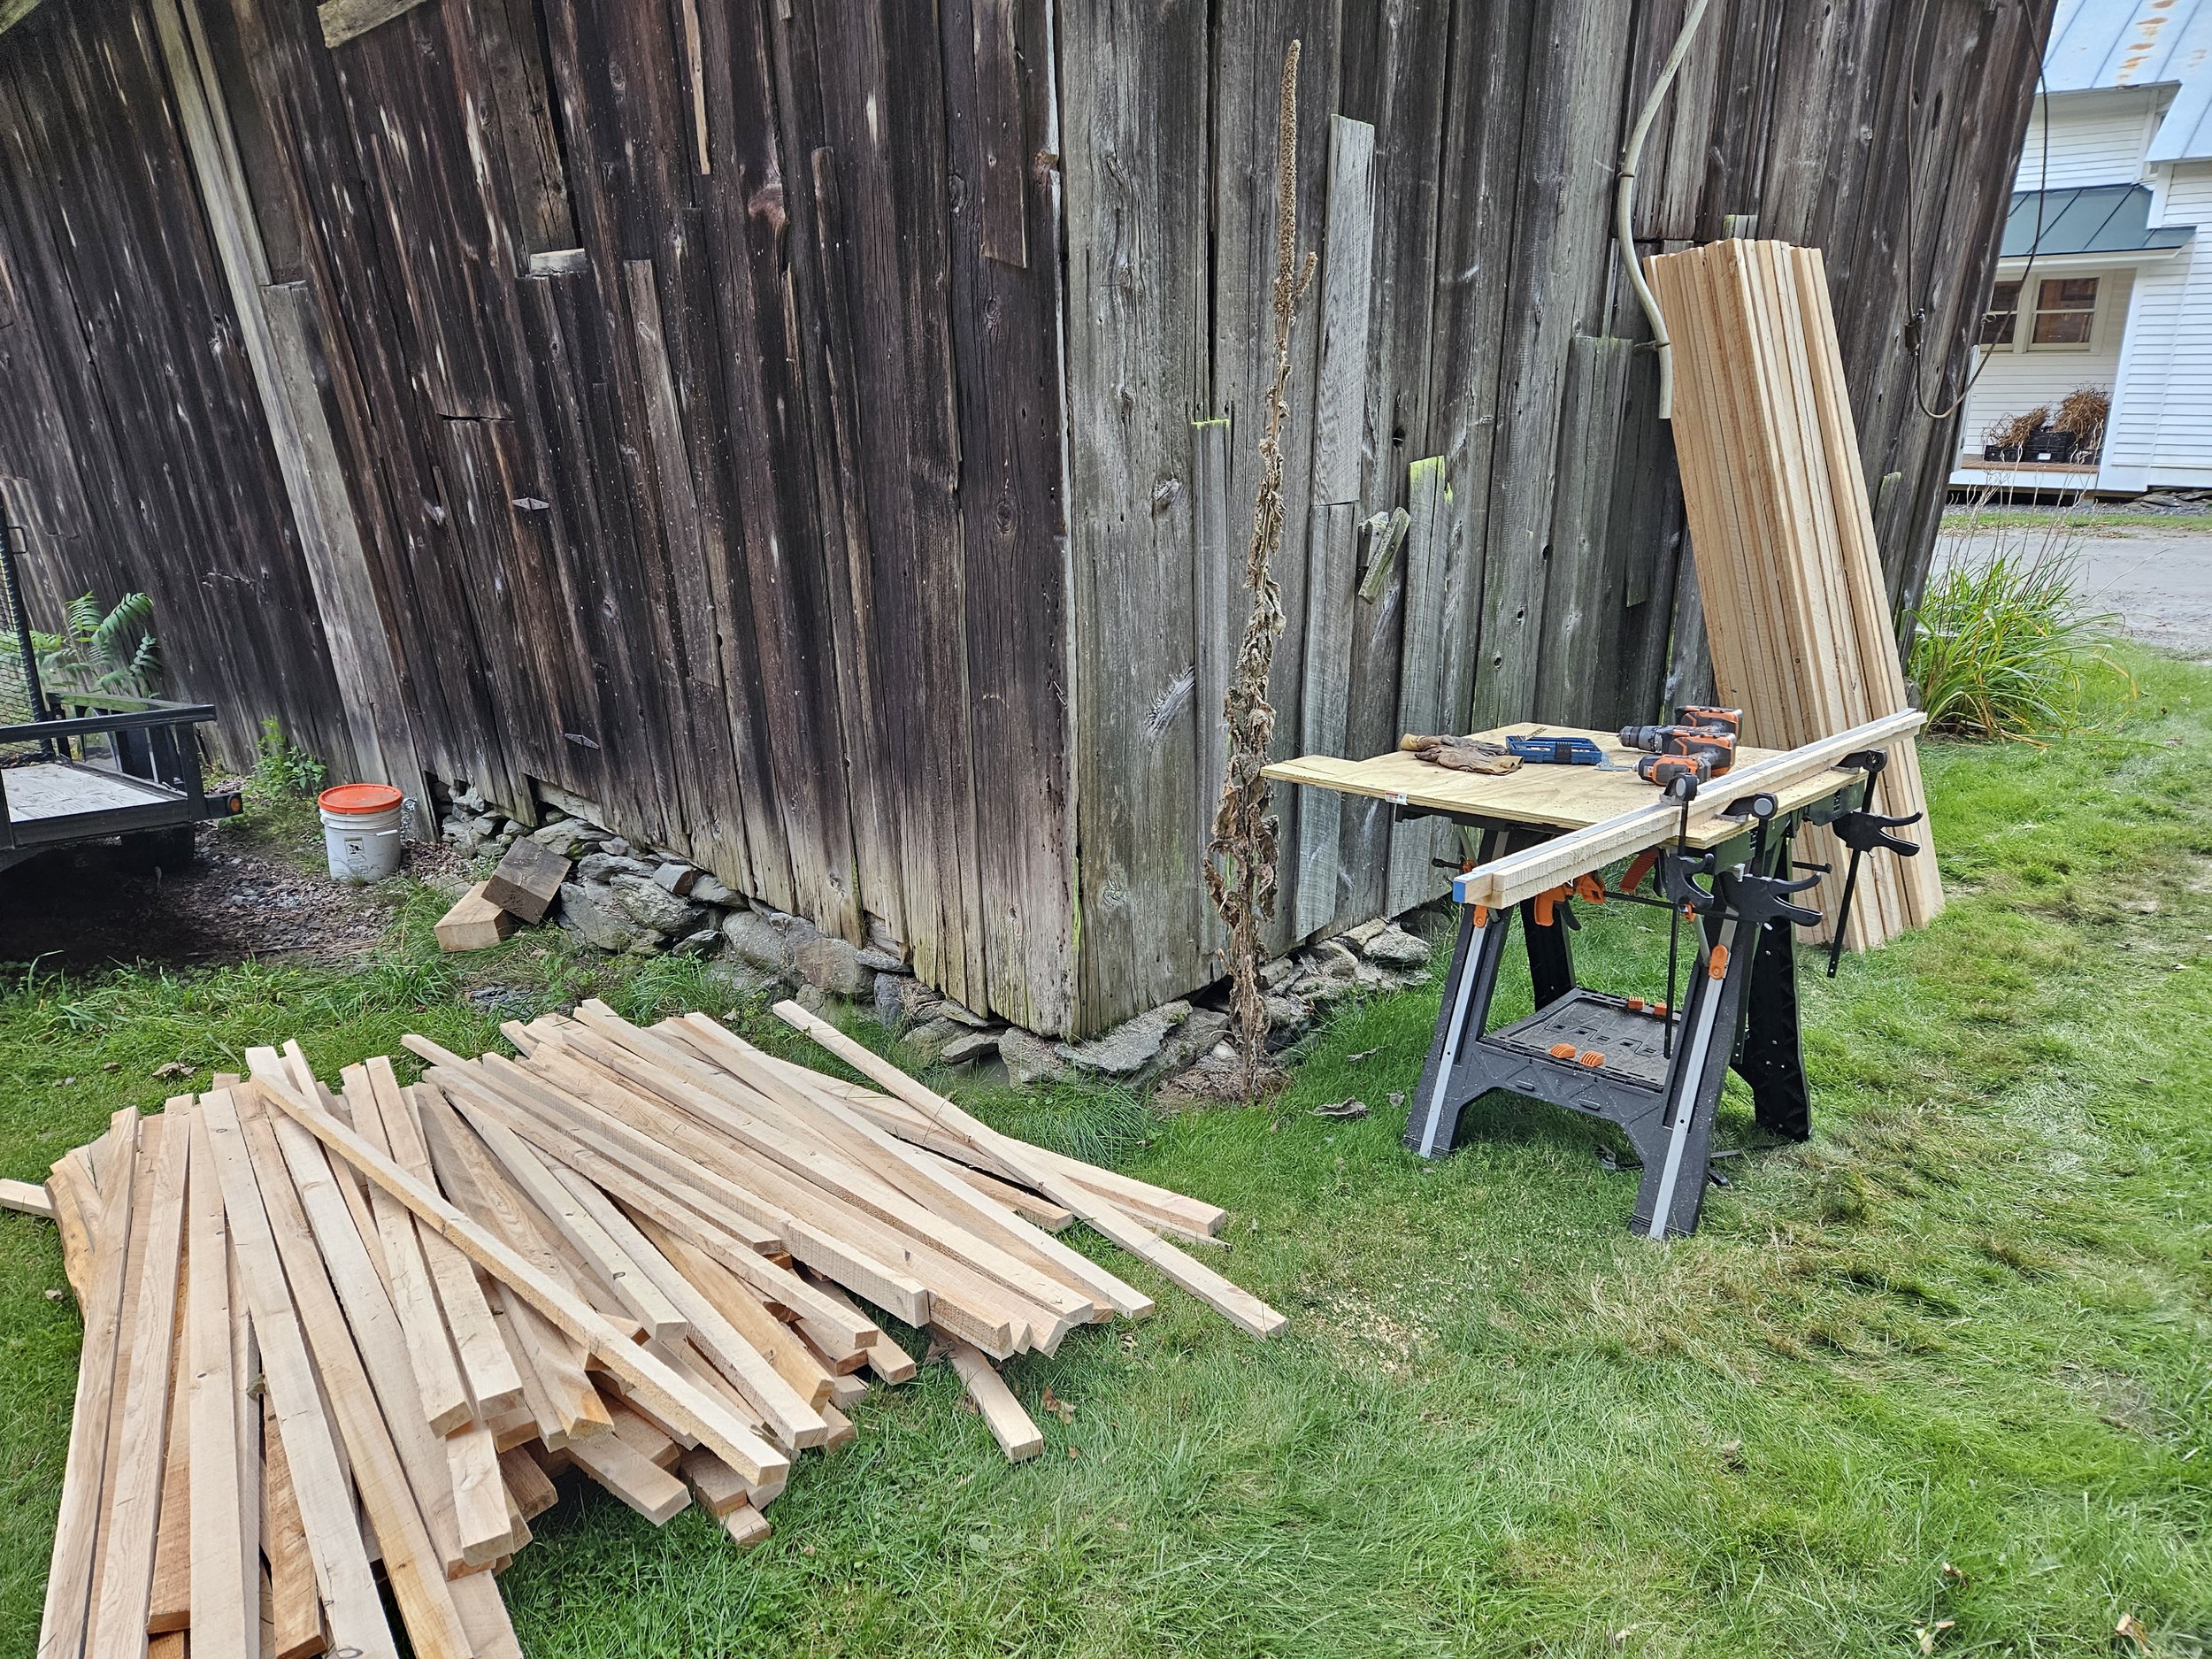
Cutting lathe to length and drilling tie-in points

Drying the lathe pieces in the barn for 18 mos.
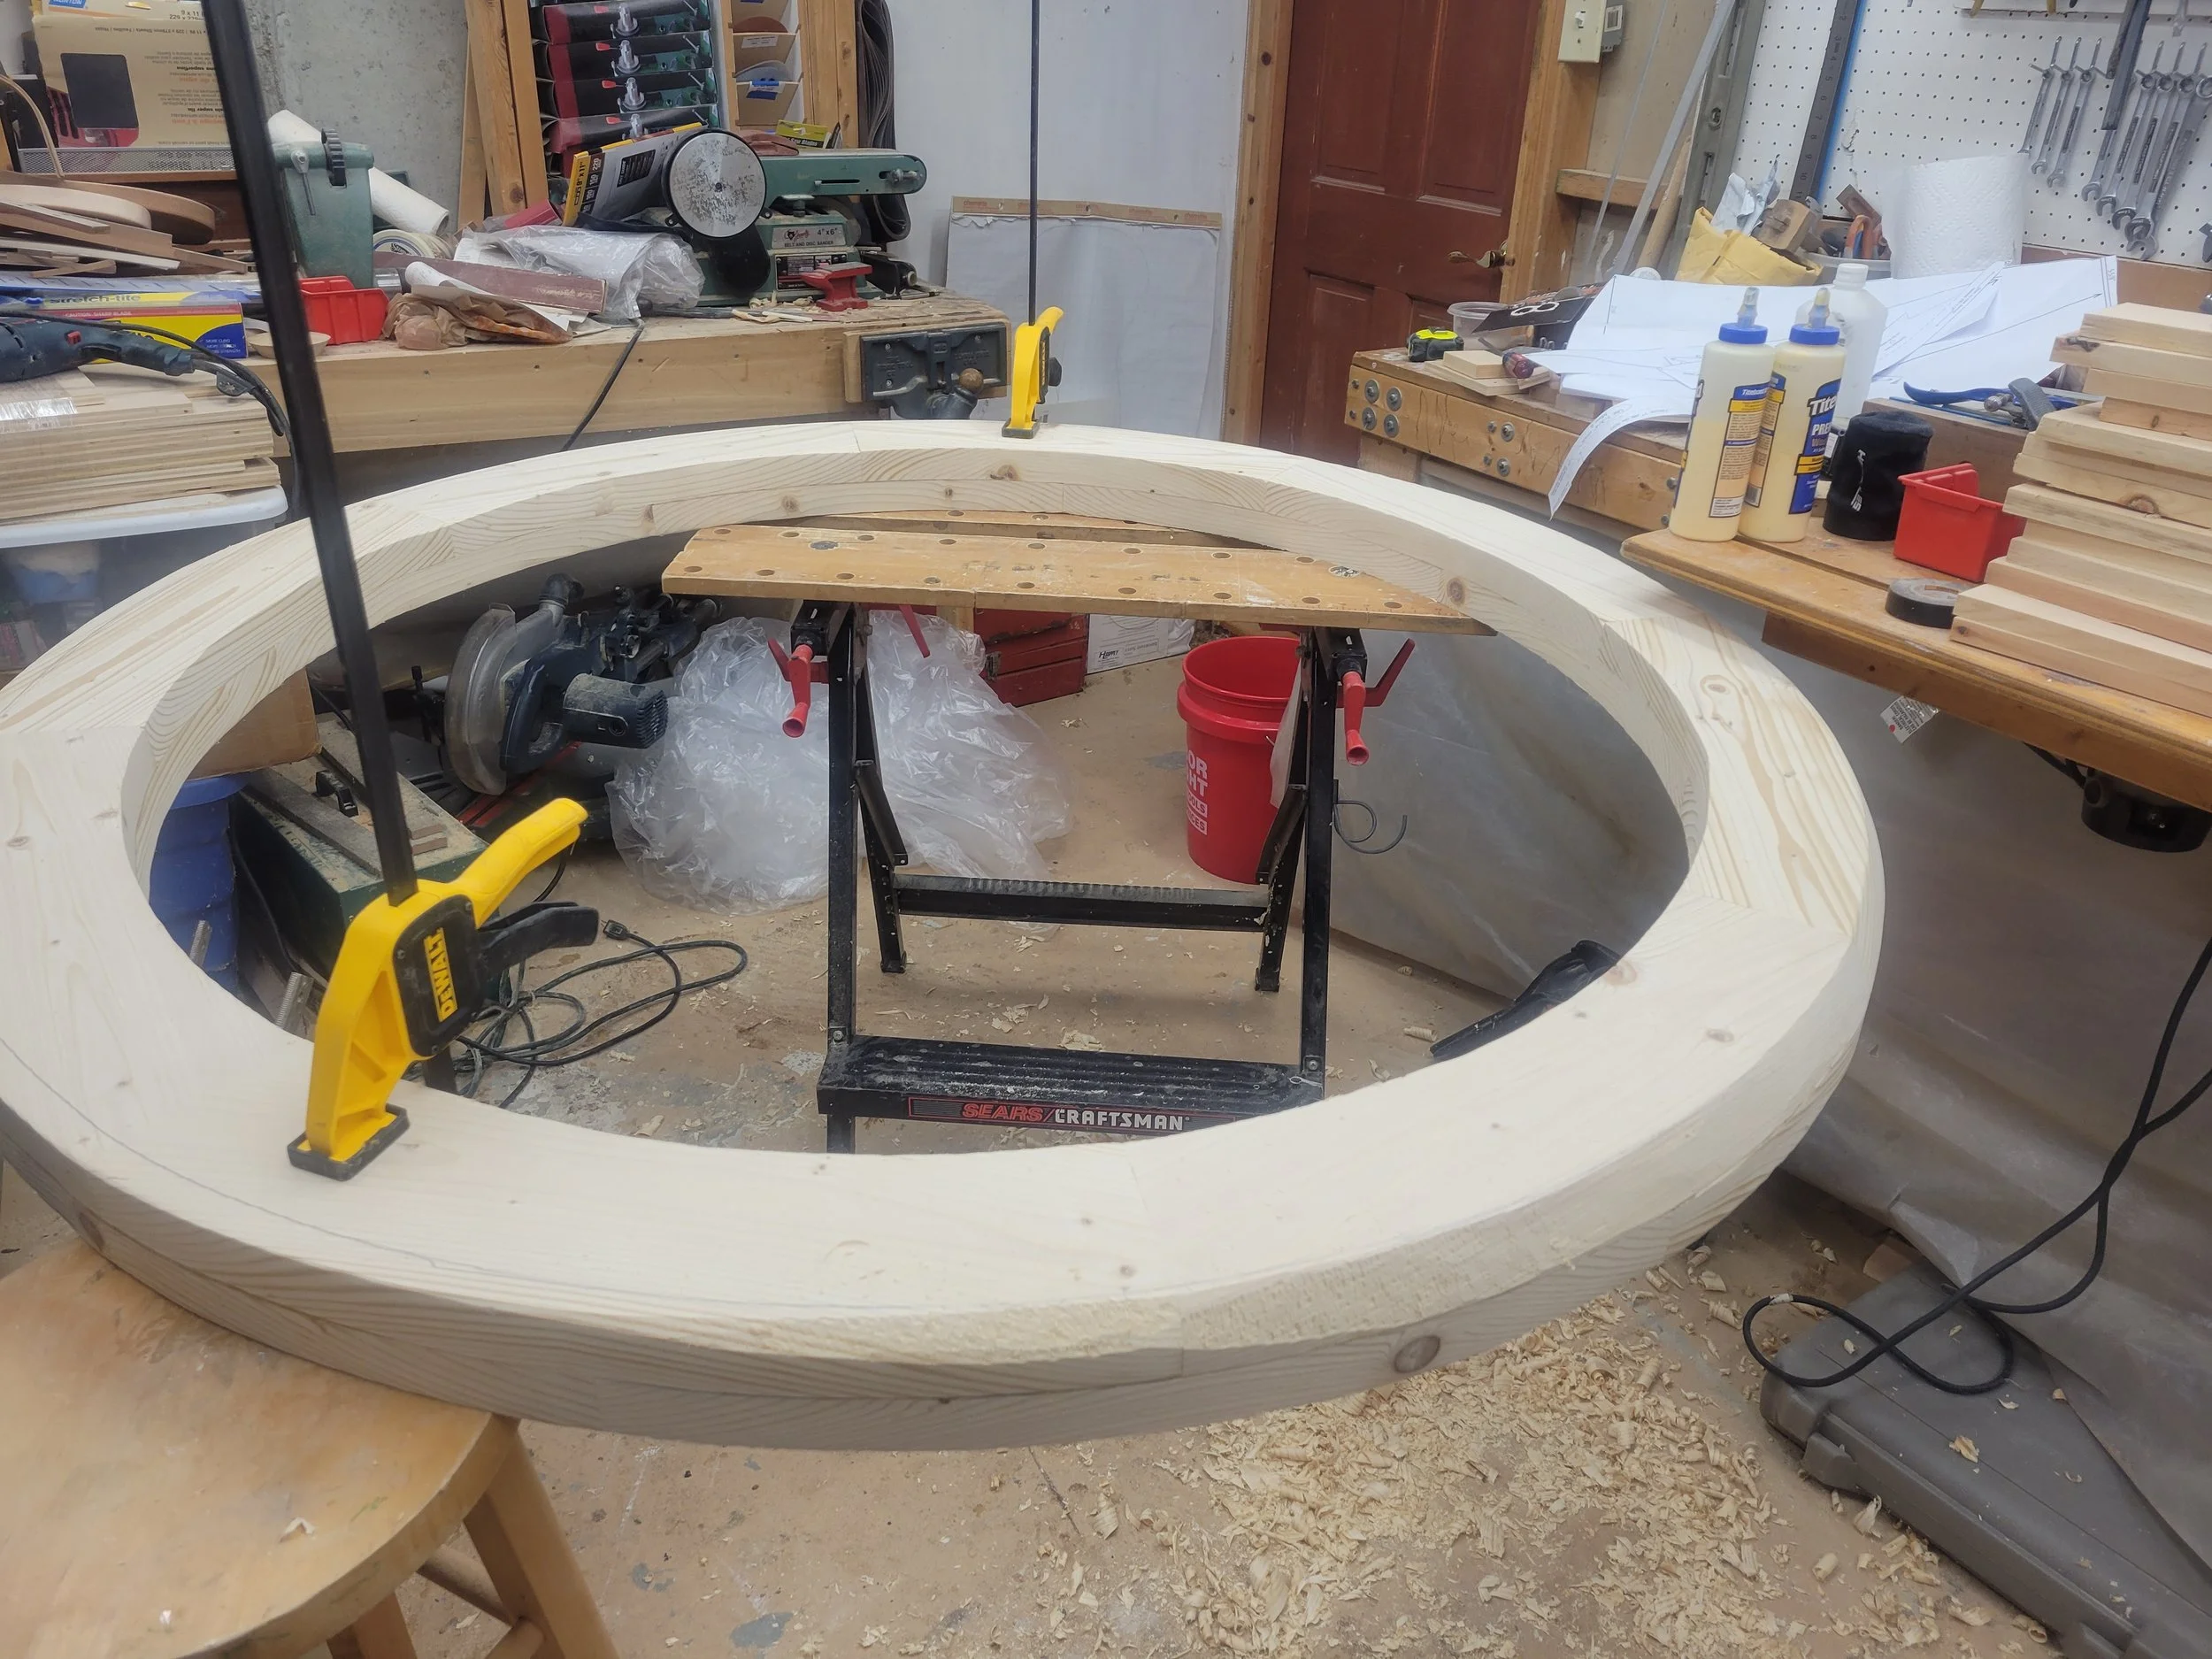
Center ring is ready for drilling rafter mortises
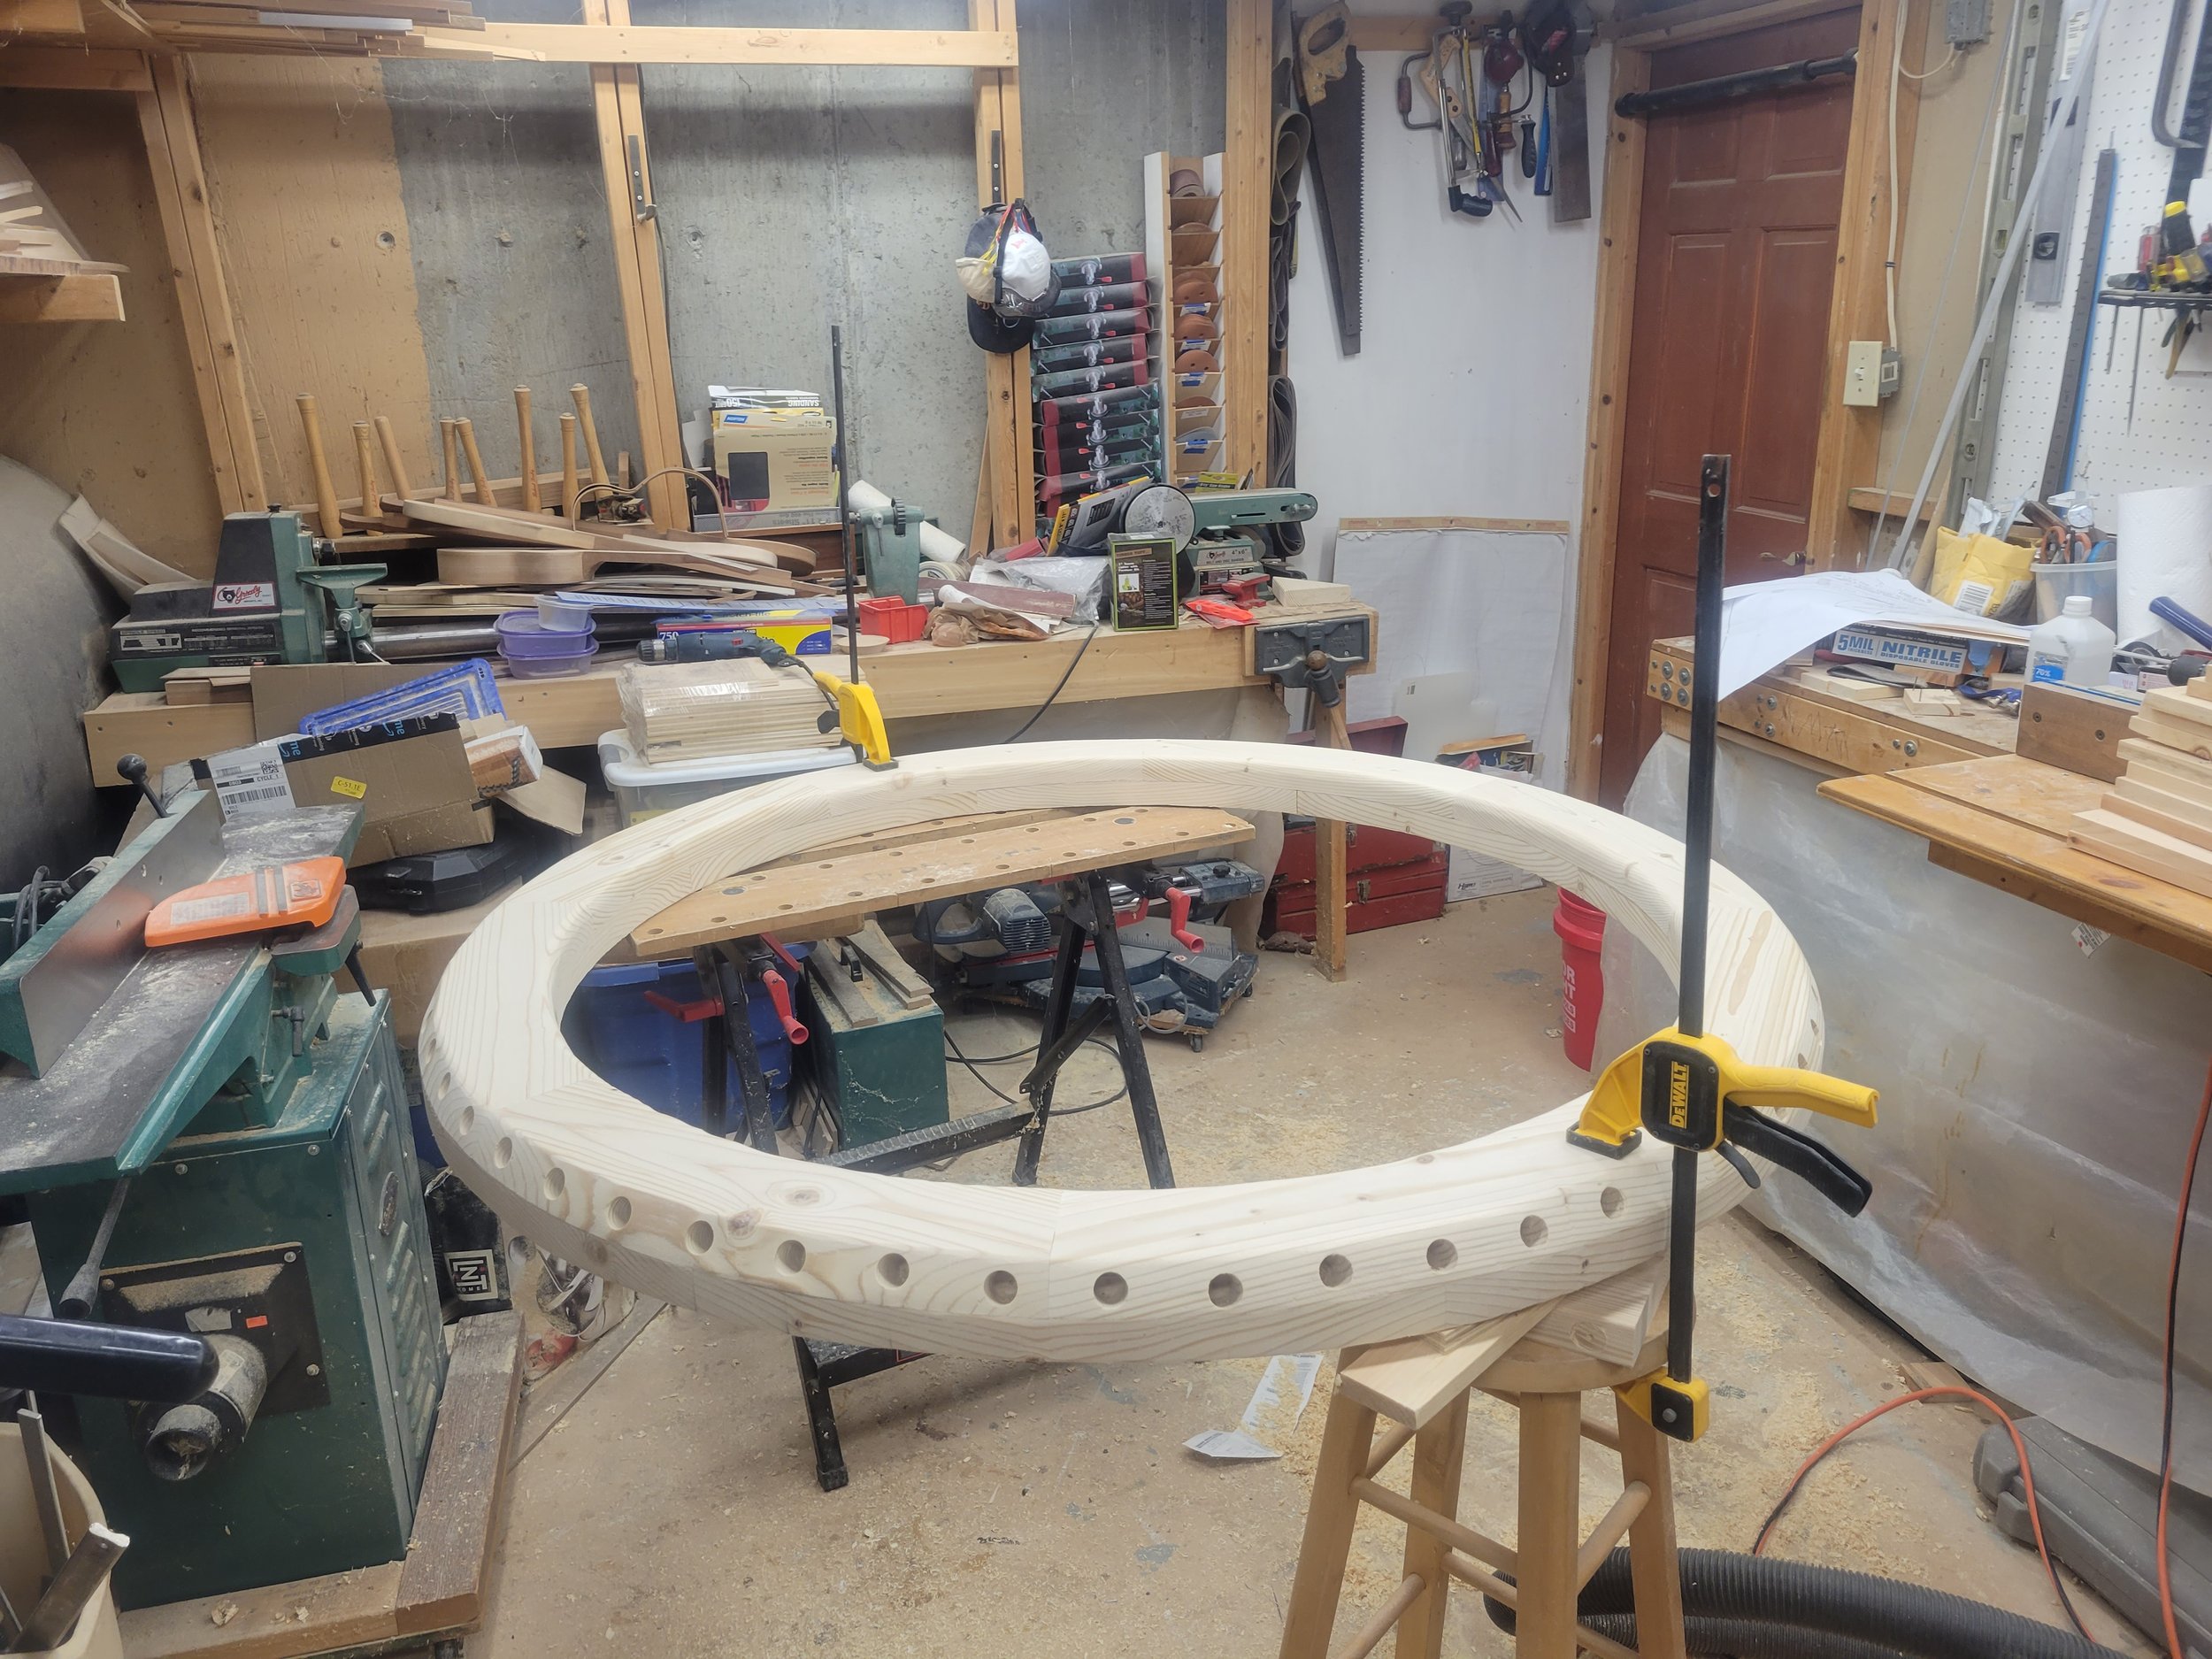
Center ring finished!
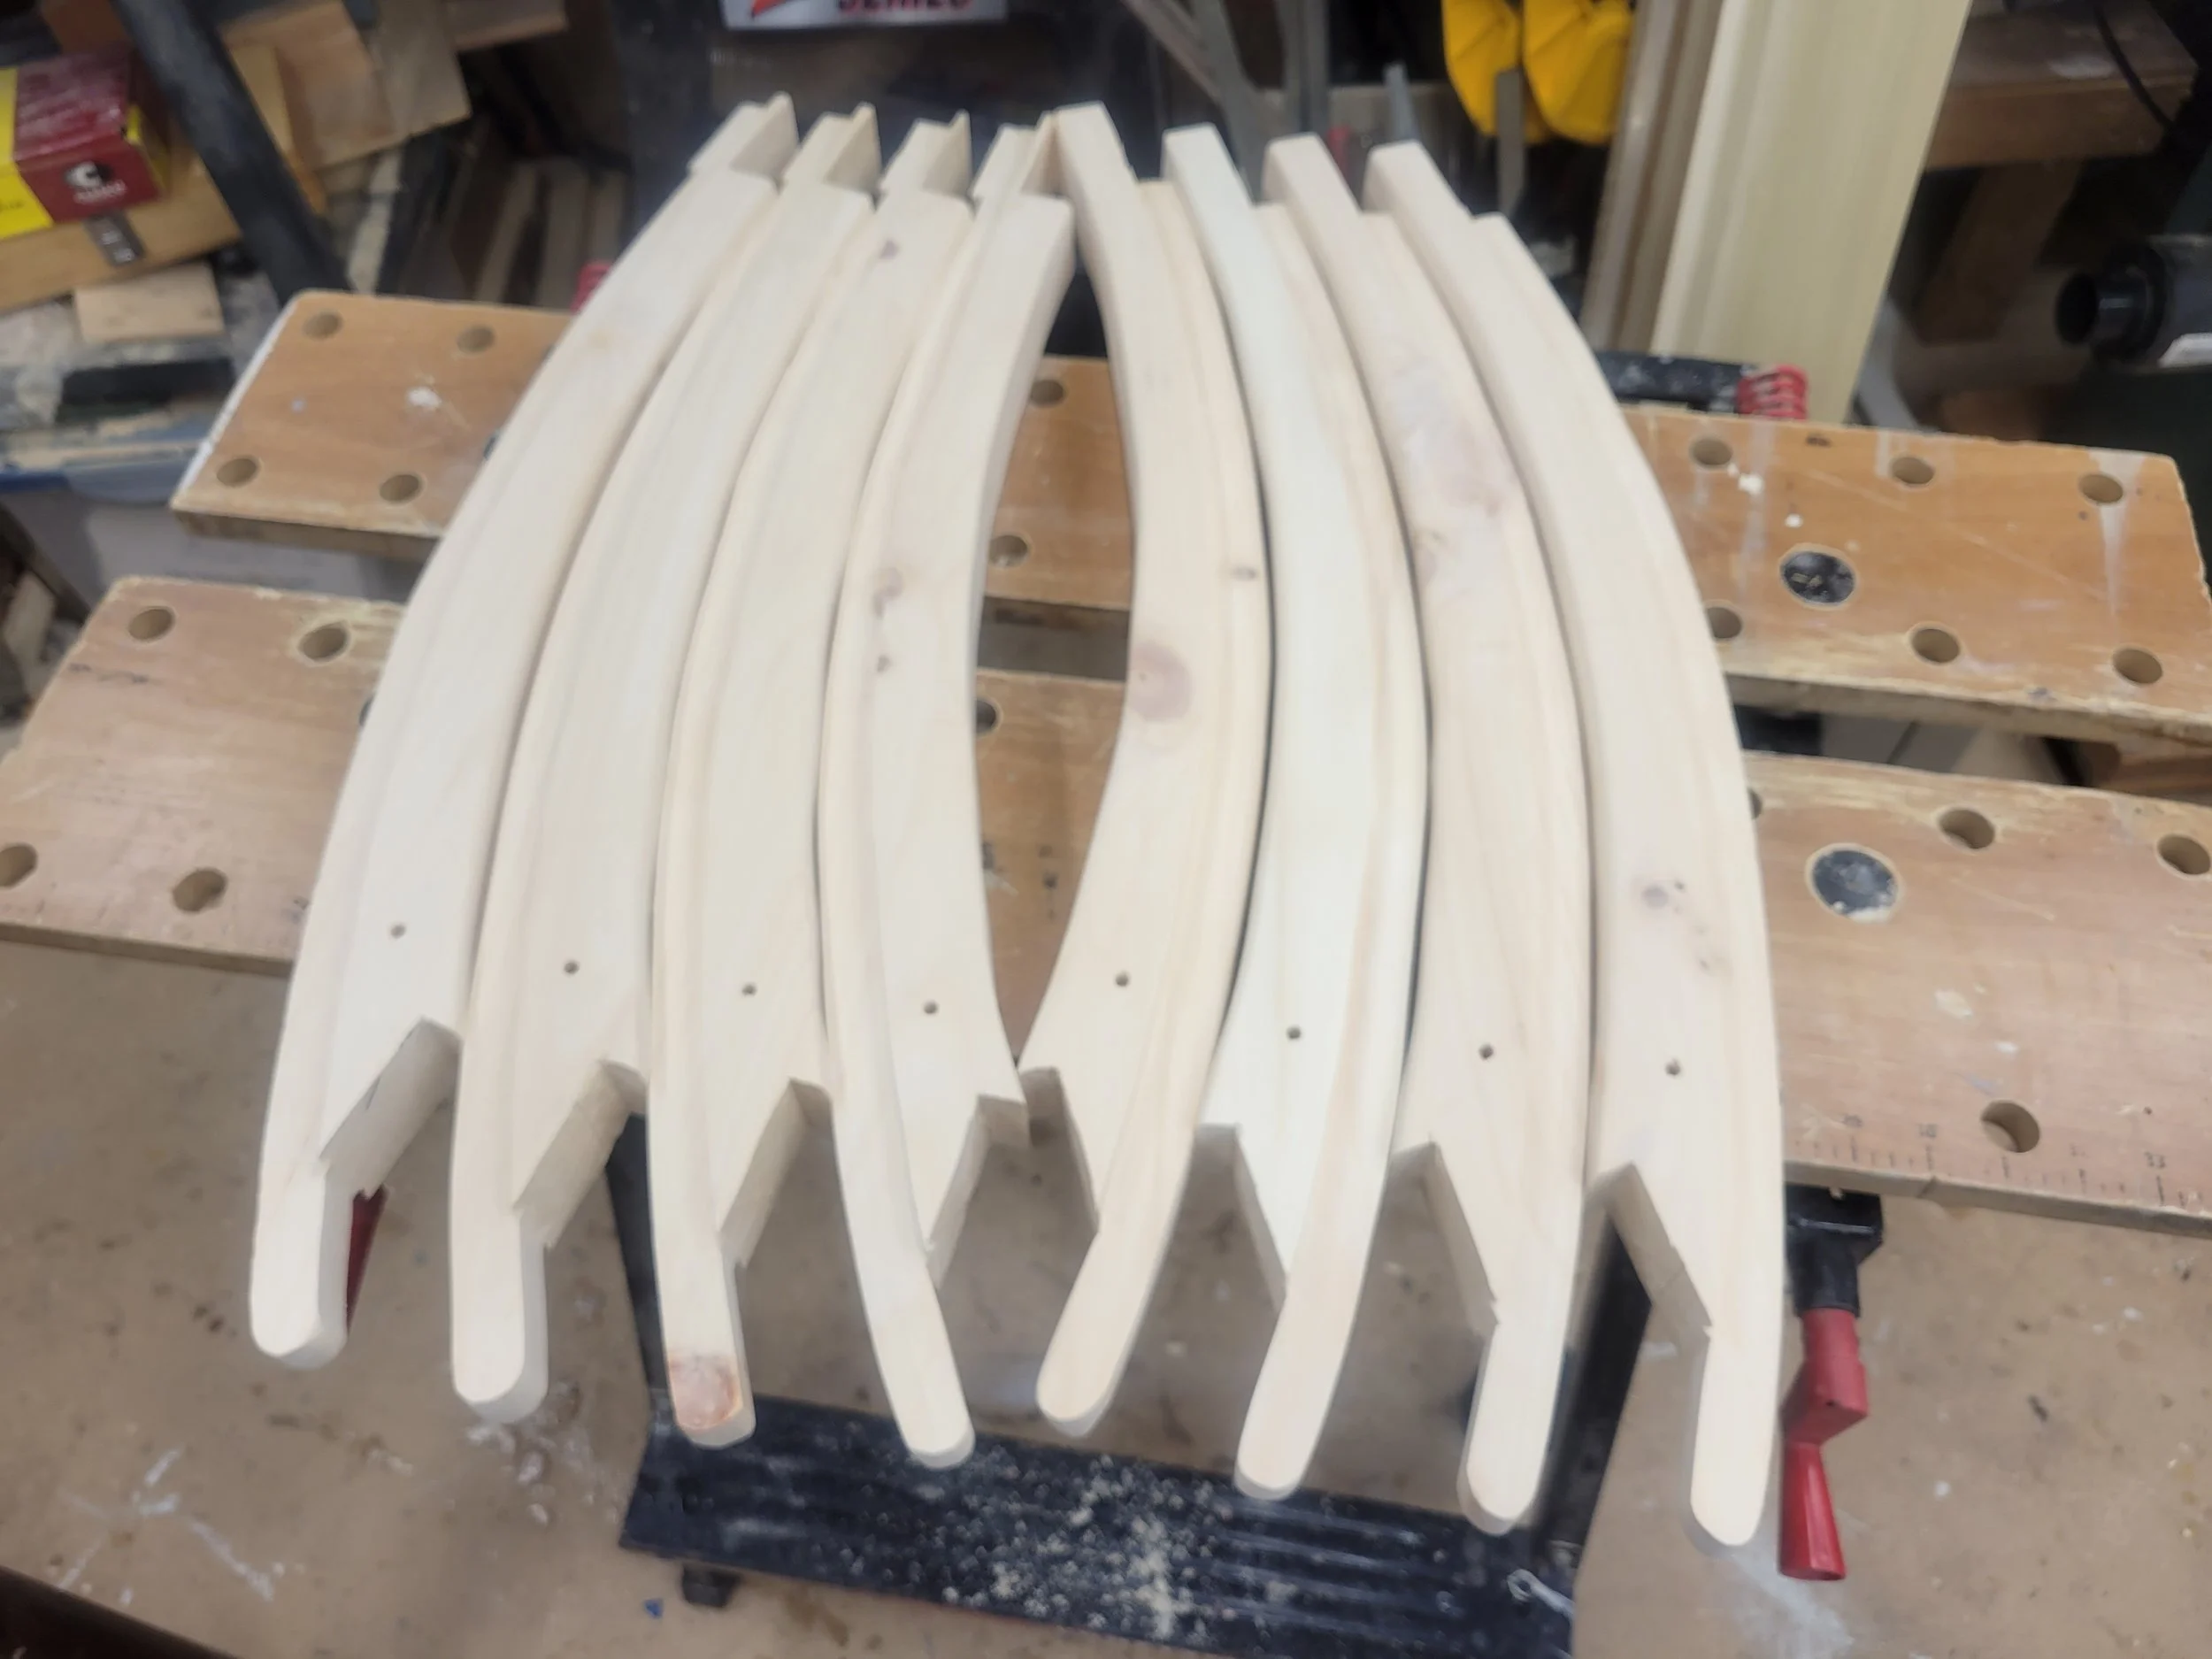
Skylight ribs
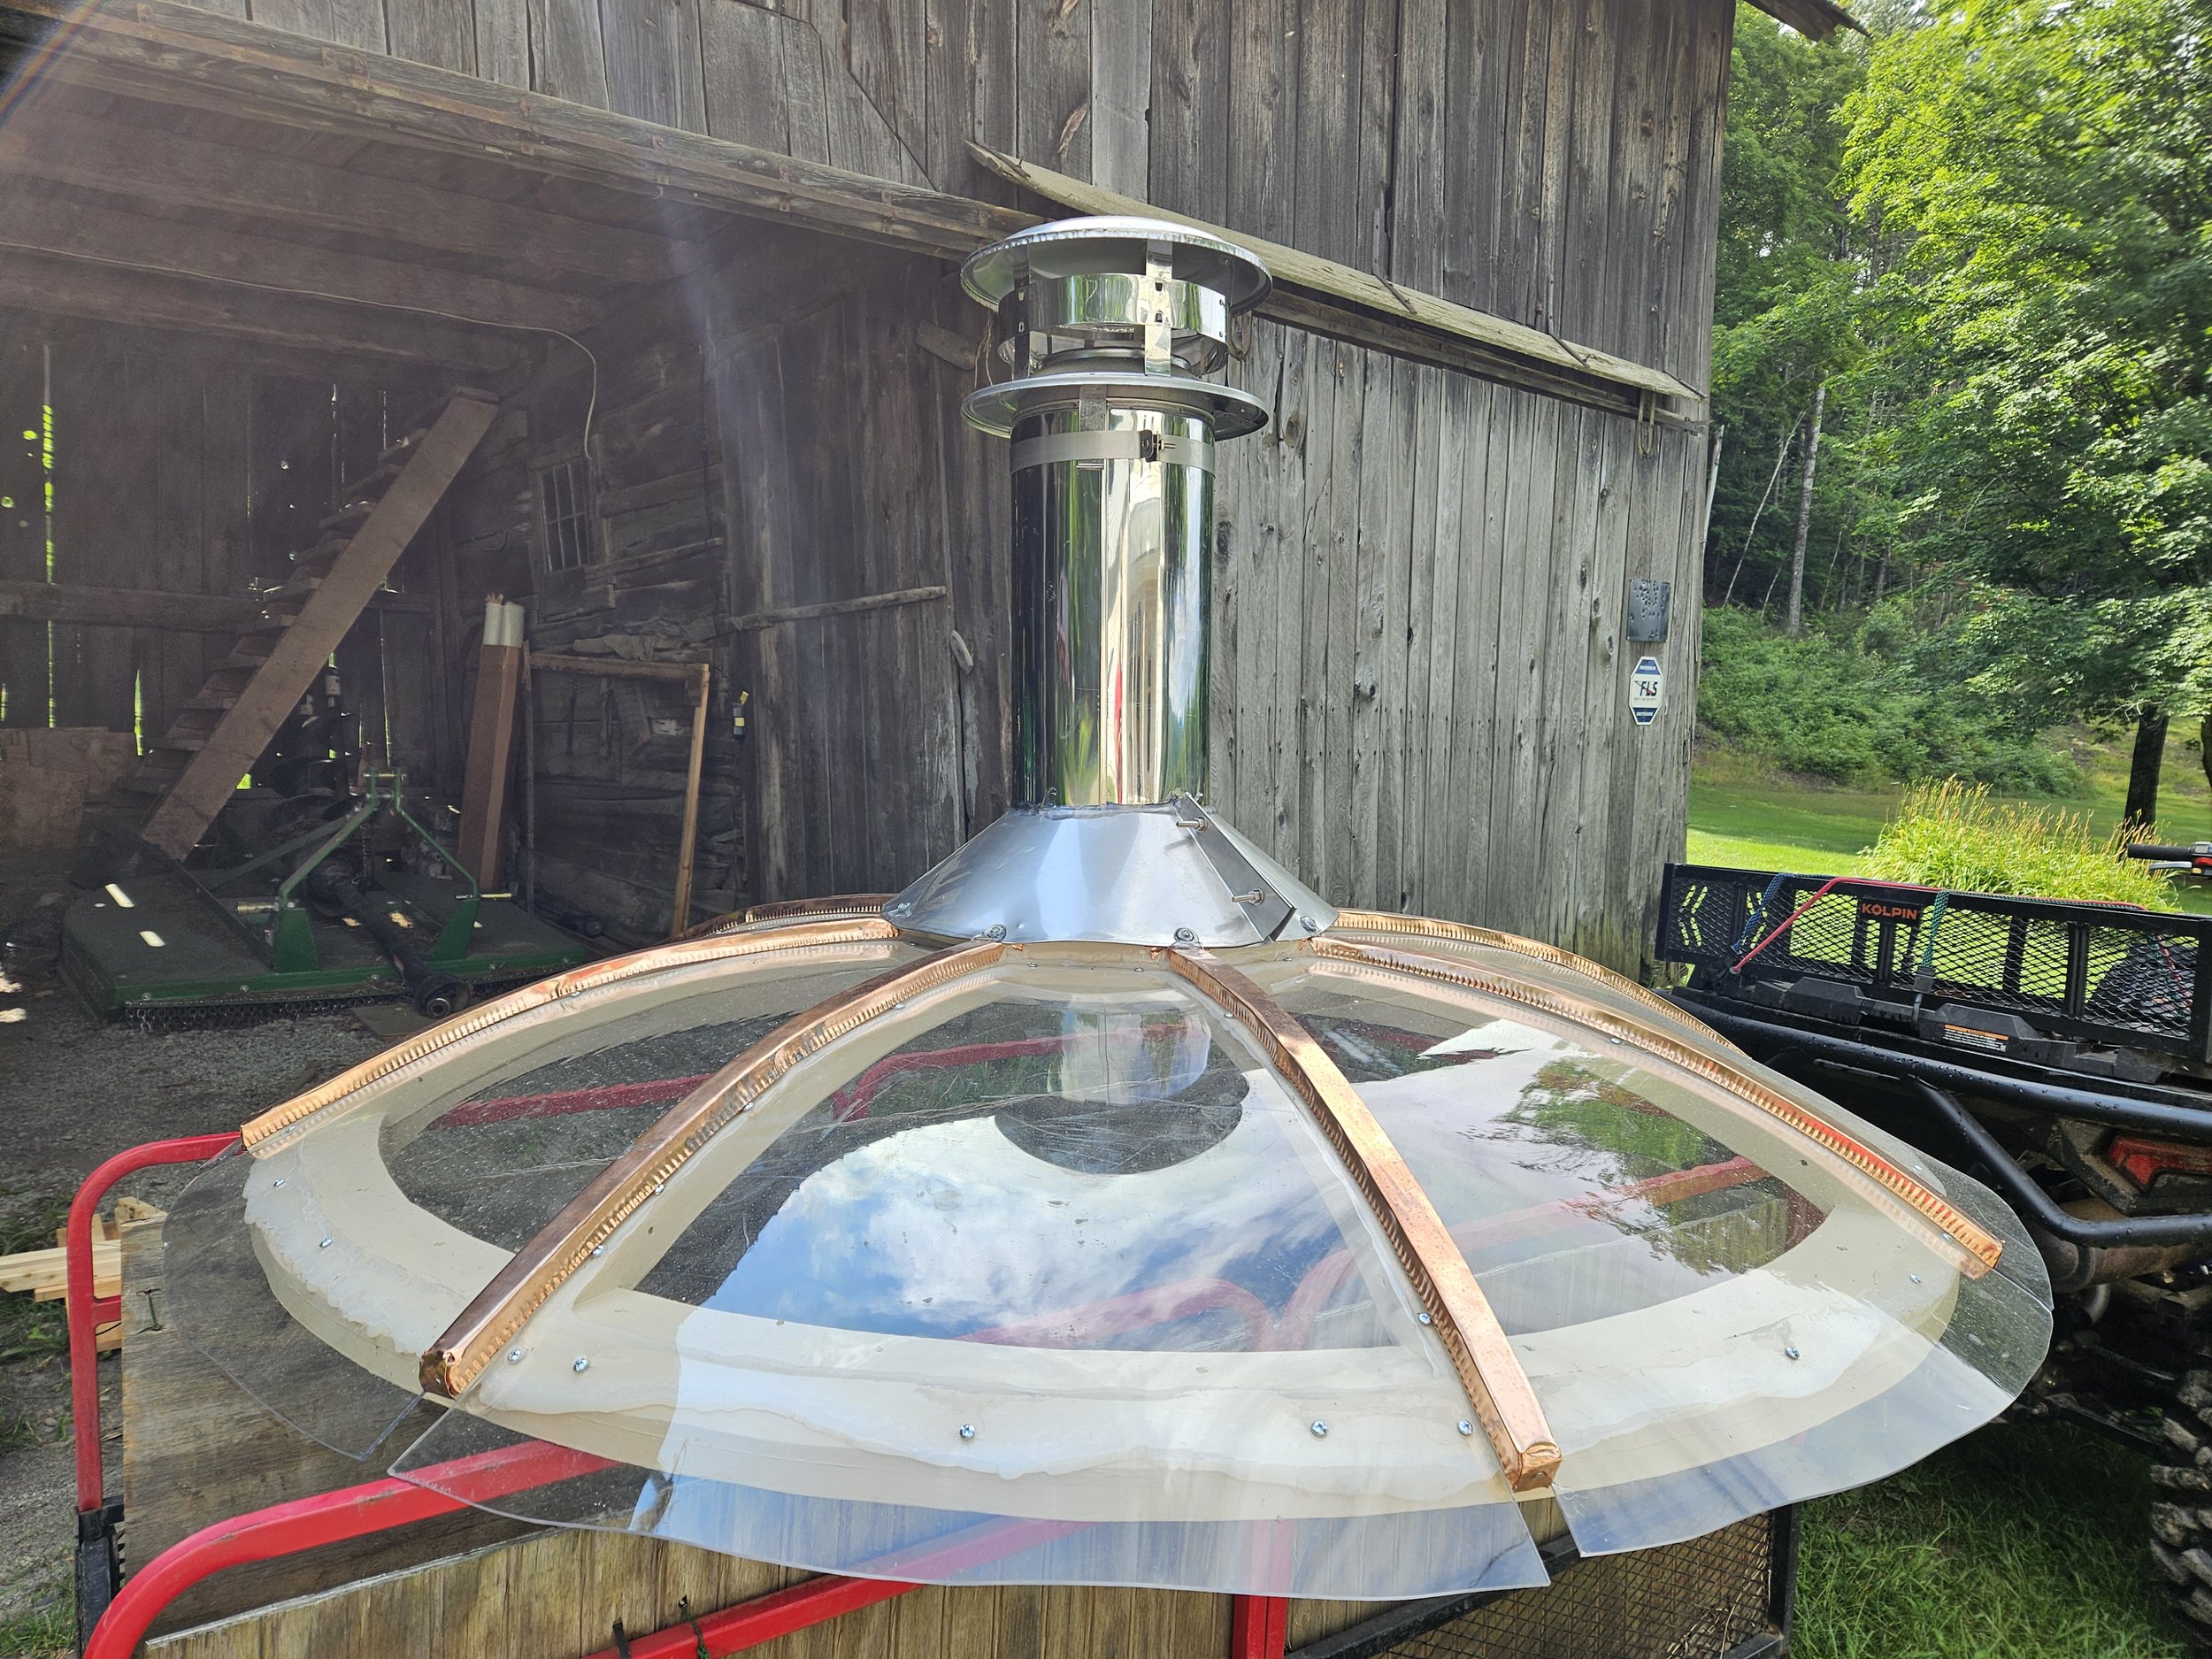
The finished skylight is ready to be installed
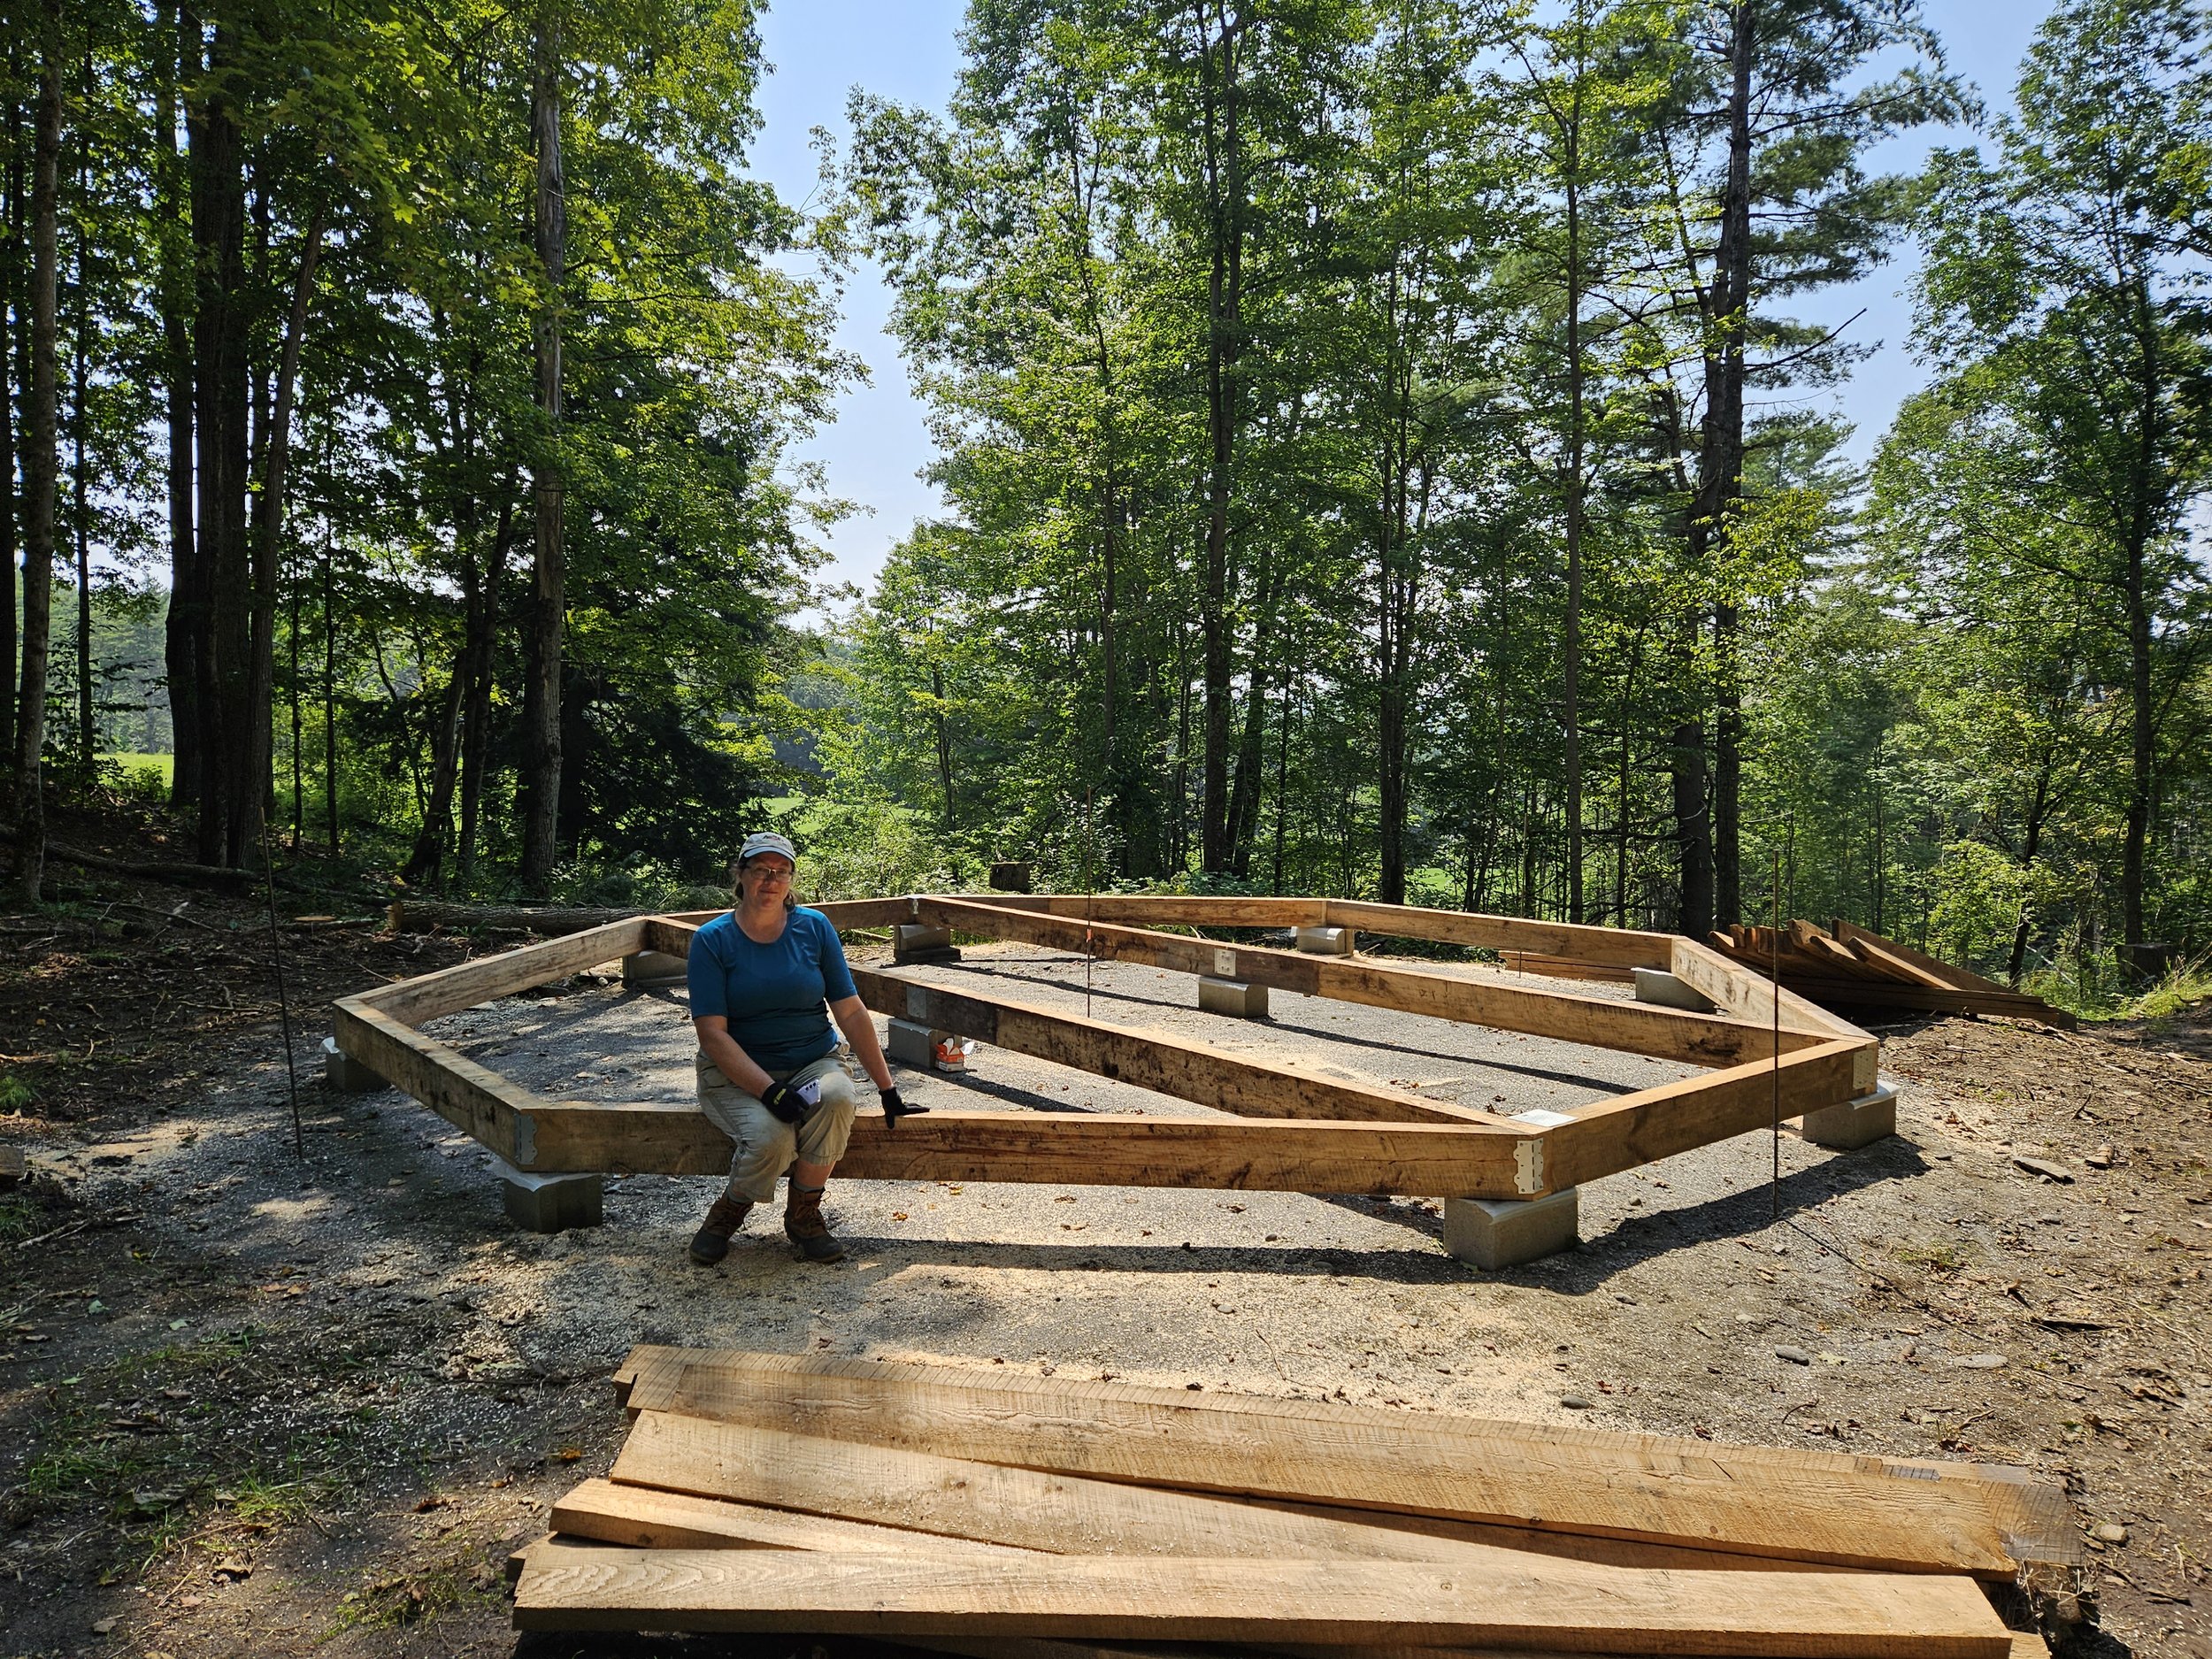
Platform octagon base is up! These are 6' x 12' beams made of freshly cut hemlock
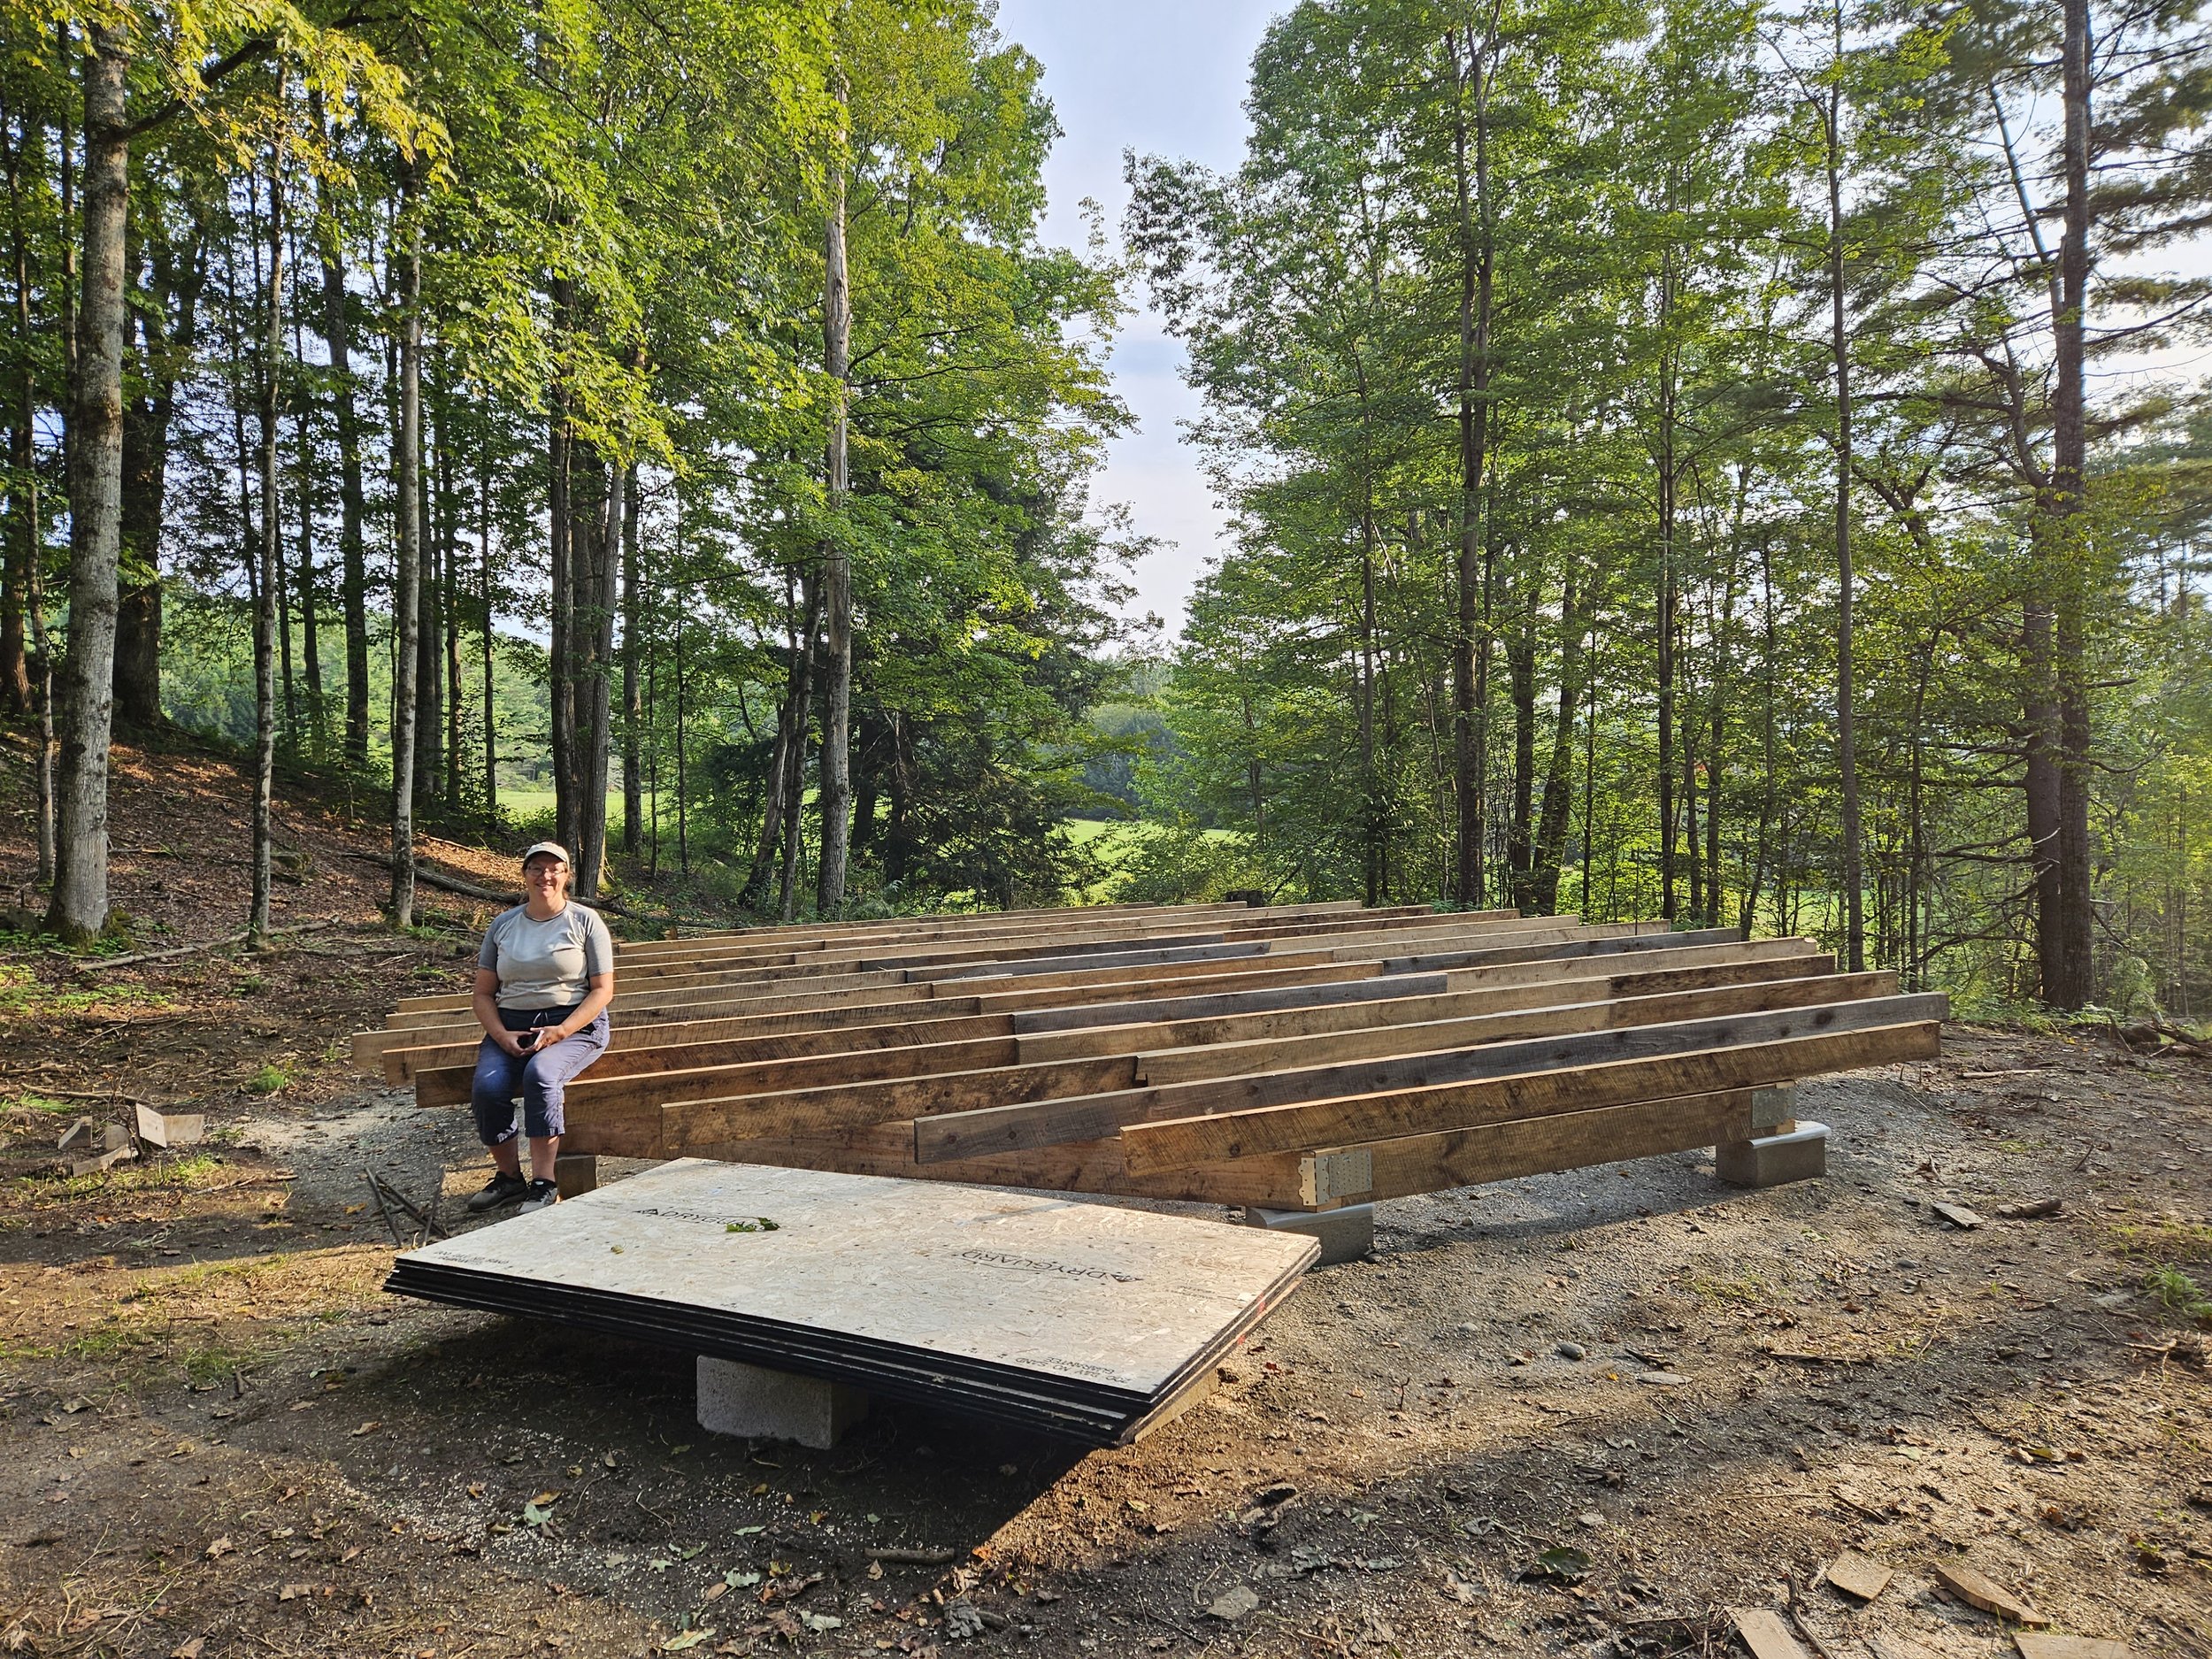
Platform joists installed. Next step is insulation.

Insulation installed in the platform

Subfloor installed and cut to 25-foot diameter

Platform finished and covered for the winter

Lathe sidewall build - tying the pieces together with twine

Tying up the lathe wall - that's a lot of knots!

Transporting the lathe wall to the yurt site

Lathe wall is on the platform ready to be raised.

Using the tractor to raise the lathe wall - this was tricky!

Lathe wall is vertical! Next step, install the door frame and cable, then the rafters!

Seasoned rafters (dried in the barn for 18 mos) are ready for transport to the yurt site

Middle of Raising Day 1 - coming together now...

The yurt skeleton is up! End of raising day 1.

The eye in sky! End of first raising day.

End of Raising Day 1. Next steps - install the insulation and cover.
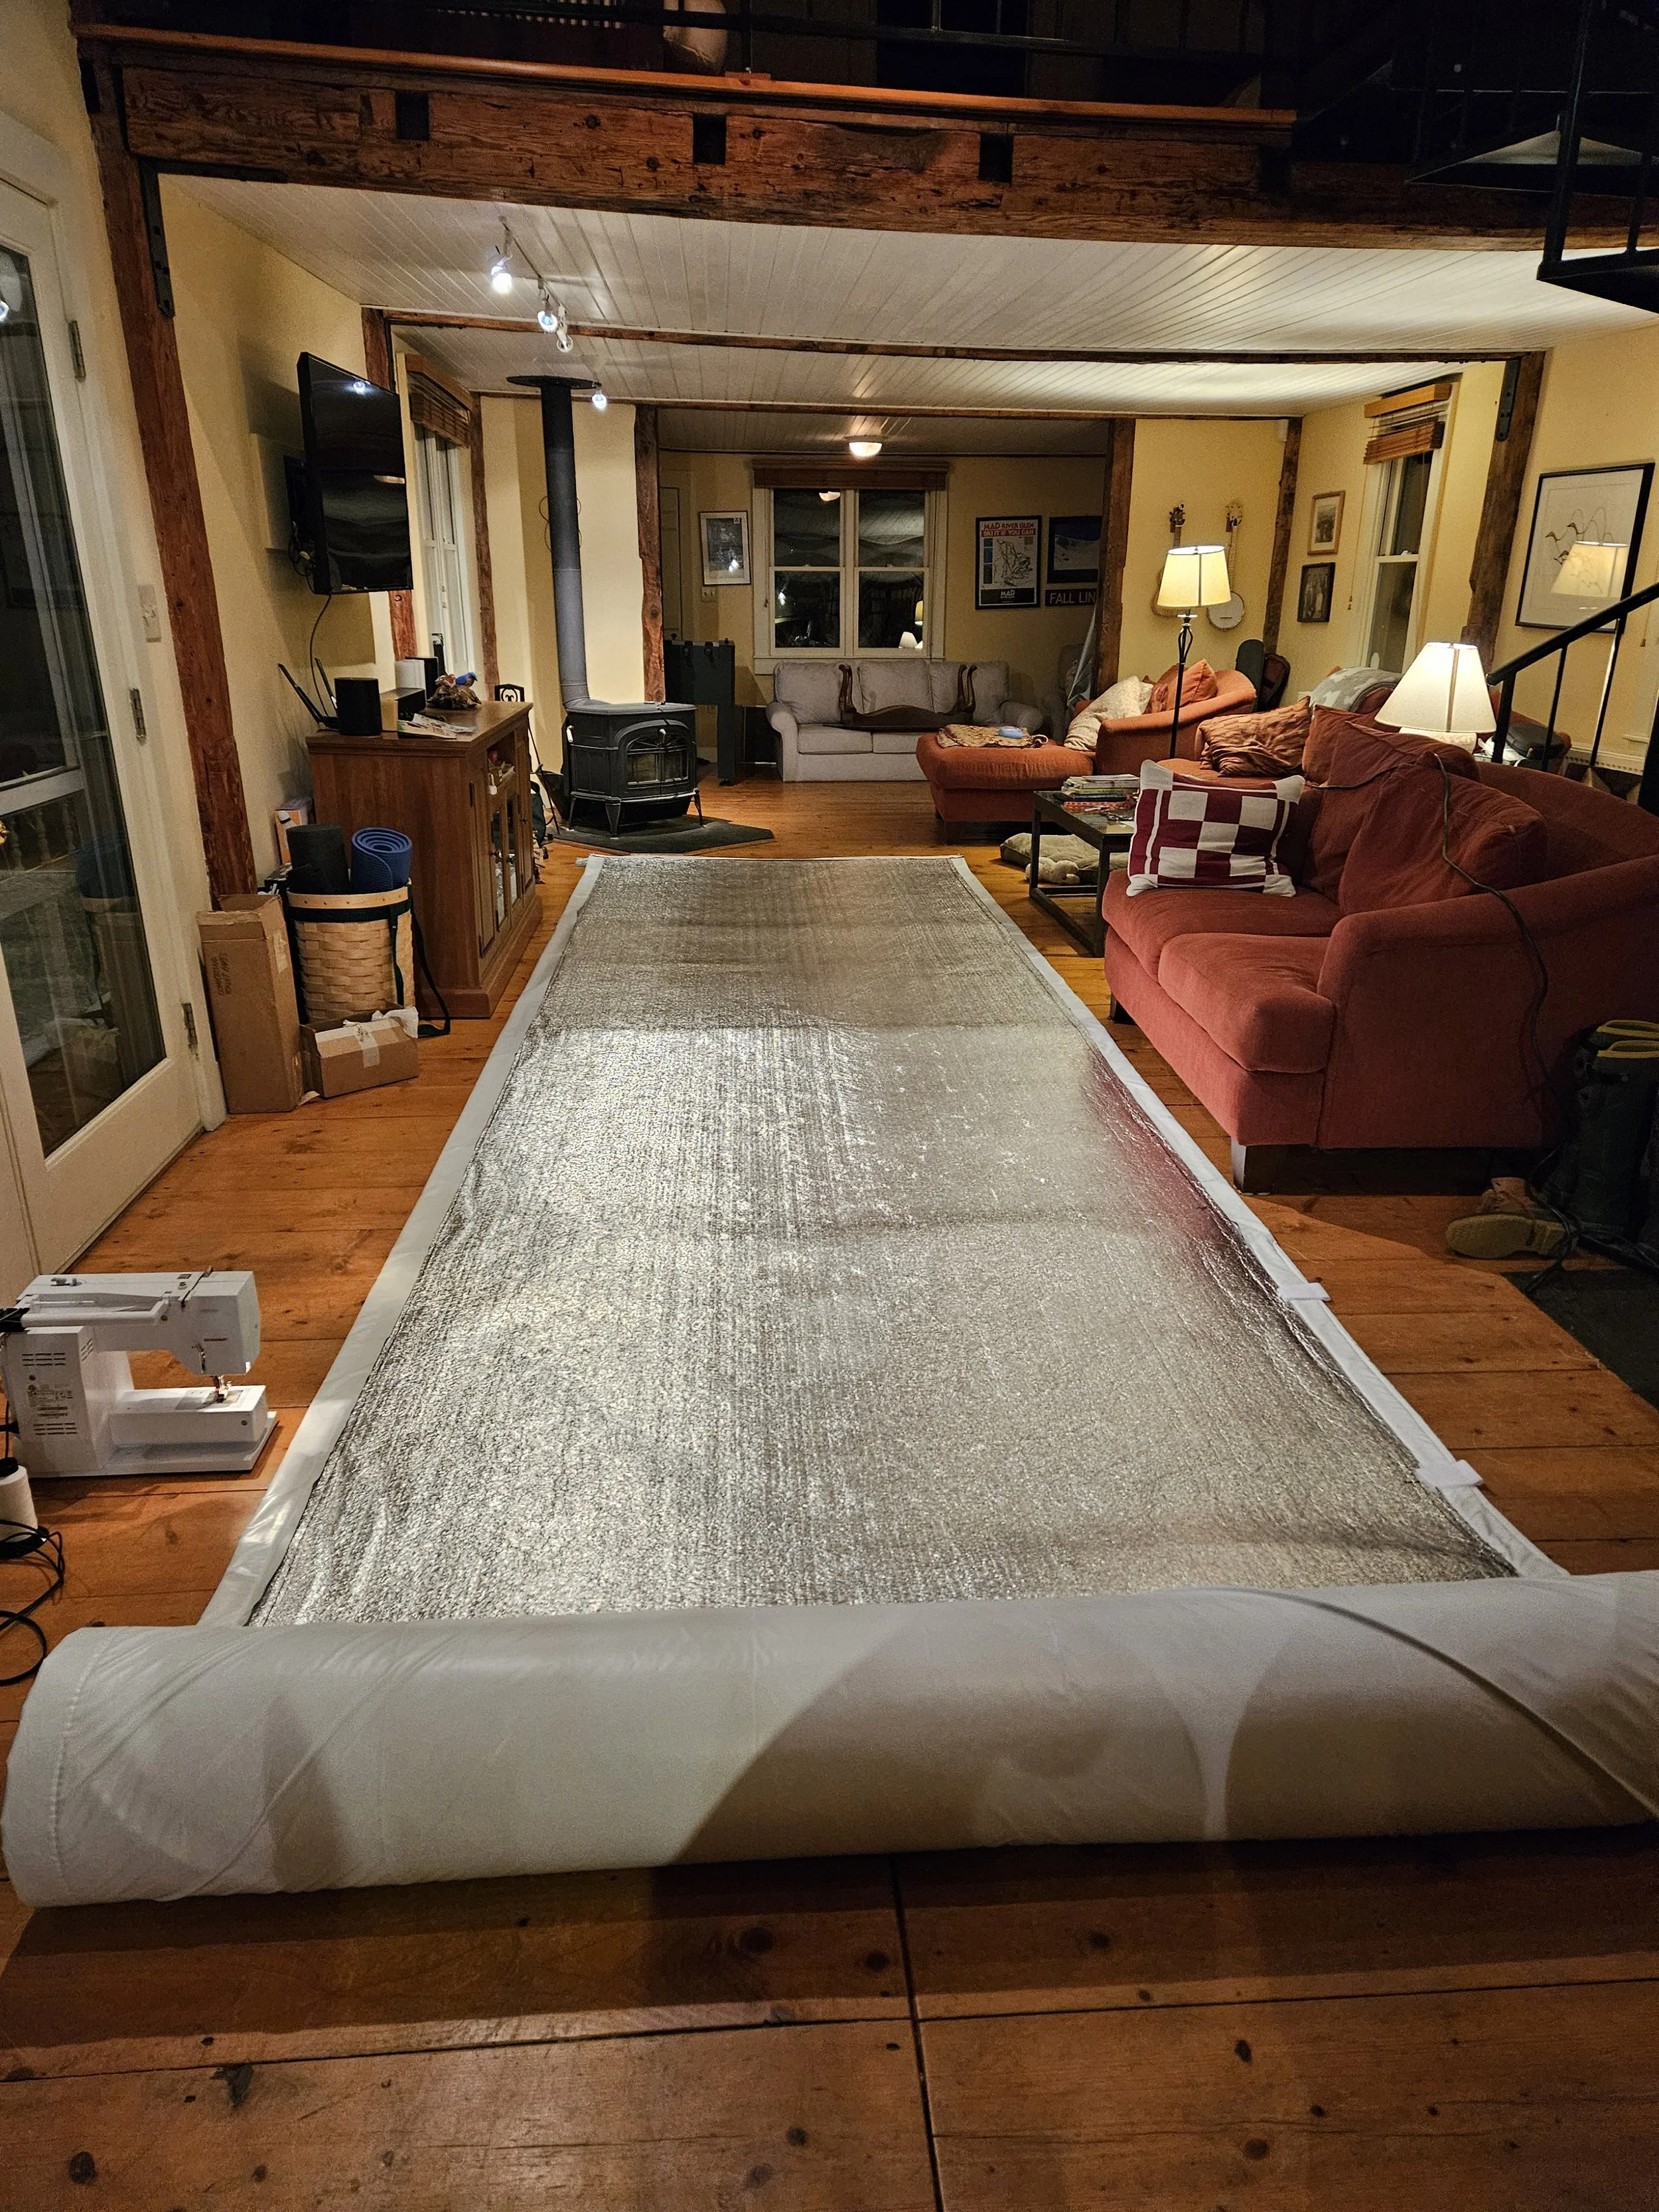
Sewing up the side wall insulation and blackout fabric.
Roof cover installed. On to the side wall.
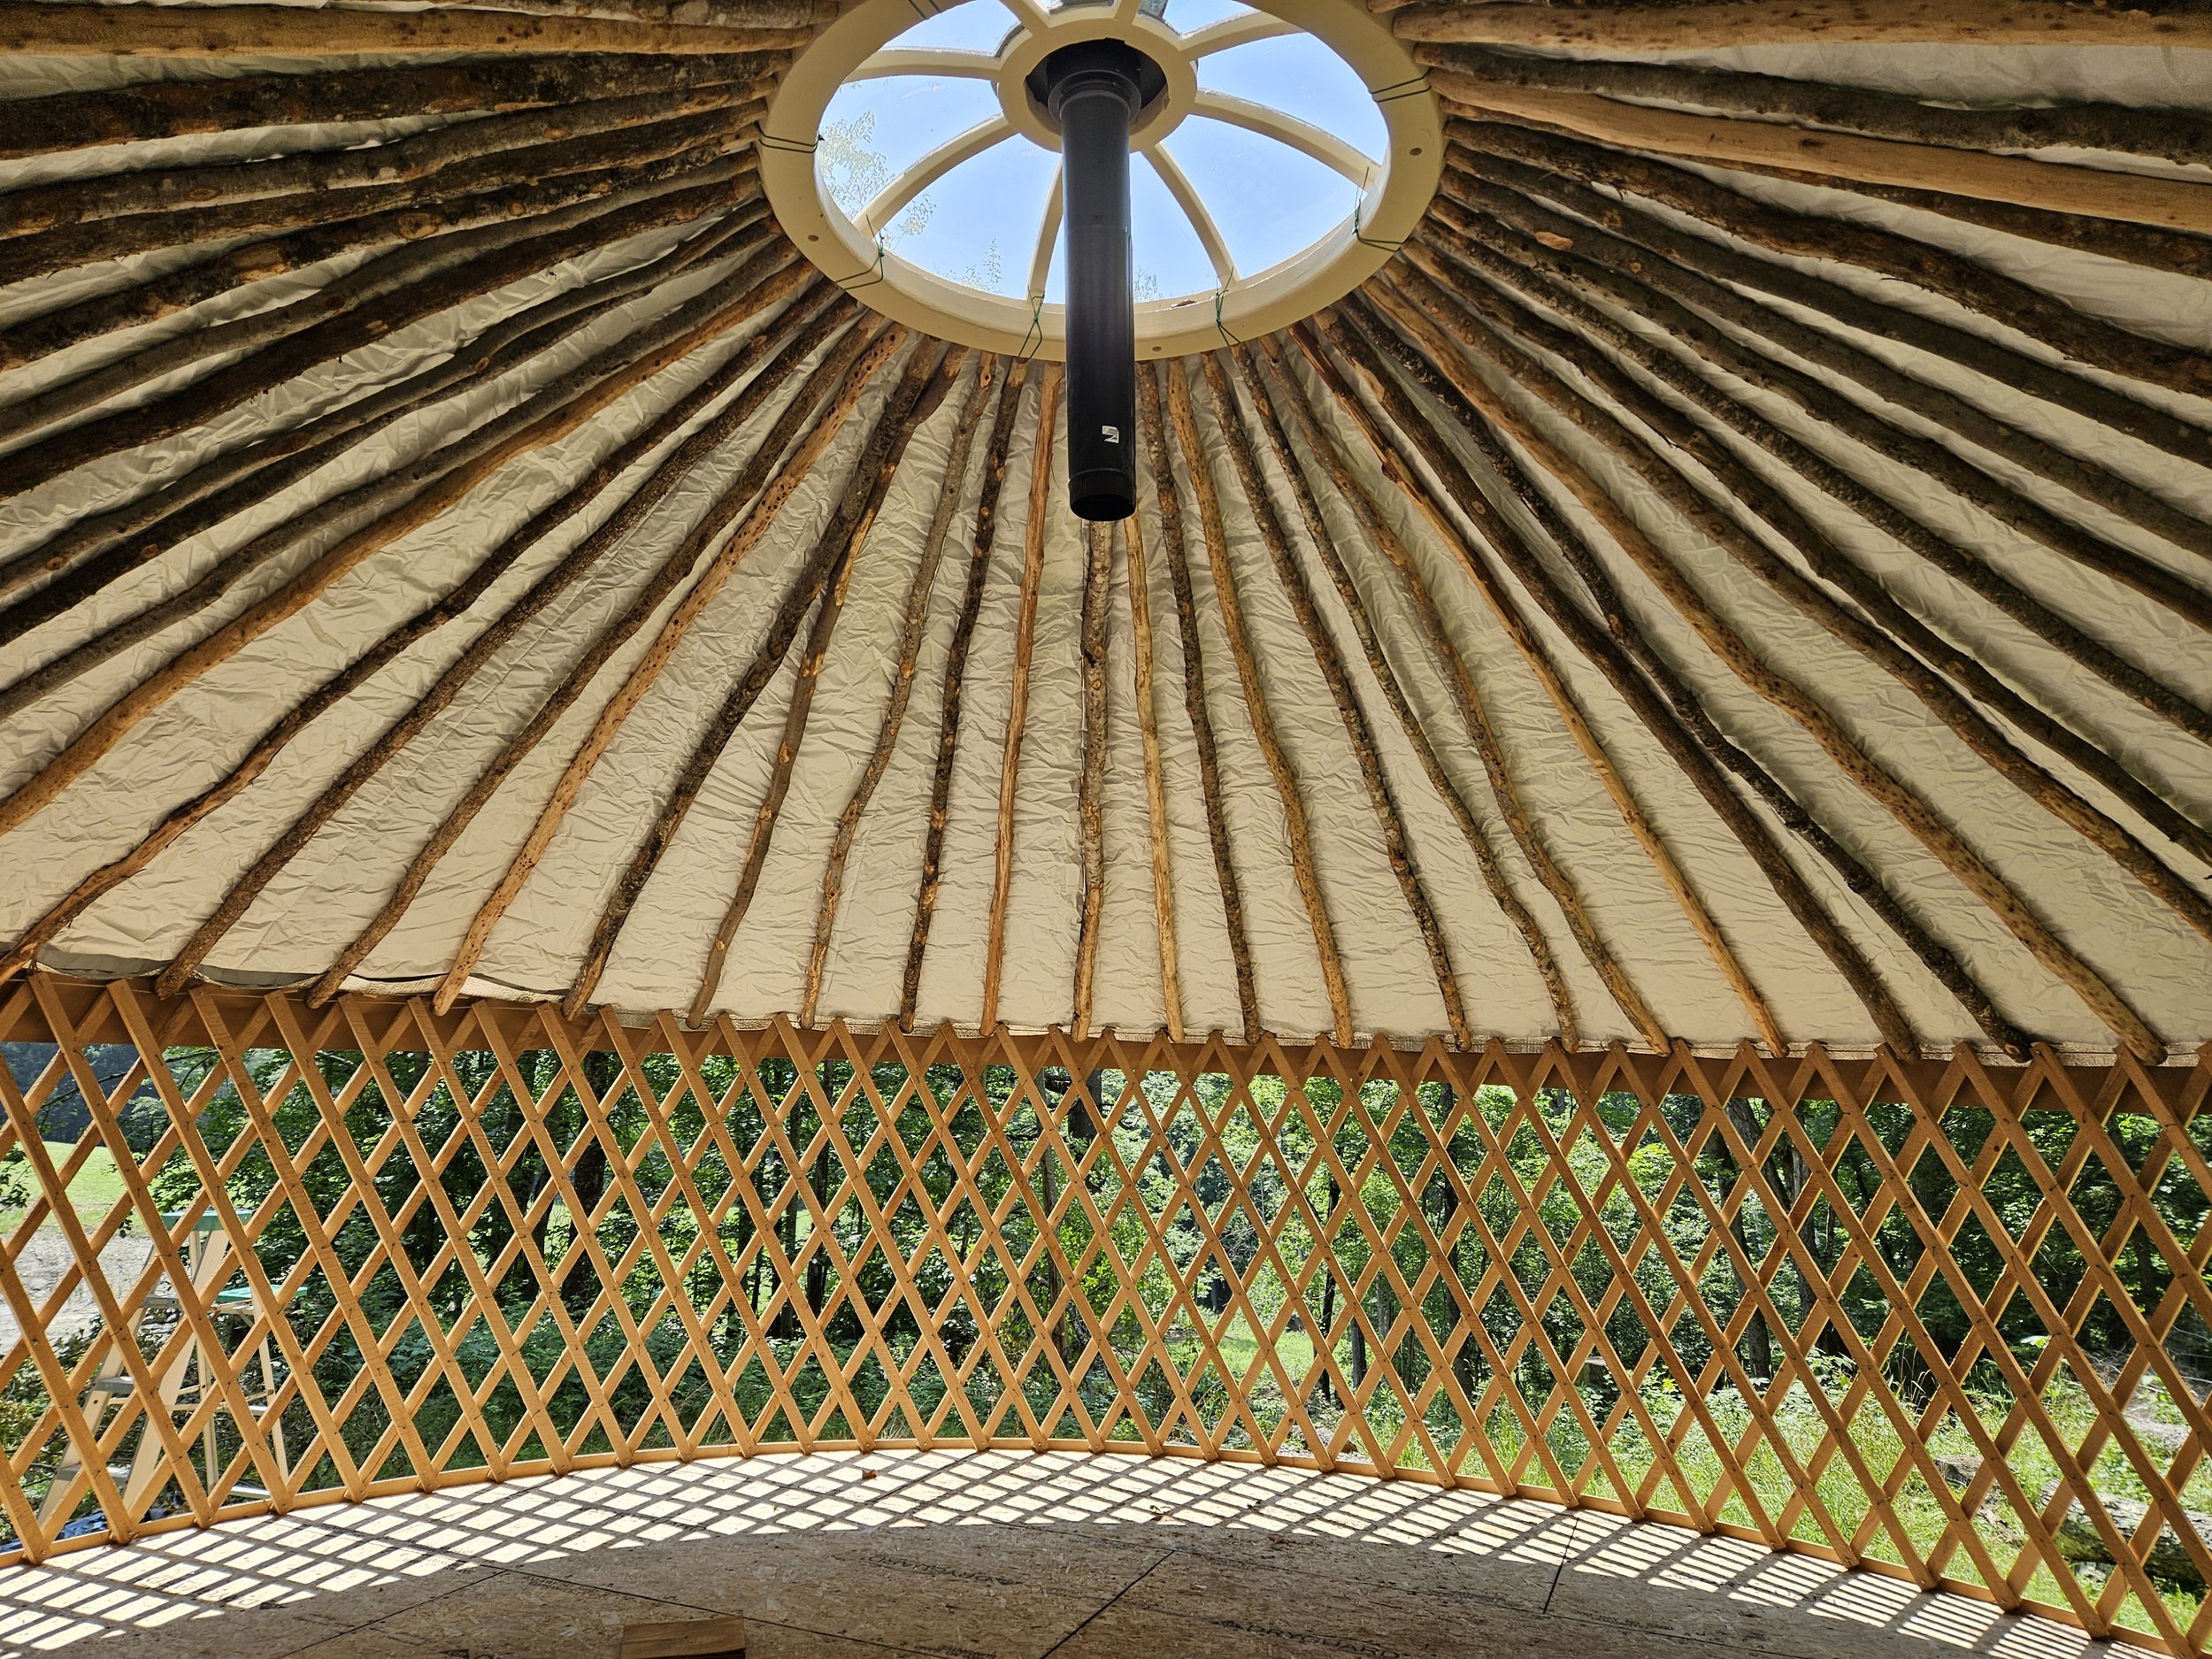
Sidewall insulation and roof cover installed. Next step is to add the sidewall covers.
Finished Raising Day 2. Now need to finish the door...

Inside view at end of Raising Day 2.
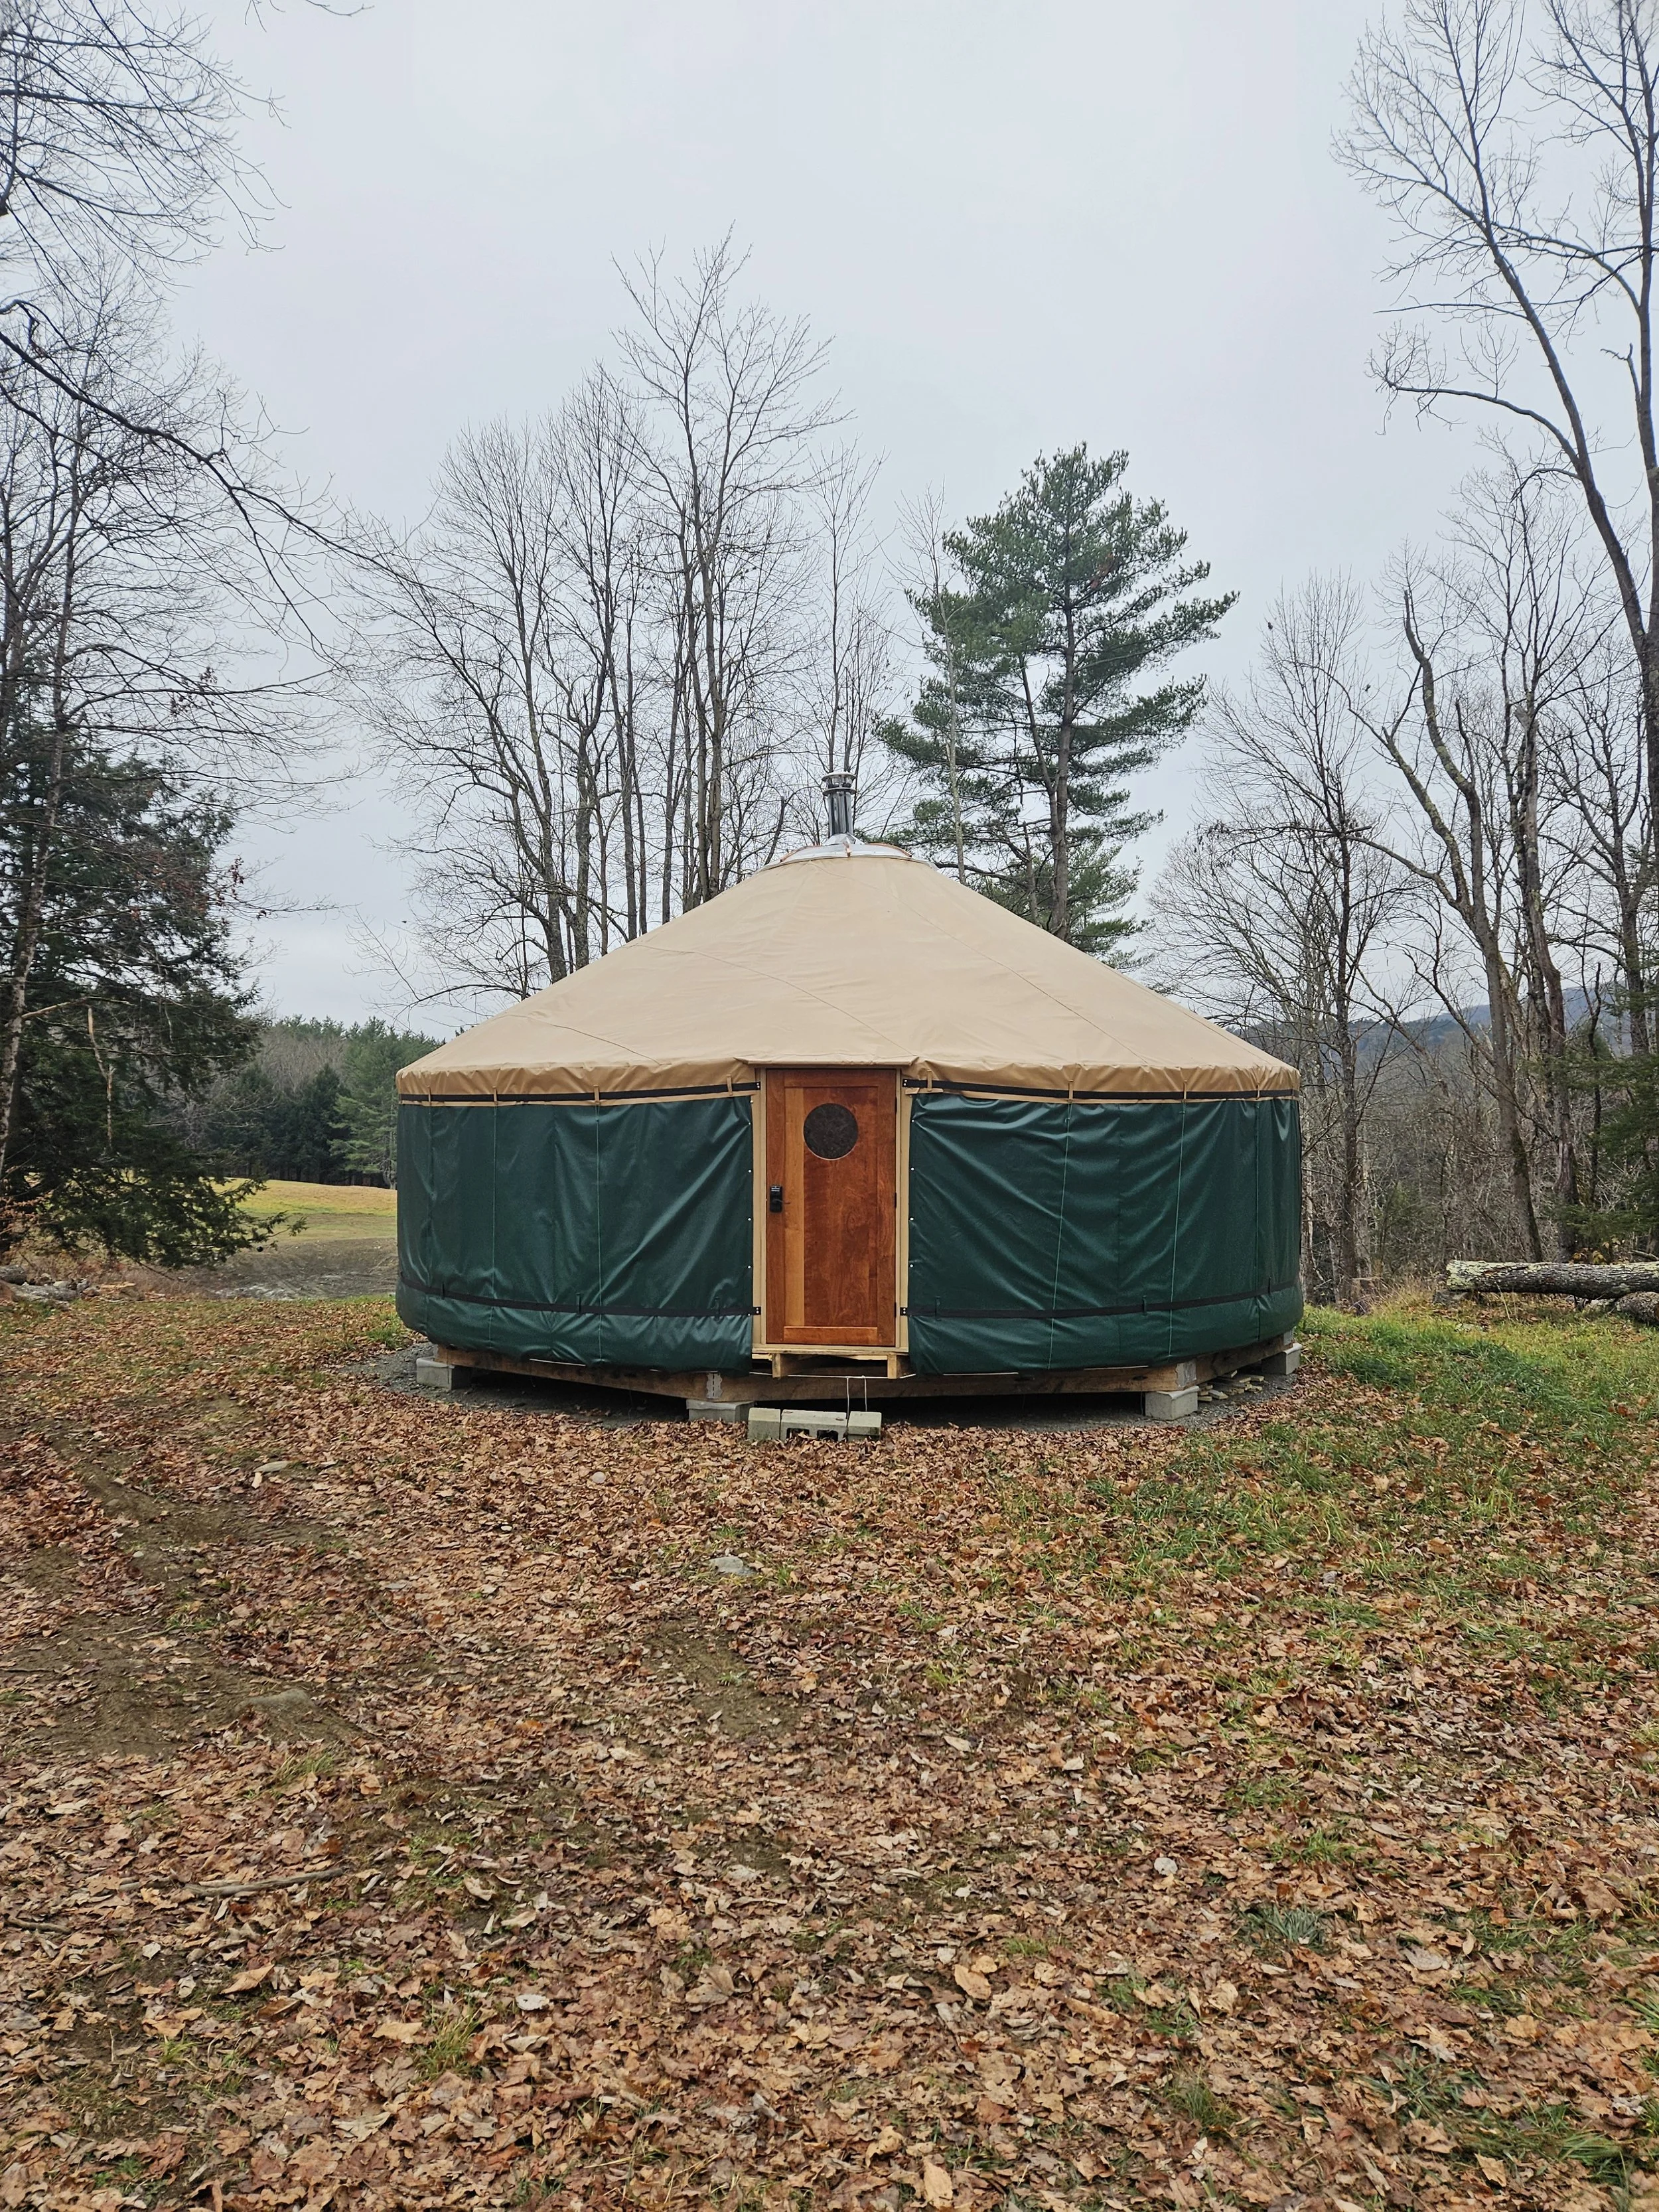
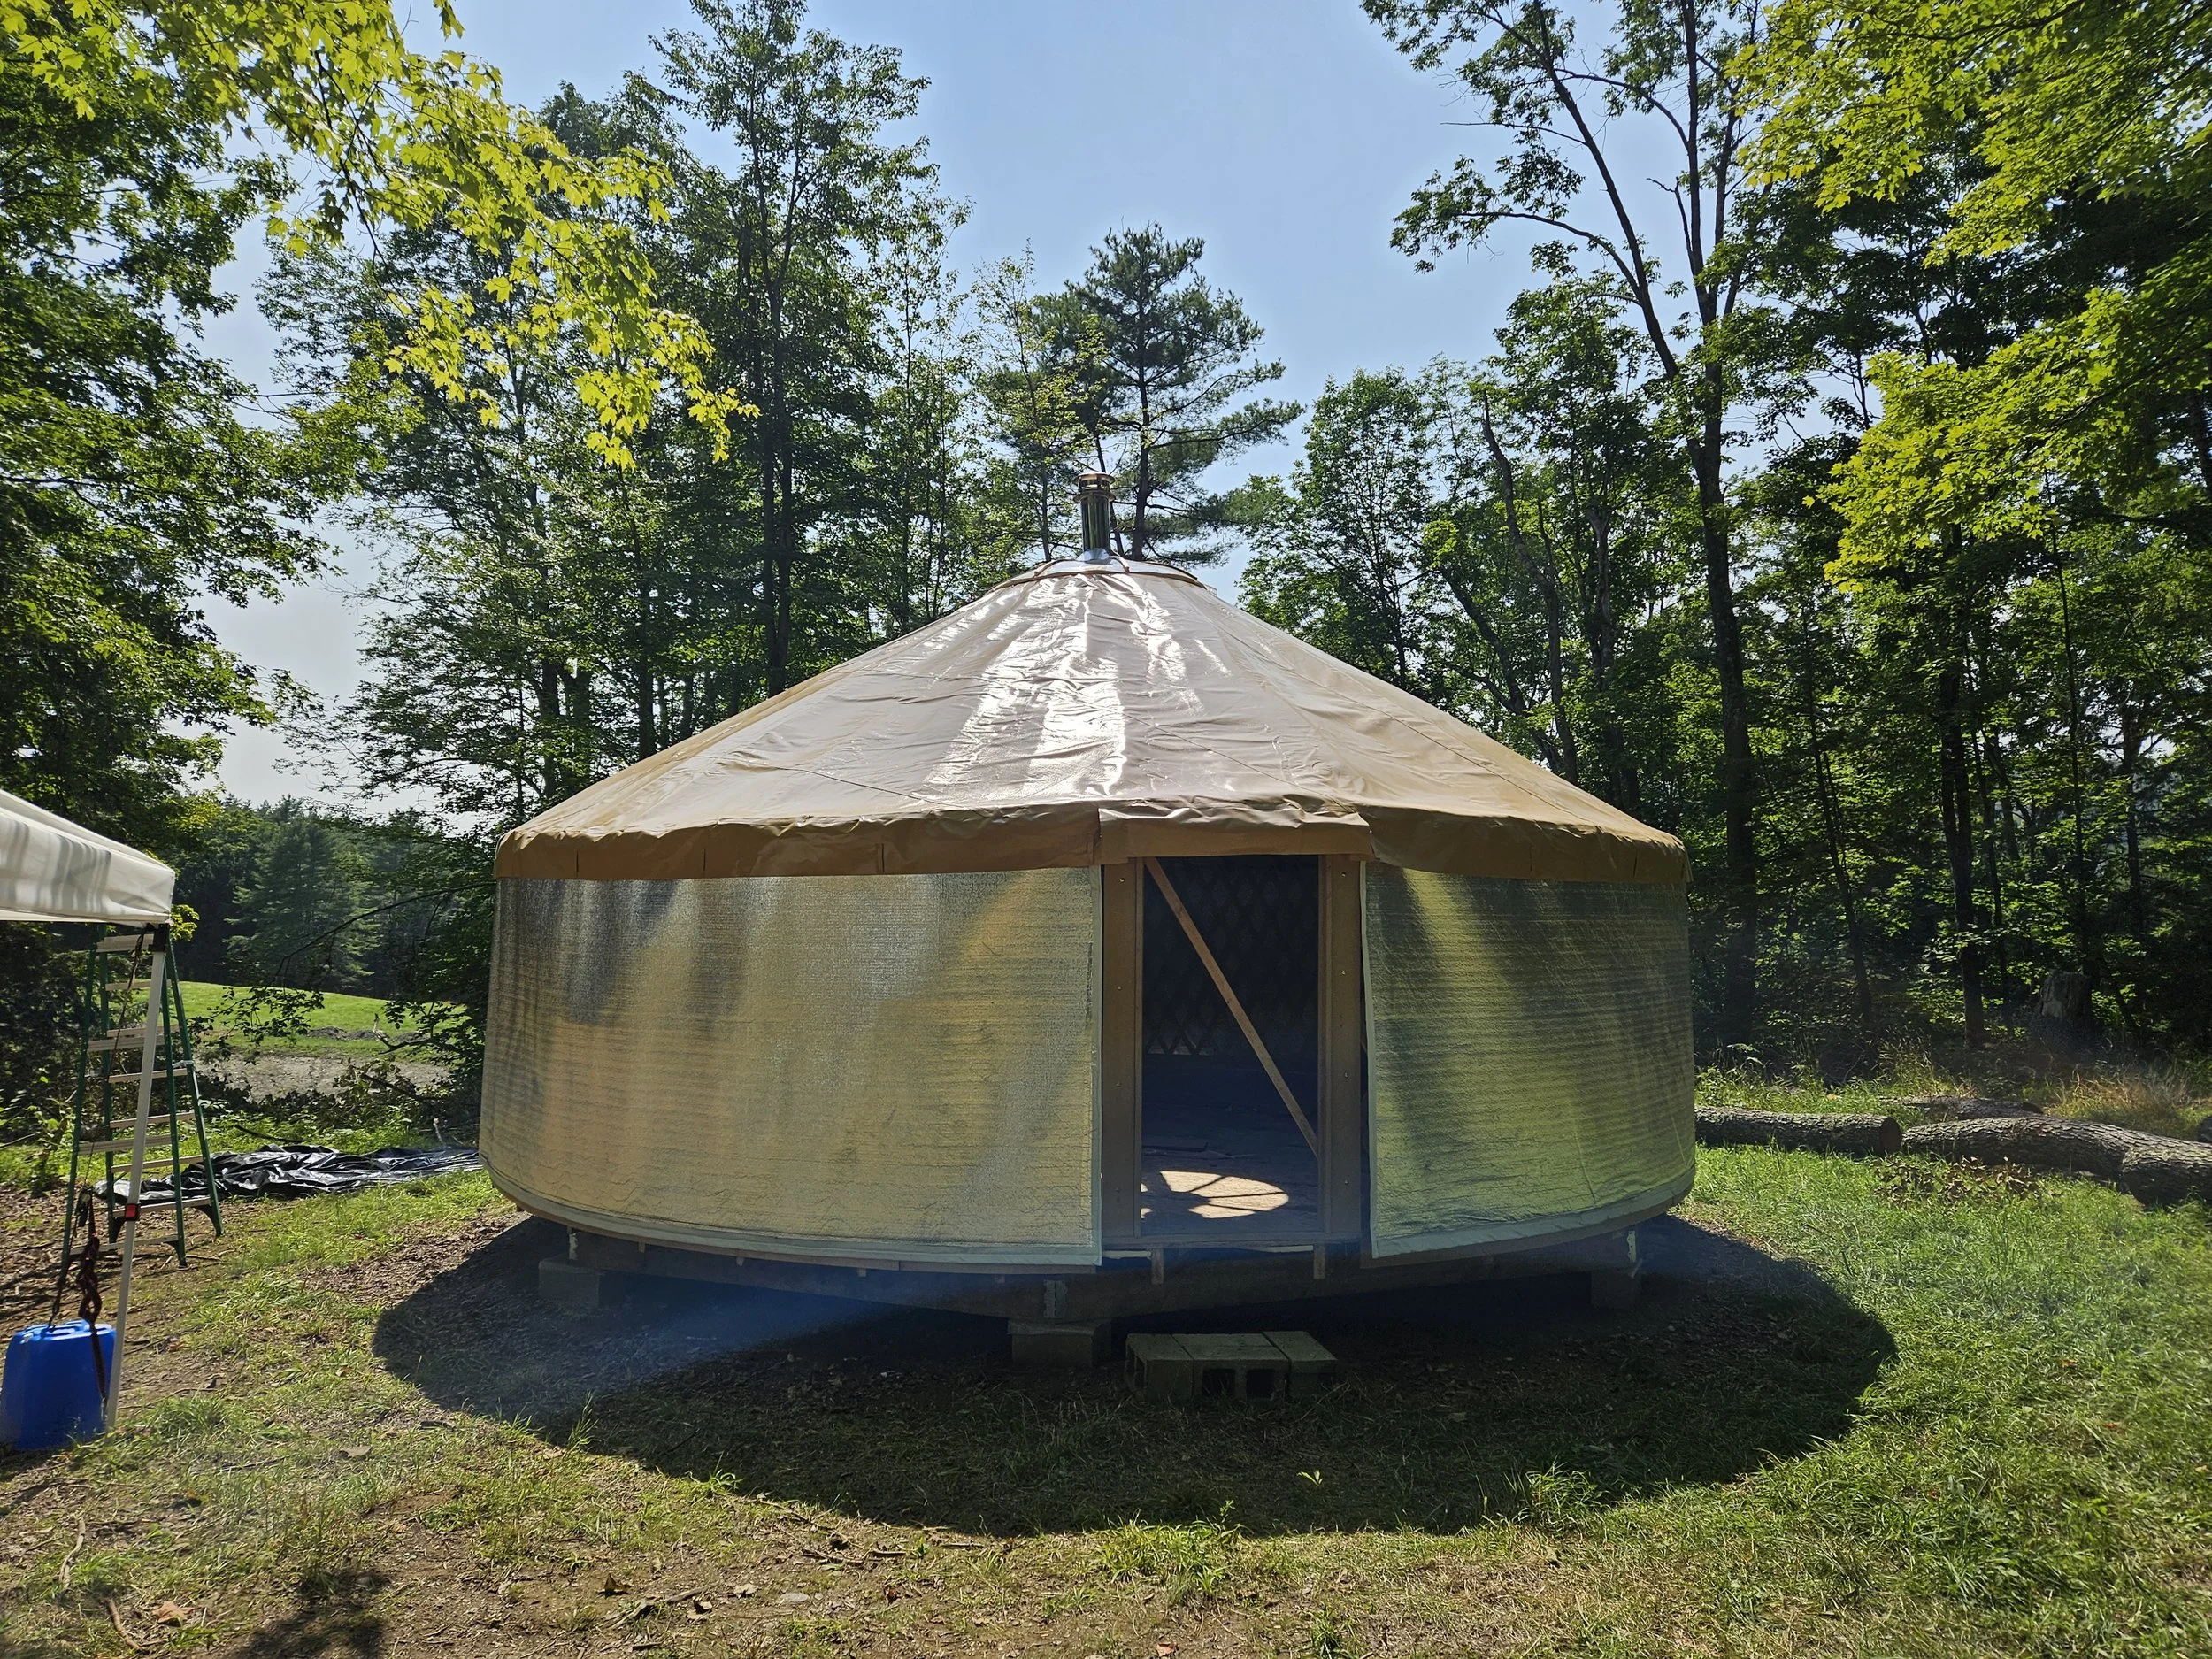
Yurt raising finished, with the door installed. Ready for the winter.

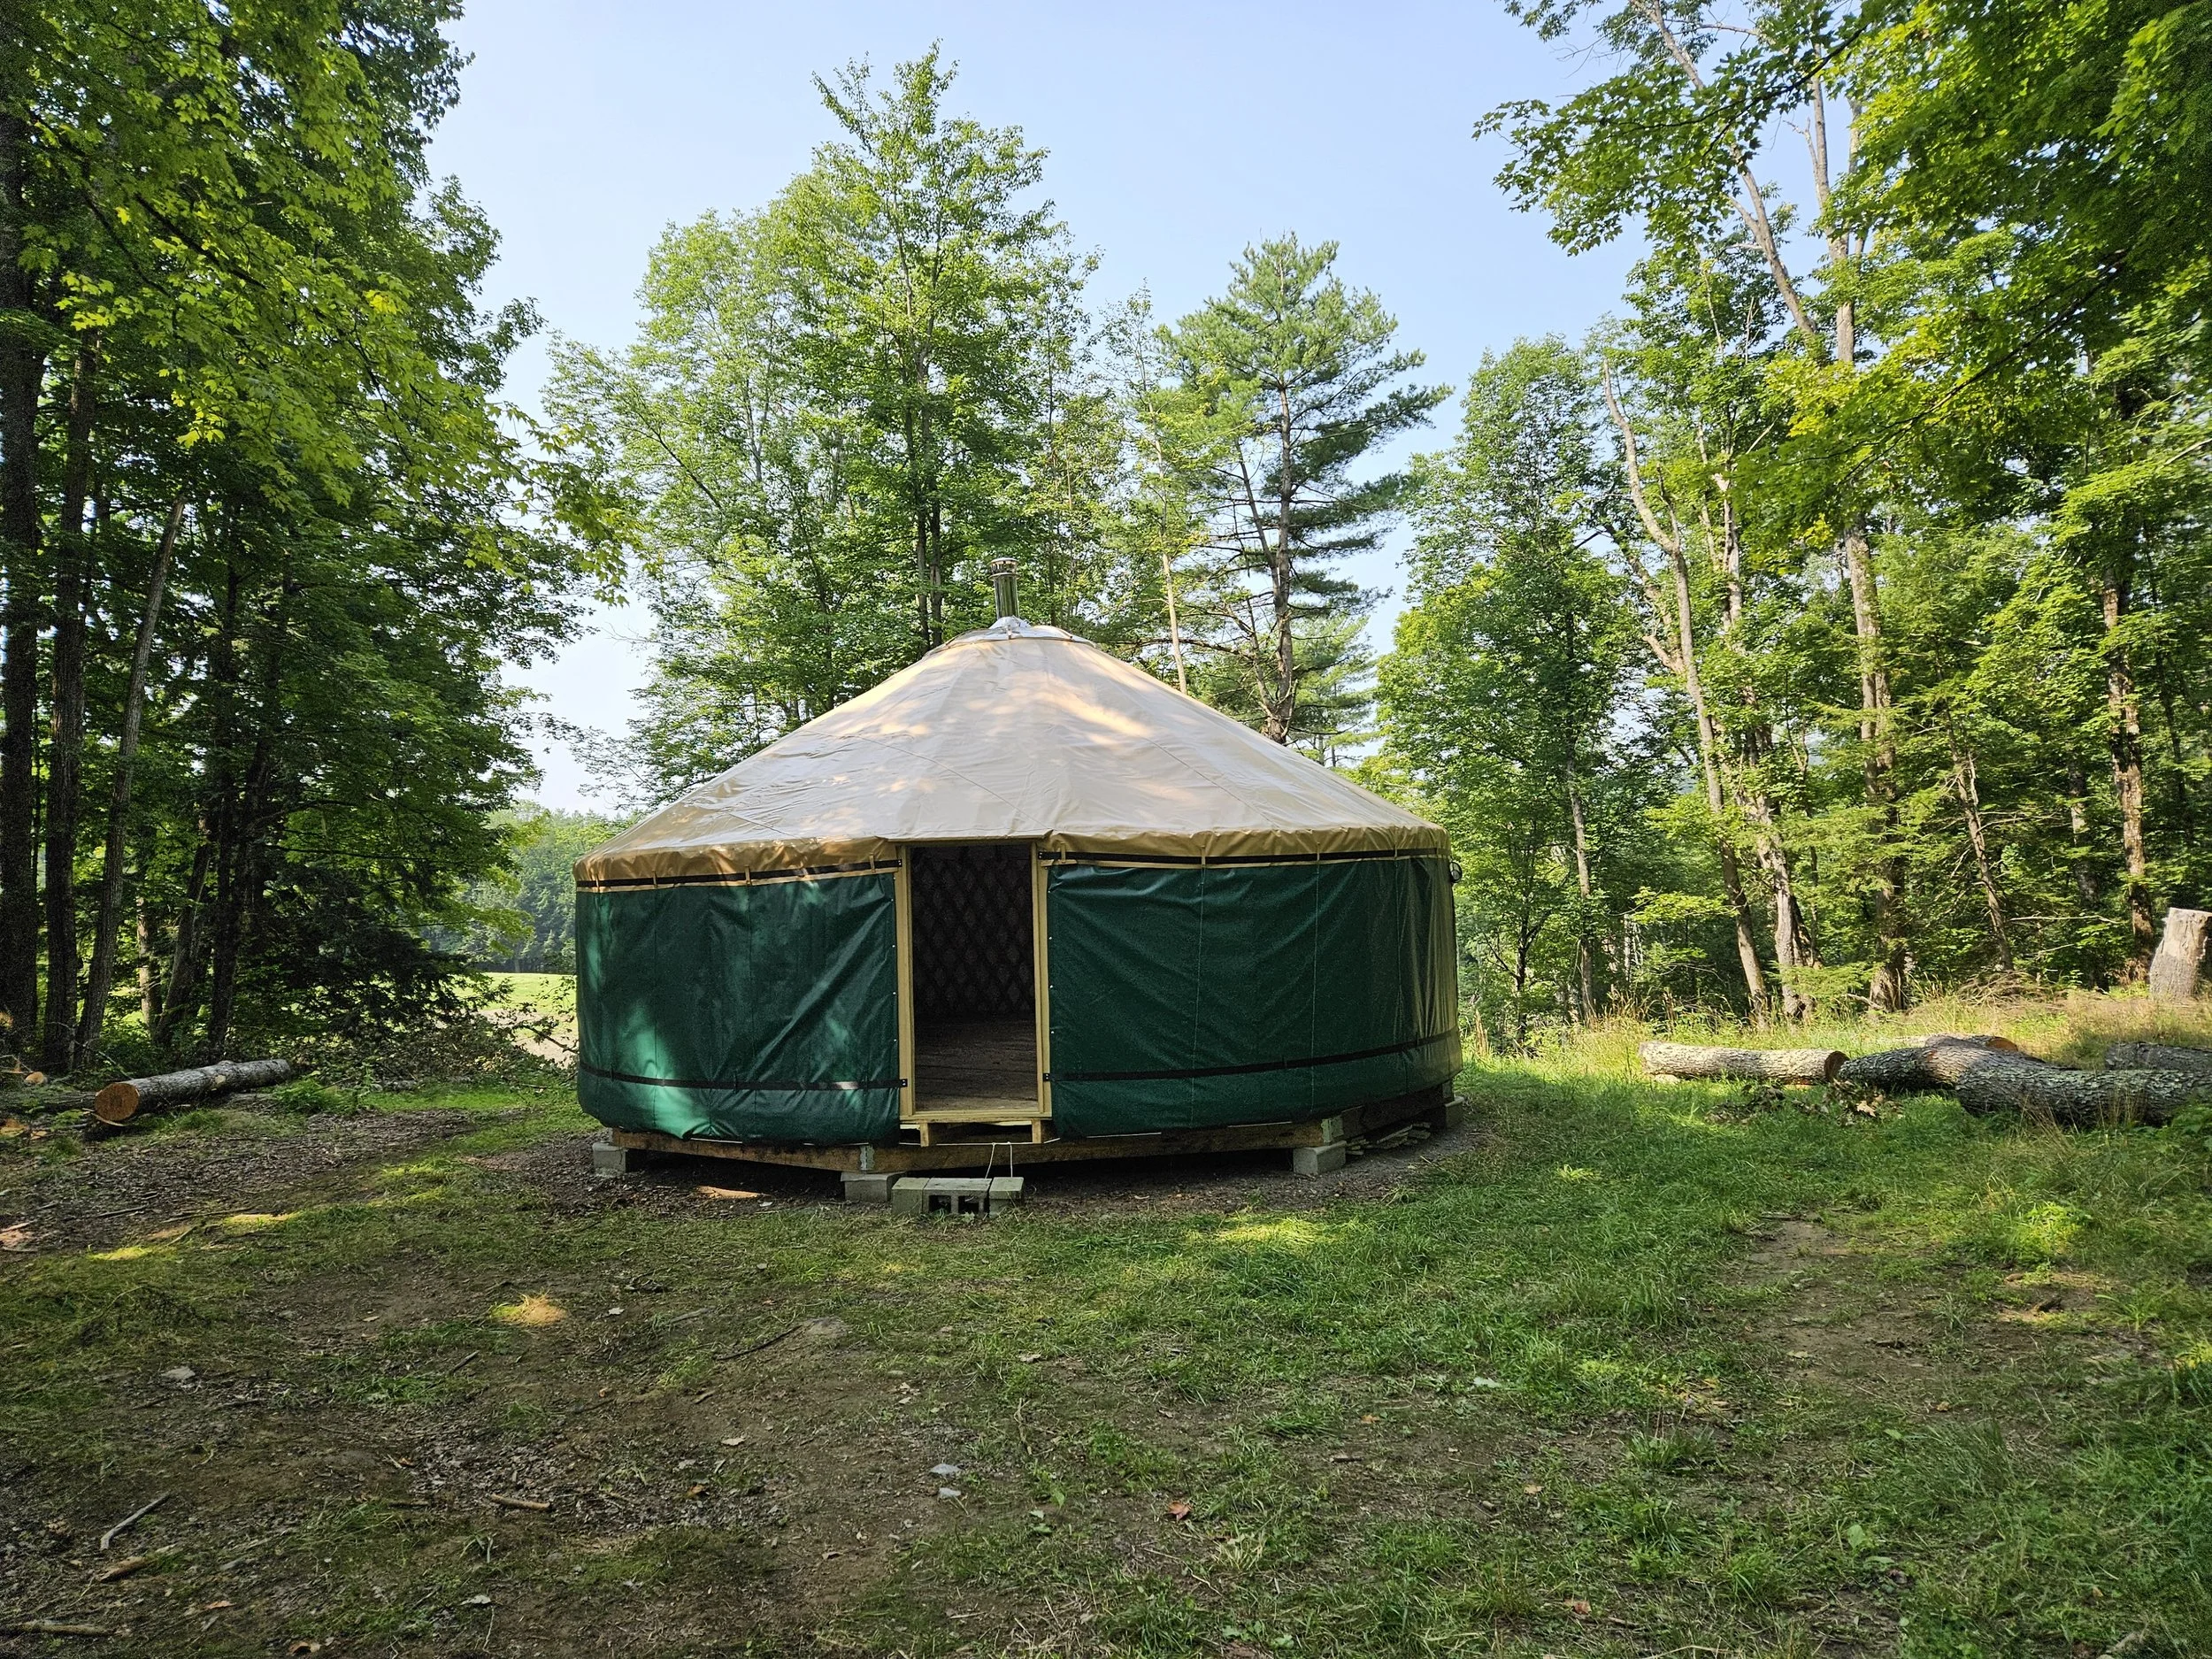
All snugged up for the winter

Wood floor installed! Now need to tile the entrance and hearth, then install trim around the perimeter