Every farm needs a greenhouse, right?
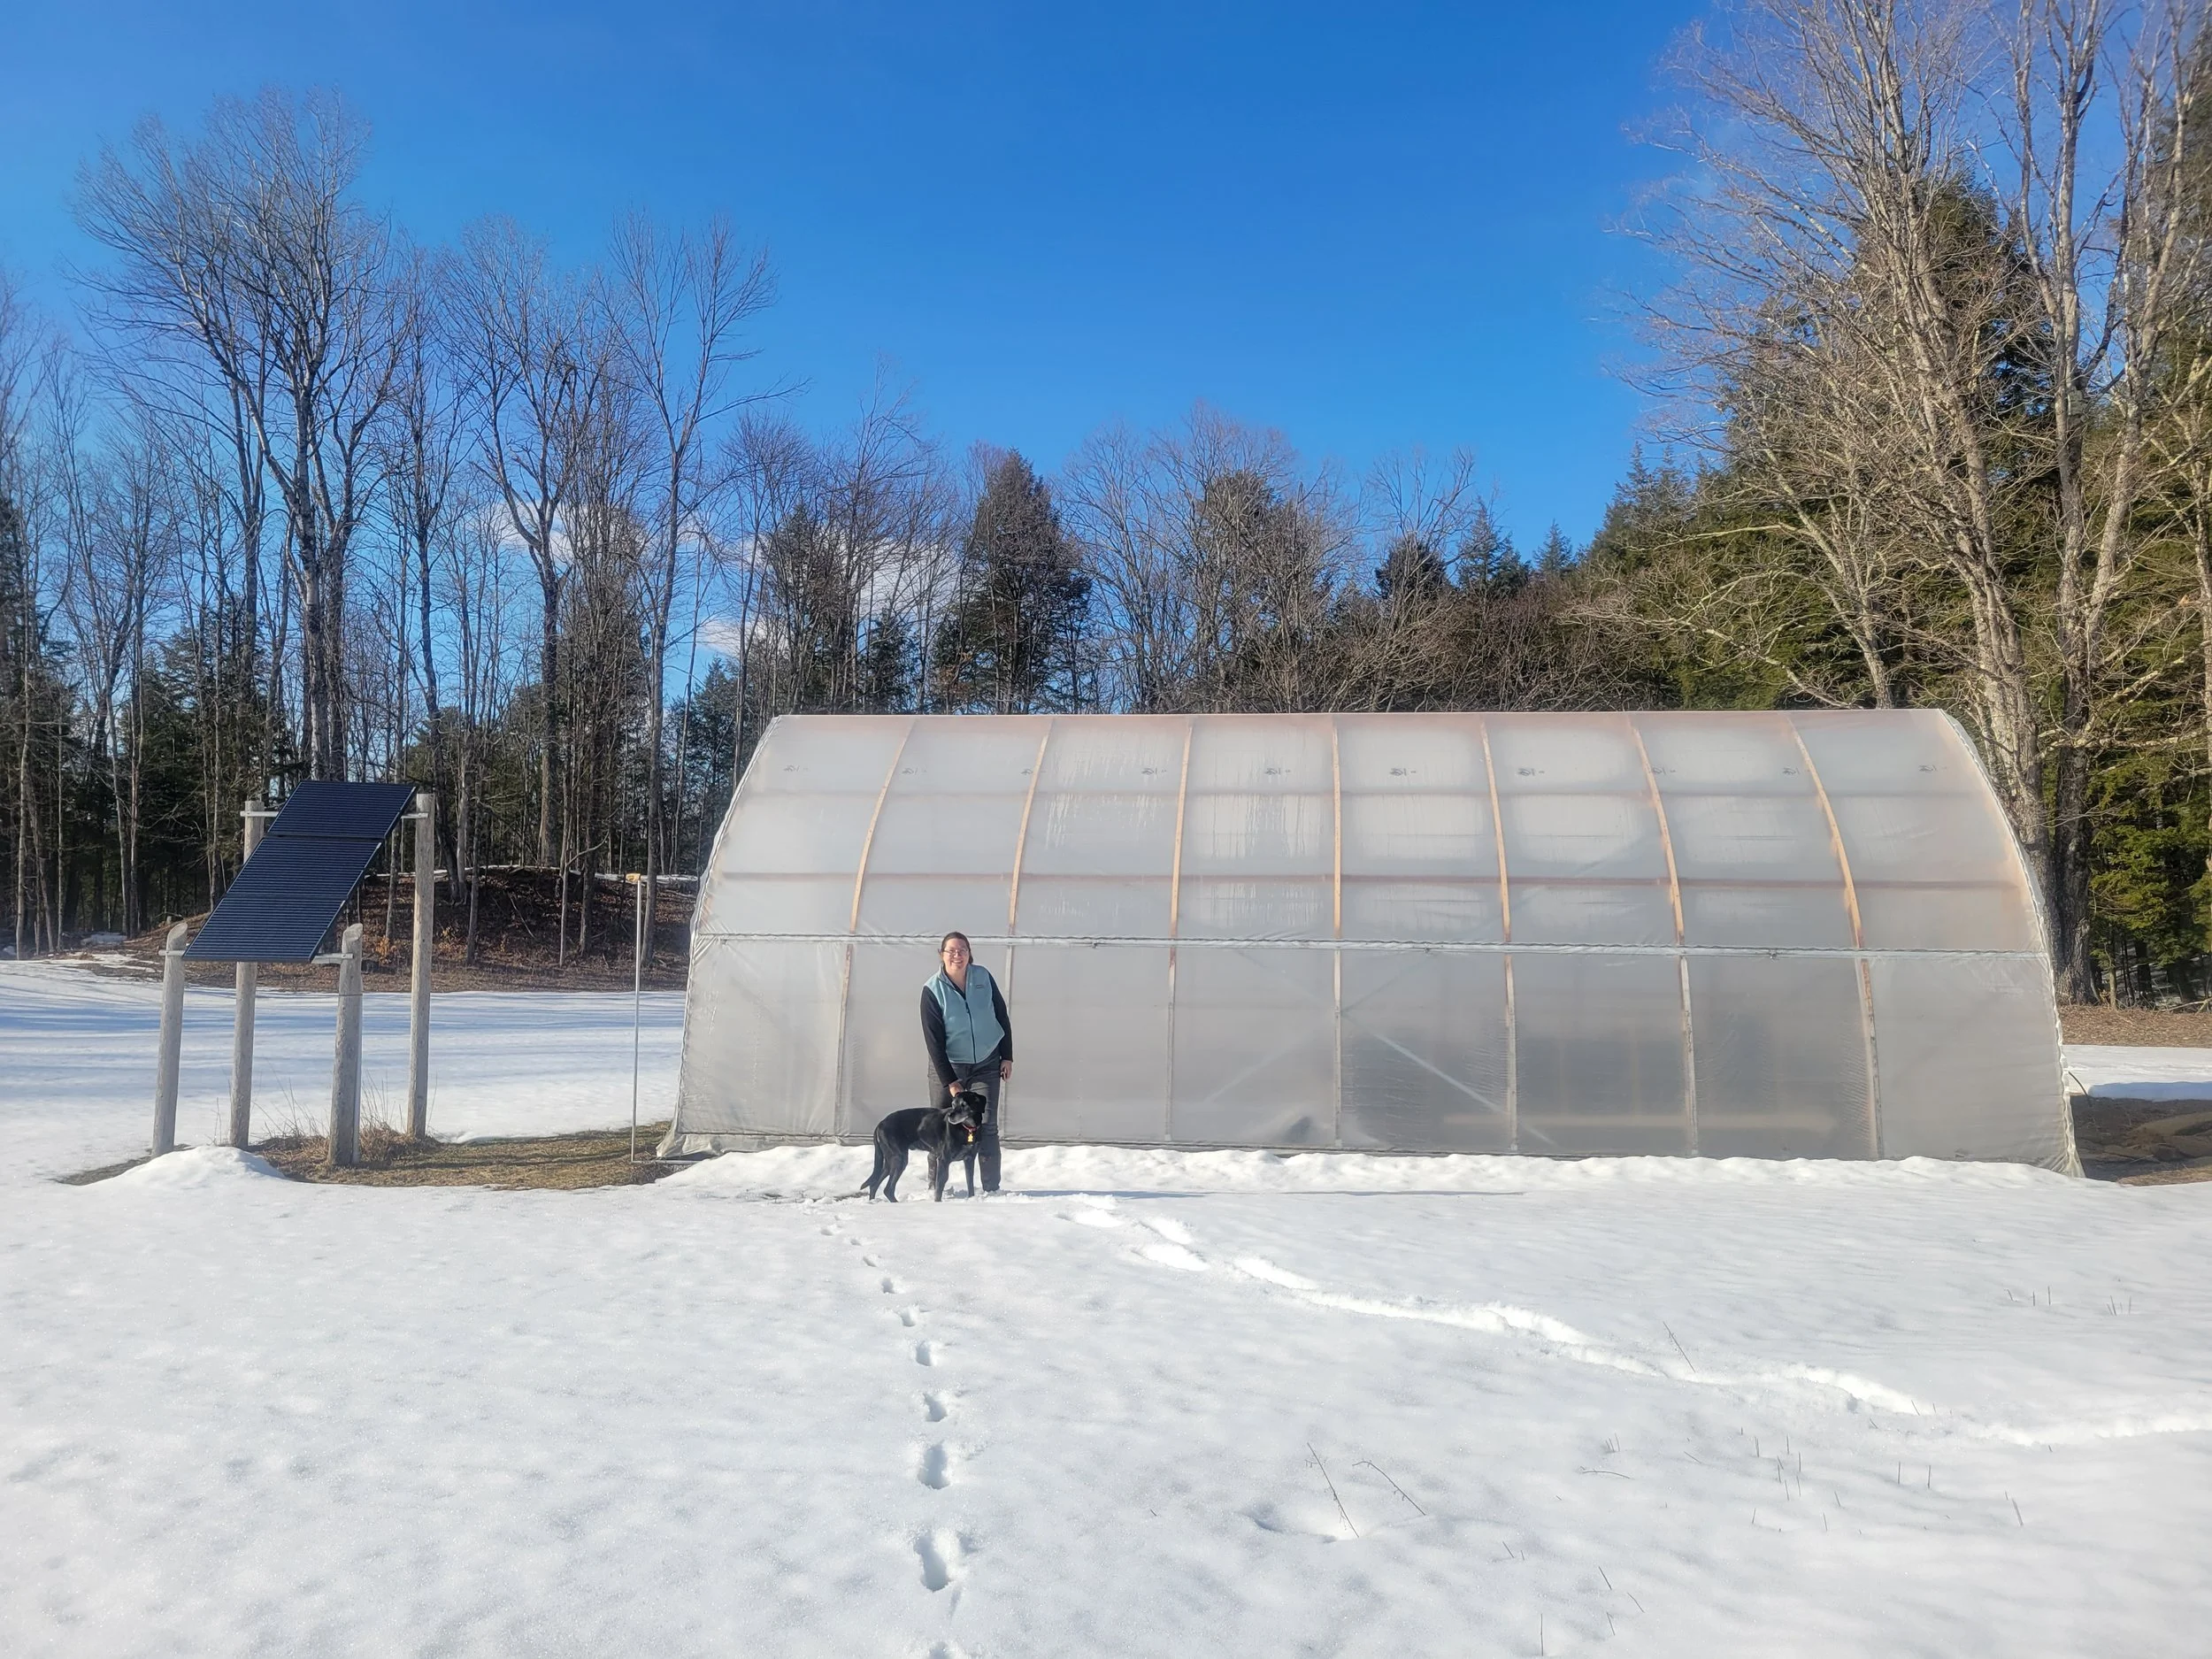
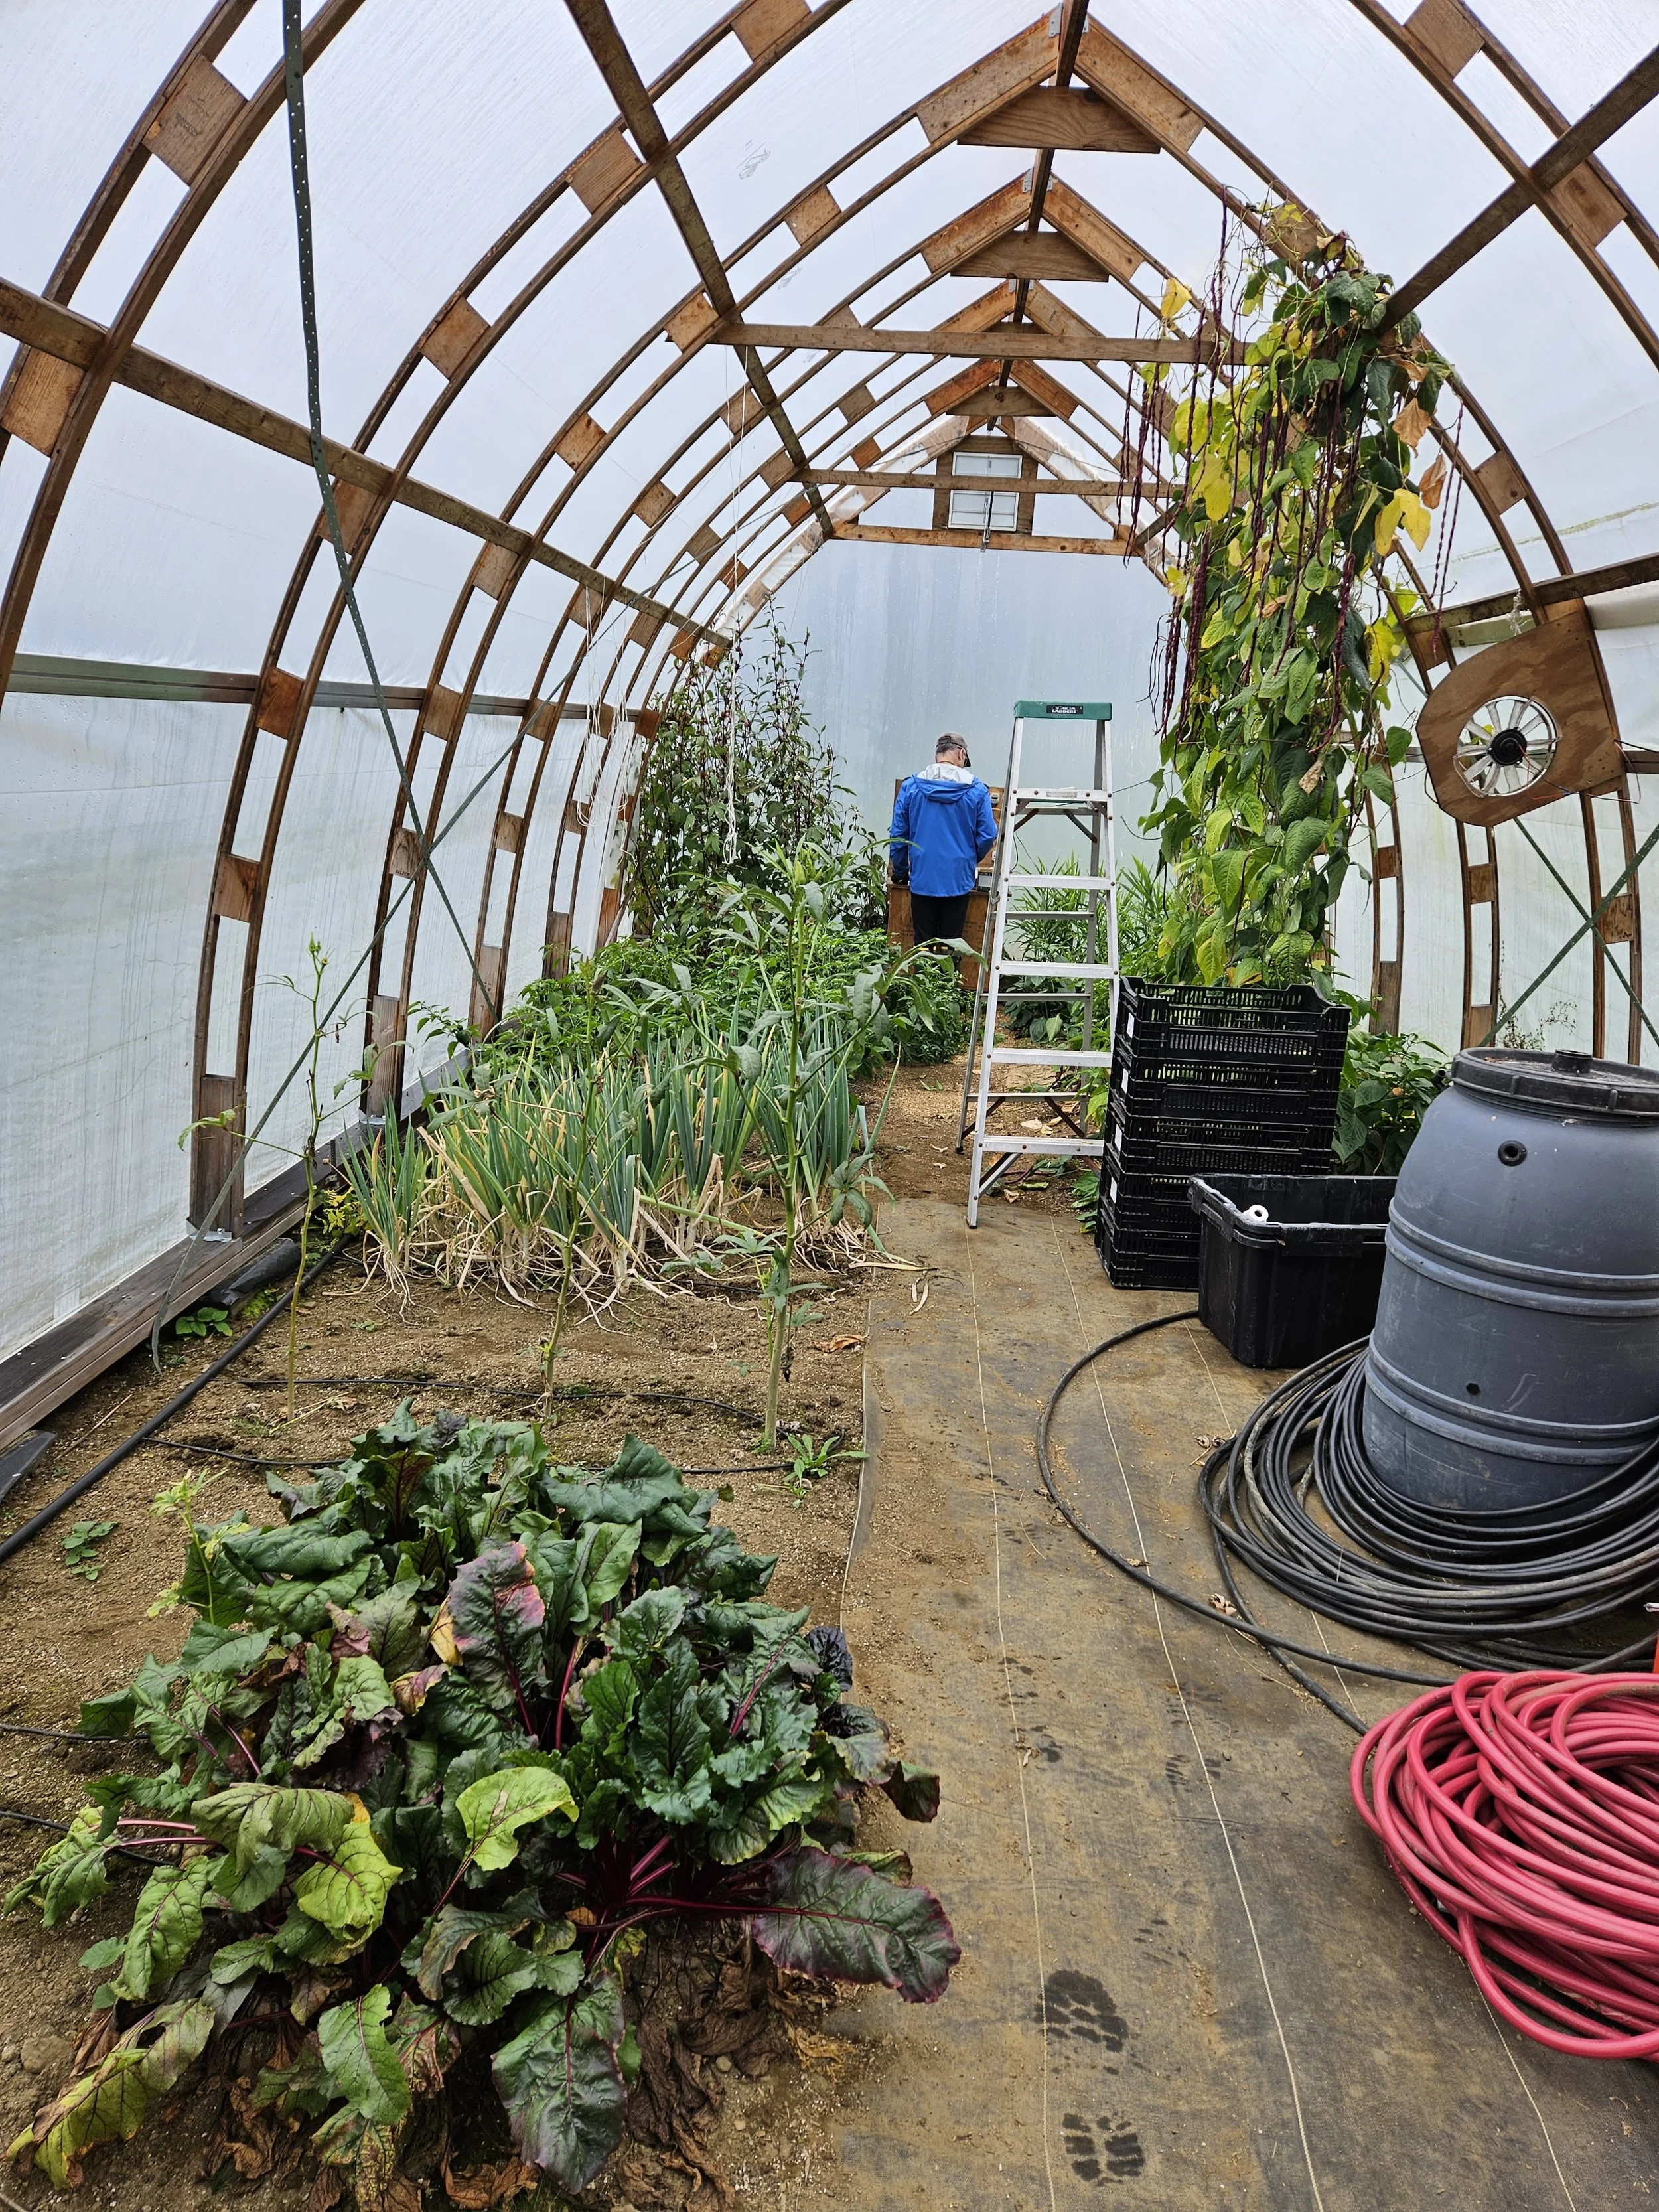
In addition to the crops that we sell, we have a large garden that provides most of the vegetables for our table throughout the year. This garden is really productive, but has seasonal and growing zone limitations. As a result, a high tunnel greenhouse was first on the list of farm infrastructure that we needed build. This was a true DIY project, including the design which was inspired by wooden ship building techniques. Our greenhouse is also off-grid, since the nearest utilities (water, electricity) are more than ~1/4 mile up the road. Our goal was to build a fully functional, automated off-grid greenhouse that we use from the last snowfall (Early April) to the first snowfall (Early Oct) each year. We accomplished this goal in 2023 and we continue to enjoy baskets of produce each season with minimal maintenance.
Inspiration - Wooden boats?
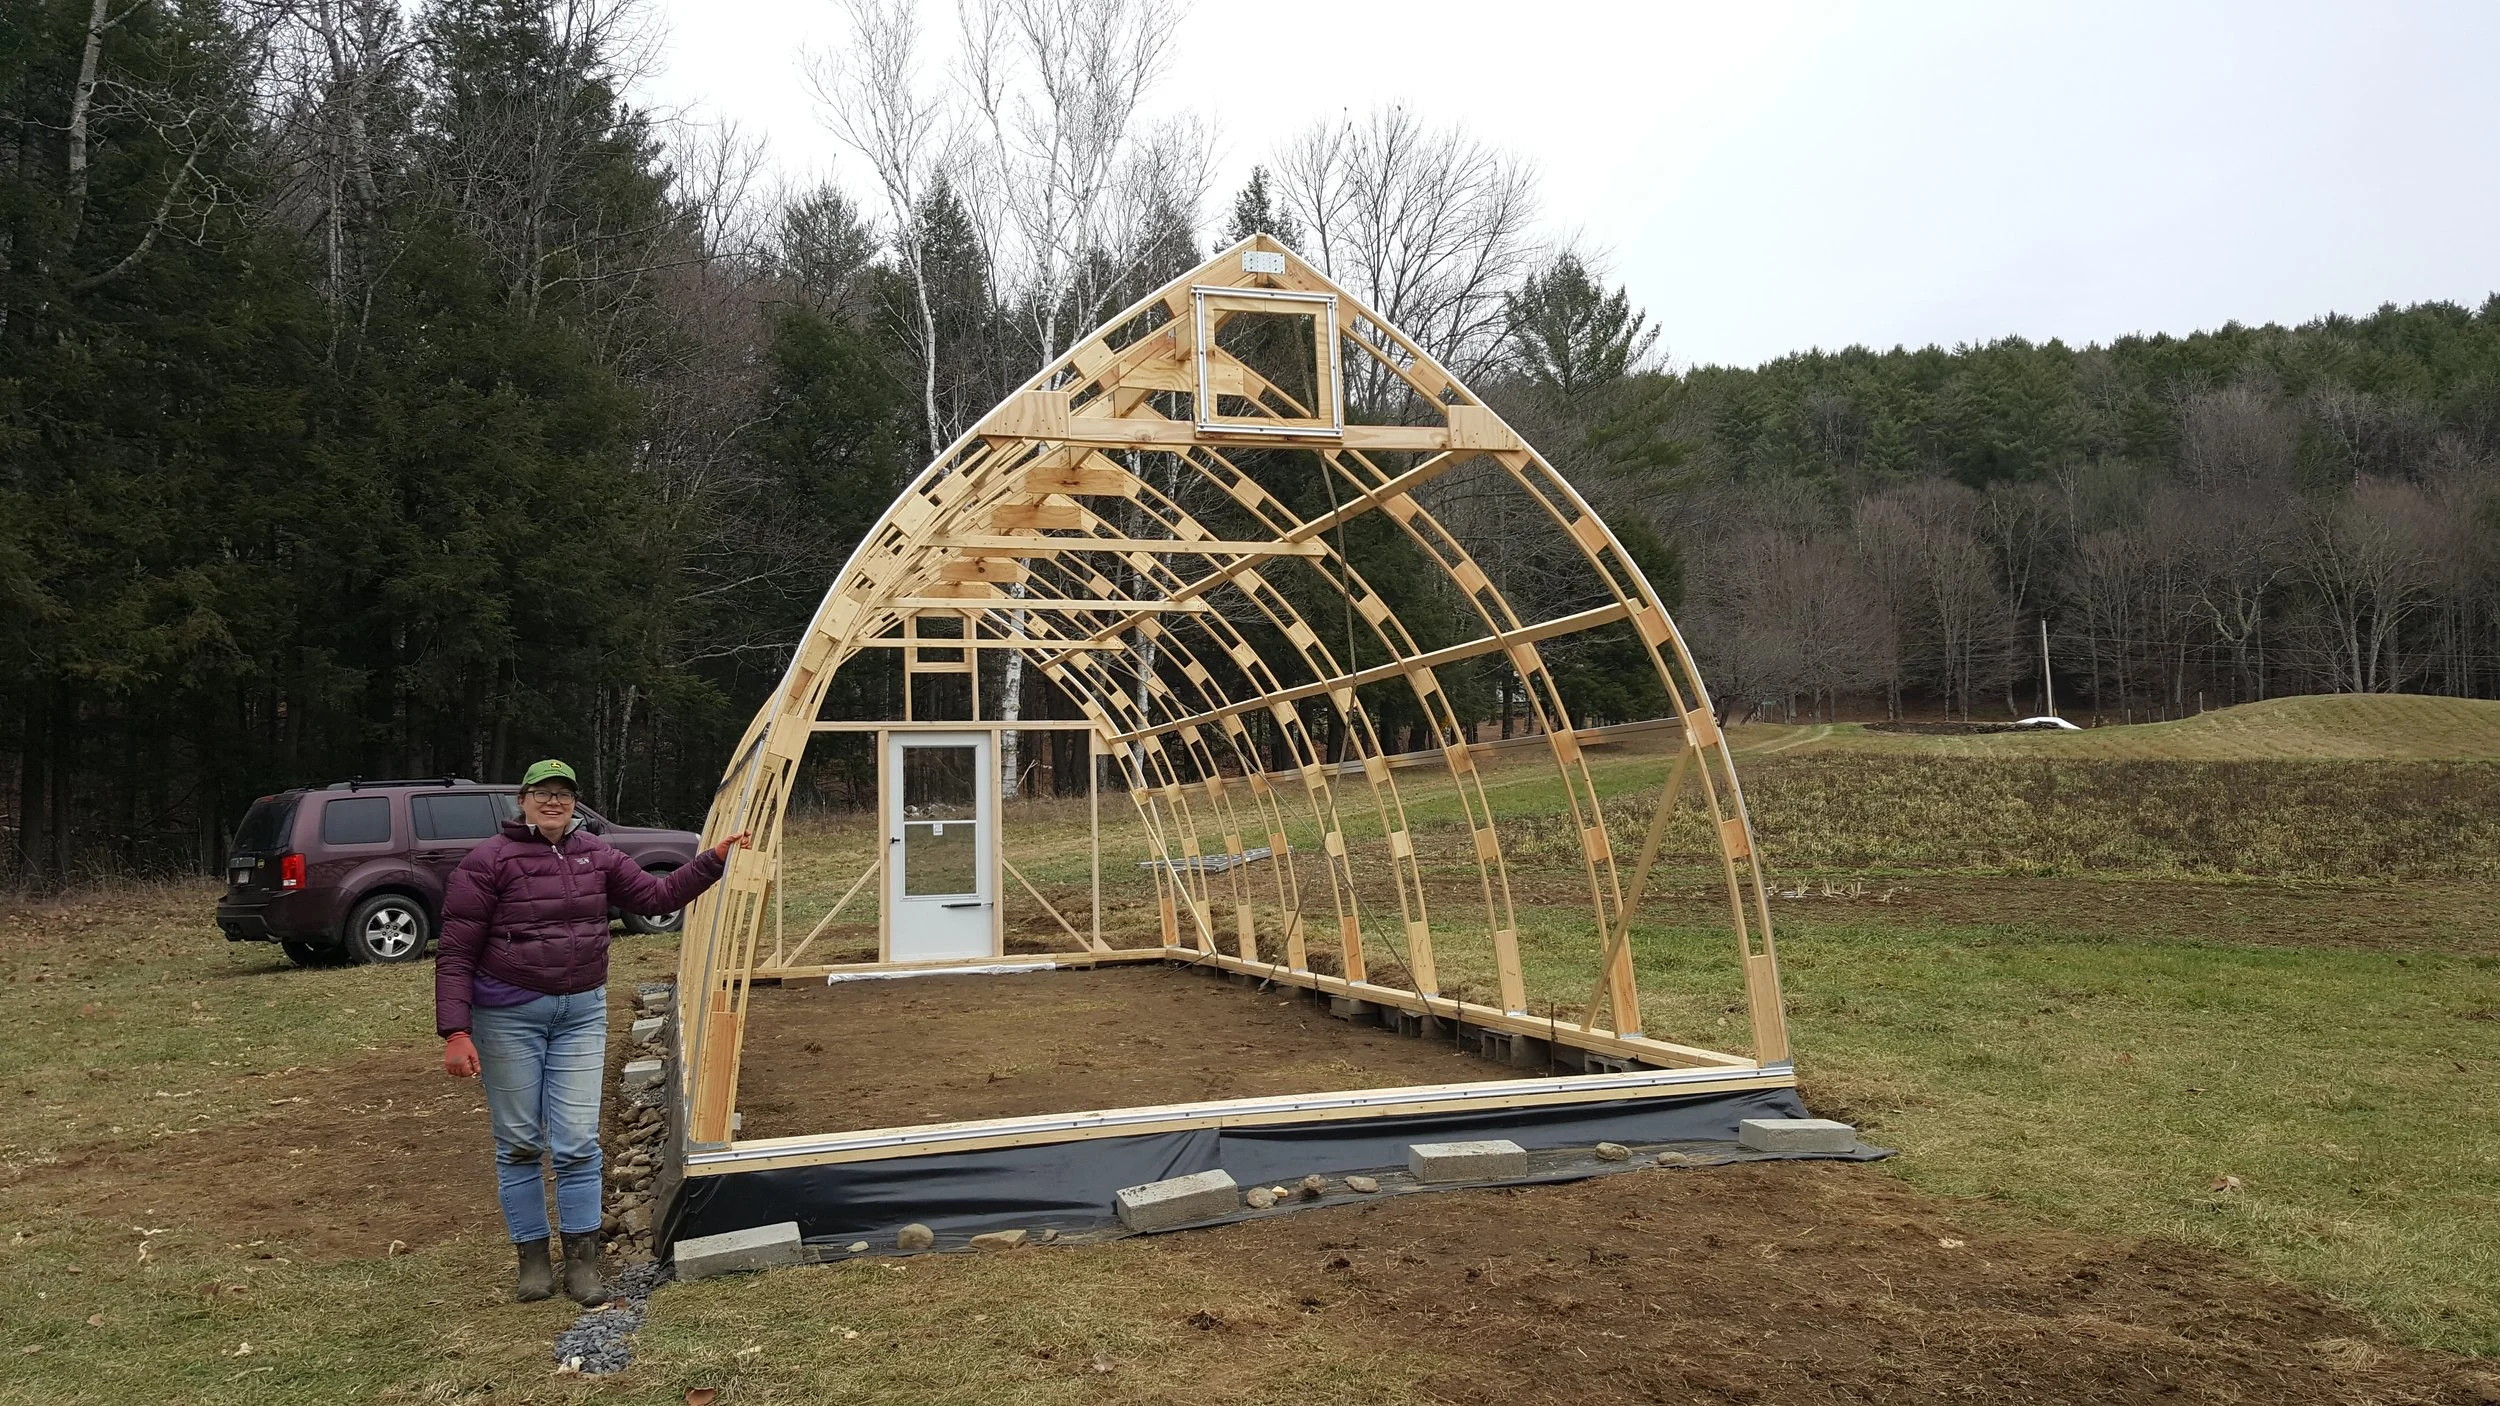
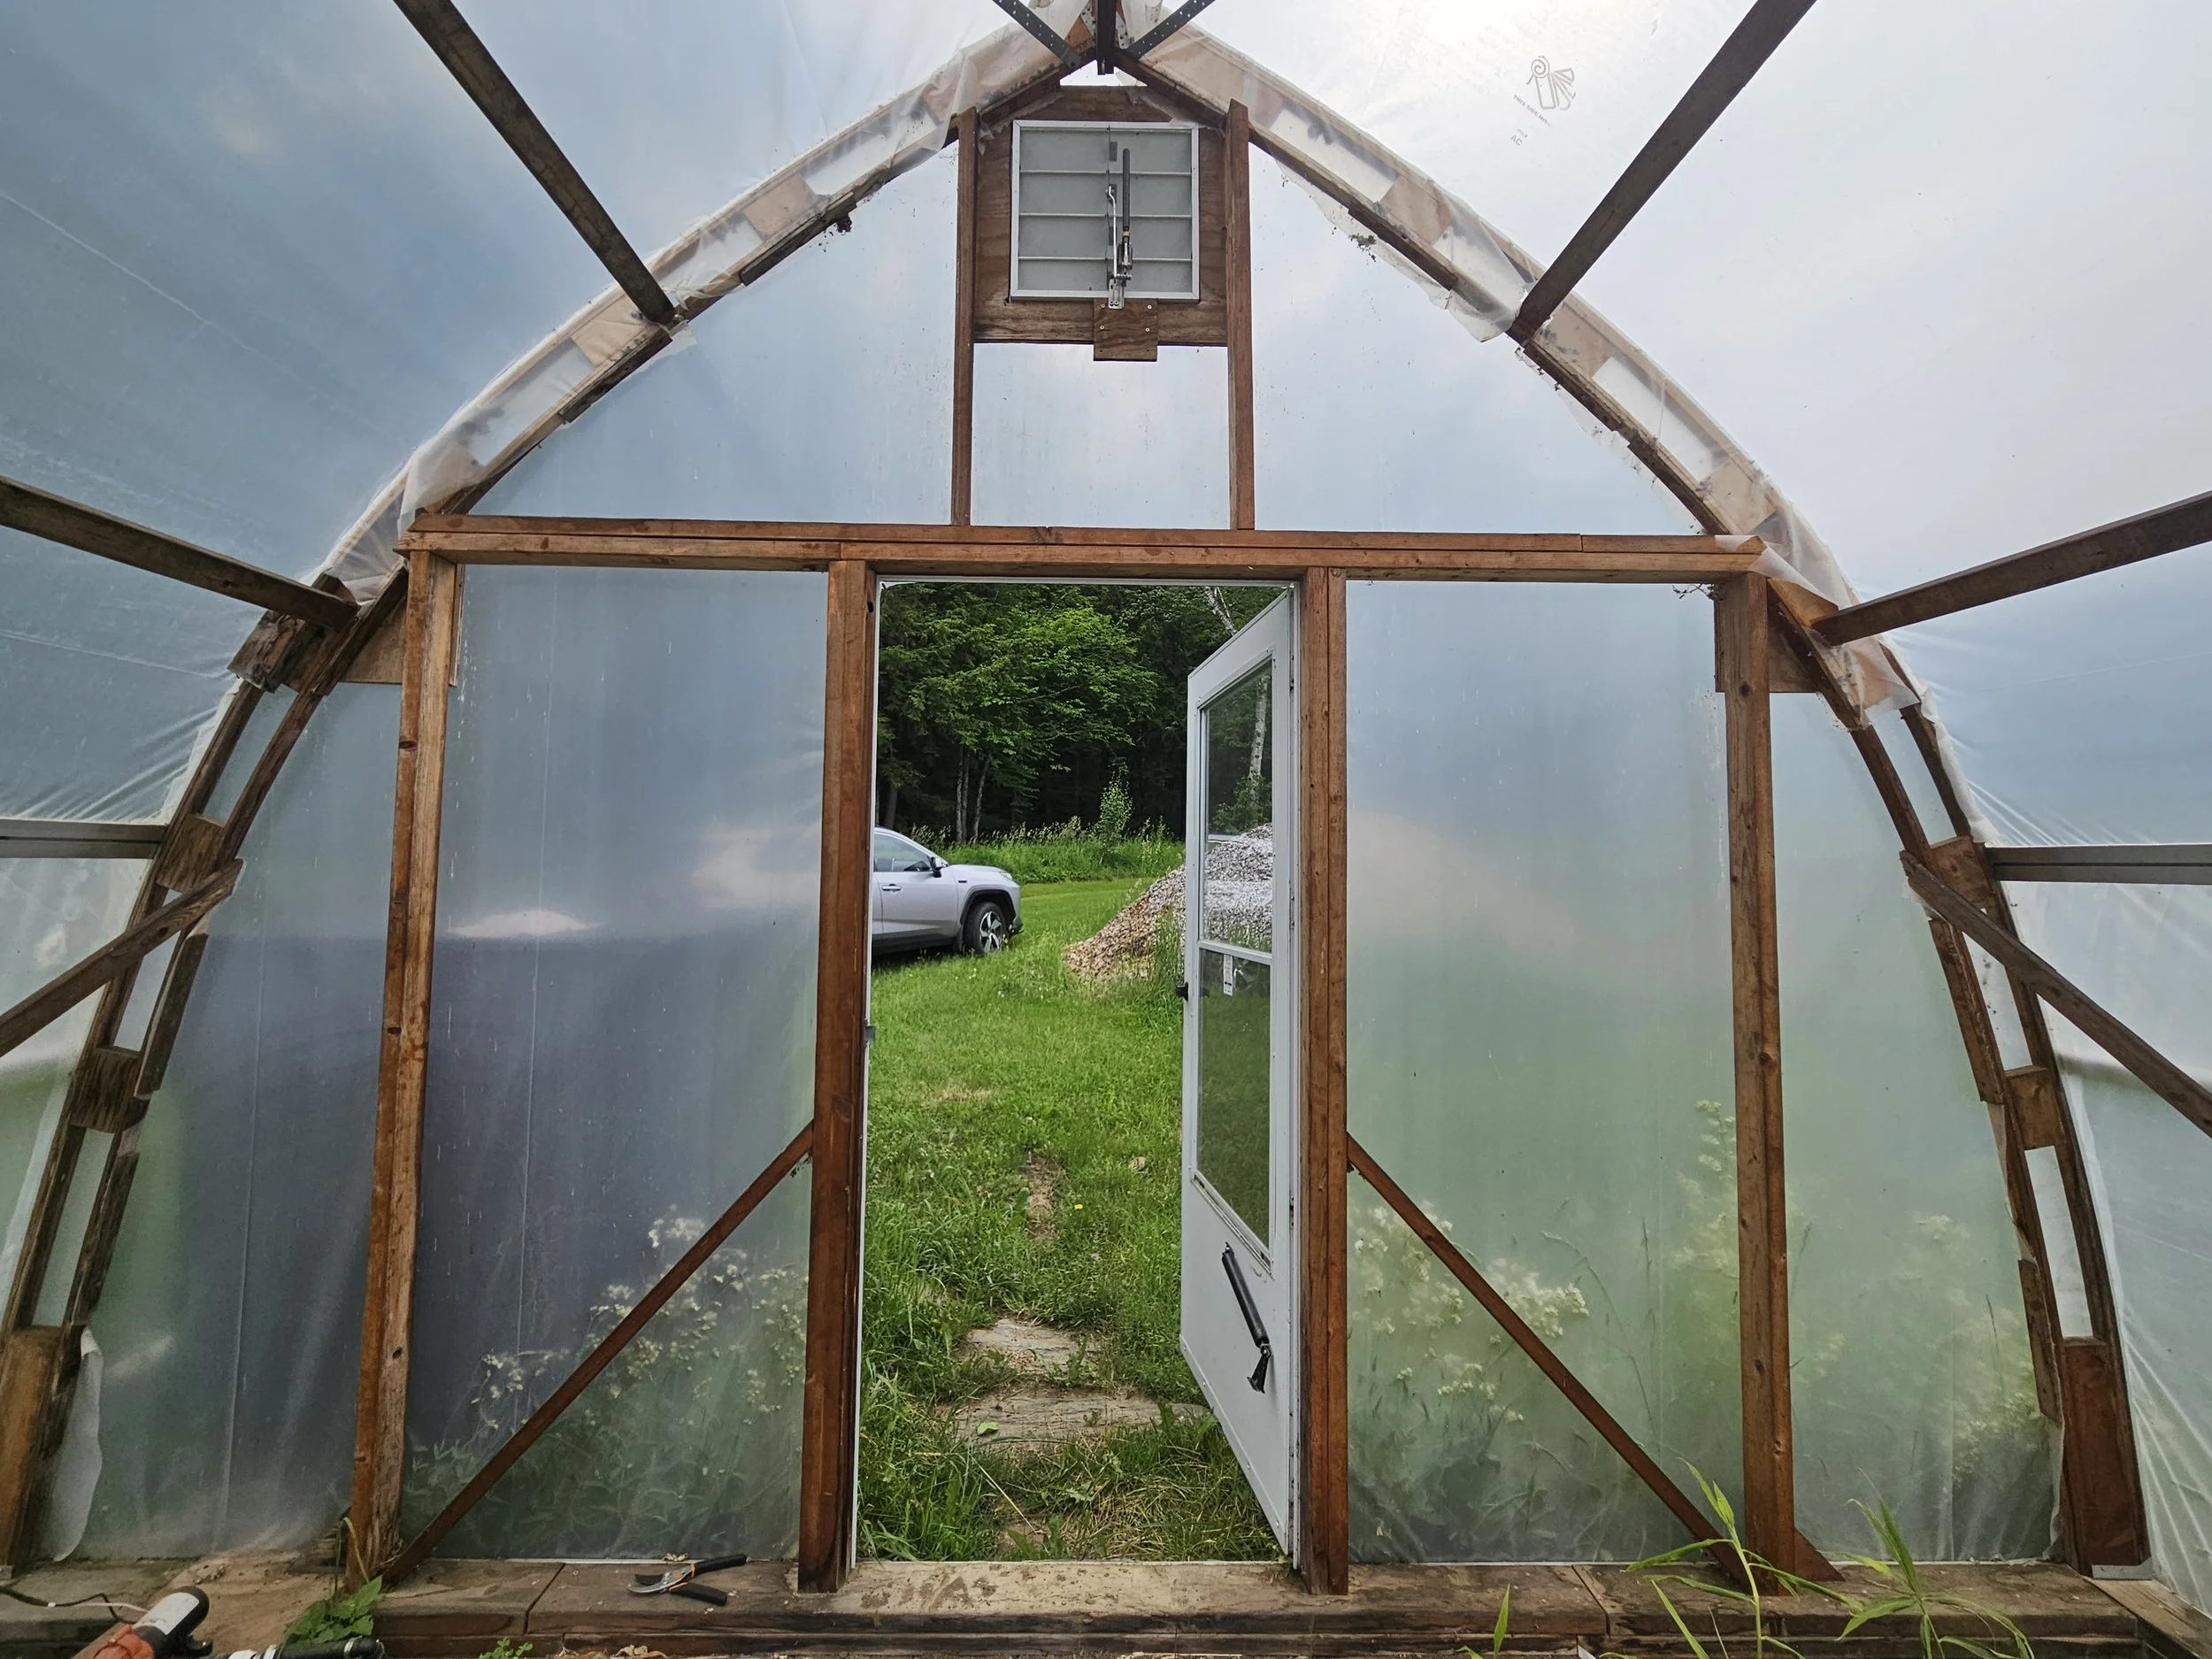
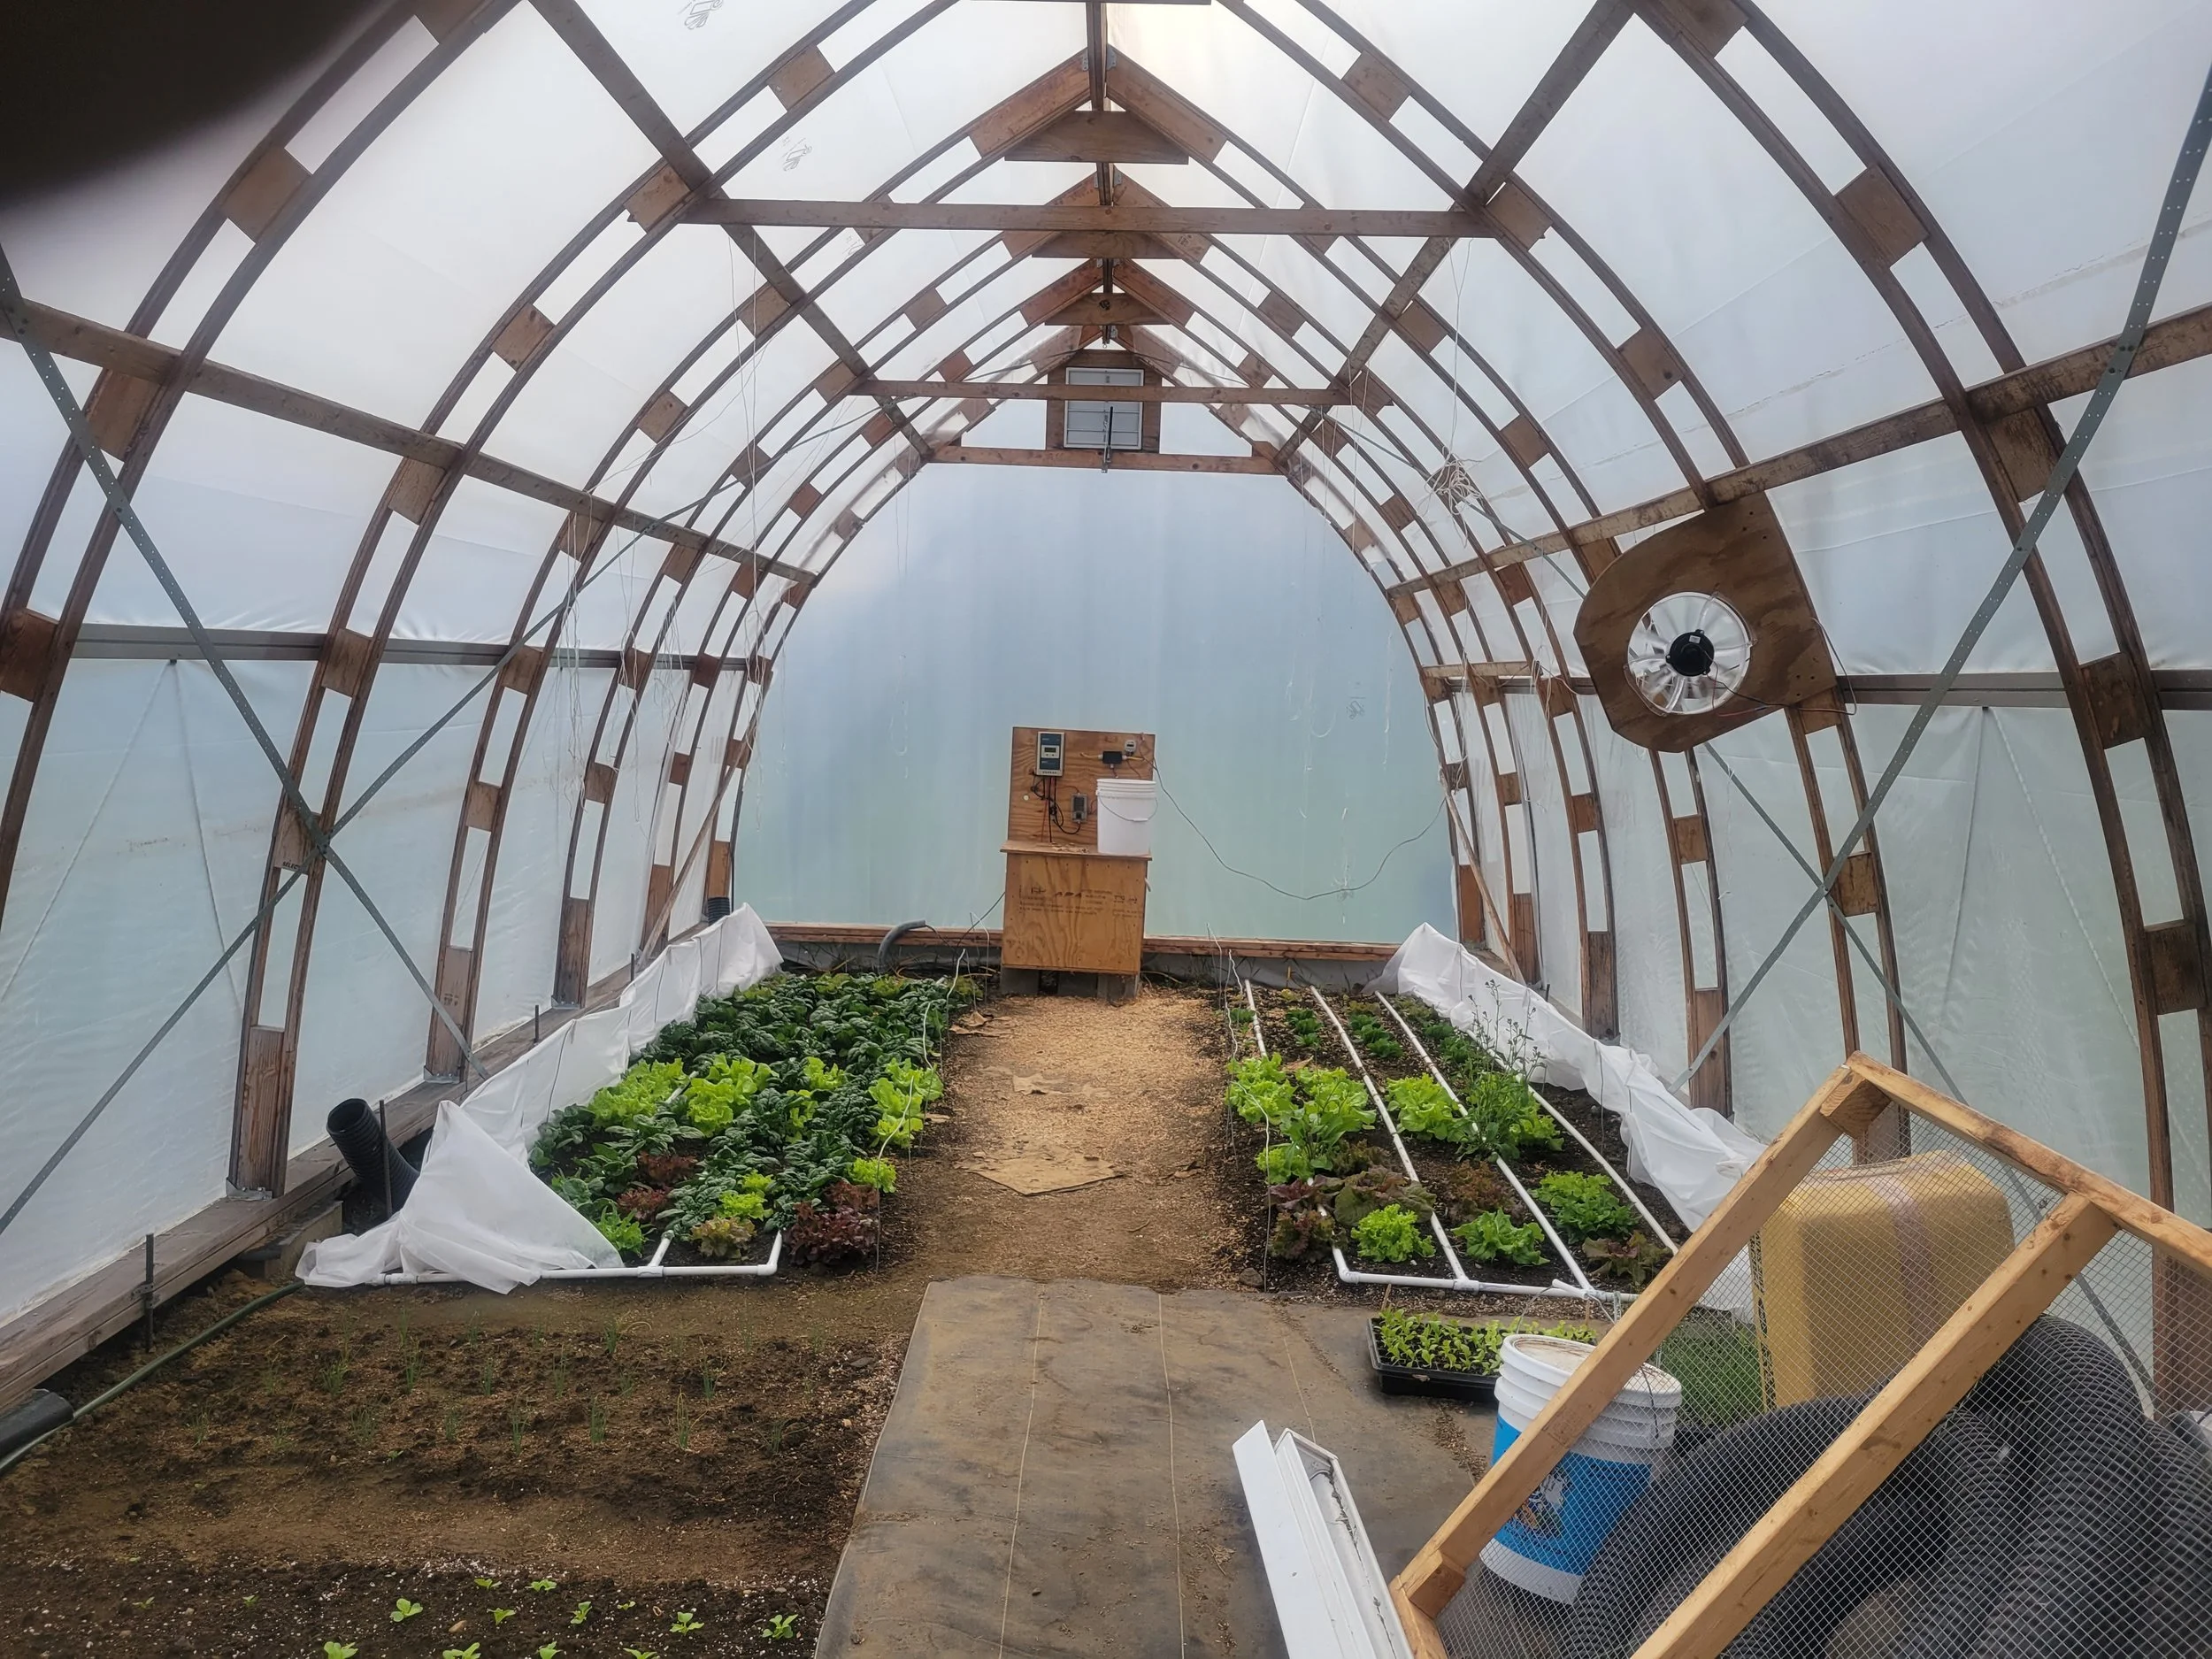
Our unheated greenhouse is a relatively small (14’ x 32’). This size was perfect for our needs, which is to grow early season salad greens and specialty heat-loving plants in the summer for our homestead. However, note that this design can be scaled easily, particularly along the longitudinal axis. Since we didn’t have commercial plans for this structure, we were focused on reducing building costs wherever possible in our design. To this end, we wanted to make it using readily available supplies from our local hardware or big box home improvement store.
We realized that there are a number of programs available that provide commercial high tunnel greenhouses at cost or better for qualifying farms . However, since our plans for the greenhouse were focused on our own table and not our market crops, we did not believe we would qualify for these grants. As a result, we decided to build our own from scratch. Our design principles were simple: we wanted a cheap, reasonably durable option that we could build within 2 months (we started this project in October and needed to finish by Thanksgiving). This meant that the supplies had to be readily available and all construction managed with hand tools and a table saw.
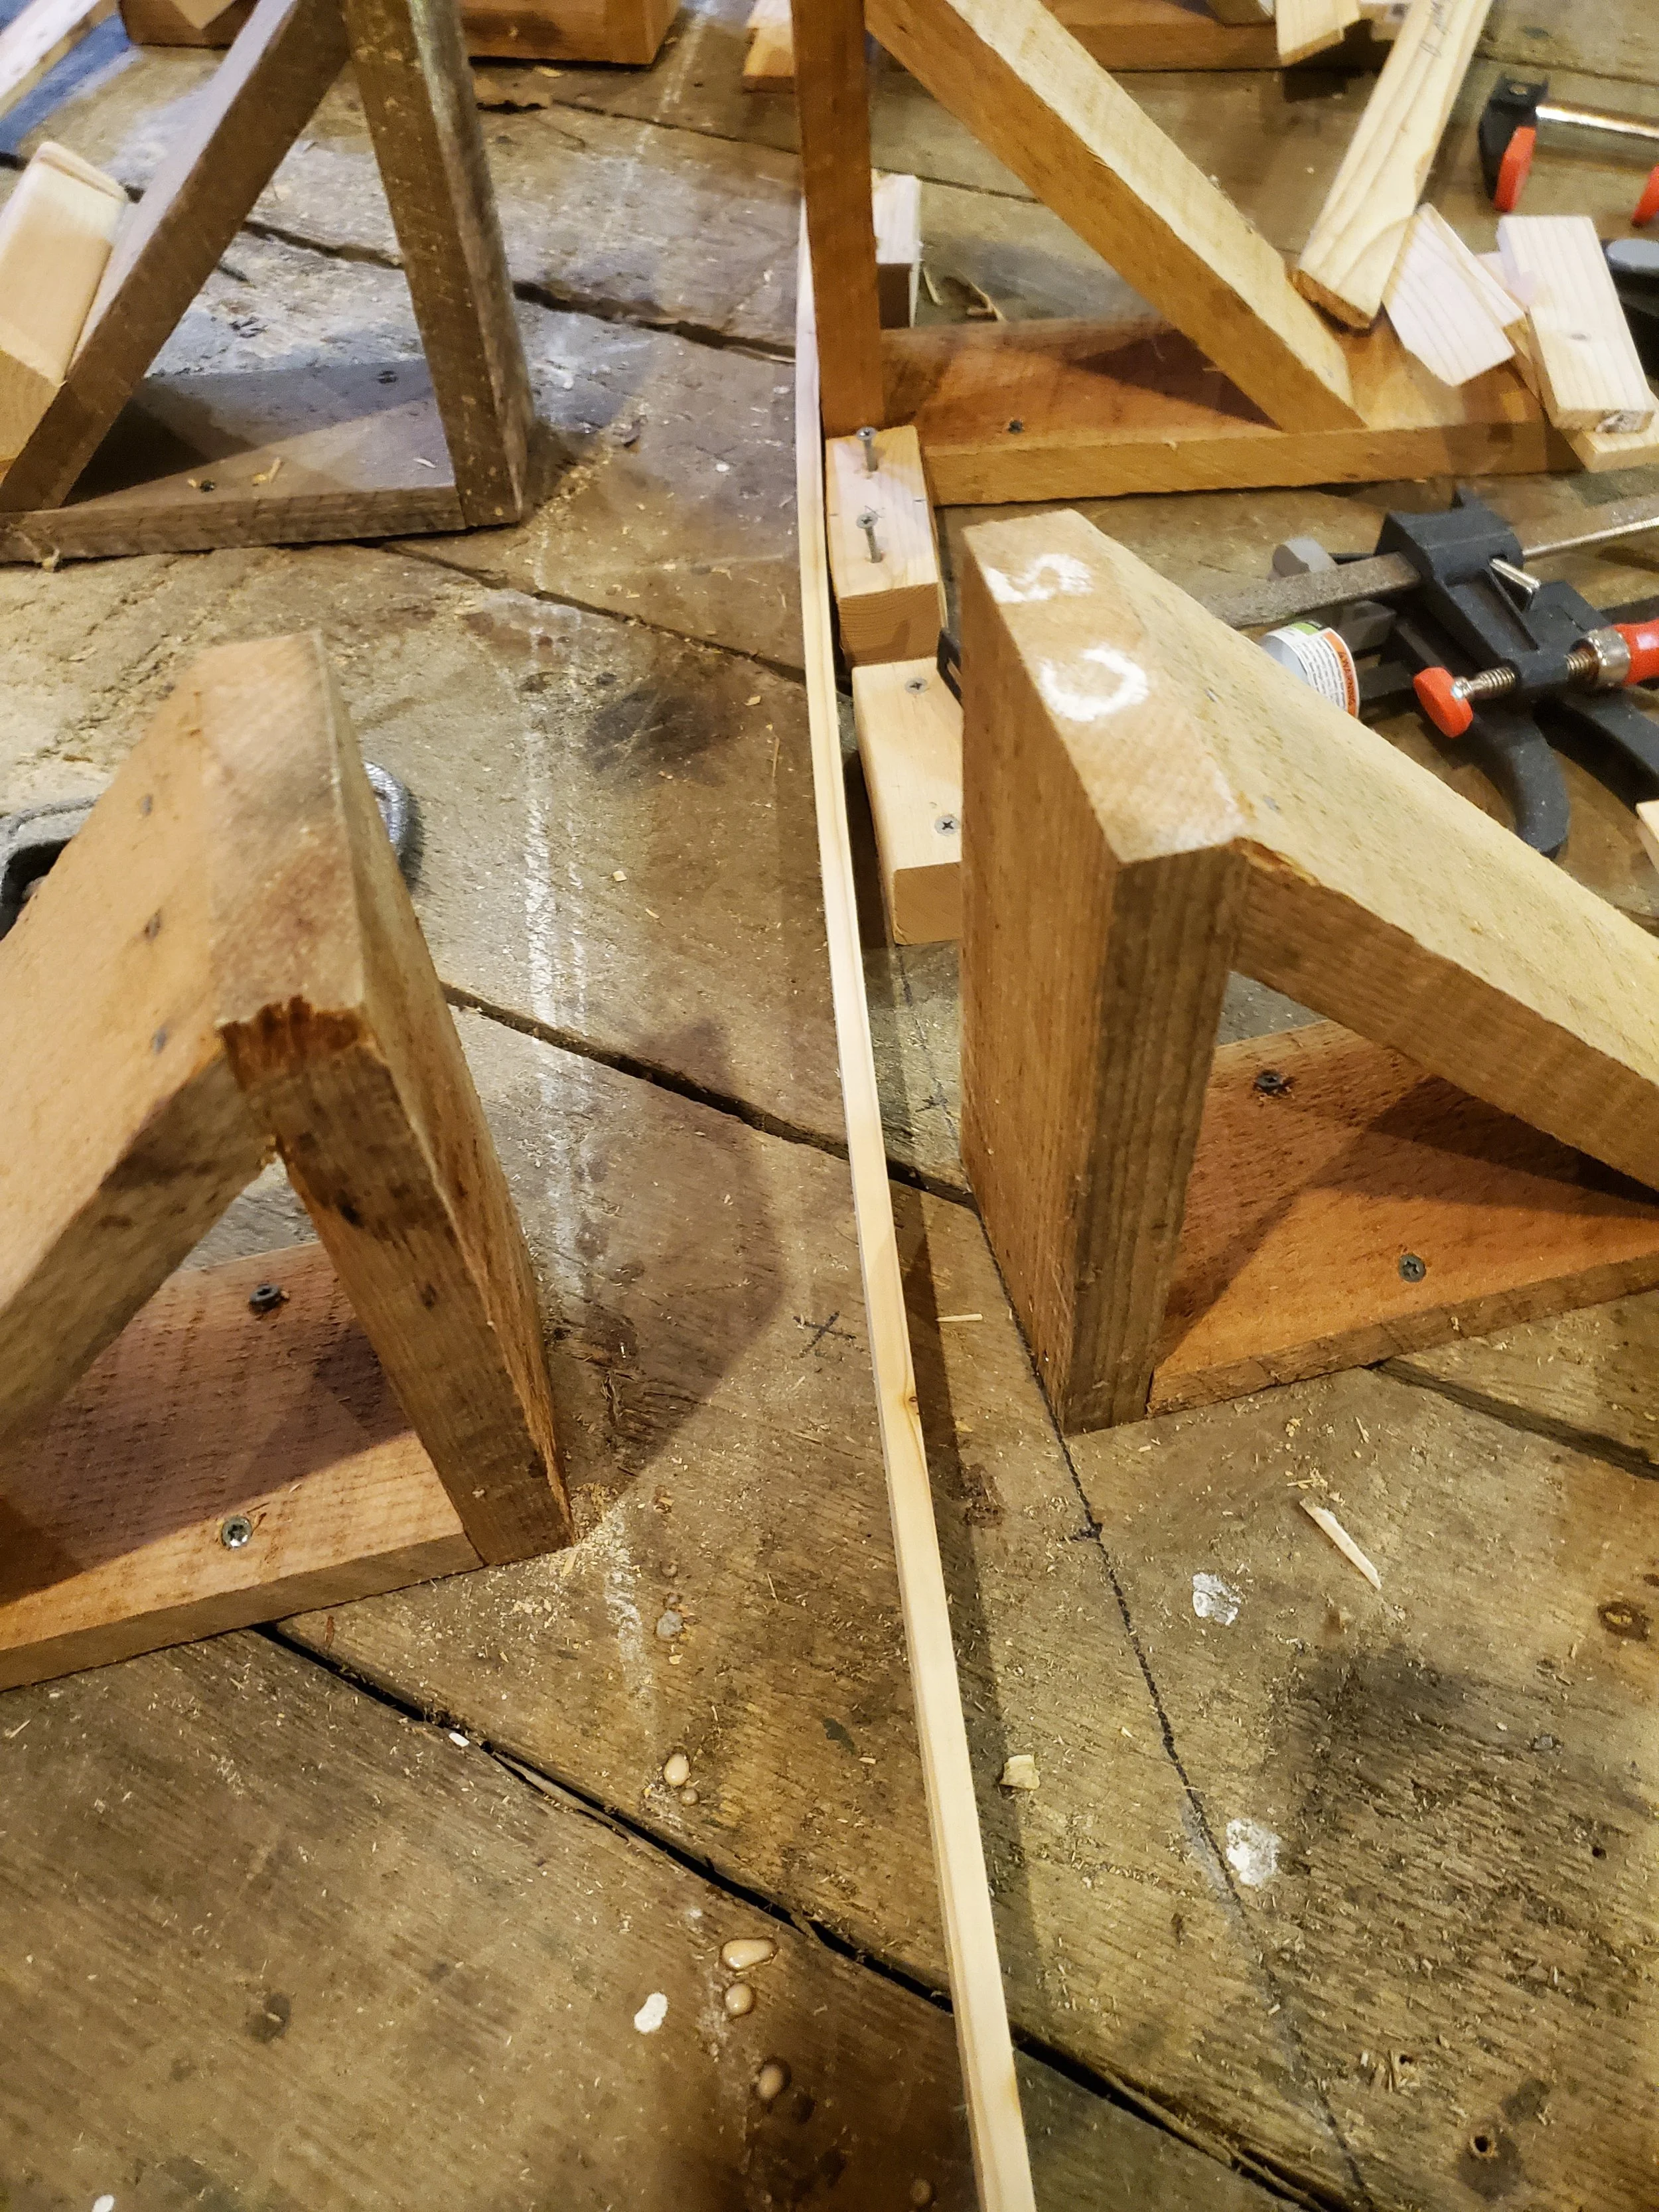
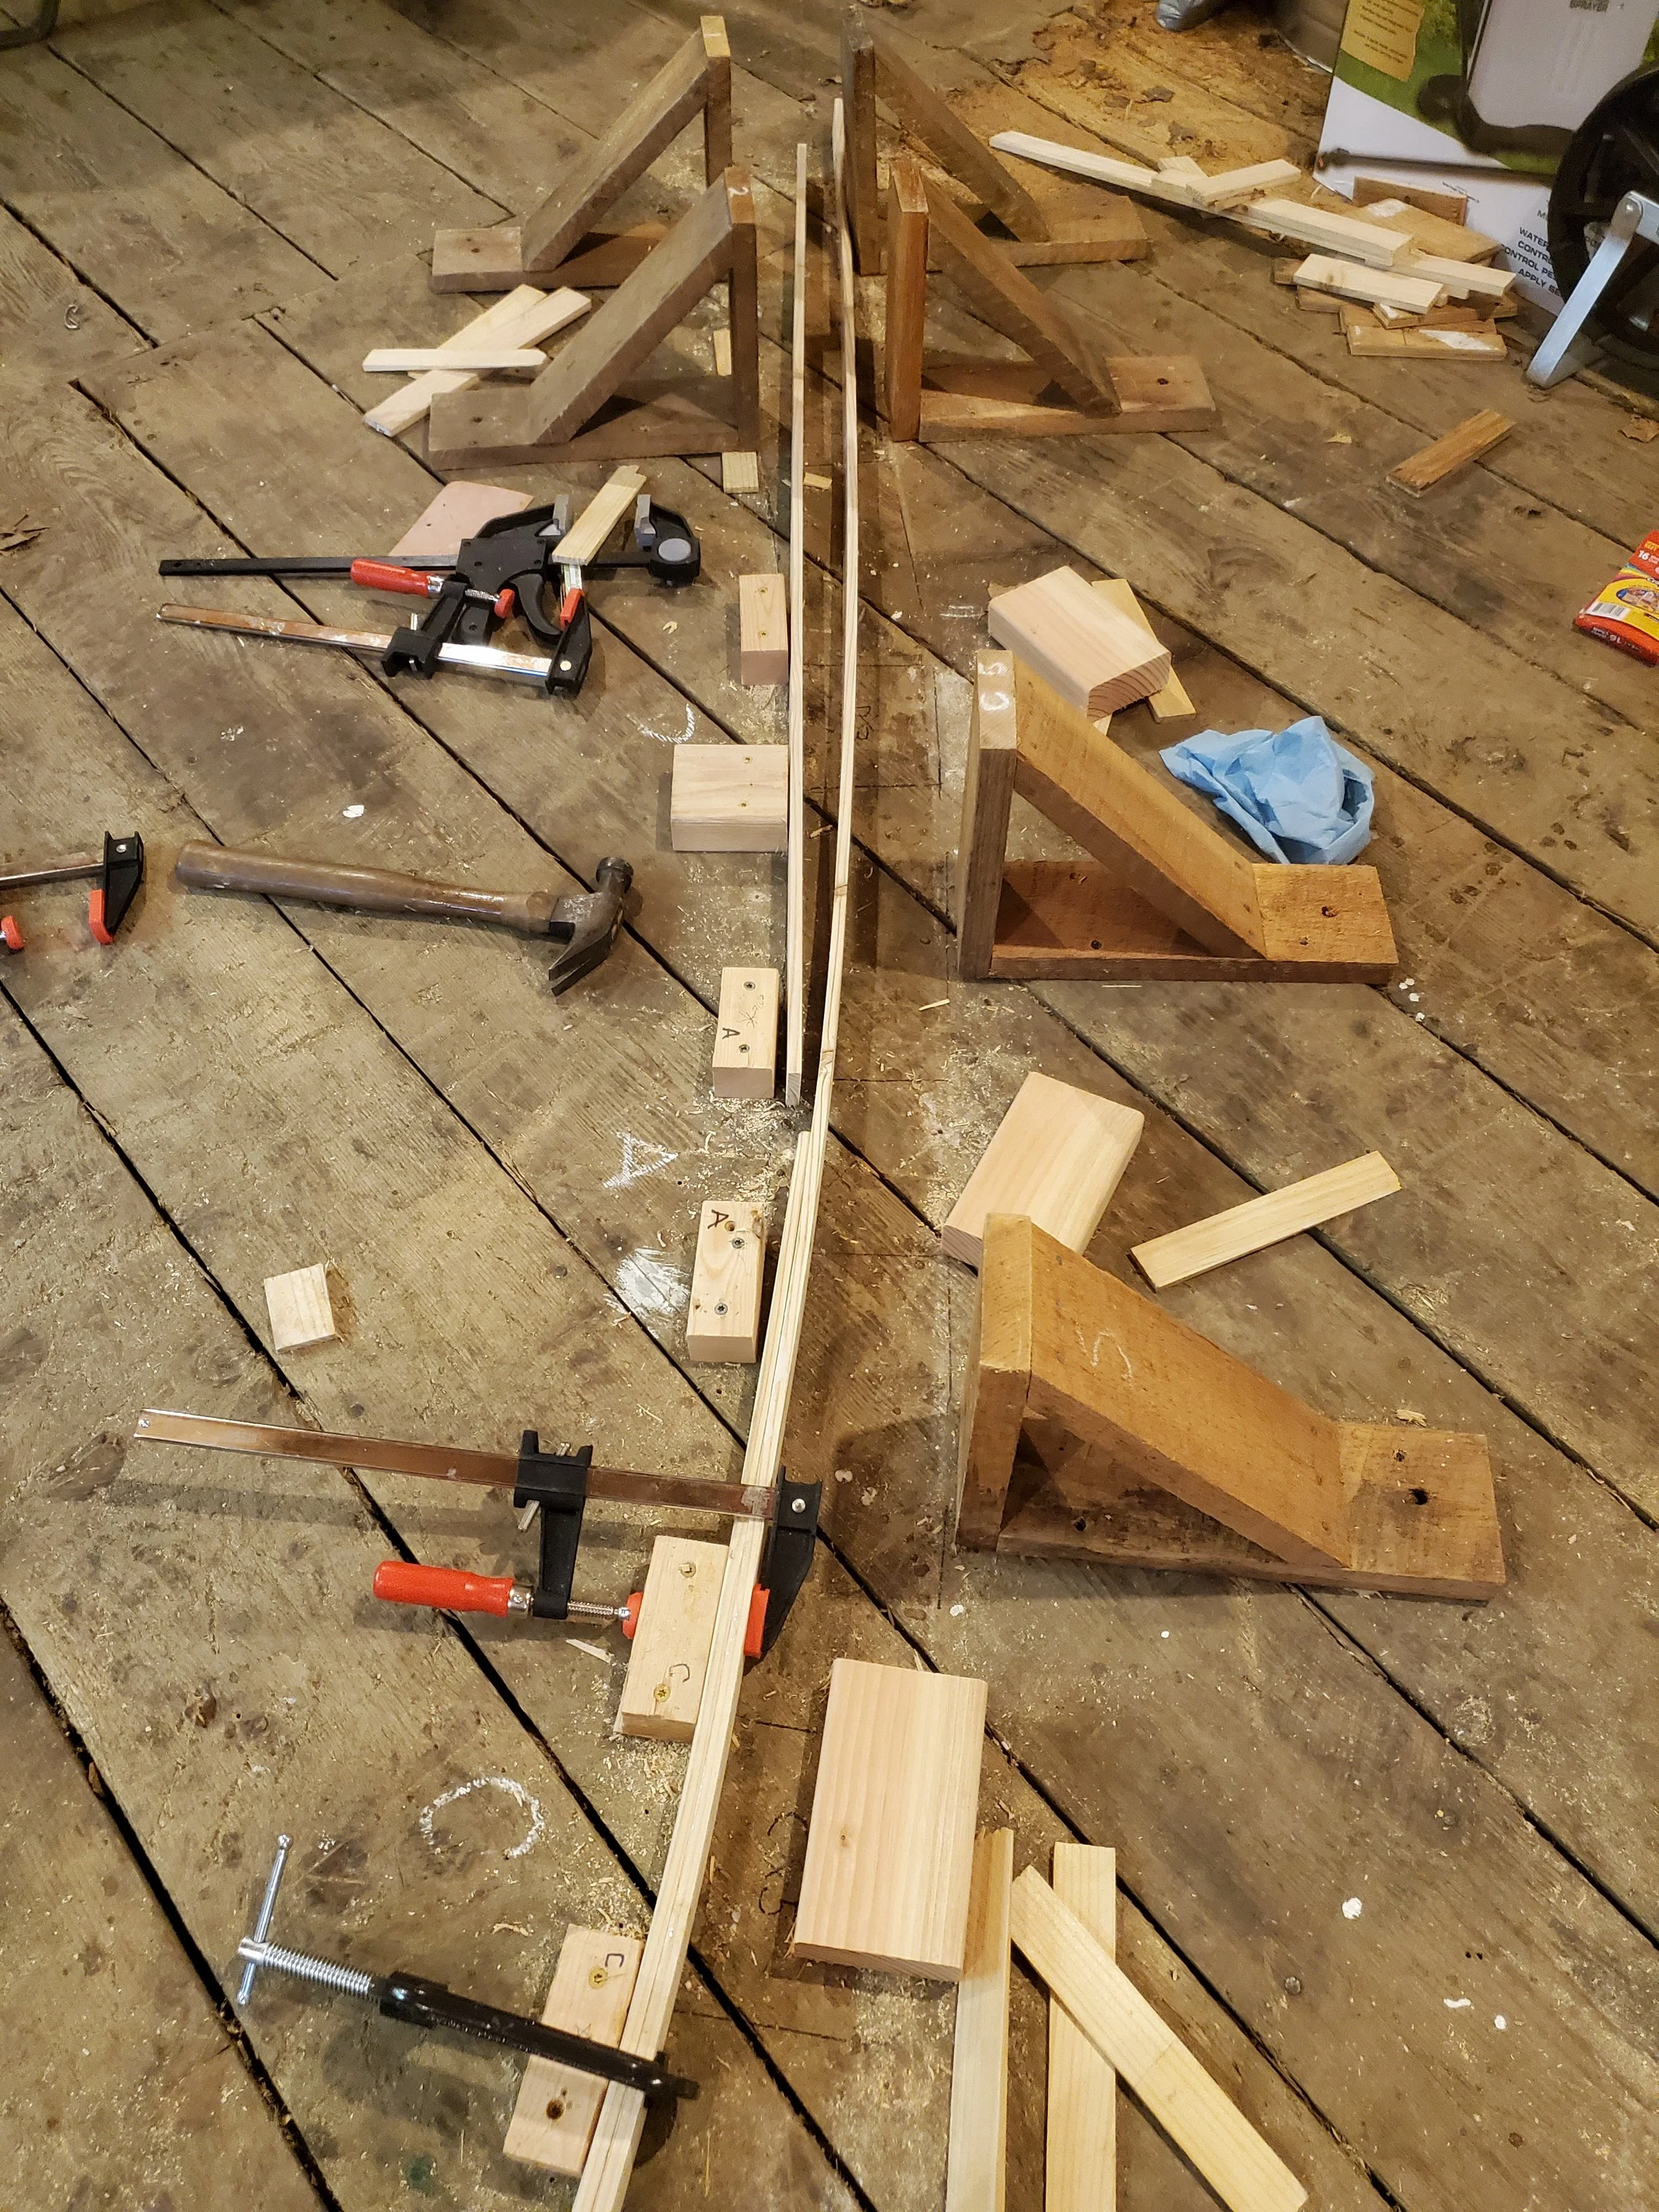
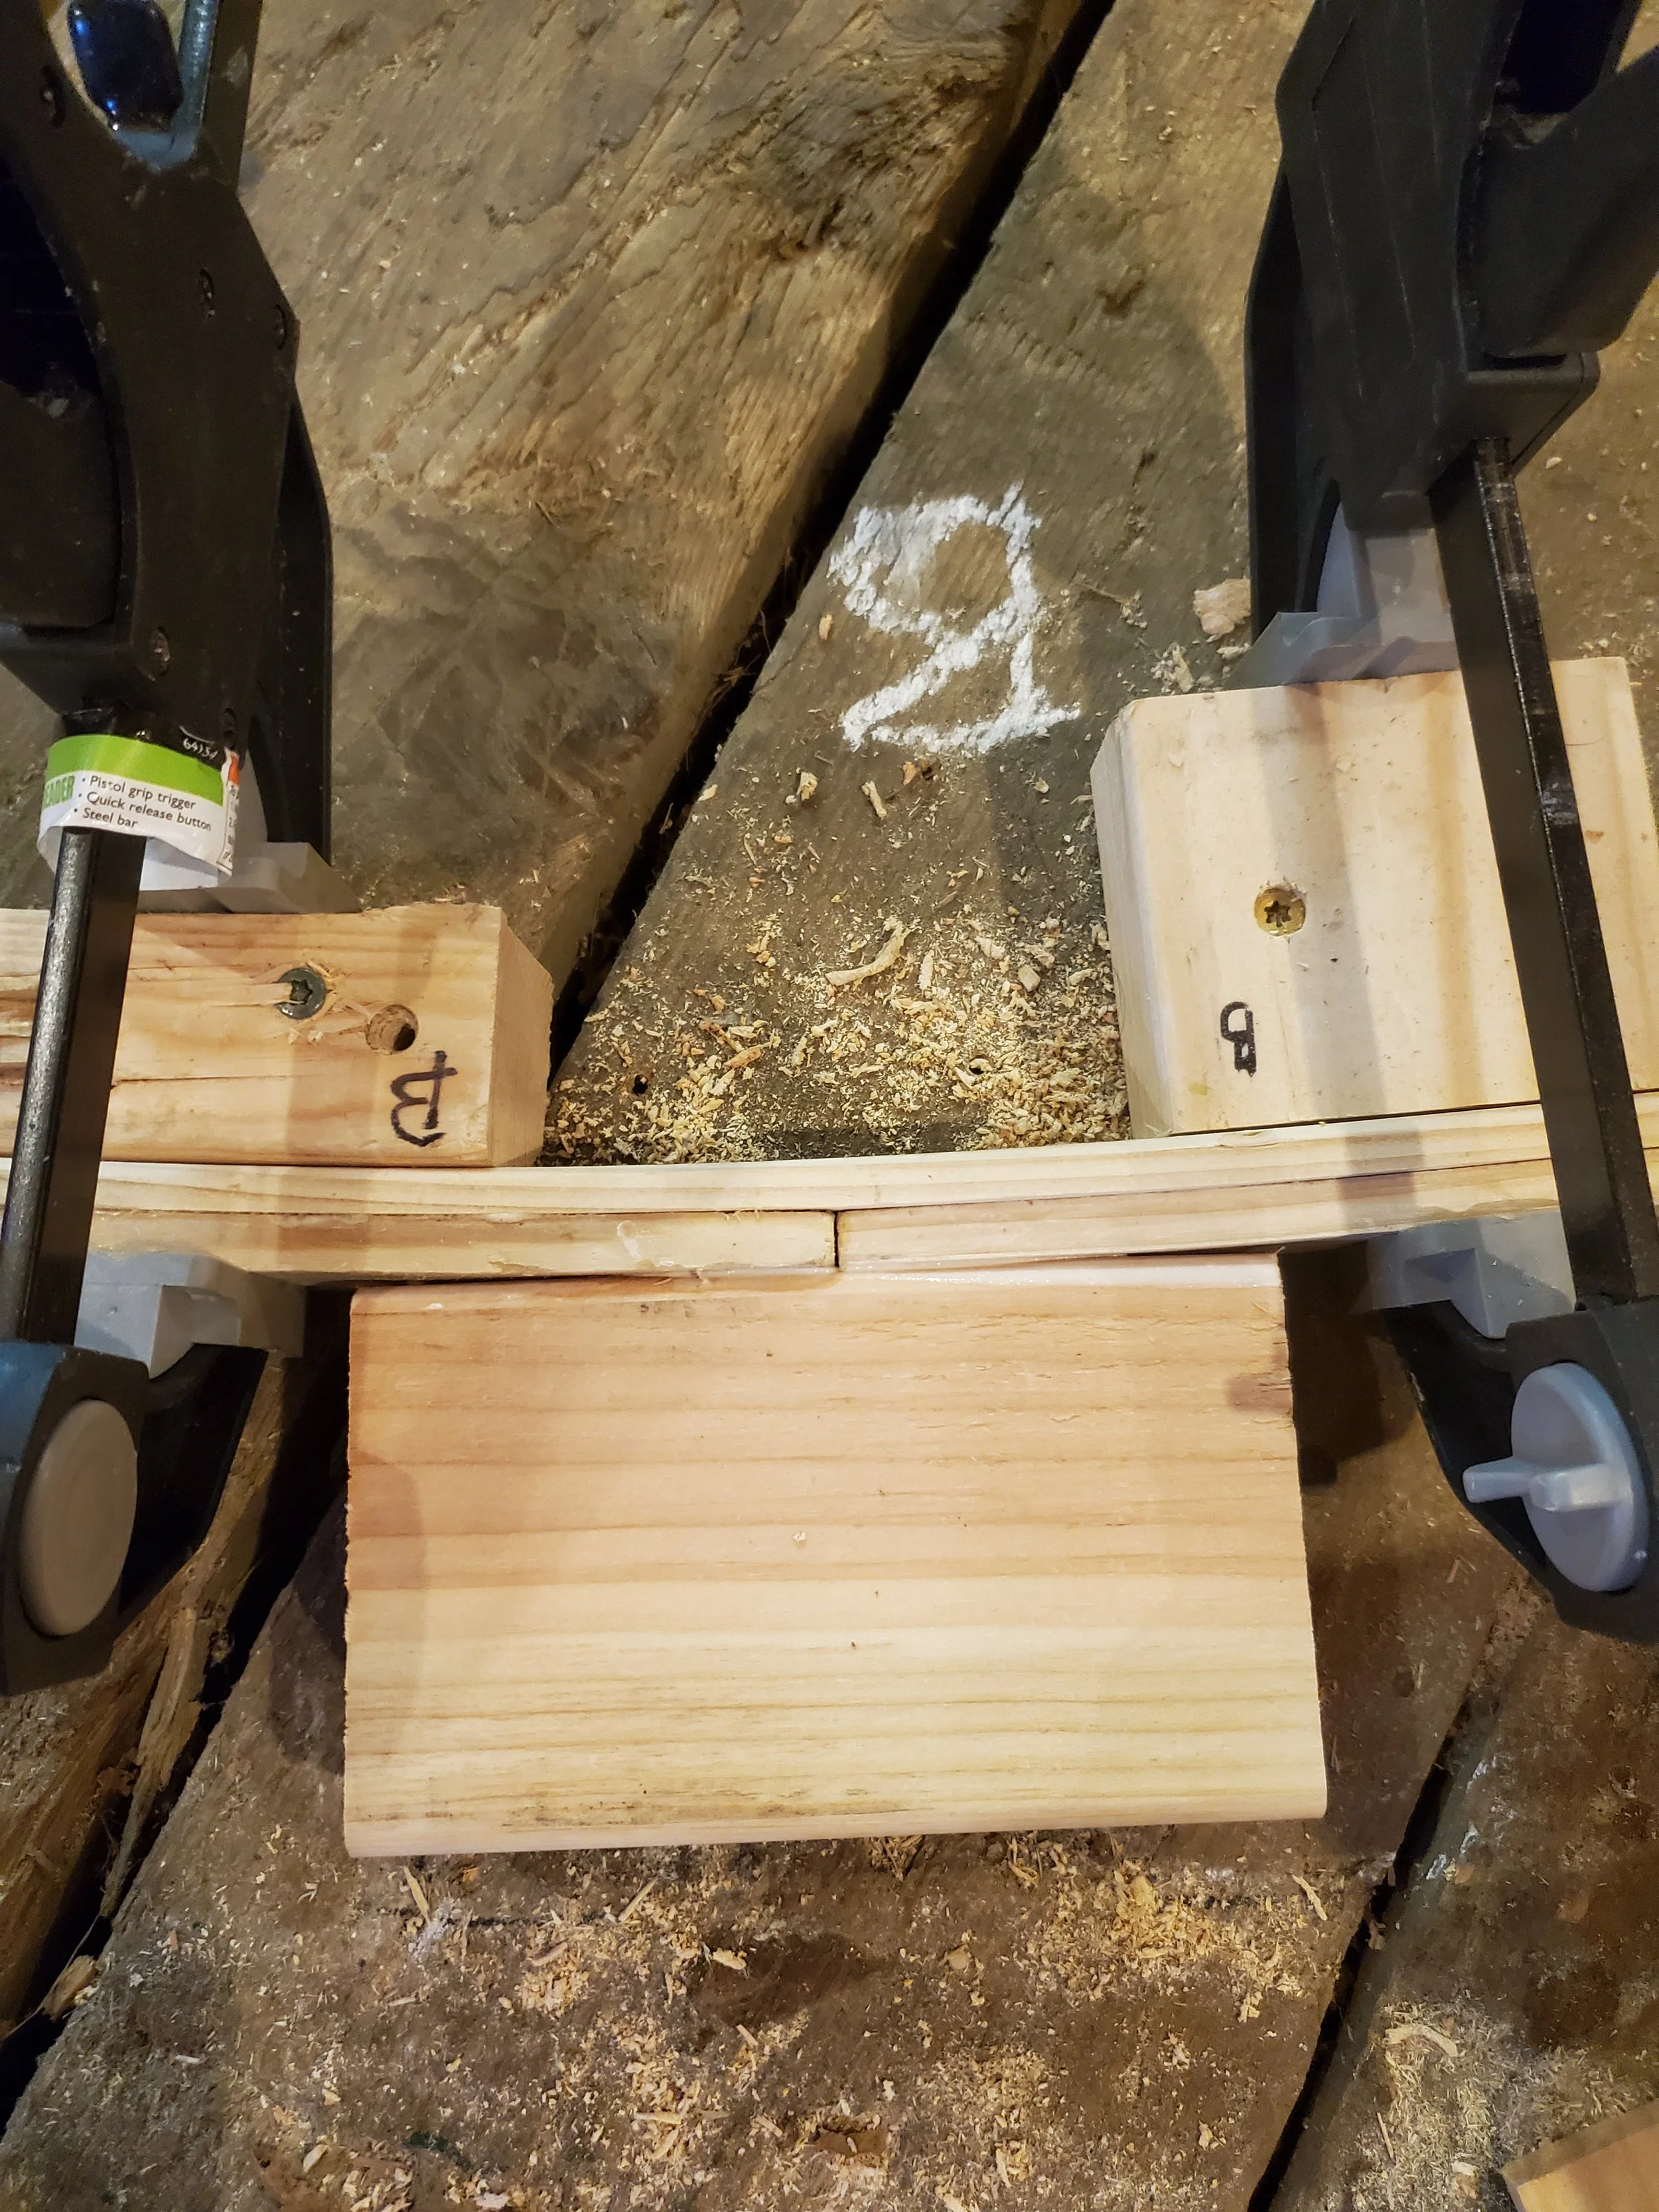
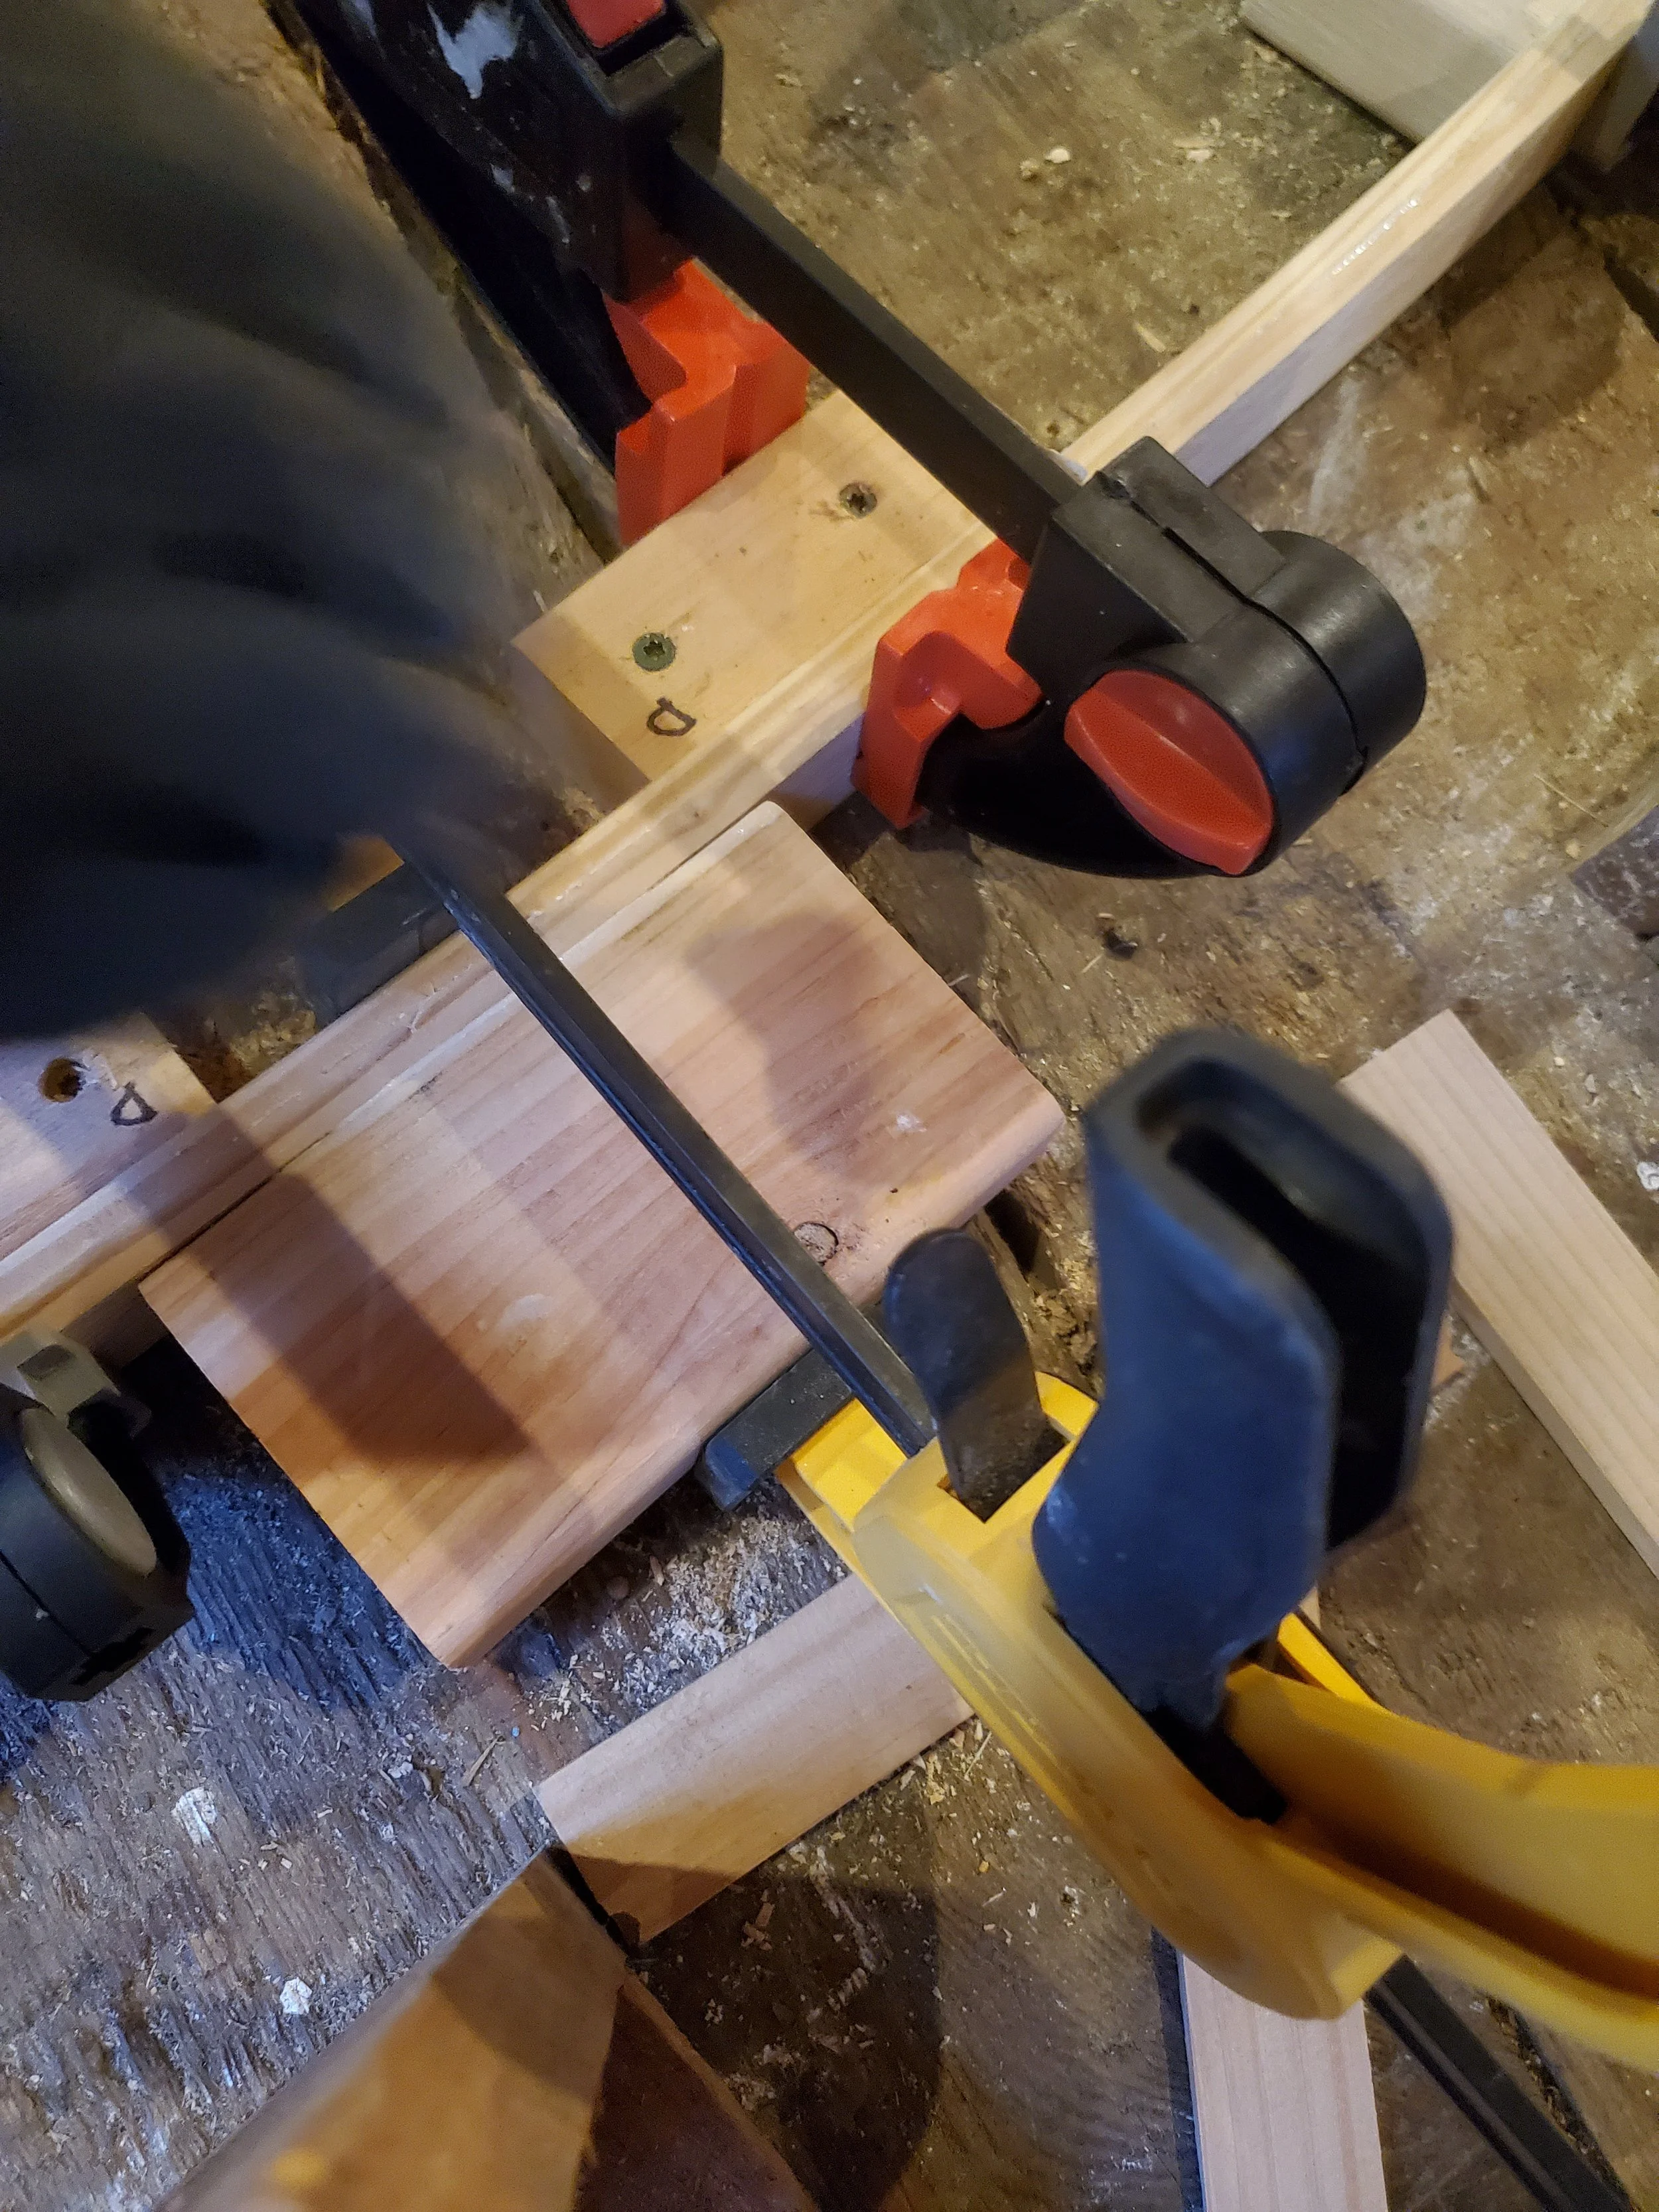
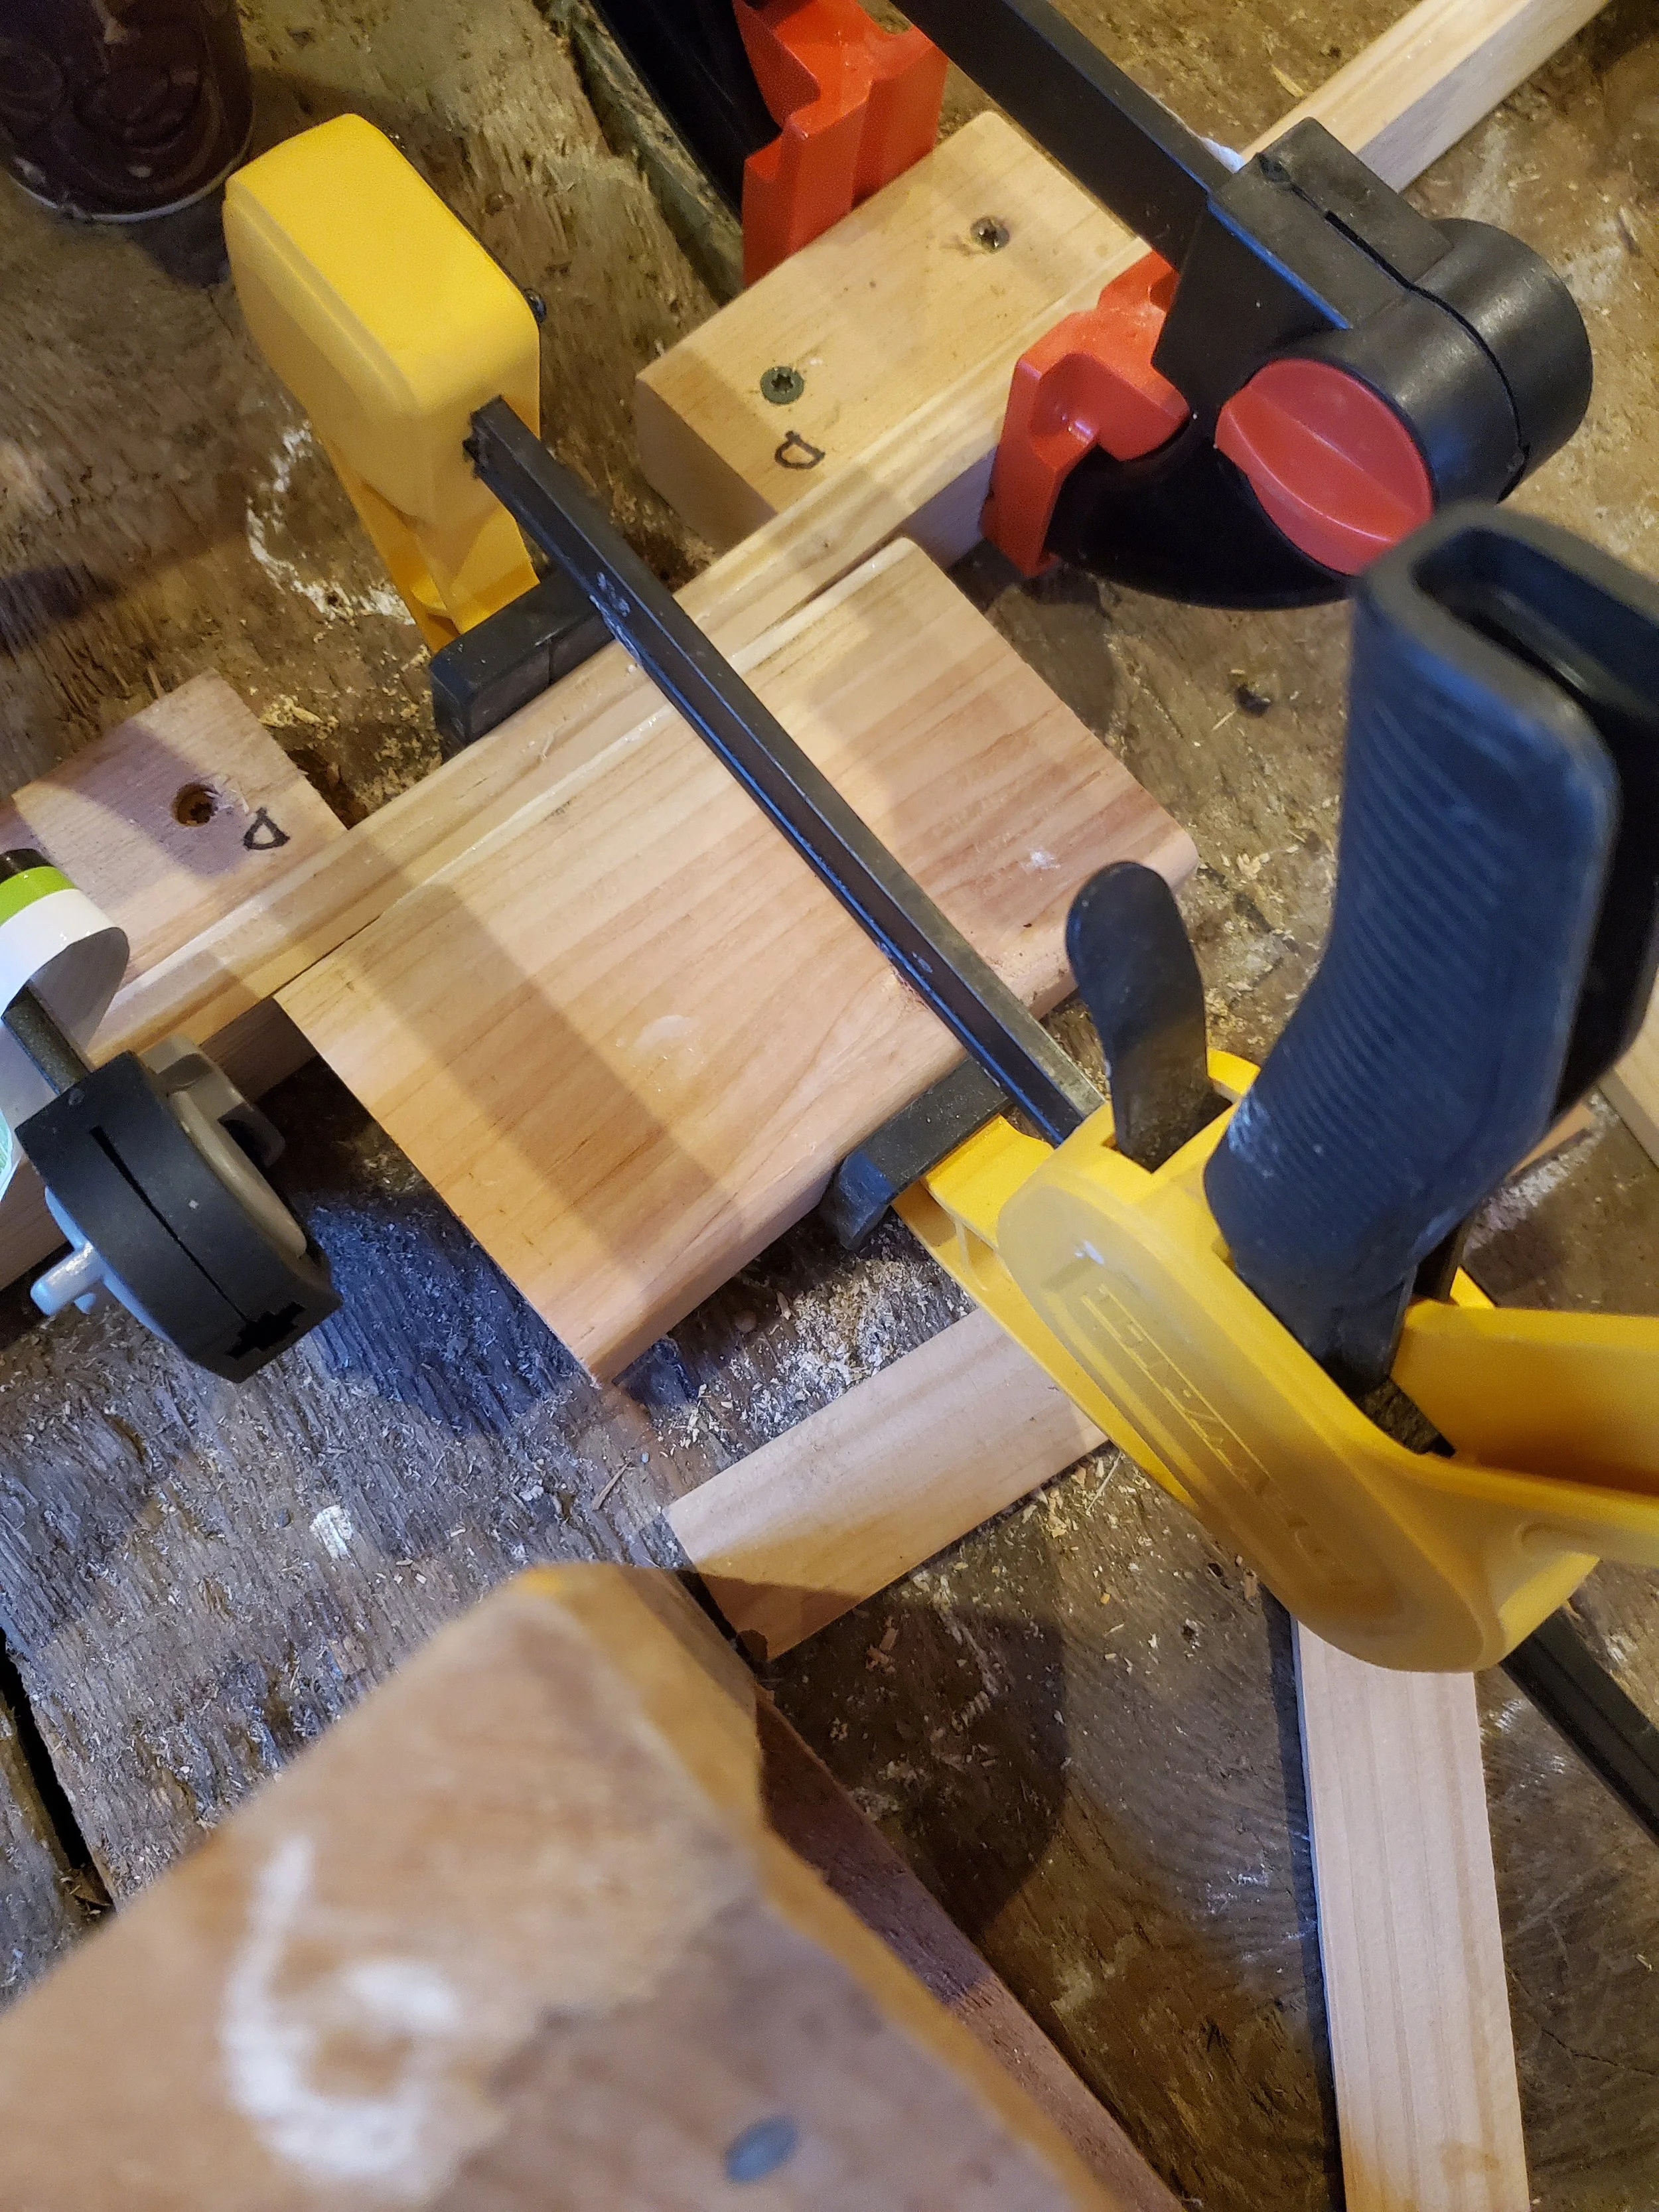
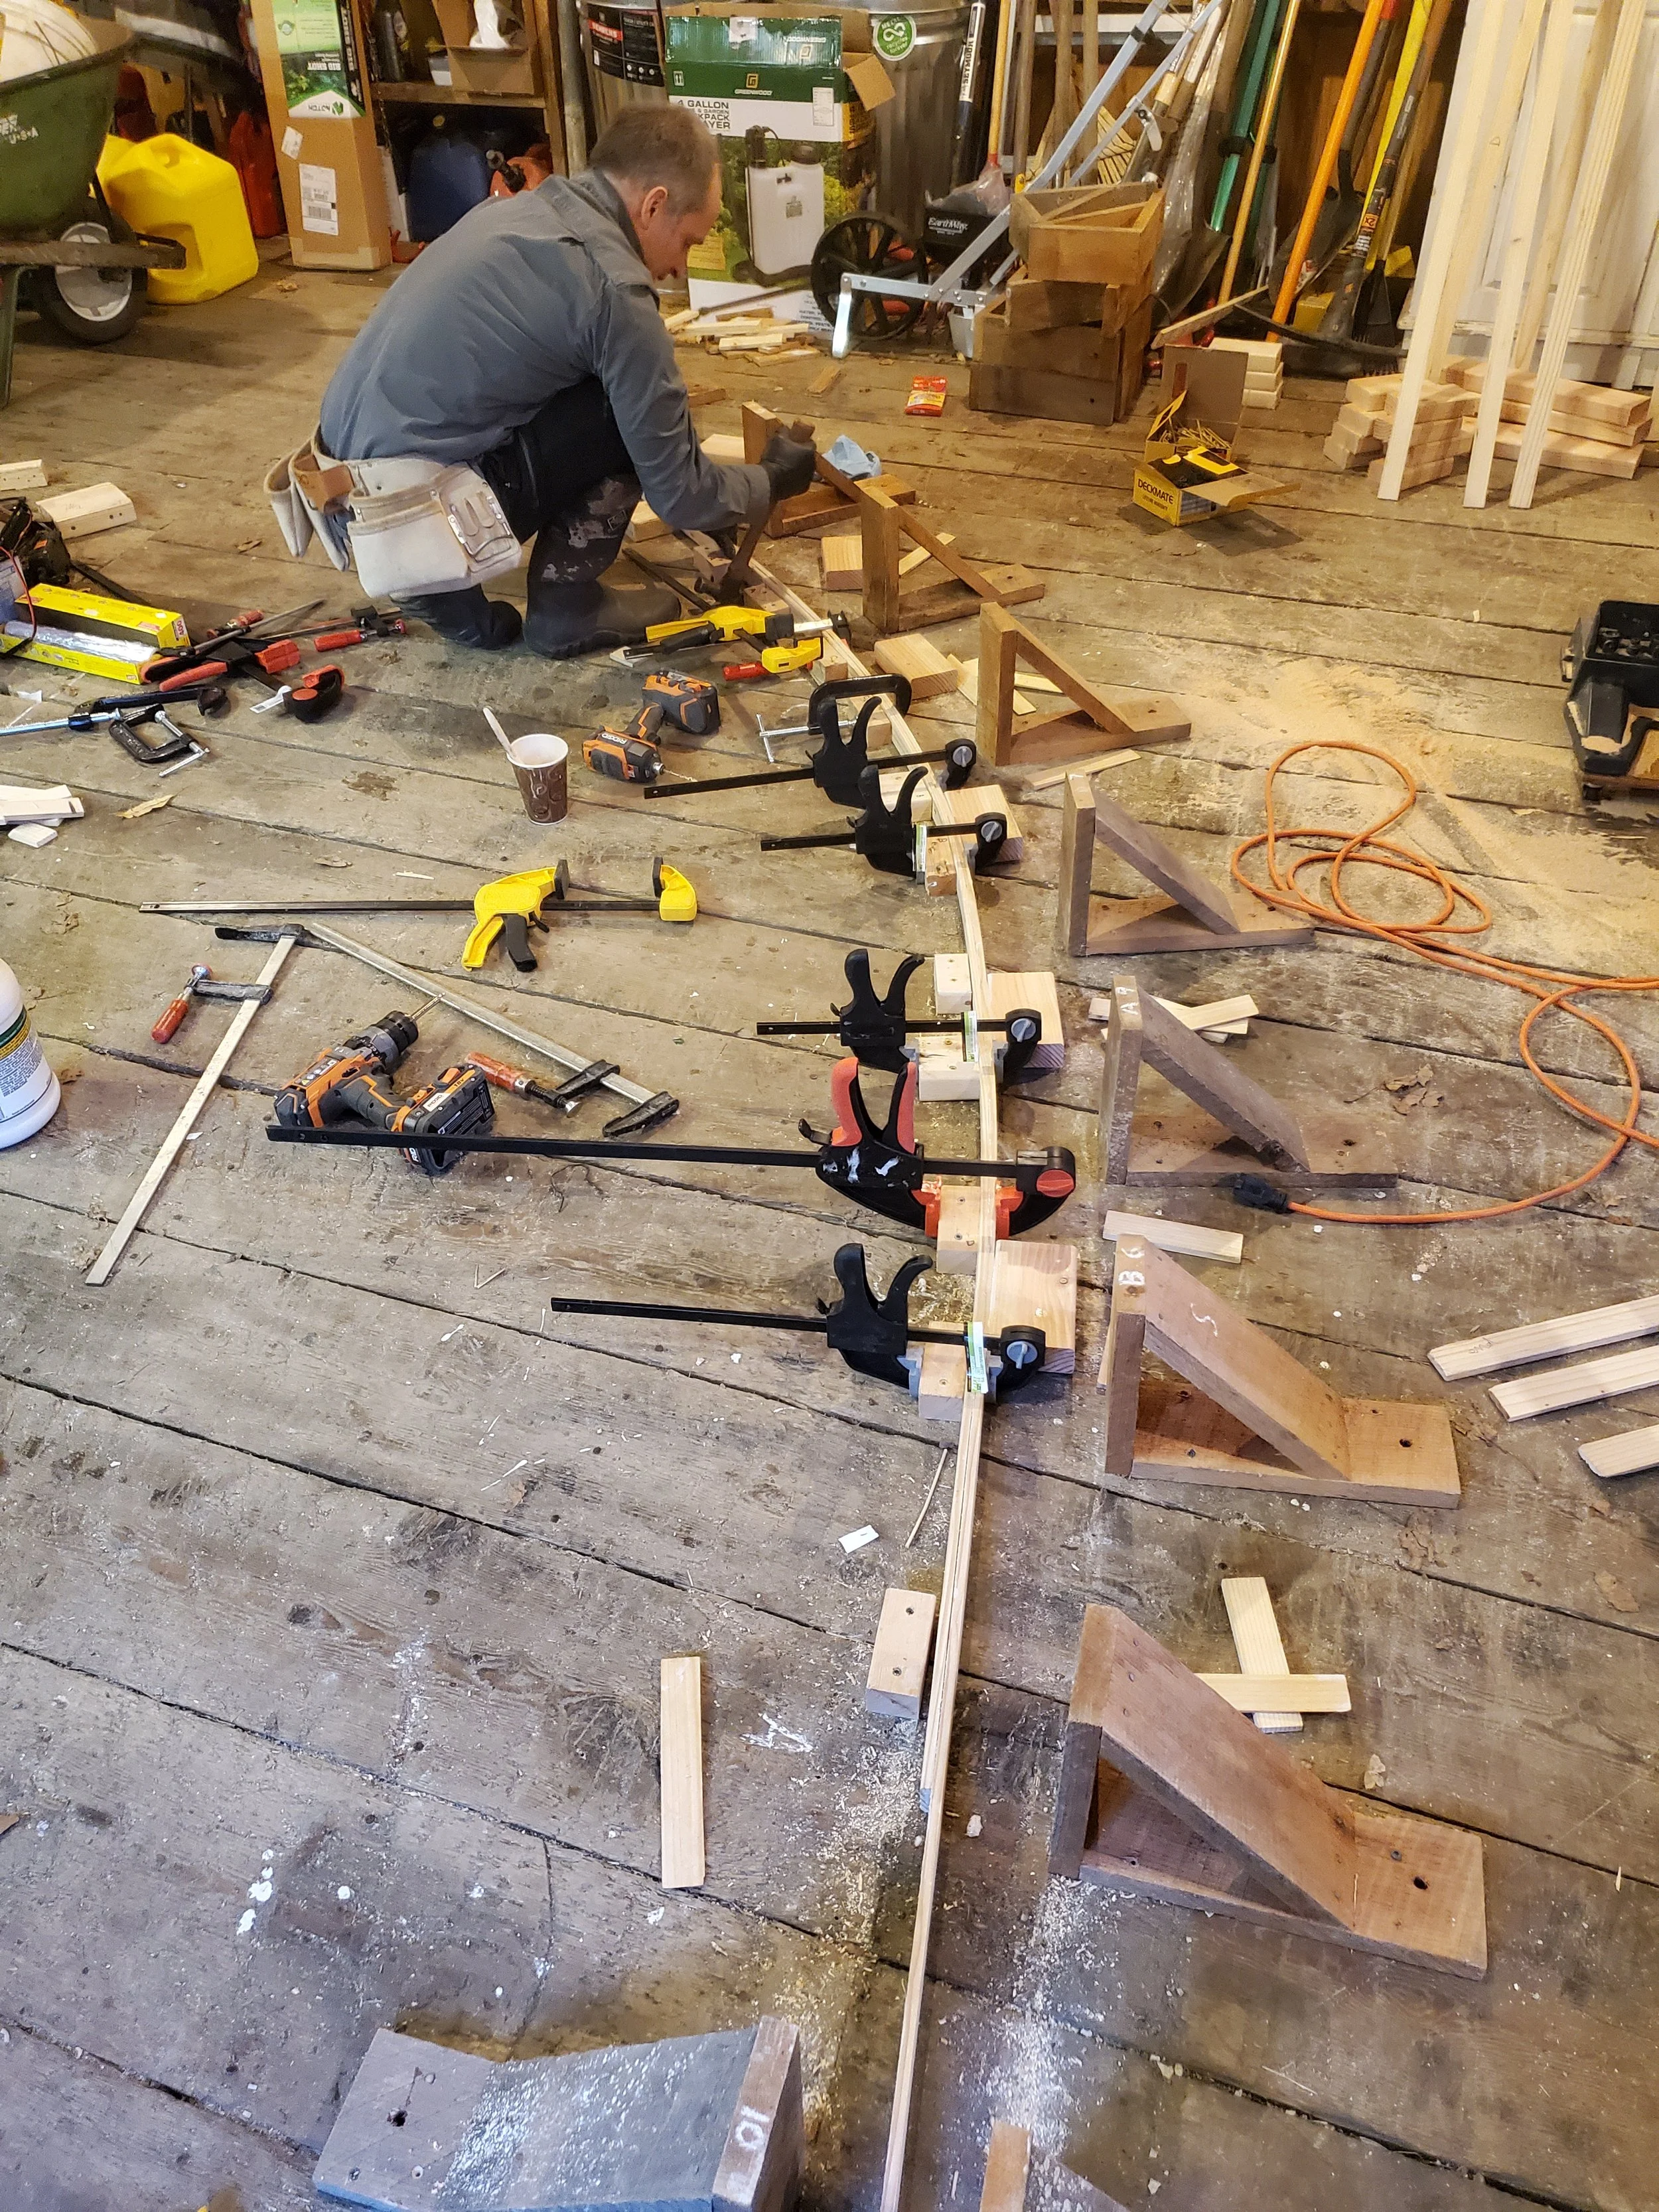
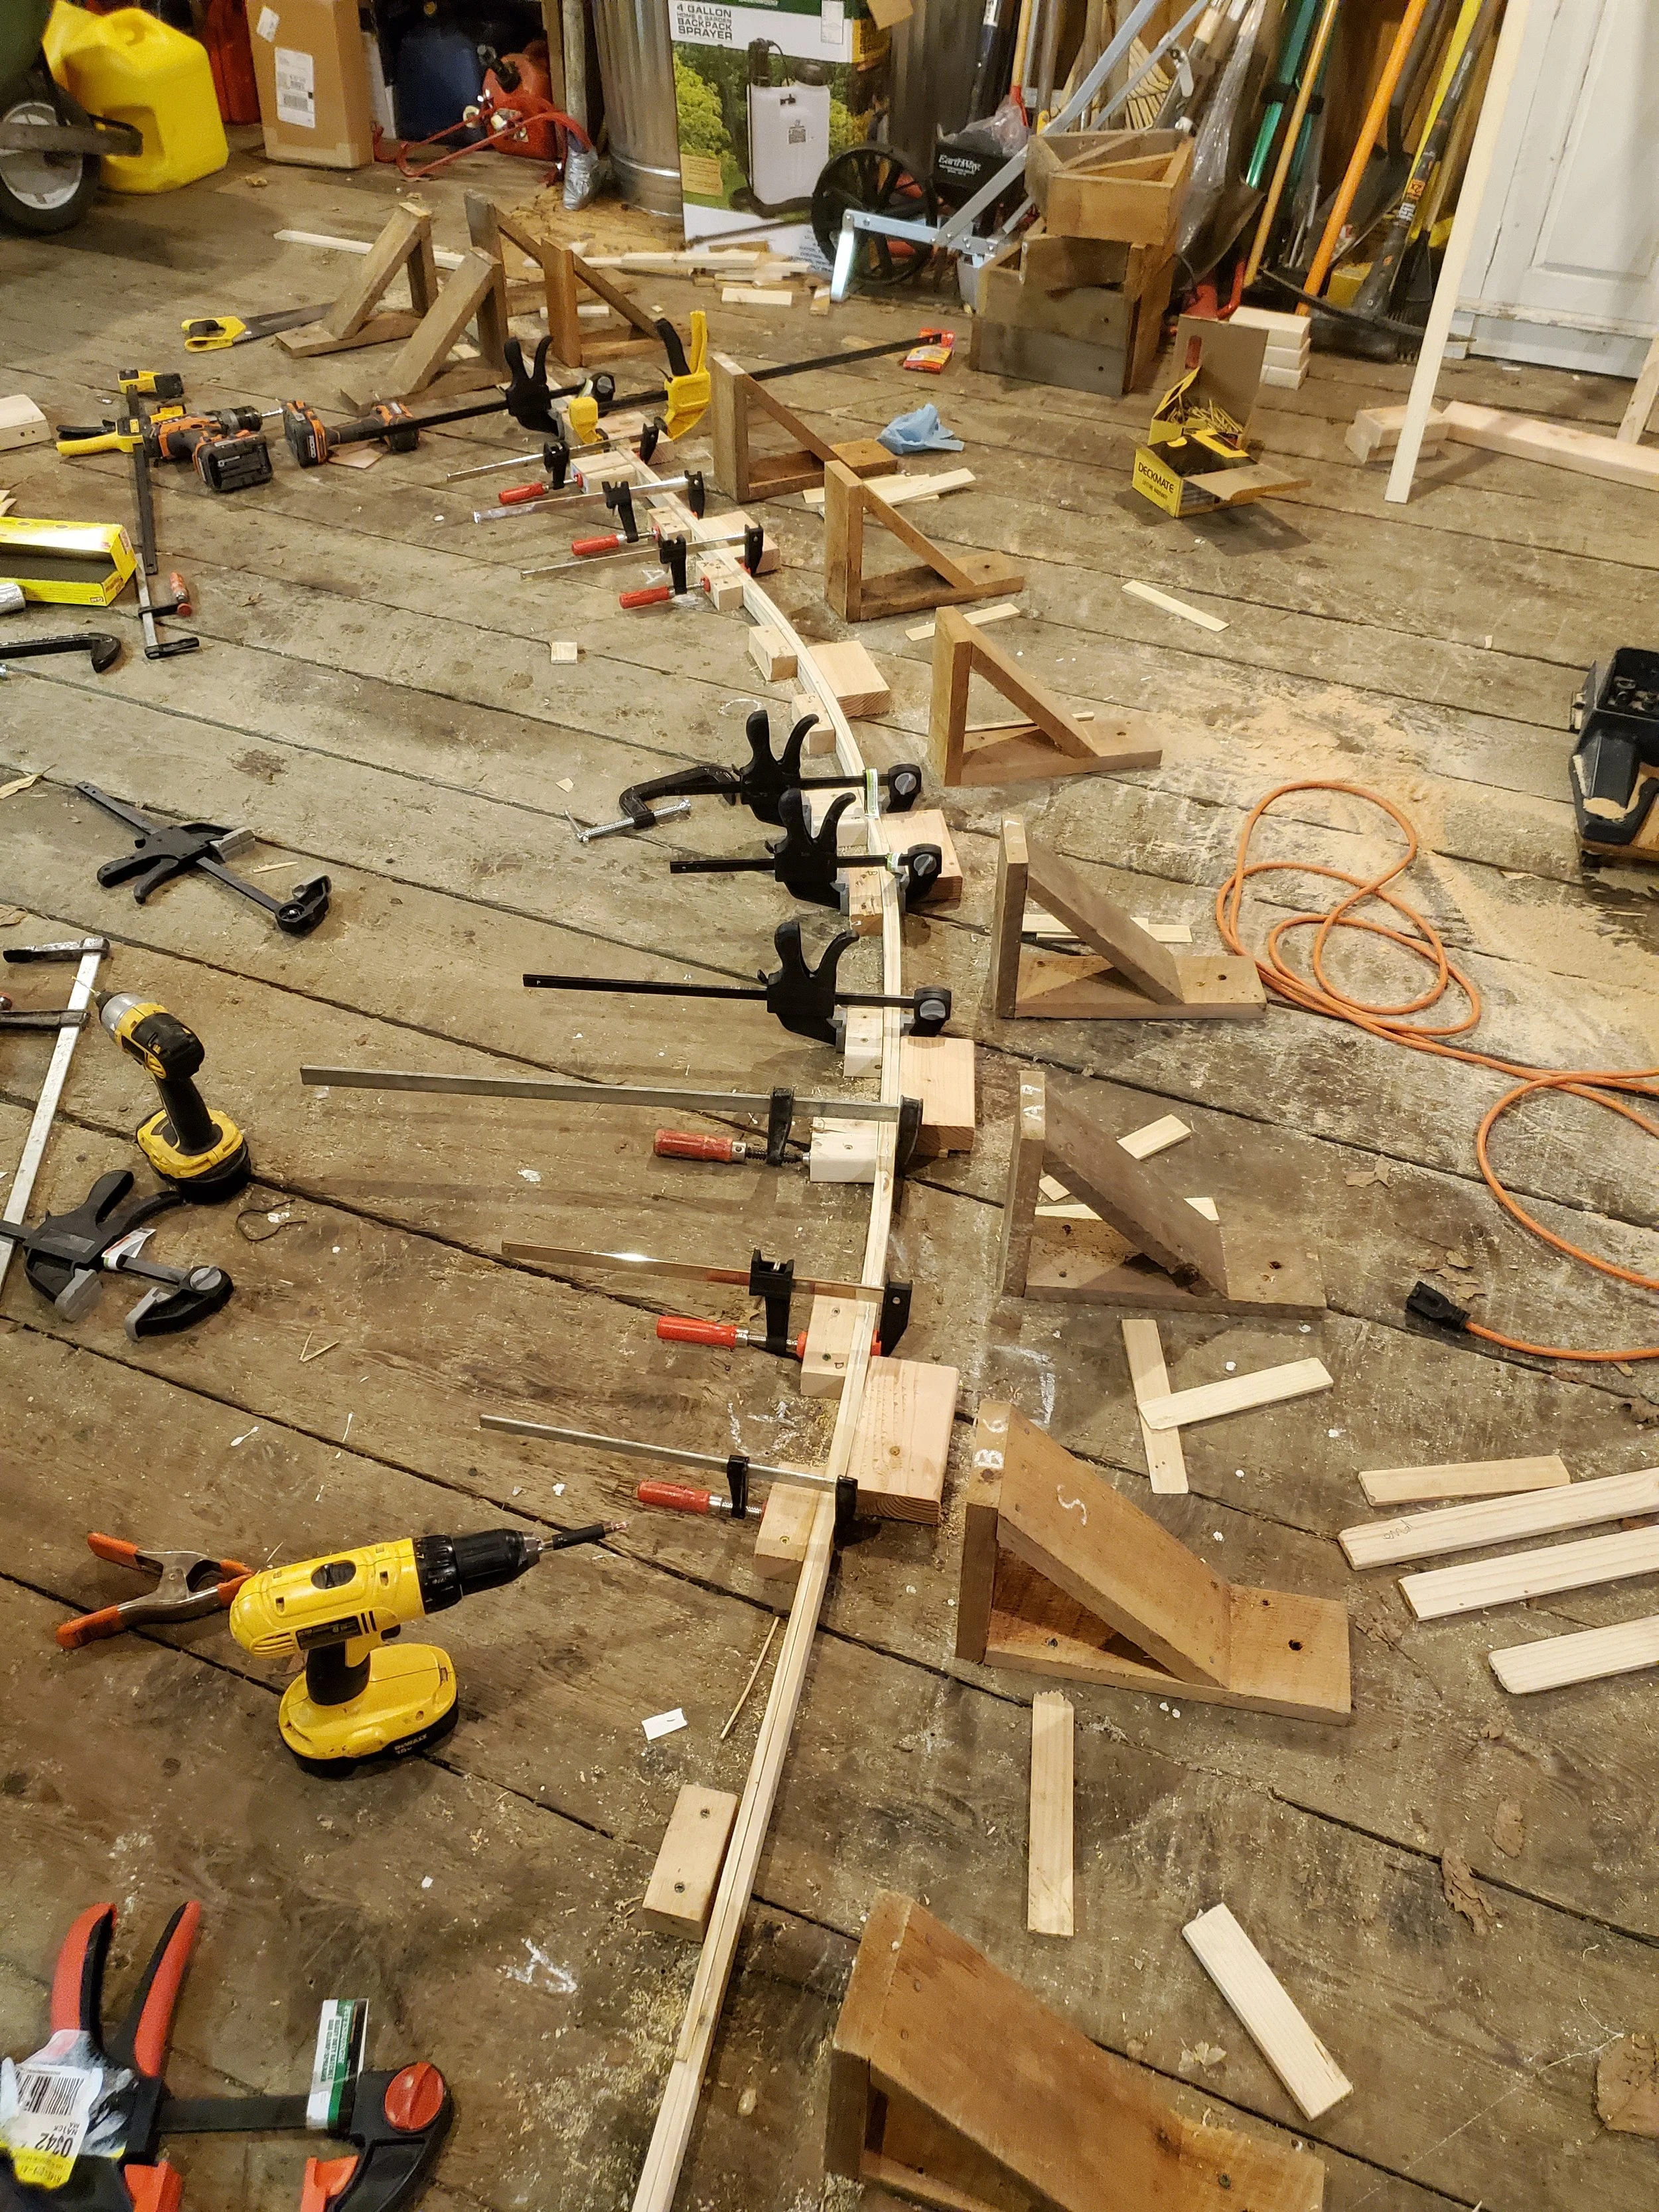
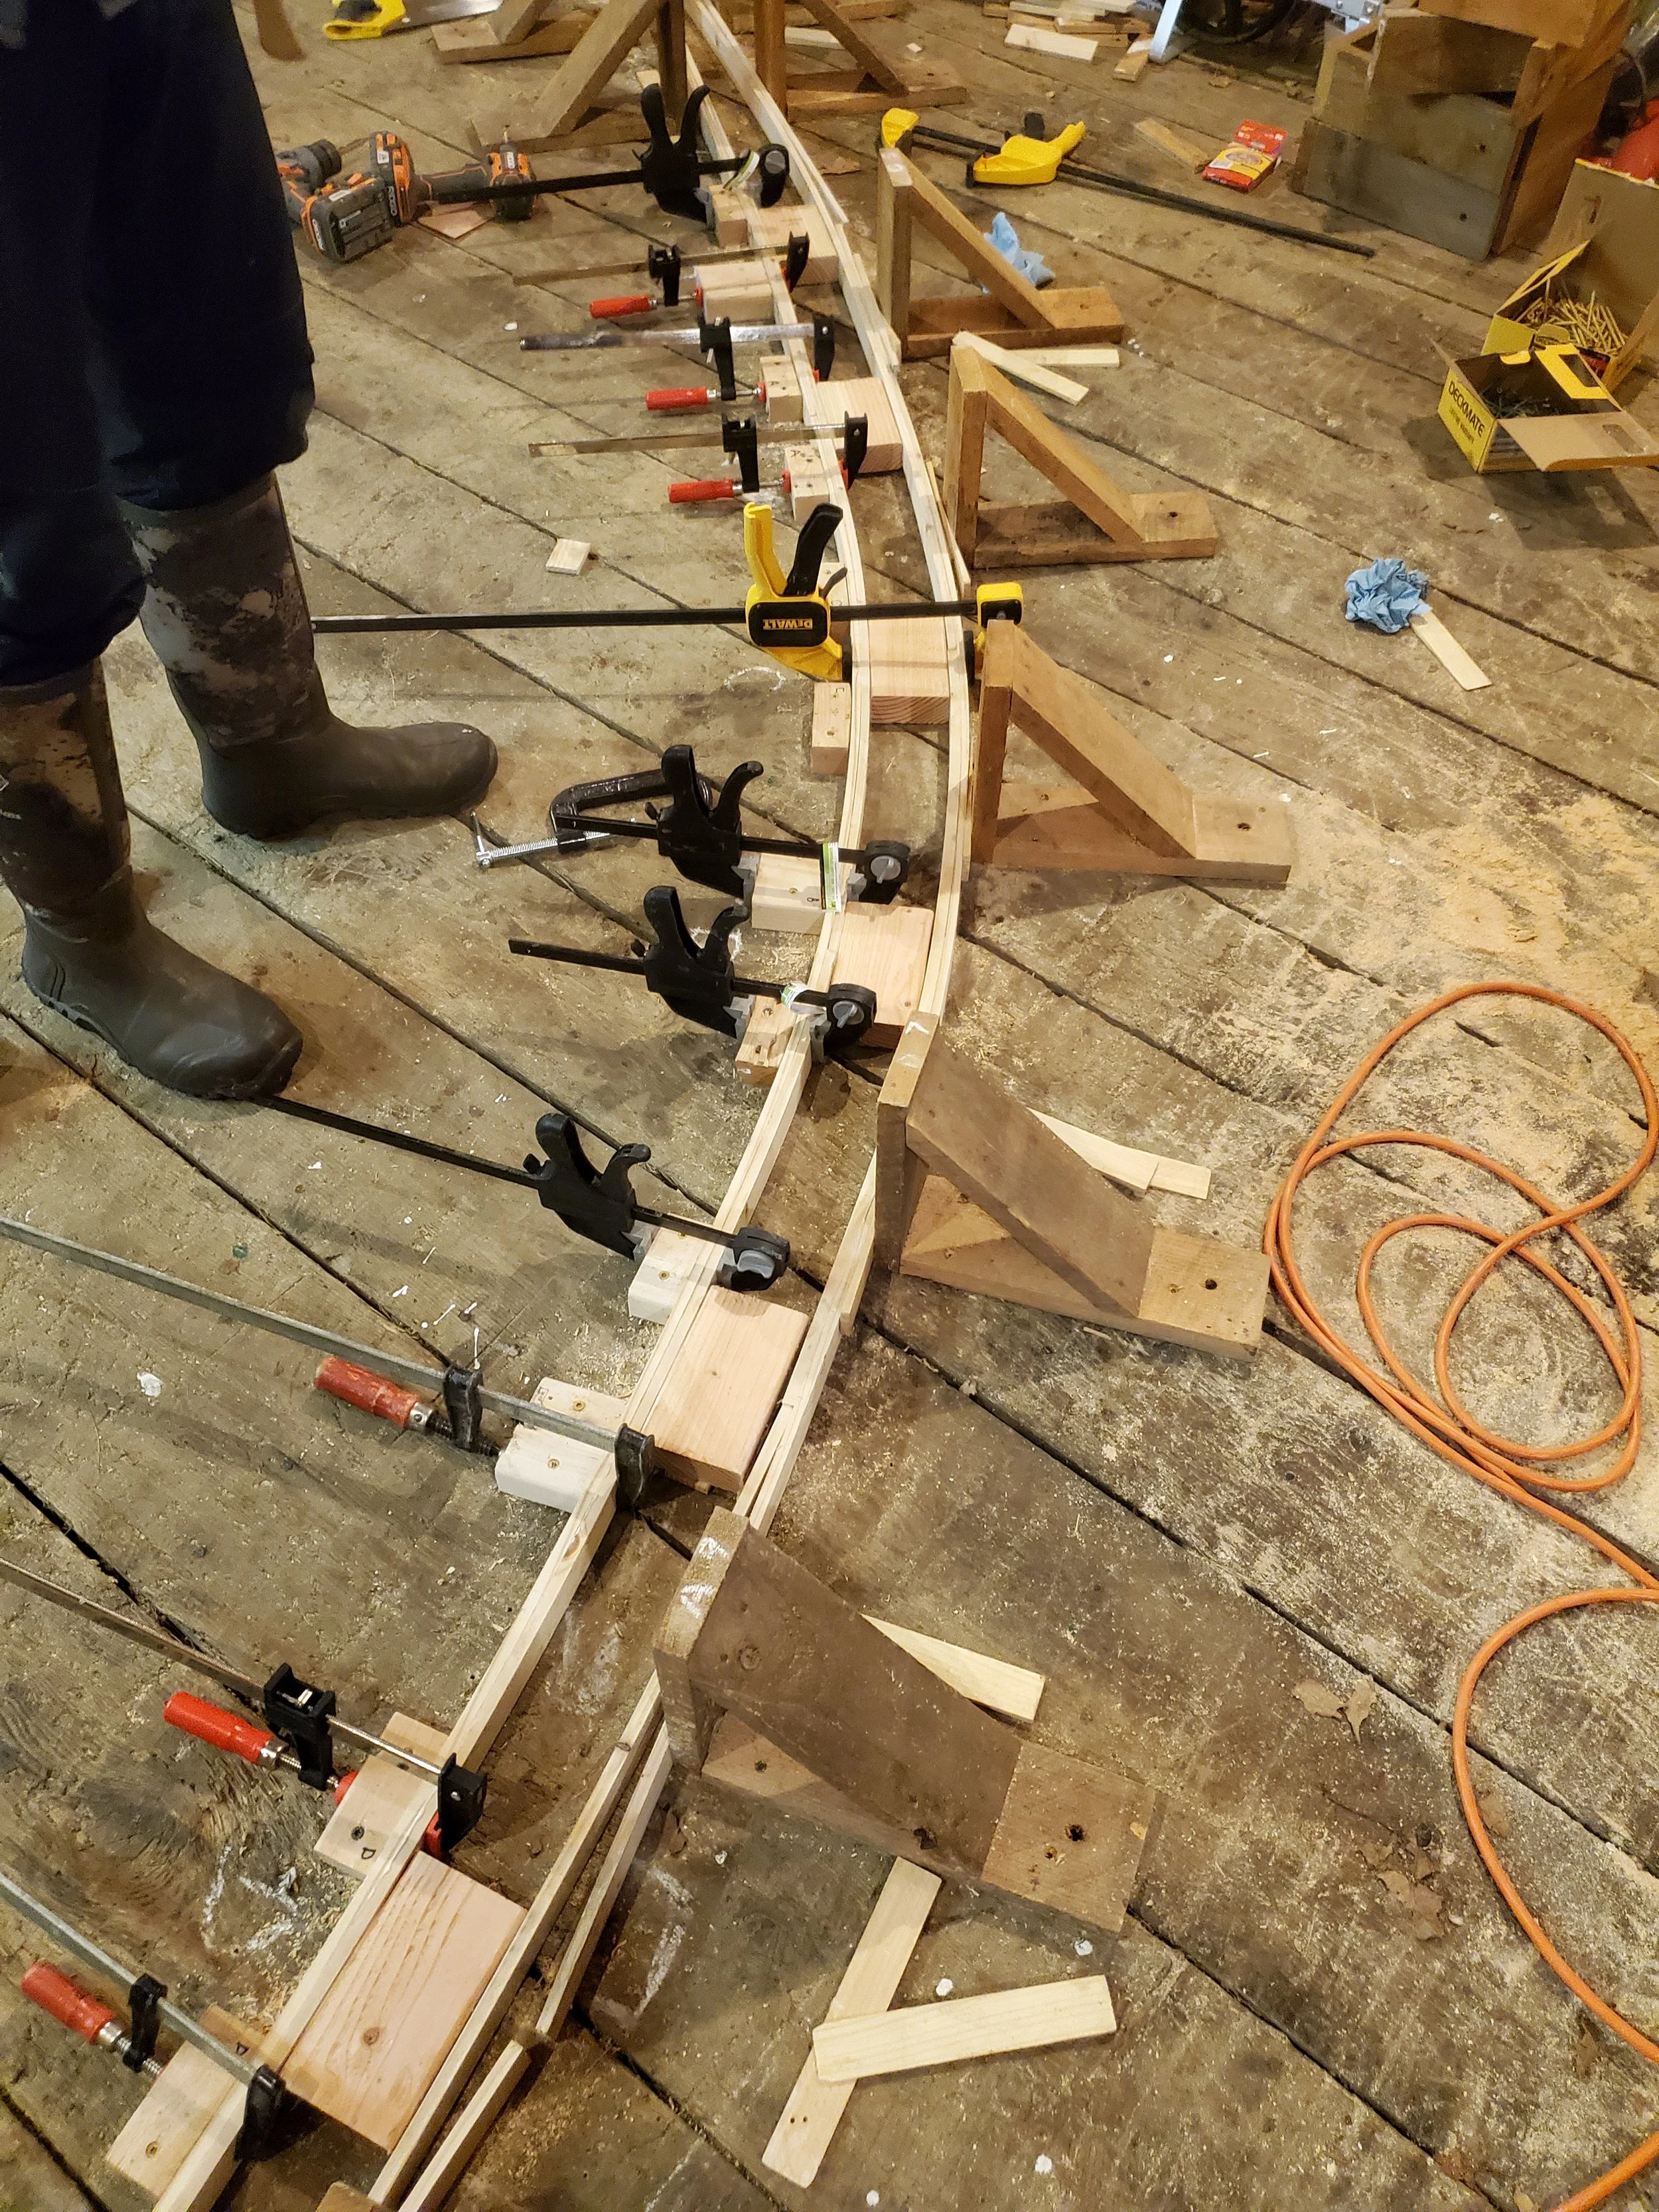
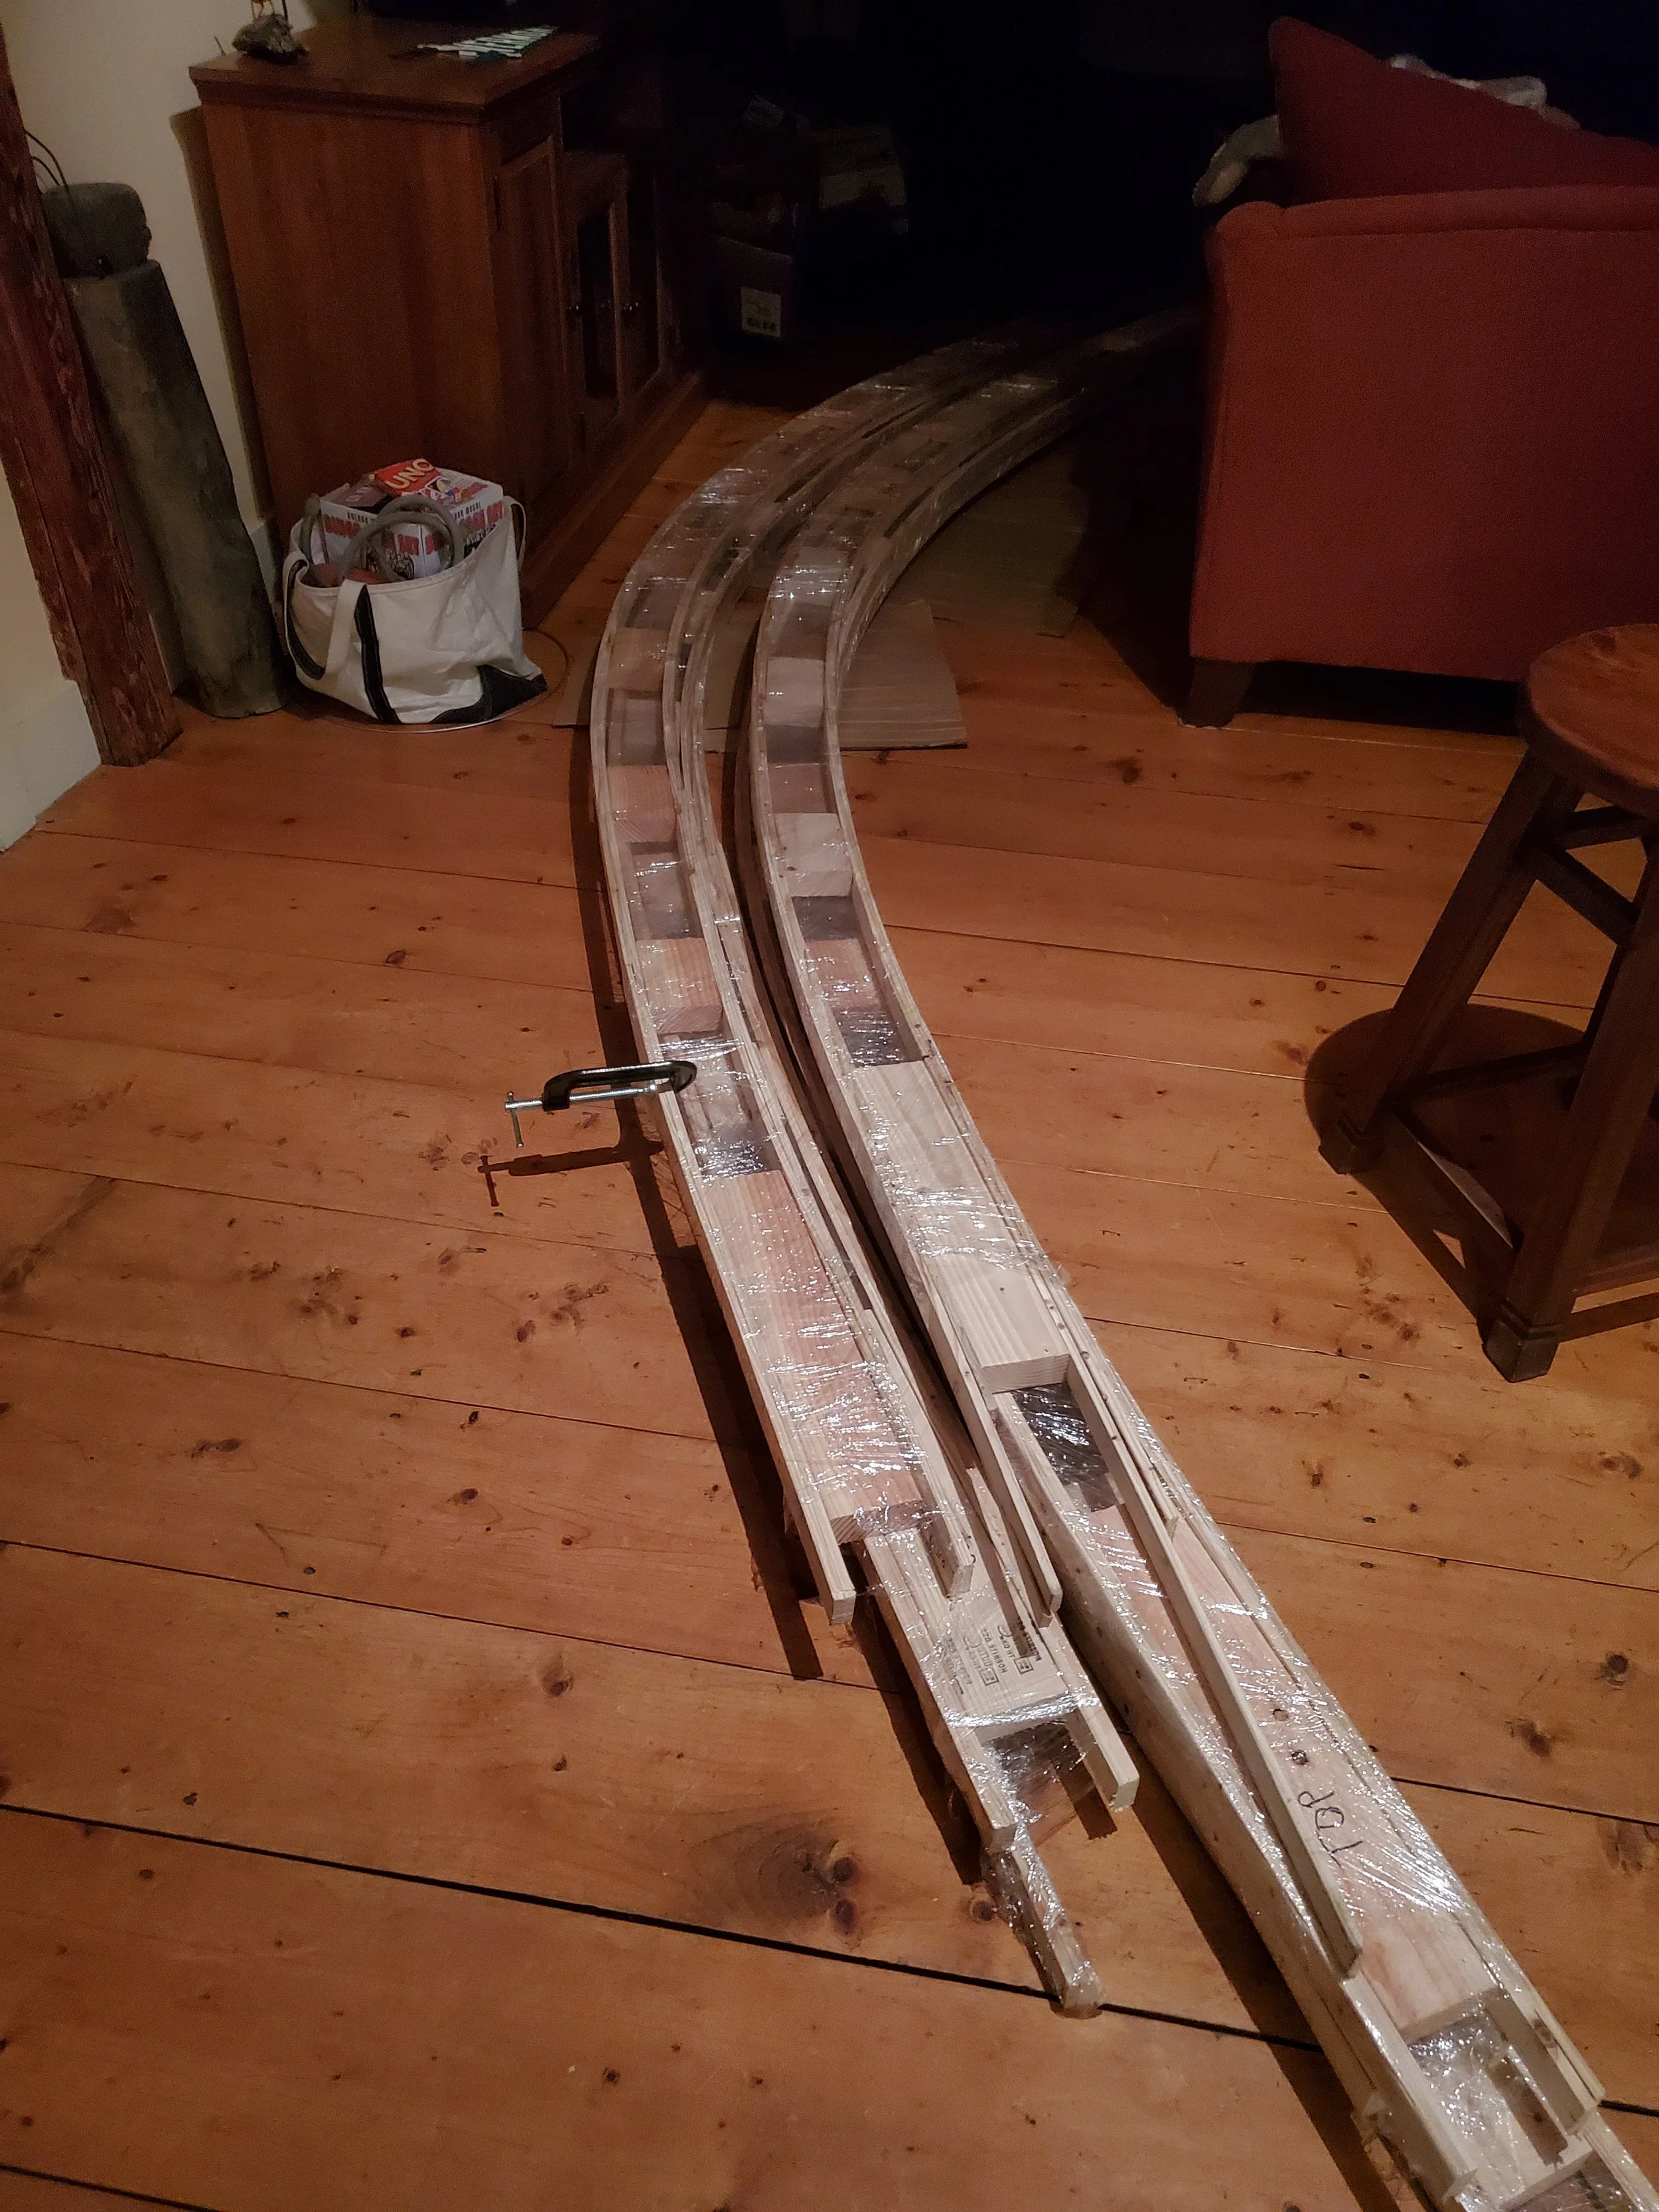
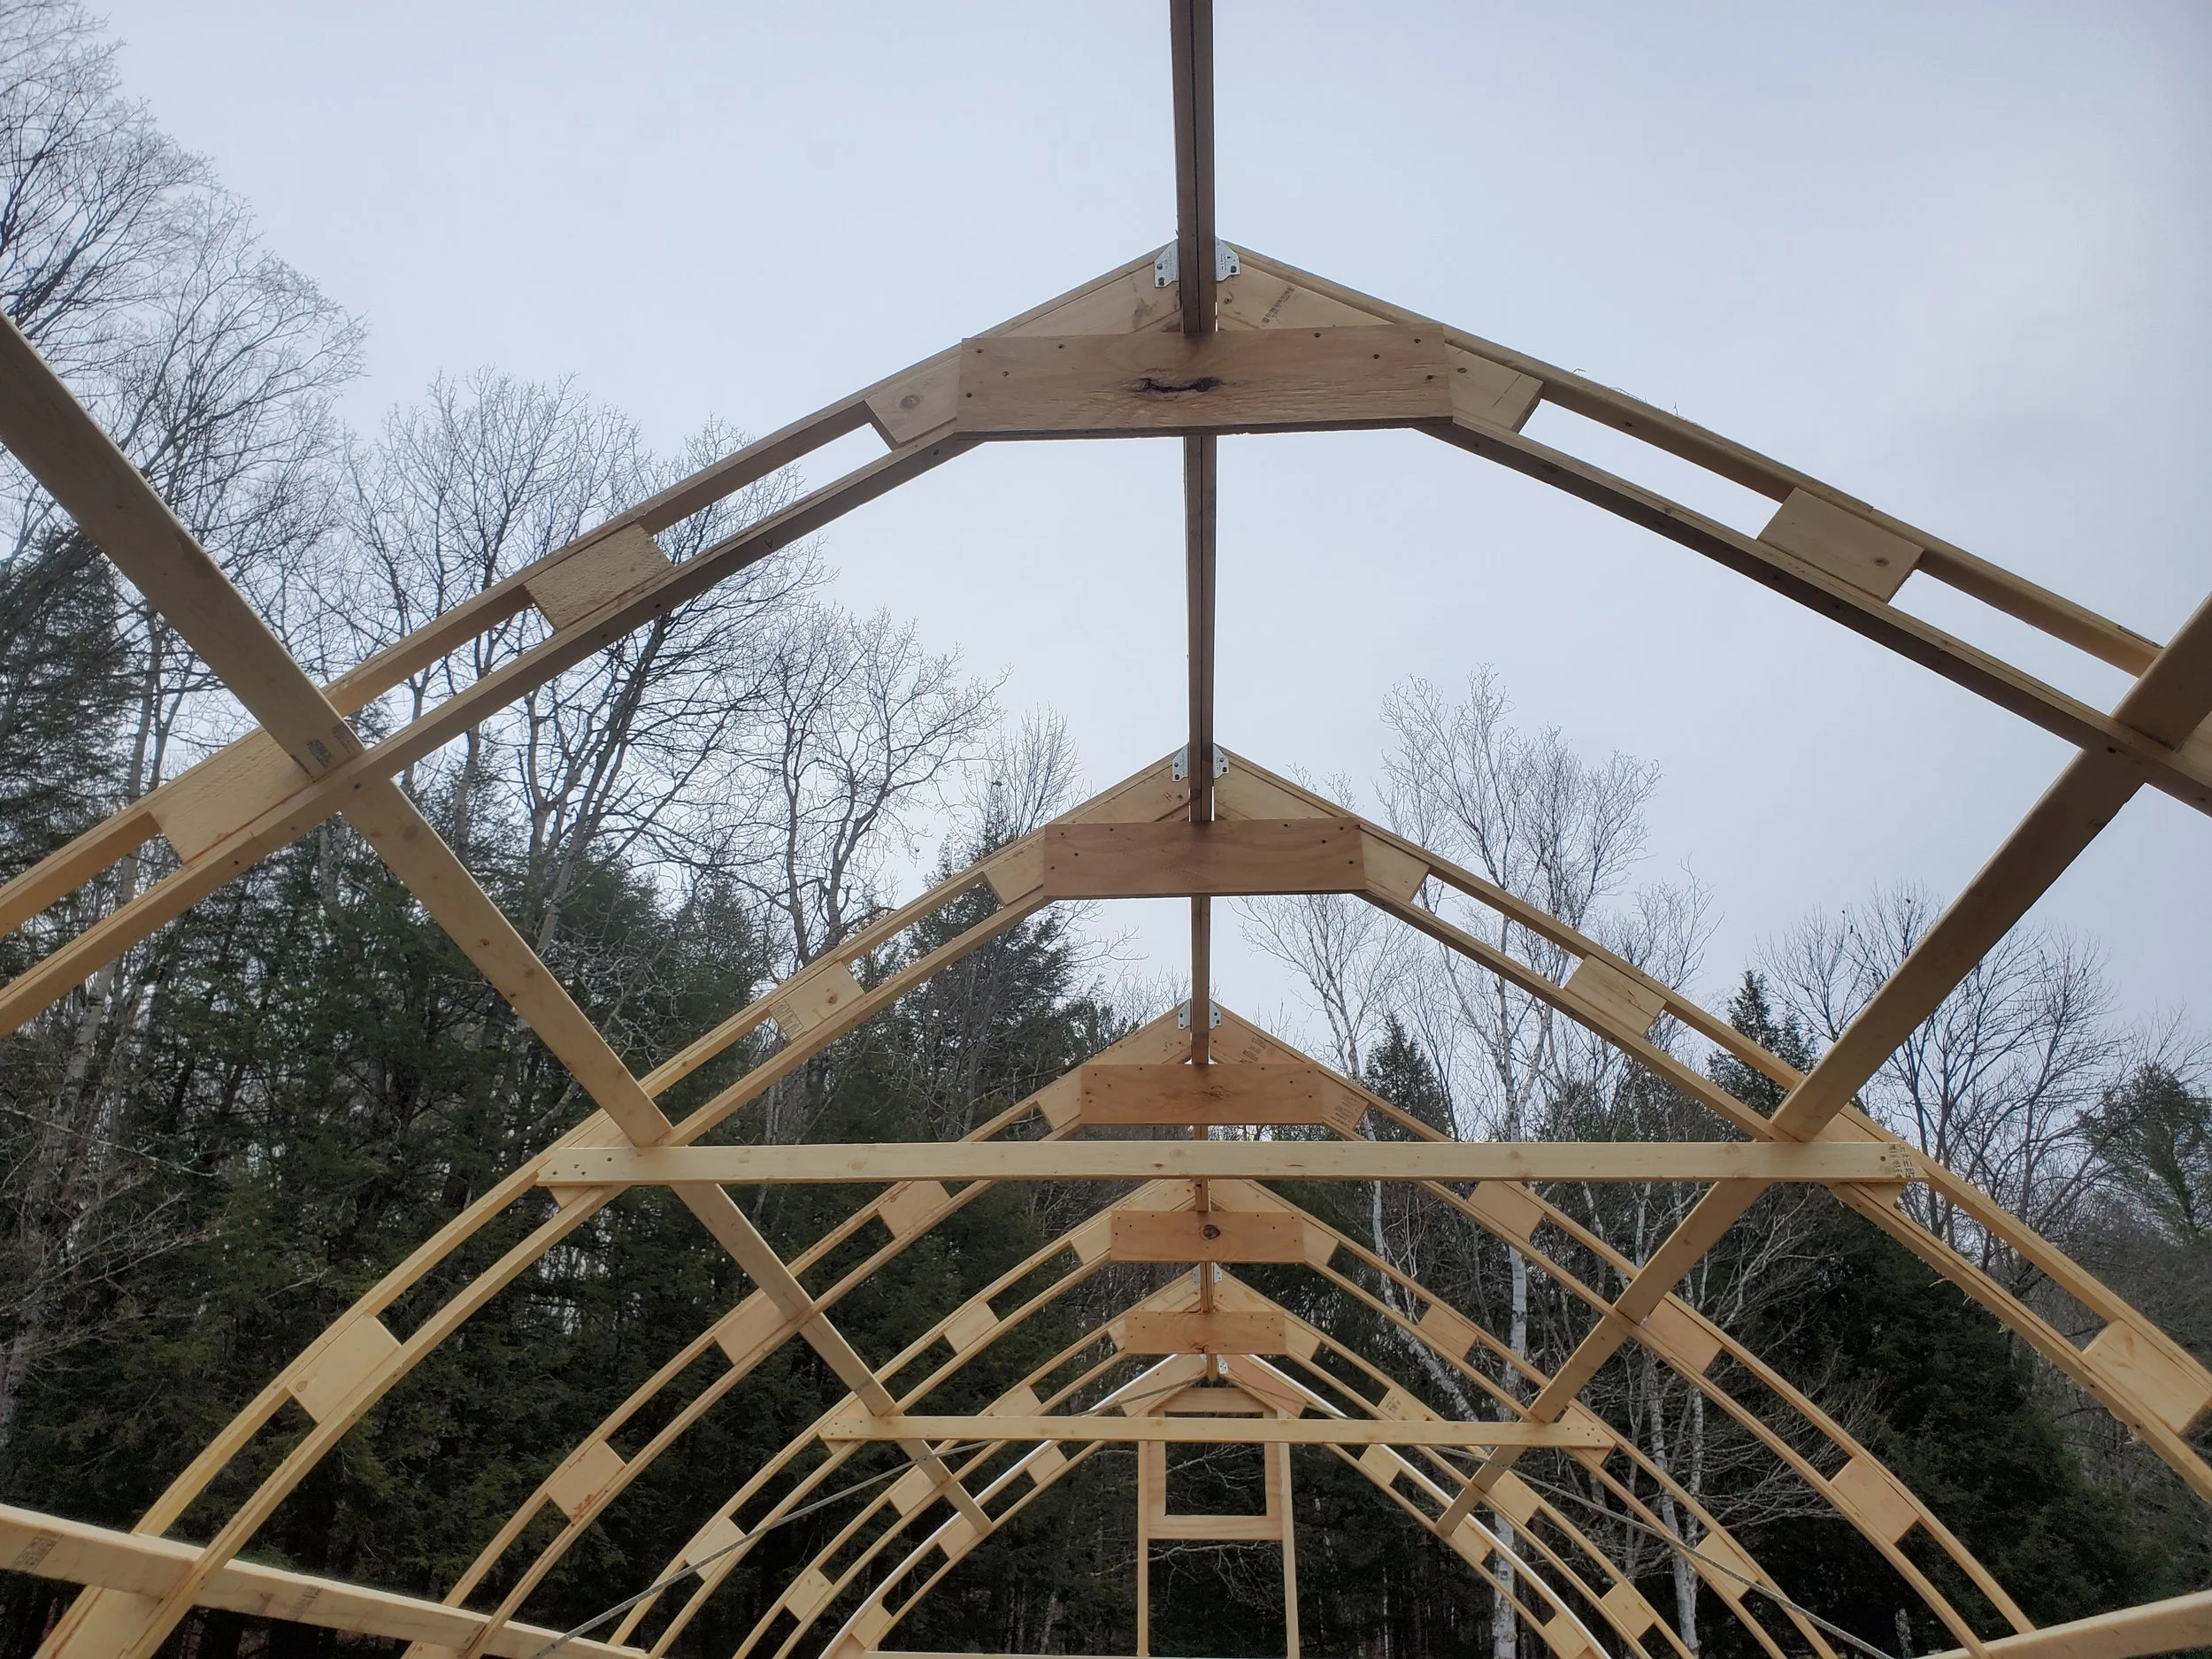
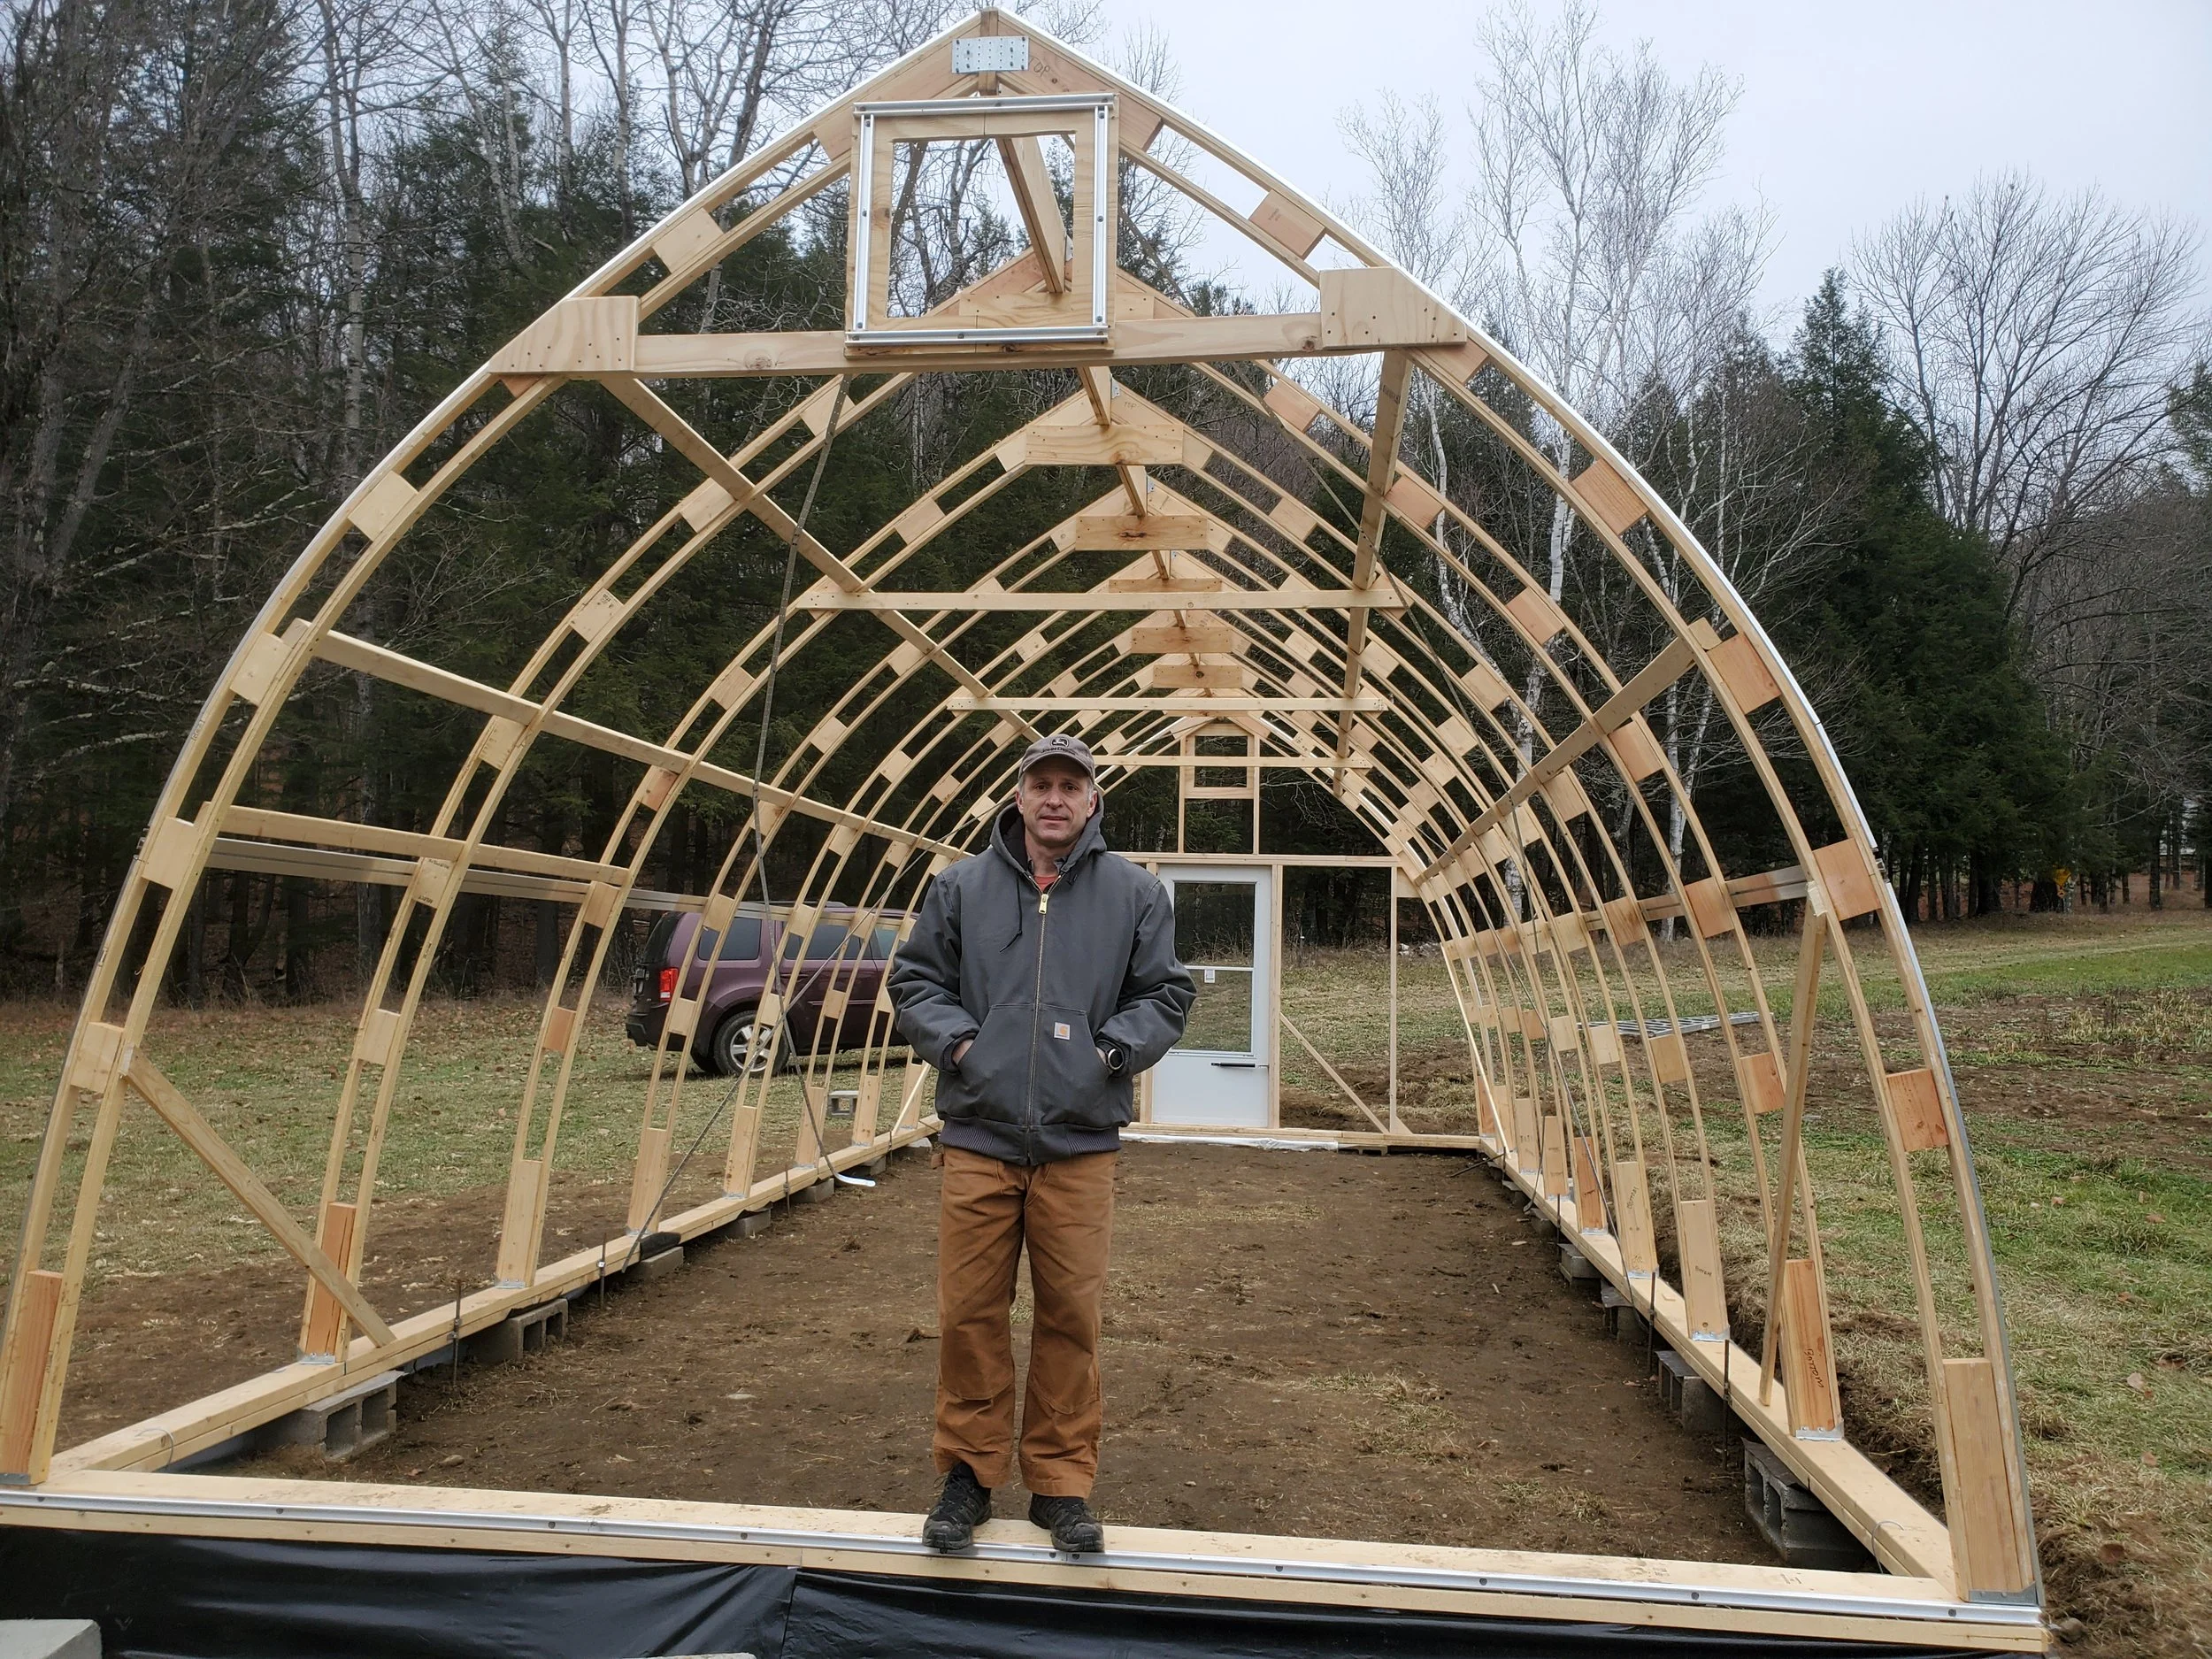
For the overall design, Susan was inspired by traditional wood boat building principles which focus on building a set of curved ribs and a main beam (the “keel” in boat terms) as the key structural skeleton. The plan was to build a set of identical ribs, prepared in a frame set on the floor of our barn. With the set of ribs for the entire structure in hand, the greenhouse would be raised in a day (or weekend), by attaching the ribs to the top board down the length of the structure. Building the ribs in this manner was straightforward, if challenged by the time of year that we decided to embark on this project. The form of the rib was drawn on the floor of our barn and clamping positions were affixed to the floor at regular distances (~2 ft) along curve of the rib on both sides. Each rib is comprised of a sandwich of lamination strips and short 2 x4 x 6” blocks to create a robust structural beam. These were constructed by laminating 3/8” x 1 1/2” x 8’ spruce strips (ripped from standard 2” x 4” dimensional lumber) along the form, using clamps to keep the shape and external grade wood glue (Titebond III) and screws. At regular intervals, the added short pieces of 2 x 4 blocks were screwed into place, which were followed by the second set of lamination strips. The process of making these ribs was very straightforward, with the only issue being that the ambient temperatures in the barn were below that required for the glue to set fully, so each rib had to be removed from the form and left overnight in our house to fully cure the glue. We prepared the ribs on weekends over the course of 5 weeks, so that in early November we were ready to start the build.
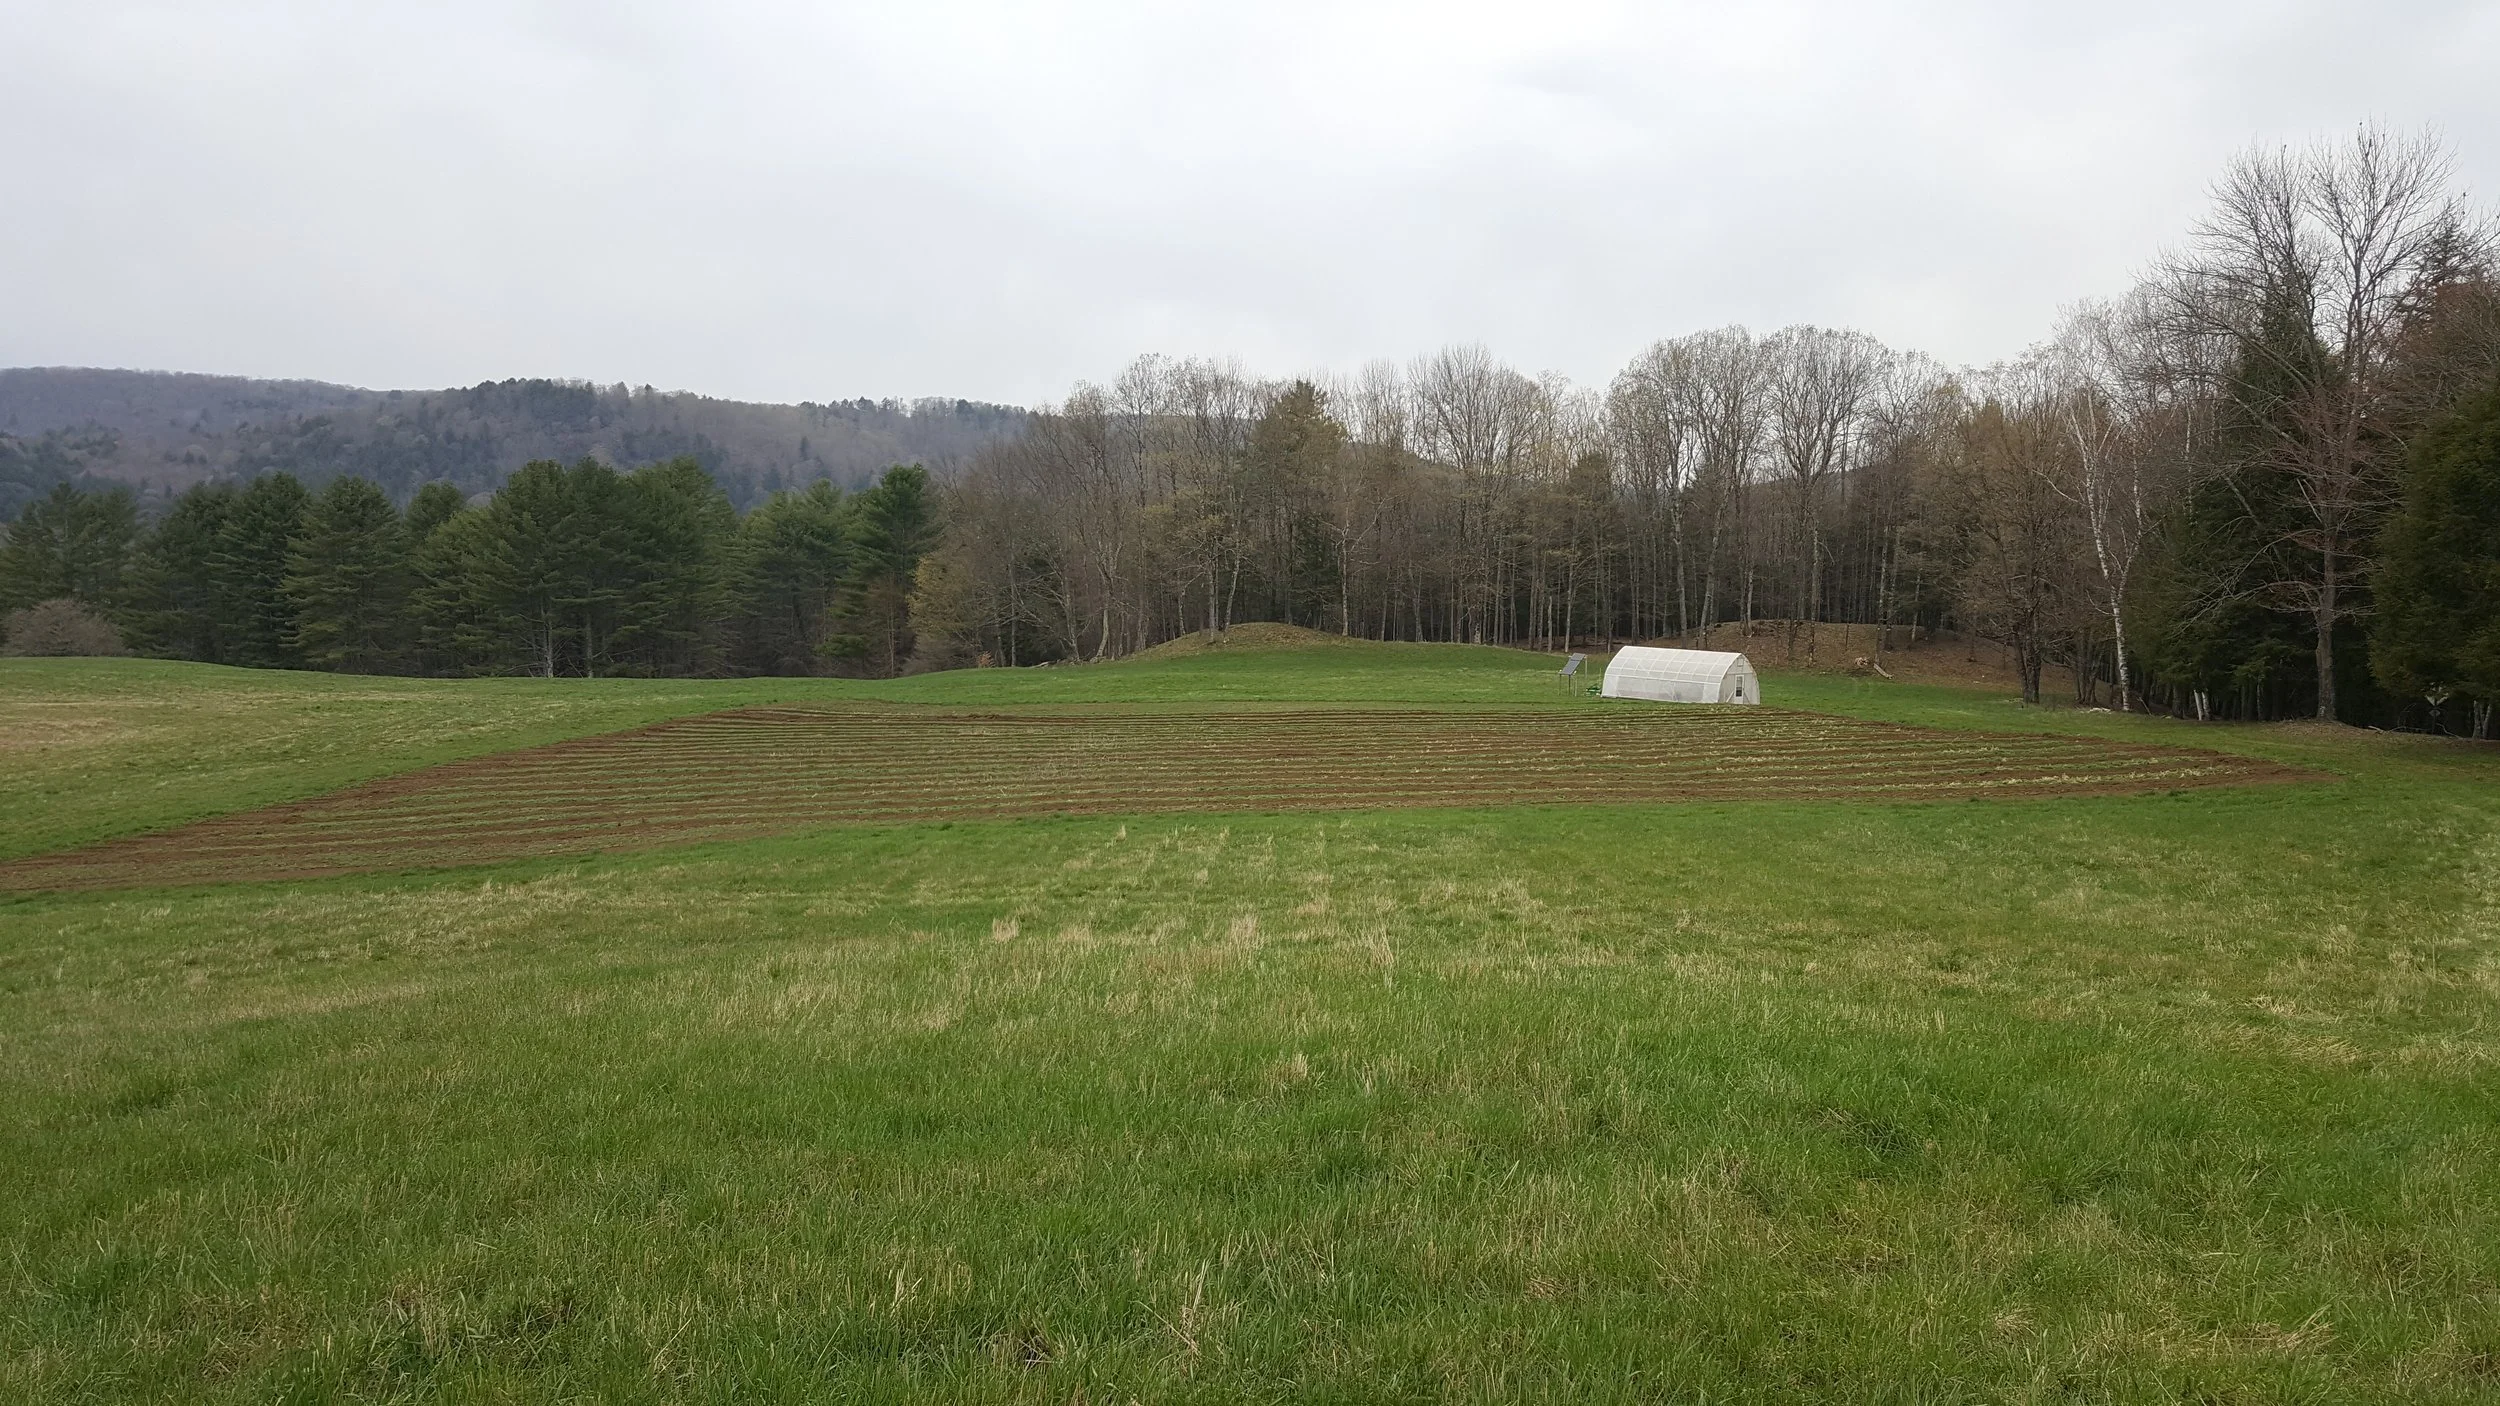
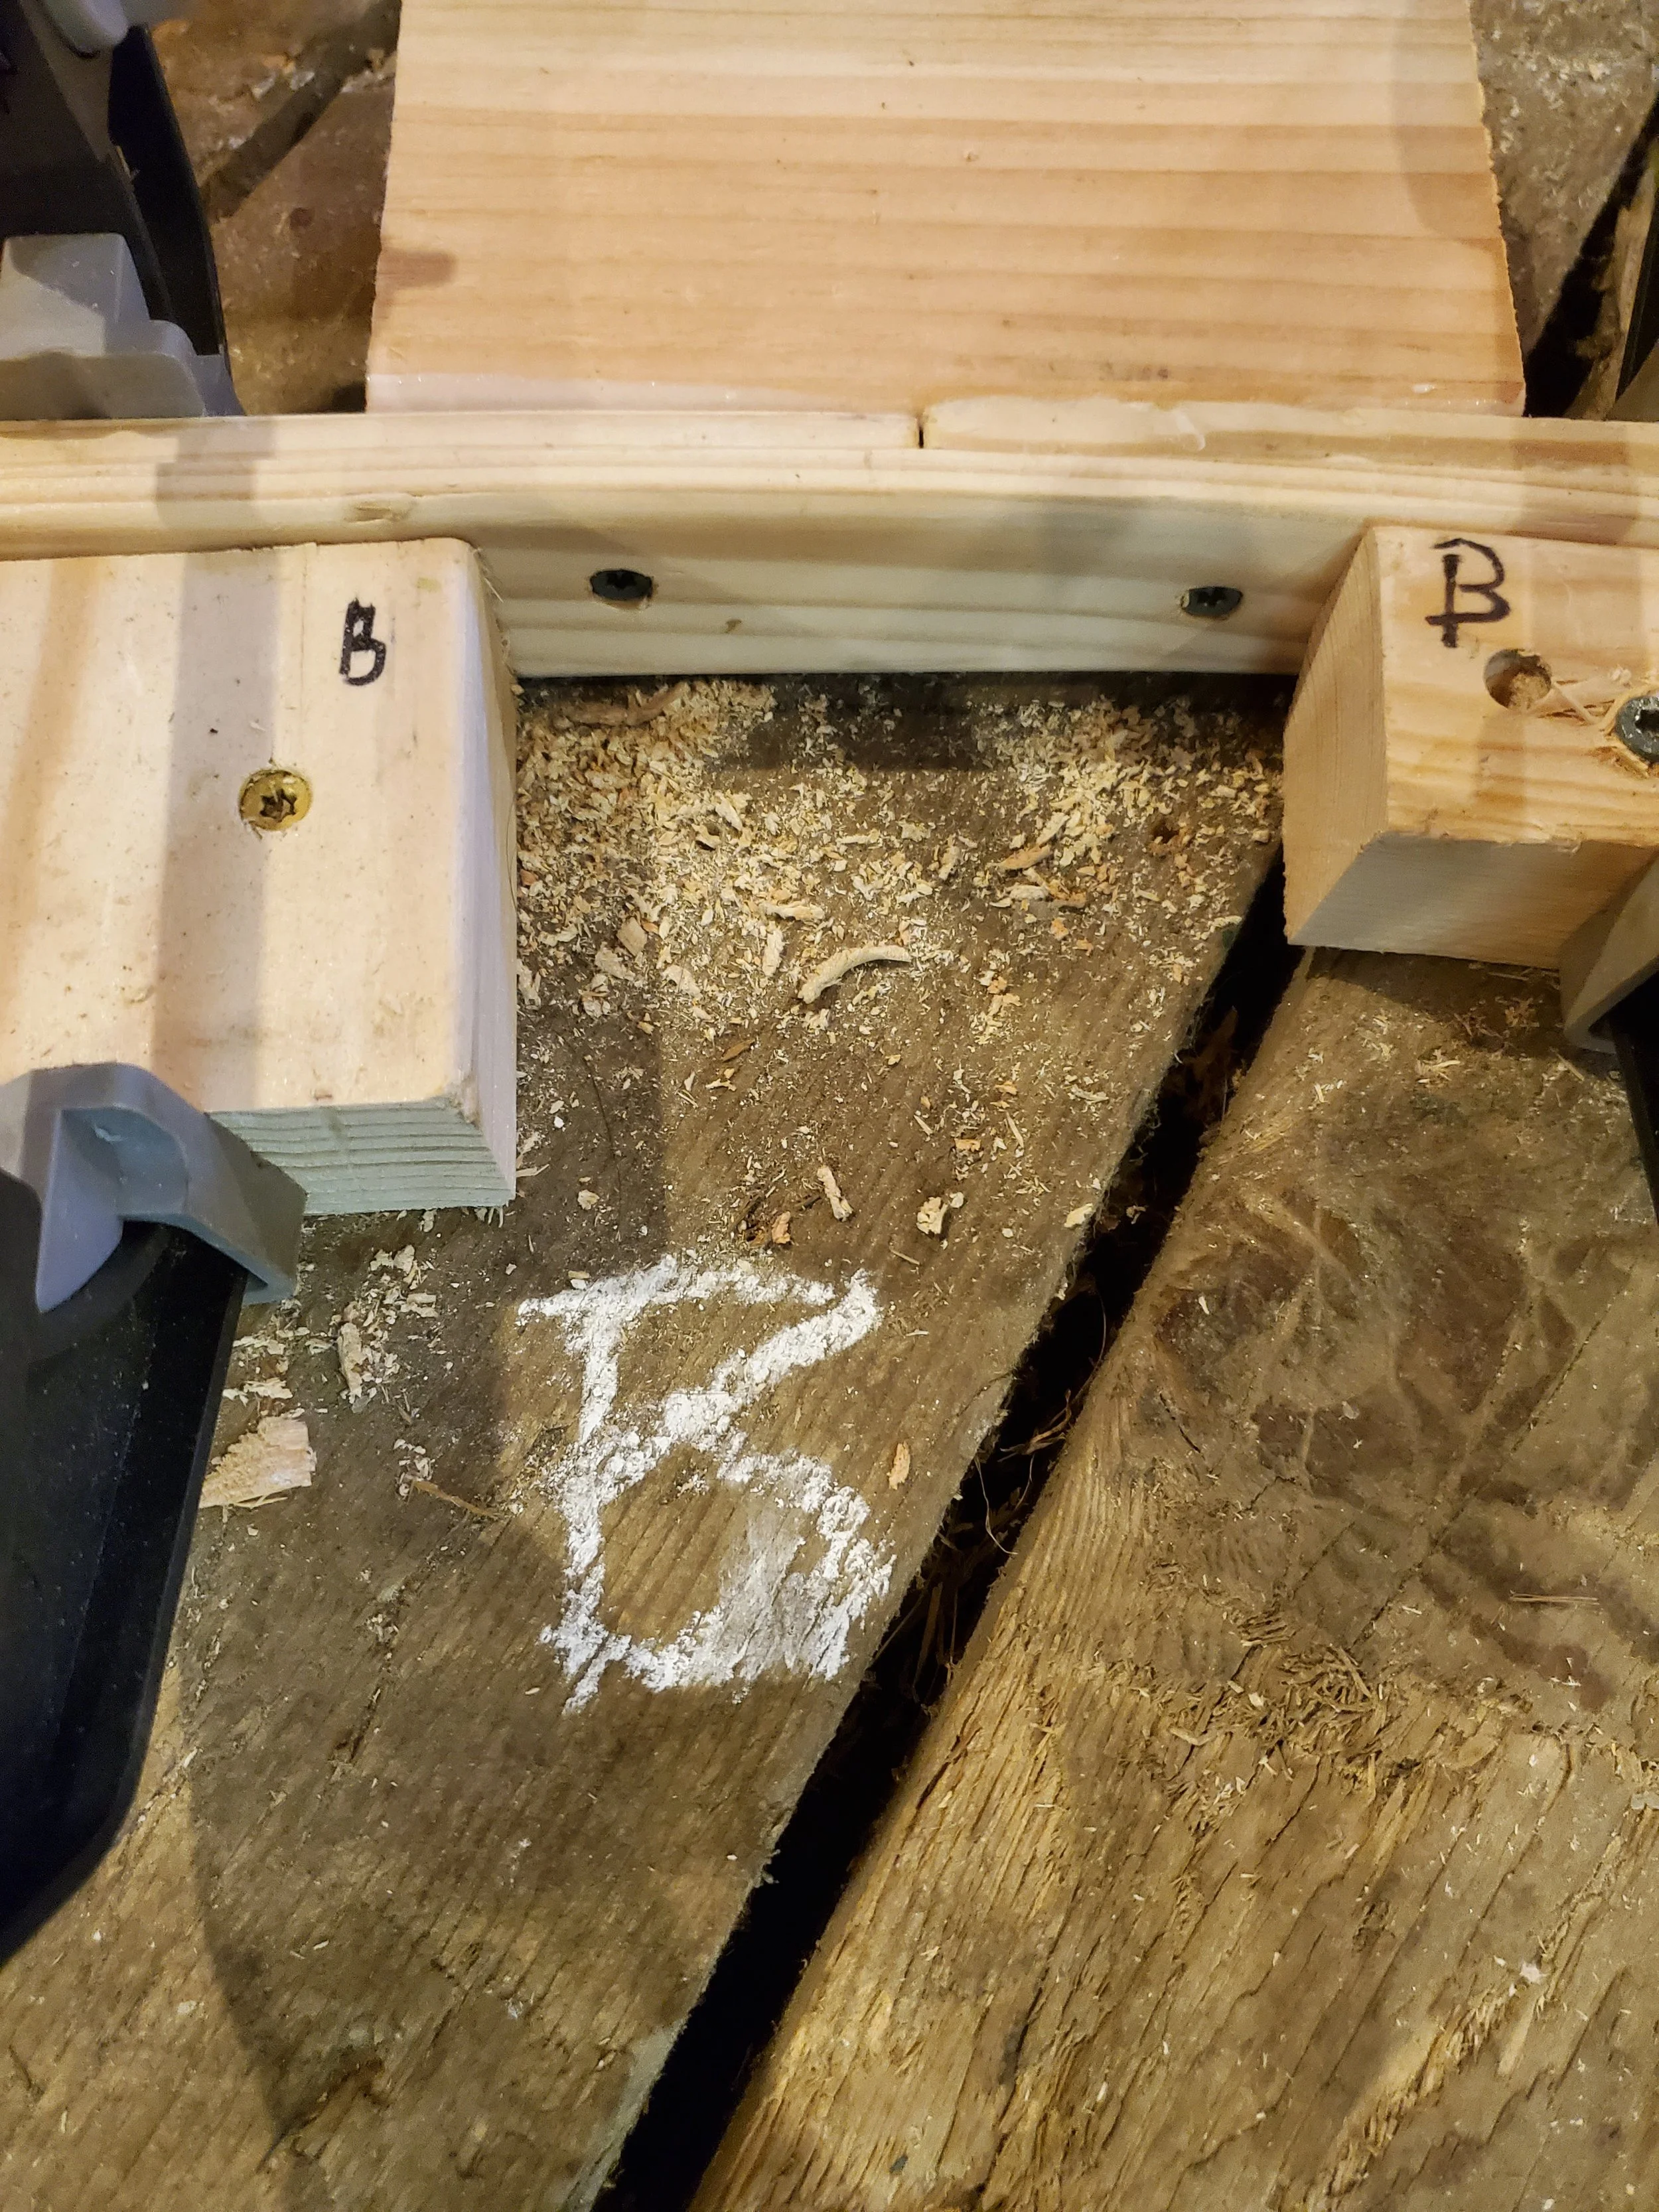
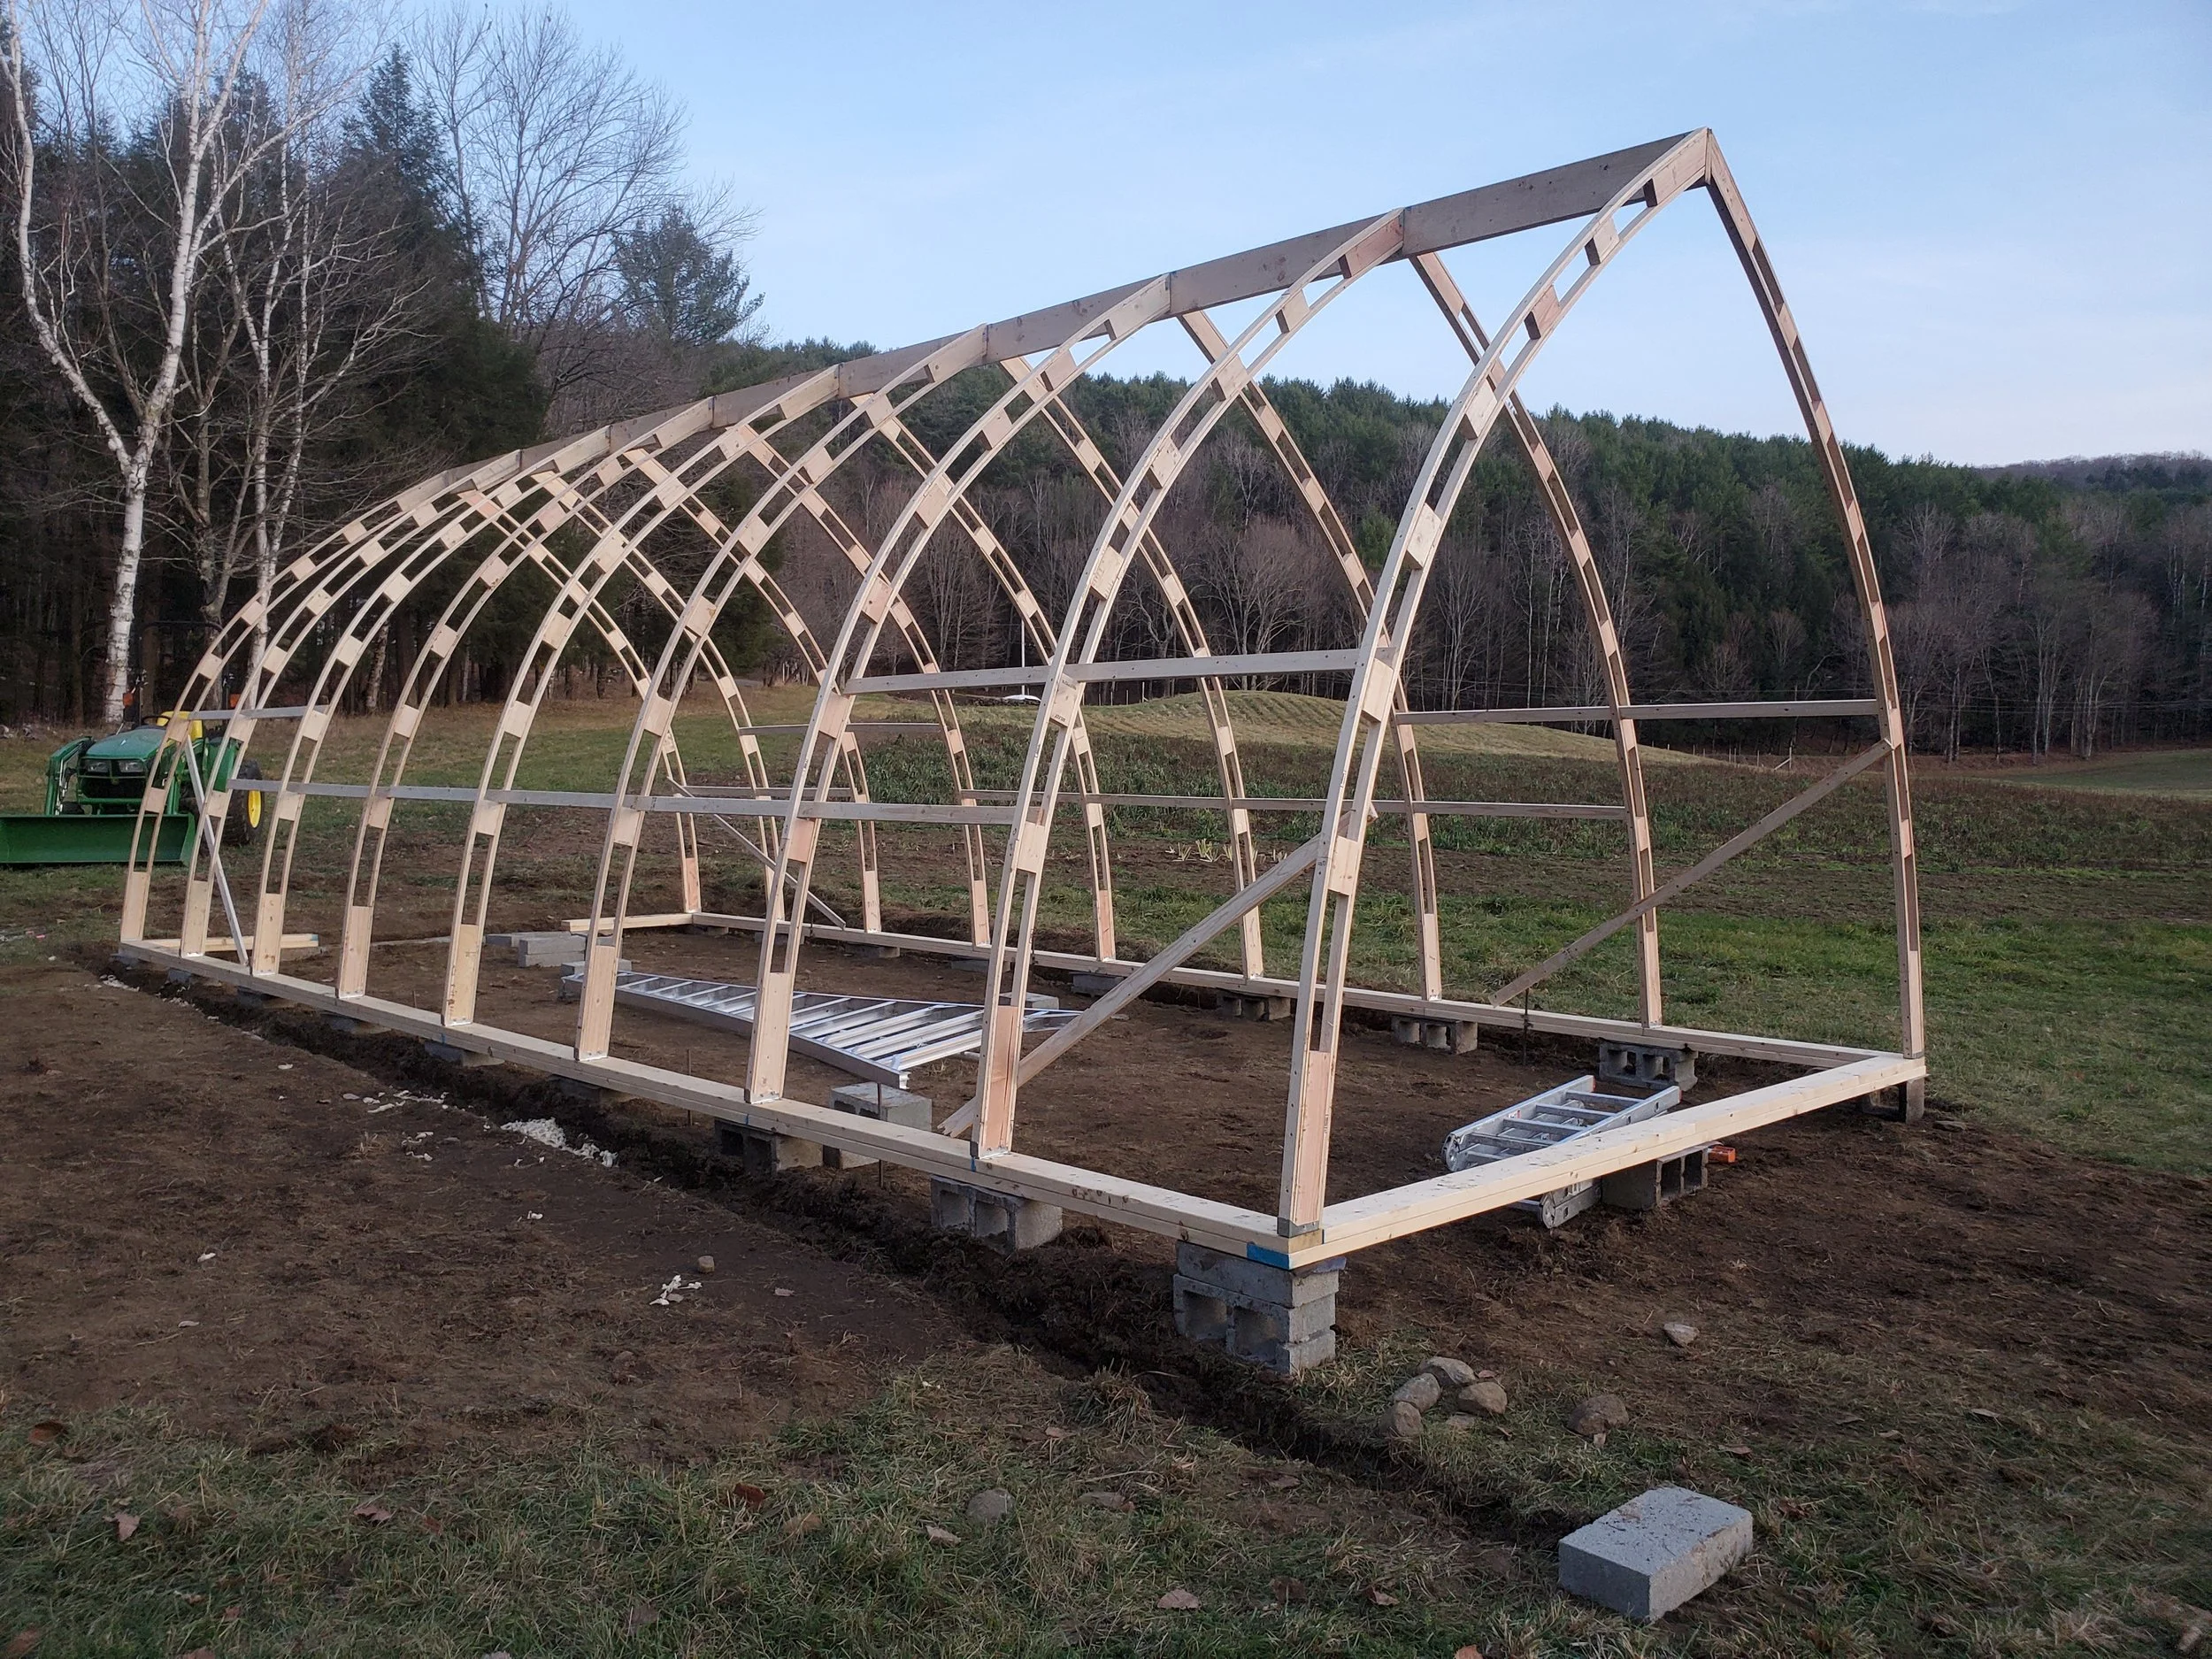
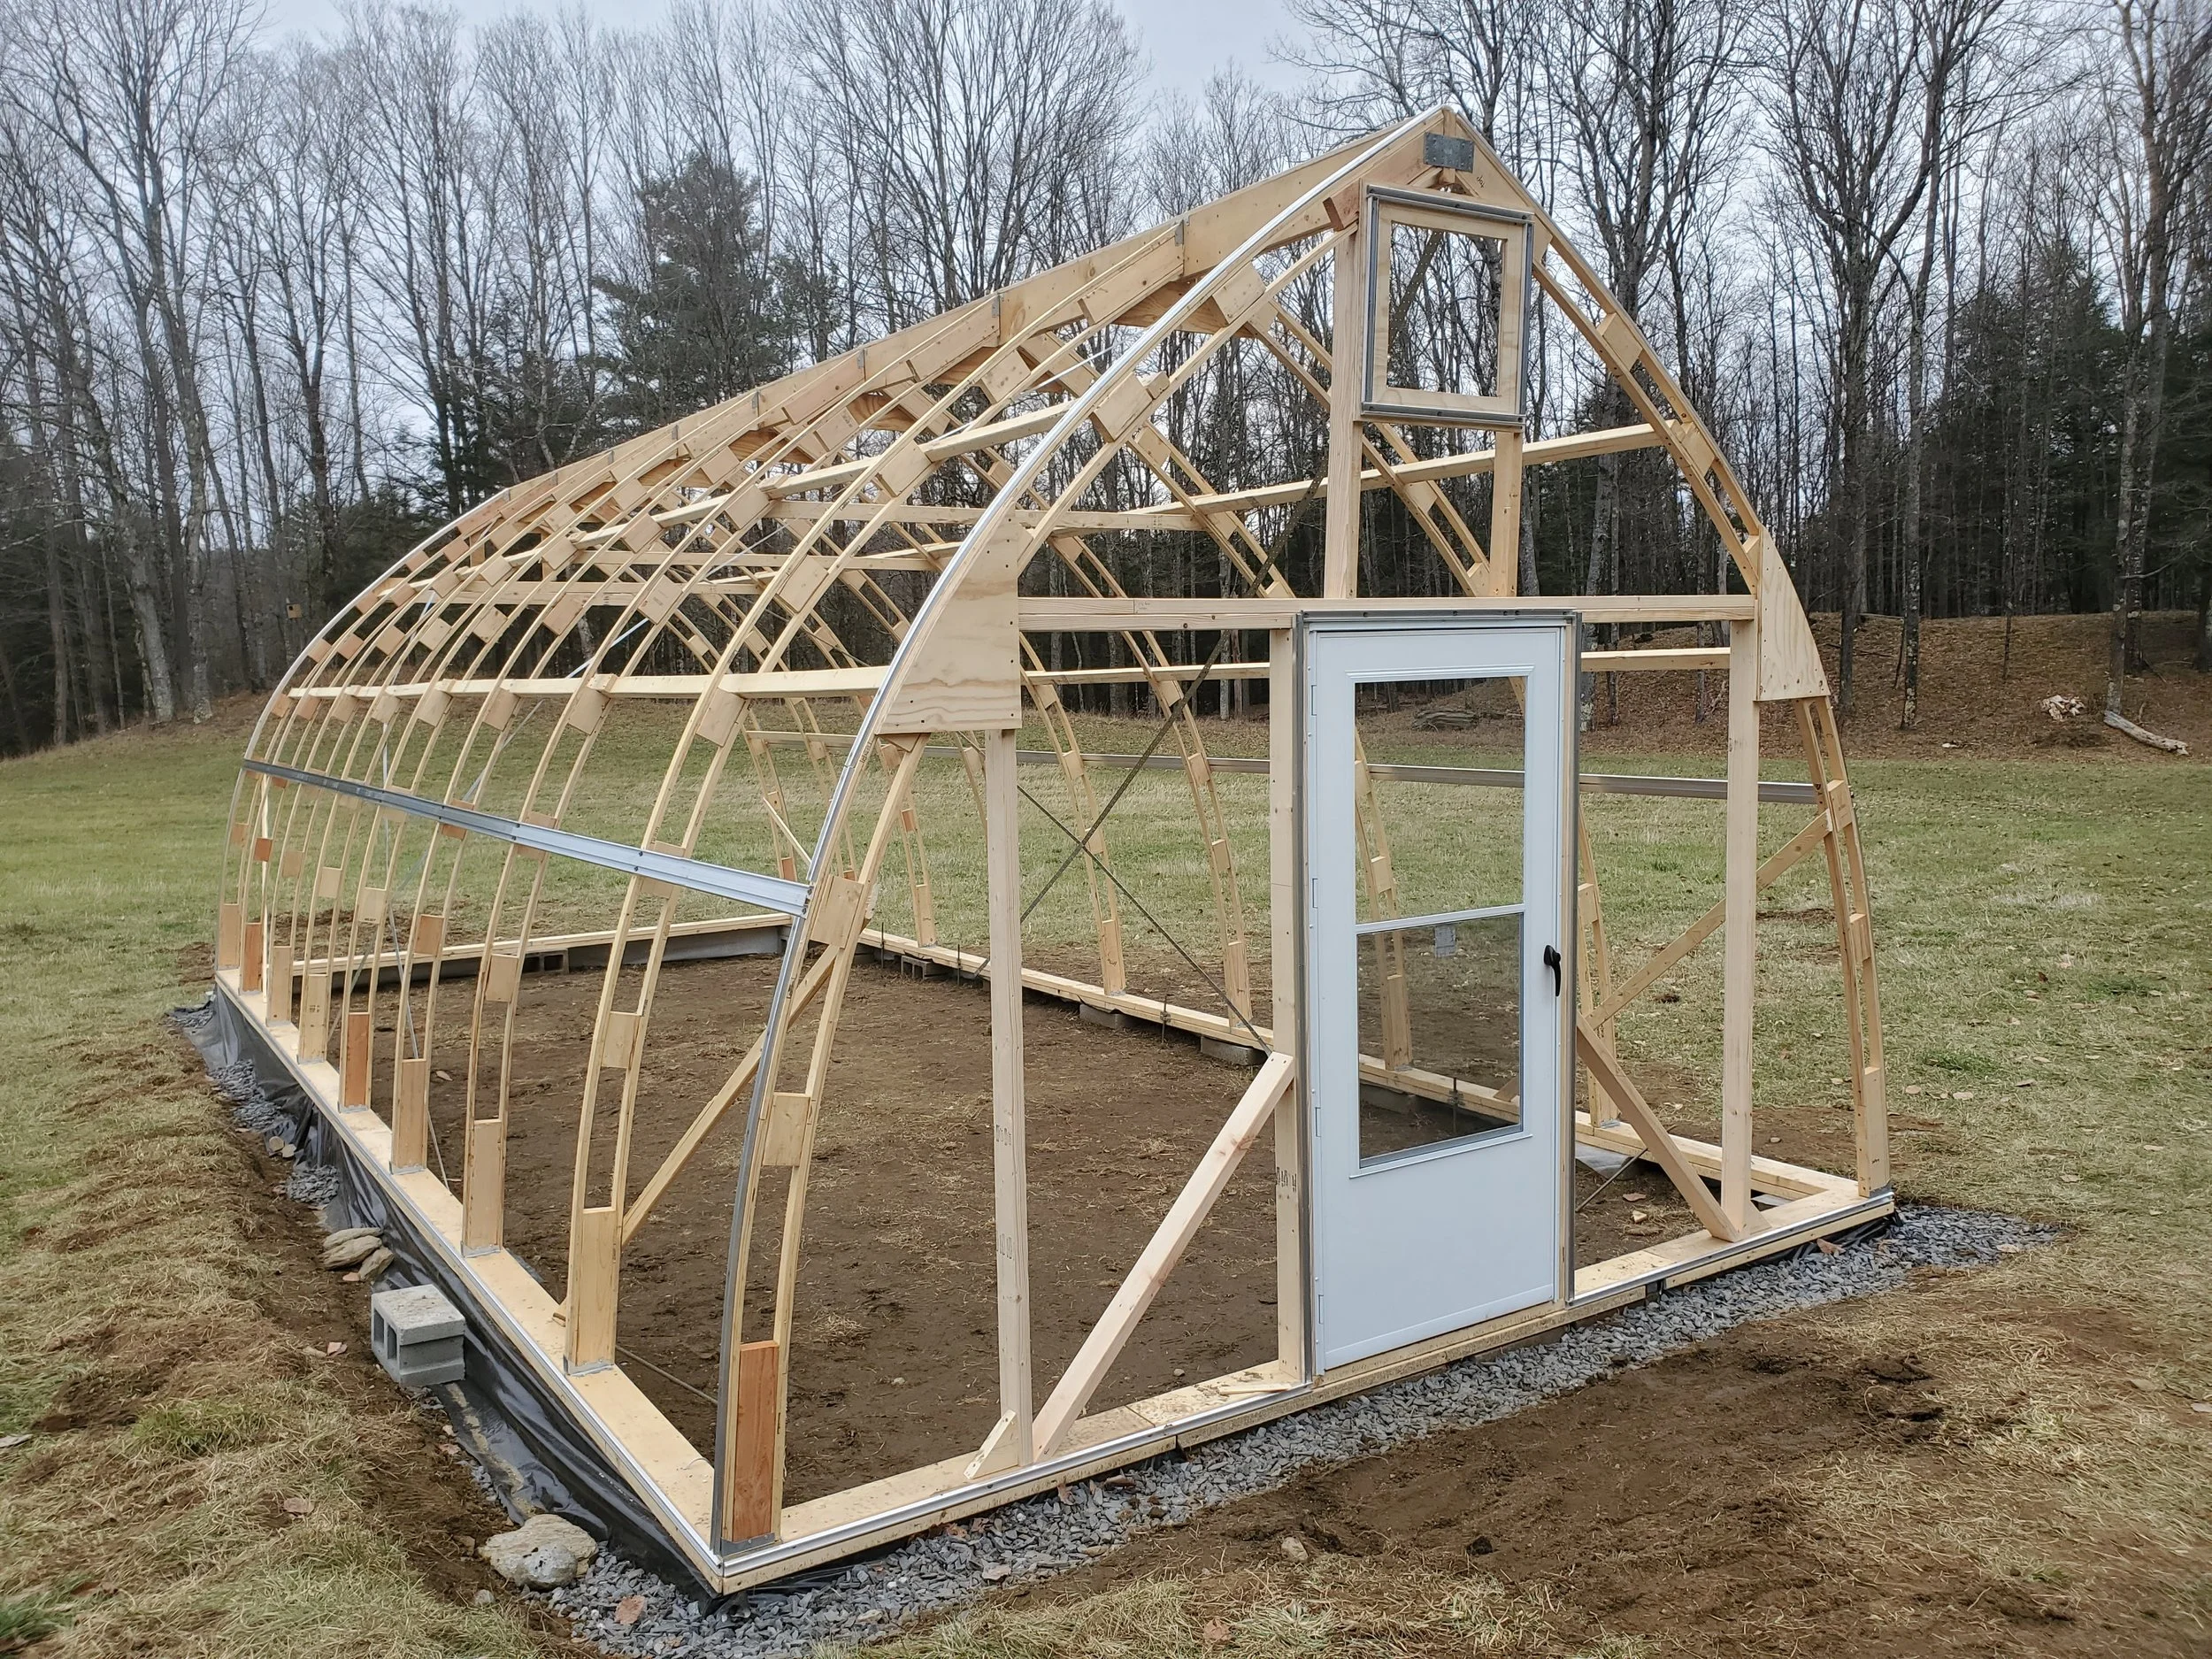
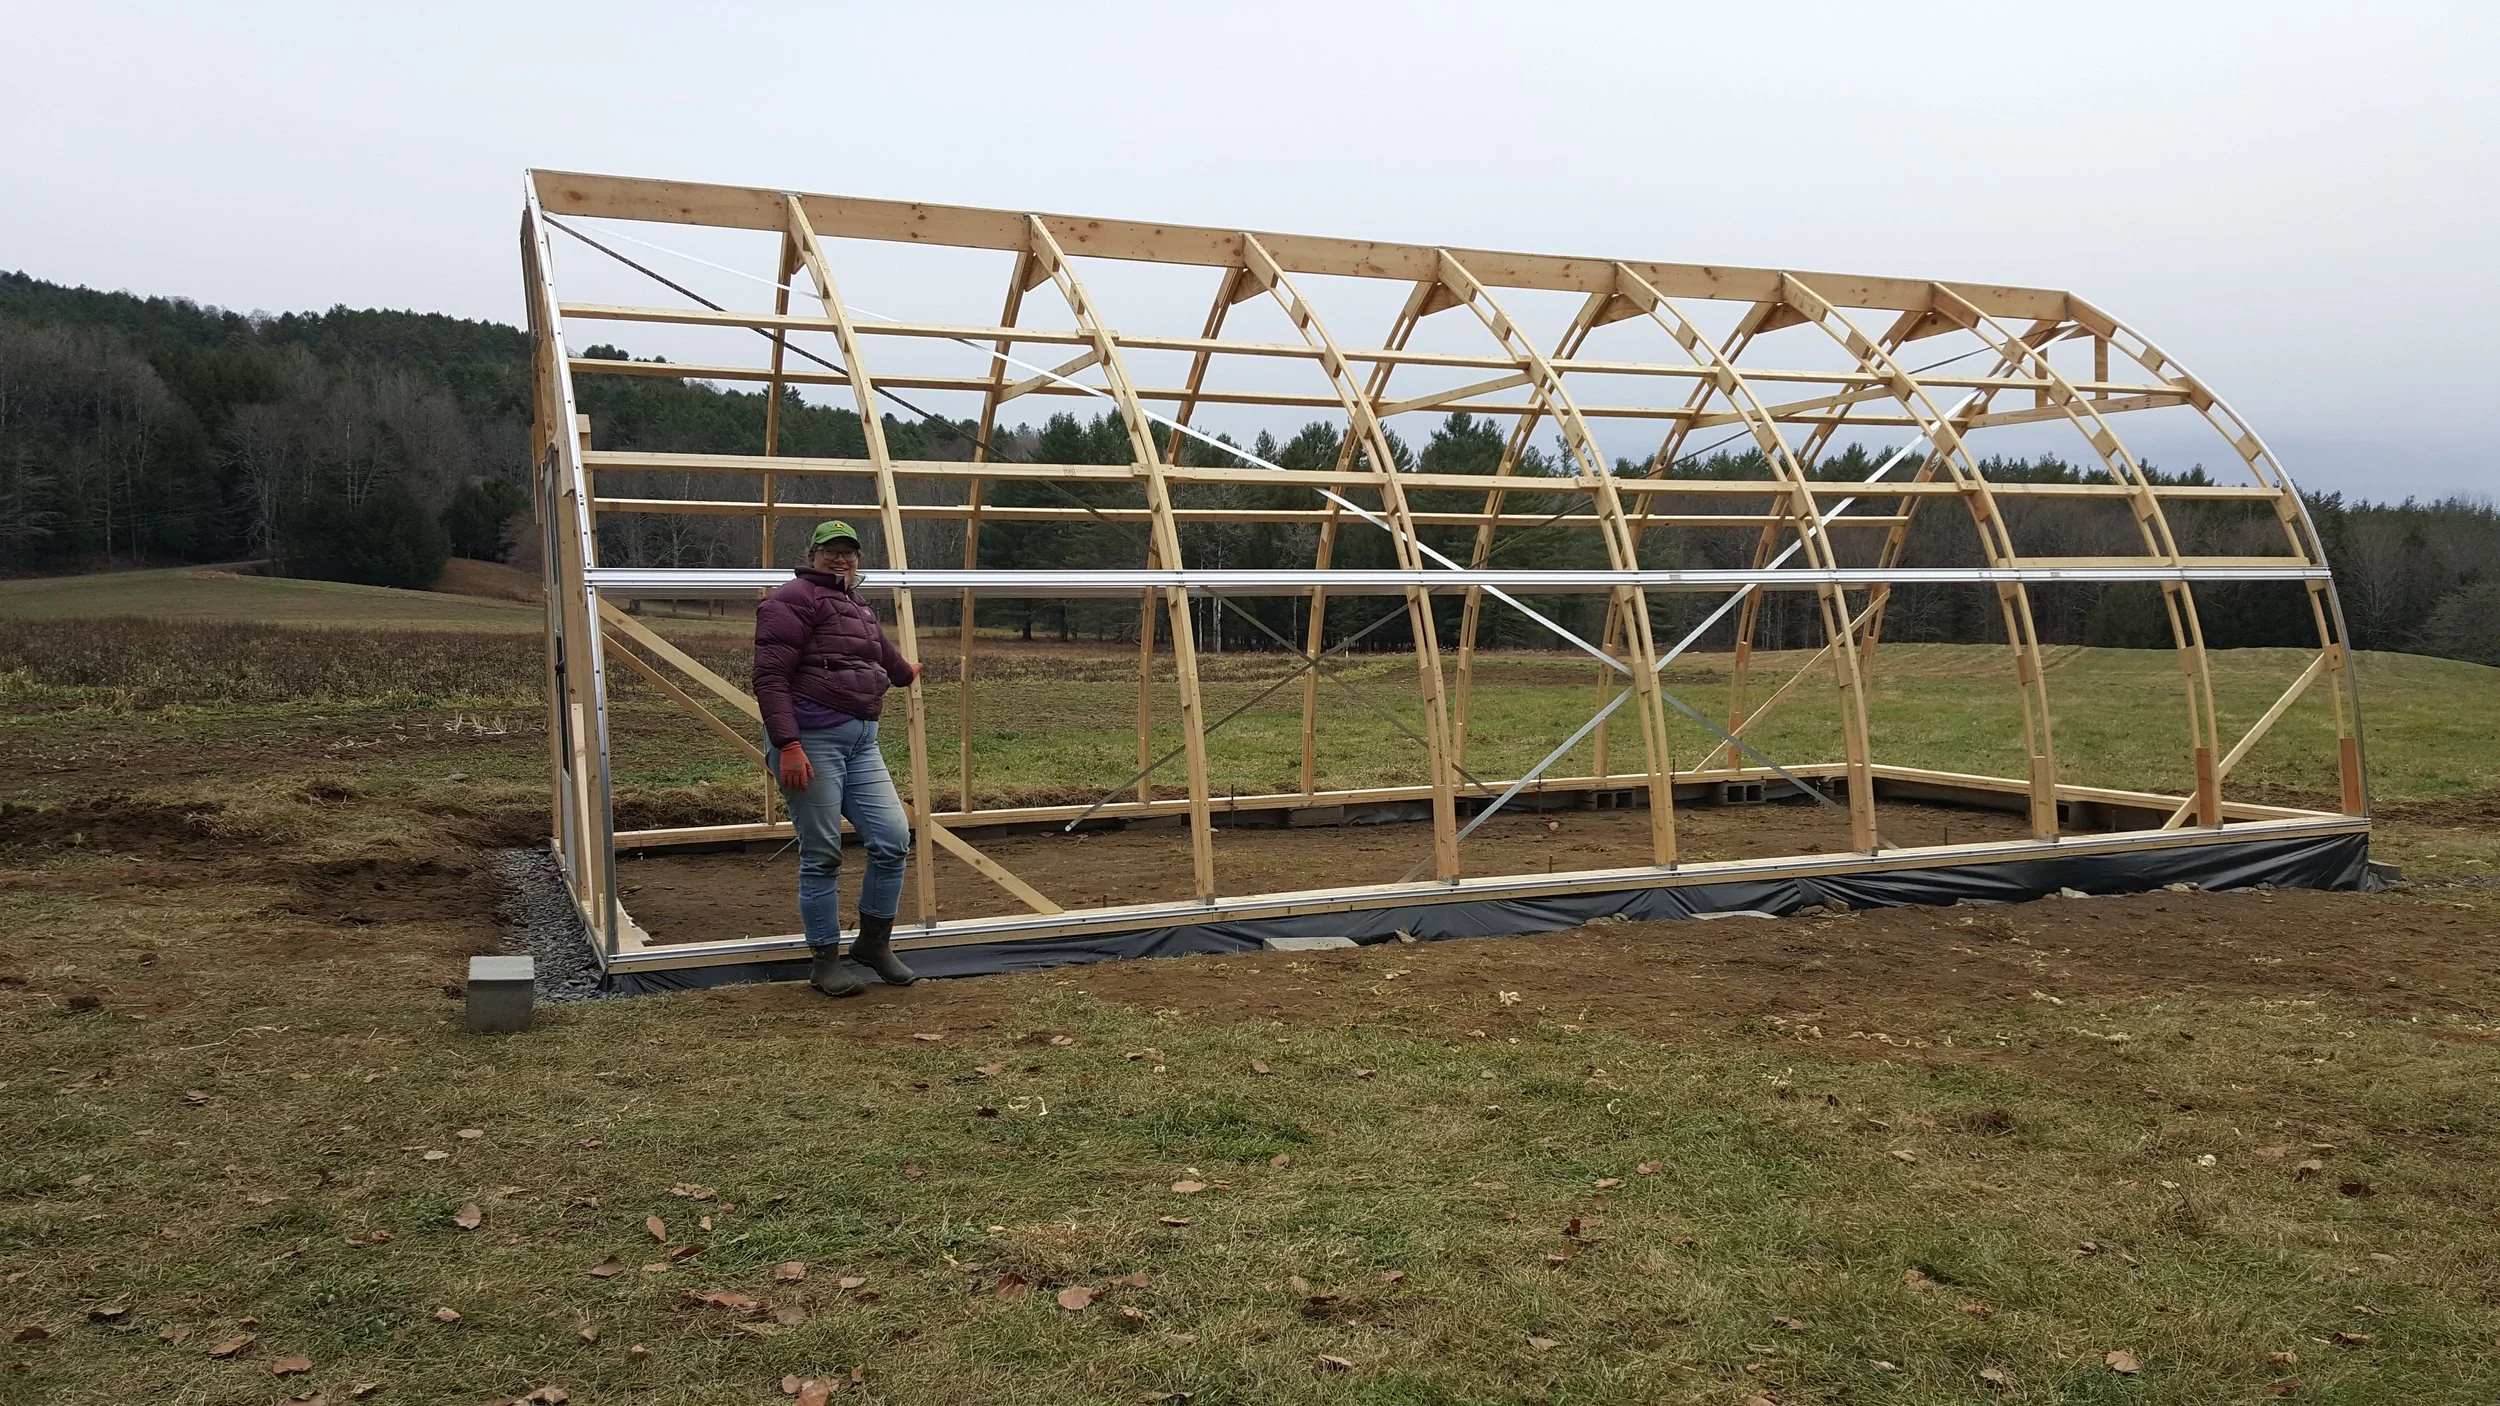
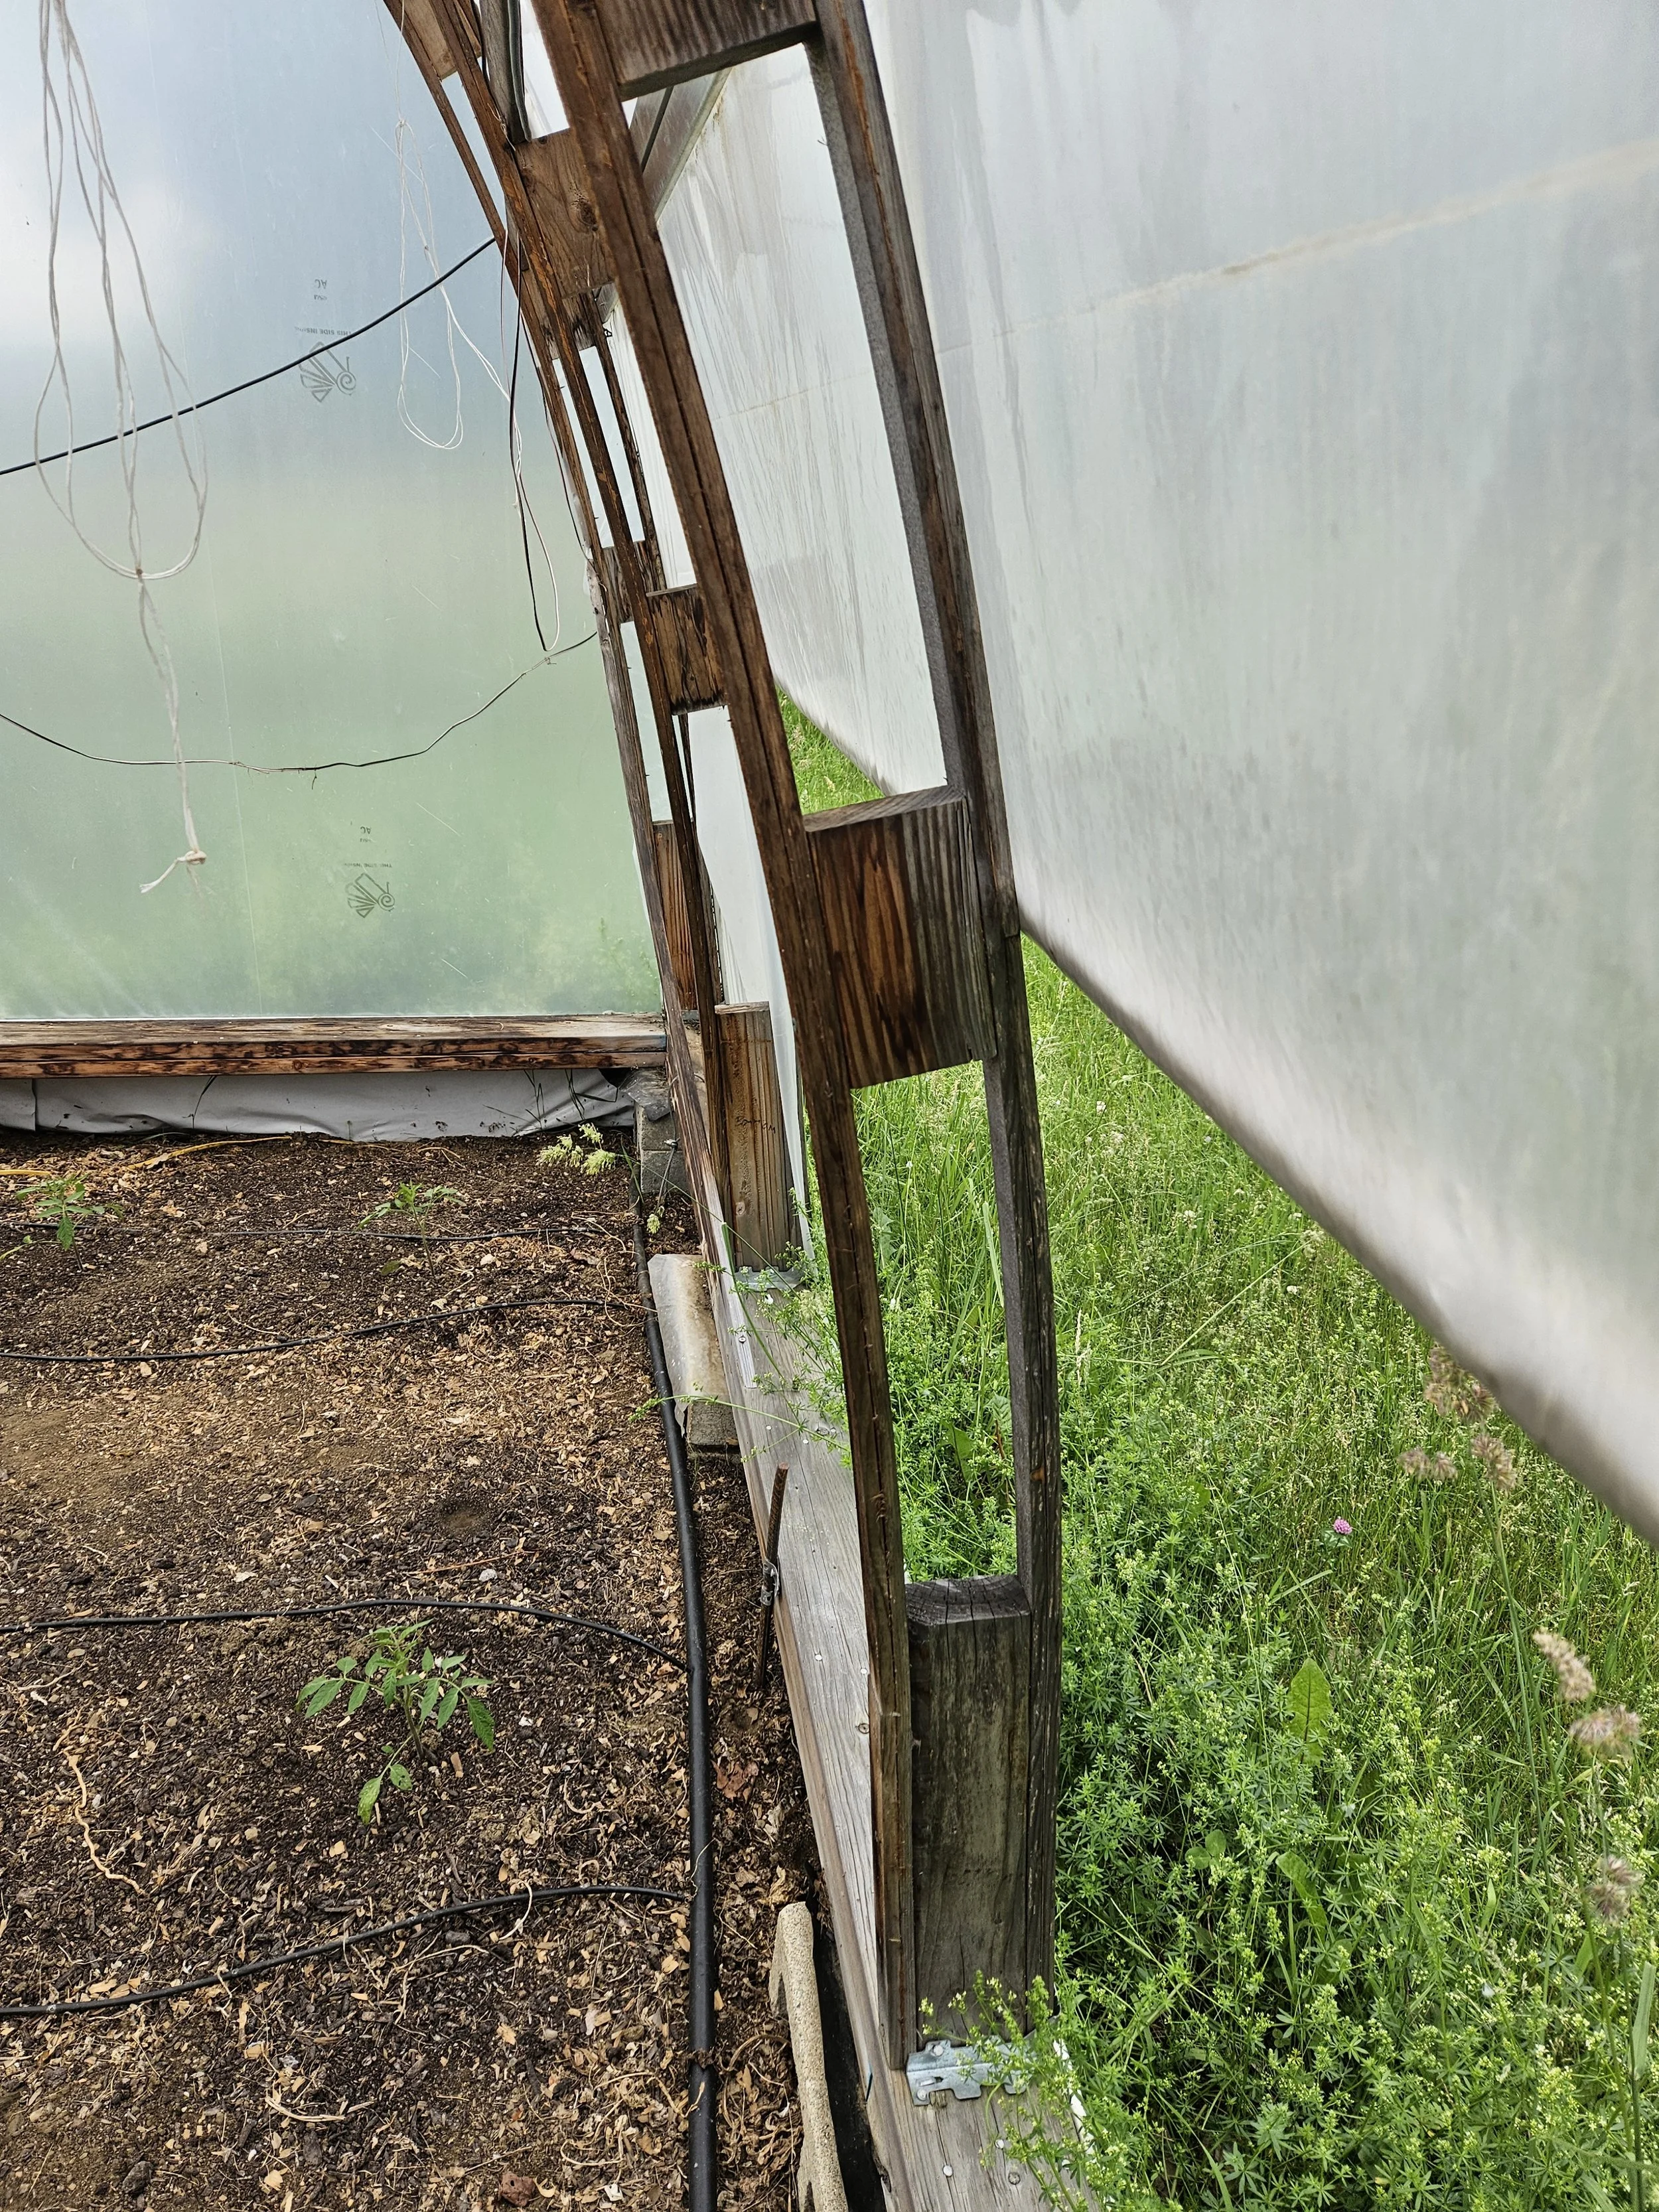
We greenhouse site was positioned on the direct East-West cardinal axis to maximize the solar exposure and the foundation consists of regularly spaced cinder blocks, covered with silage tarp. We did have to do some leveling of the cinder blocks to ensure that the structure would distribute the weight equally and not sag over time. The ribs were attached to 2 x 6 sleepers on the cinderblocks at the base and to the top beam (which was built from sandwiched 1 x 6 pine boards) using galvanized metal joint hangers. The structure was quite unstable at first, but became more rigid as additional ribs were added. Plywood bracing of ribs at the top board and using stringers of 1” x 2” strapping helped, but the structure became quite rigid once galvanized metal strapping was attached in a crosswise (high to low) pattern on both sides of the greenhouse. It was relatively straightforward to finish the skeleton structure by framing out a screen door and framing for louvered eave vents.
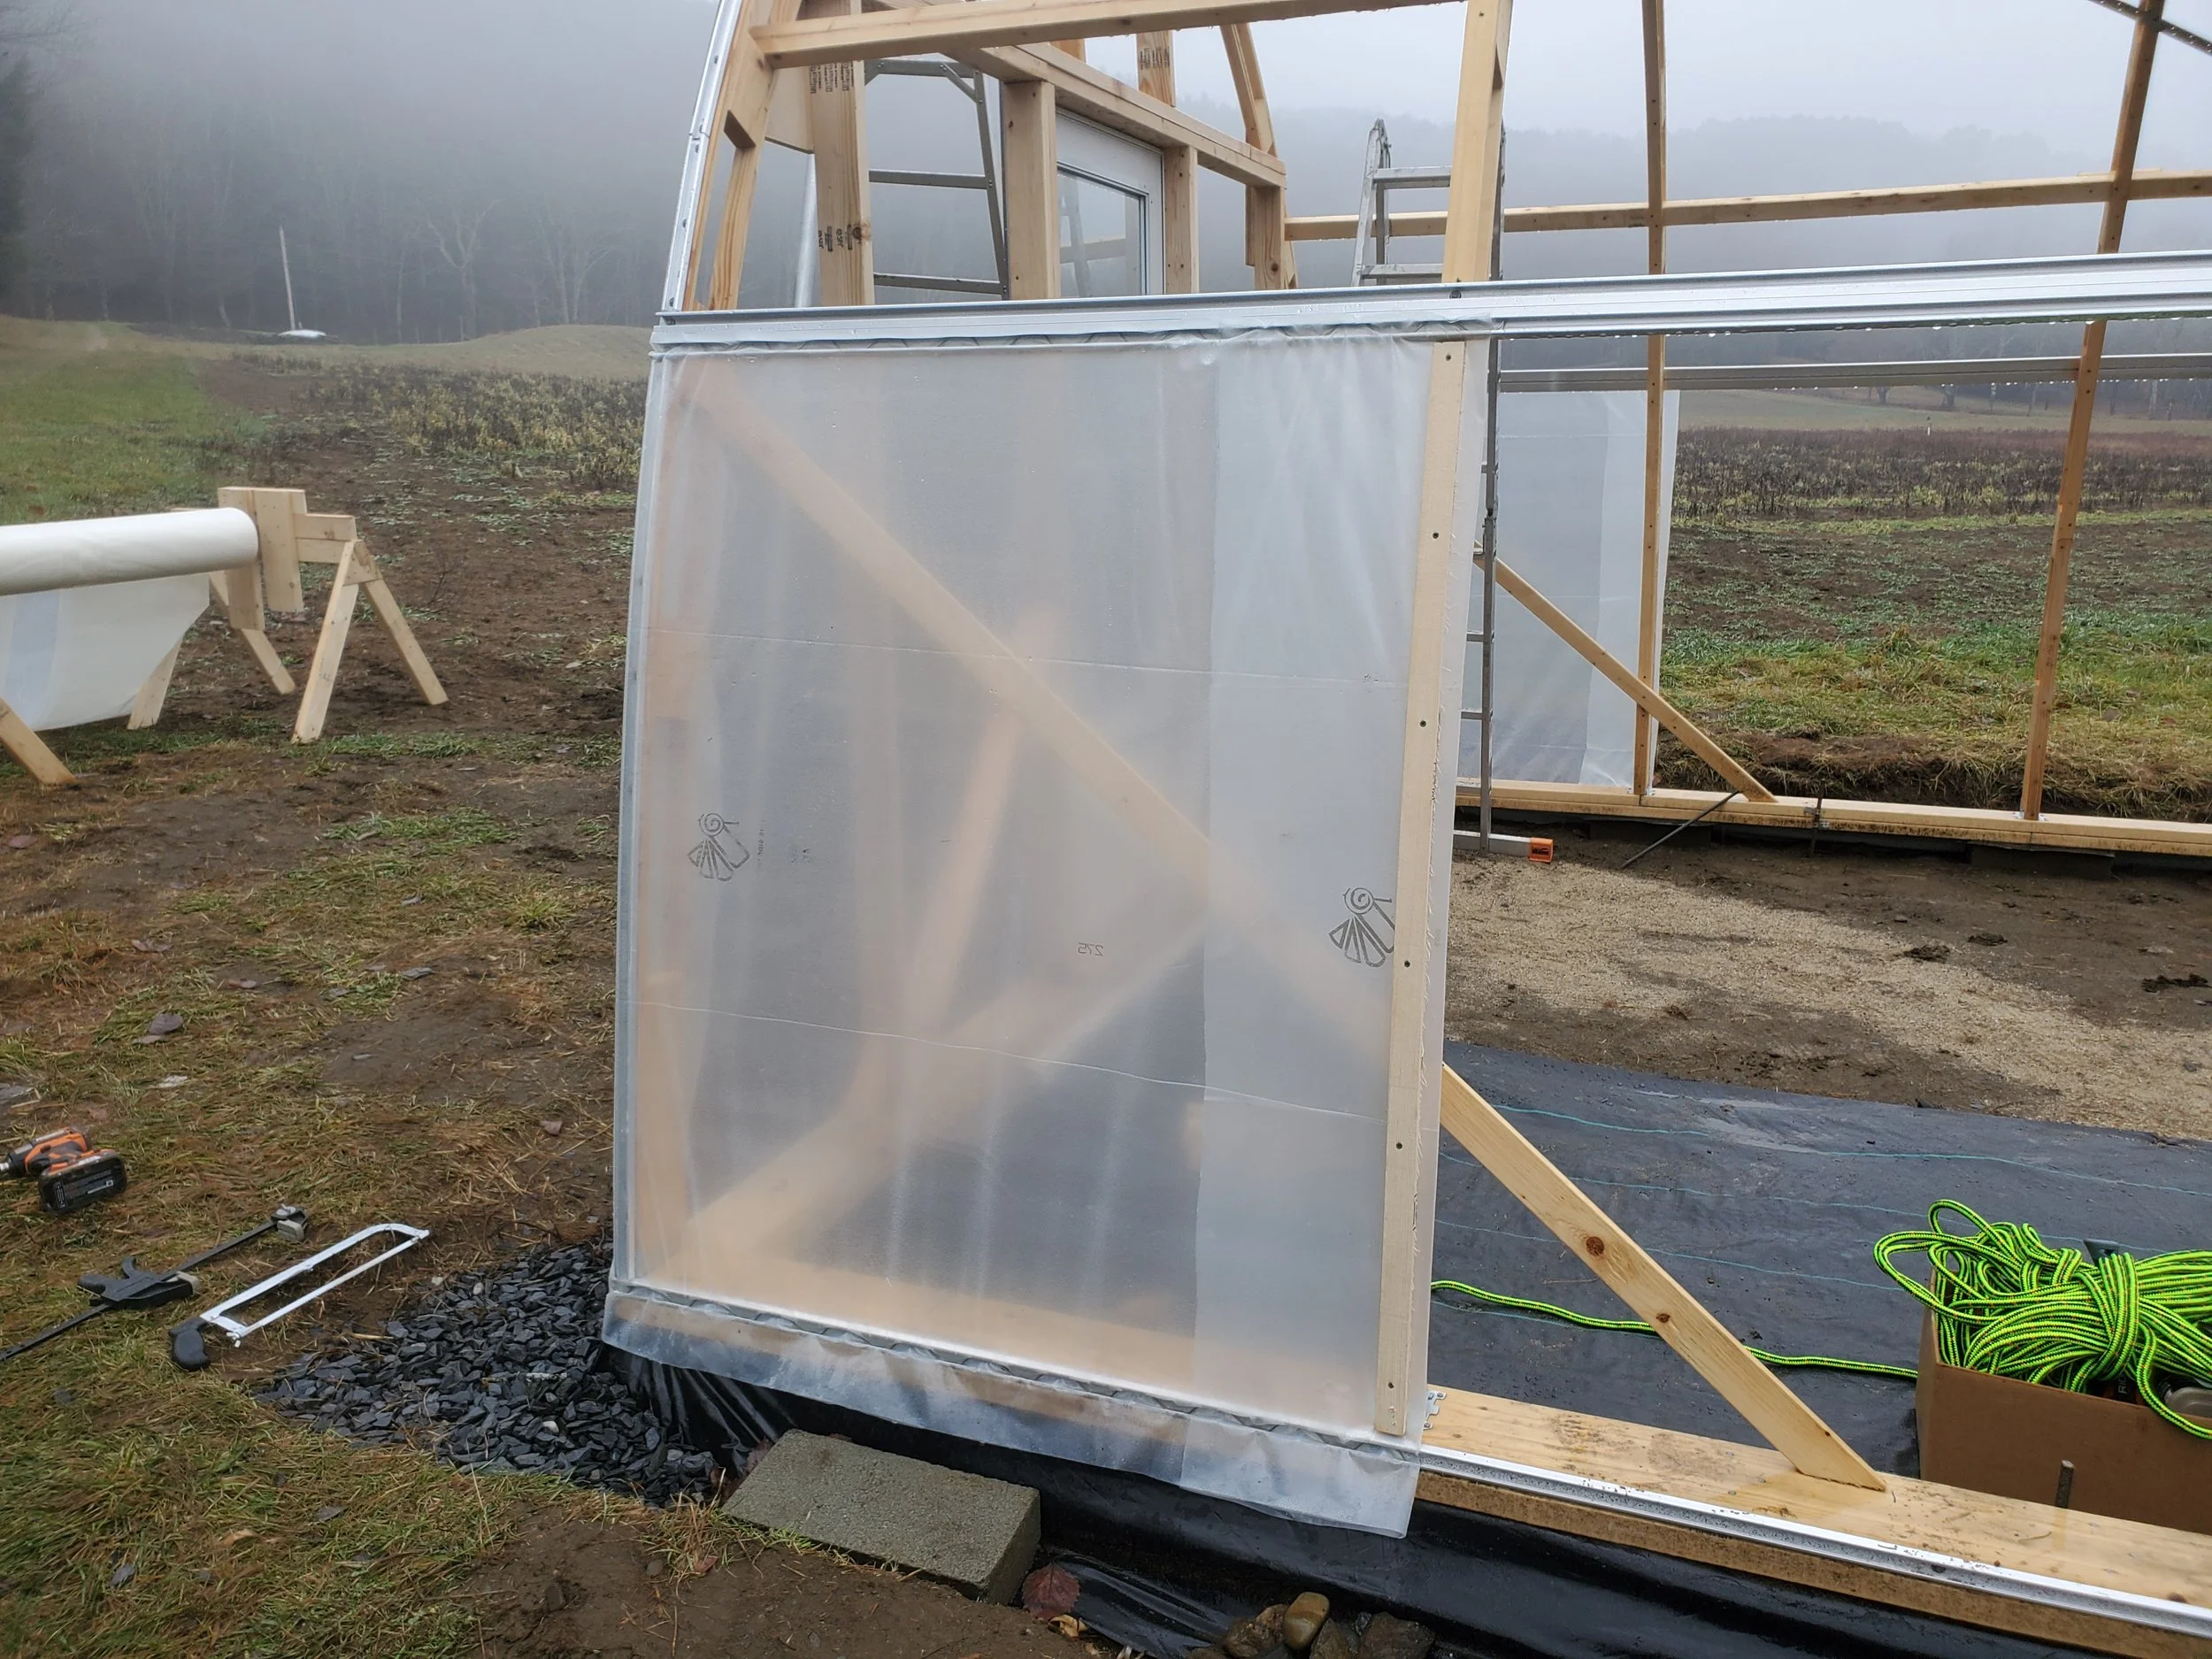
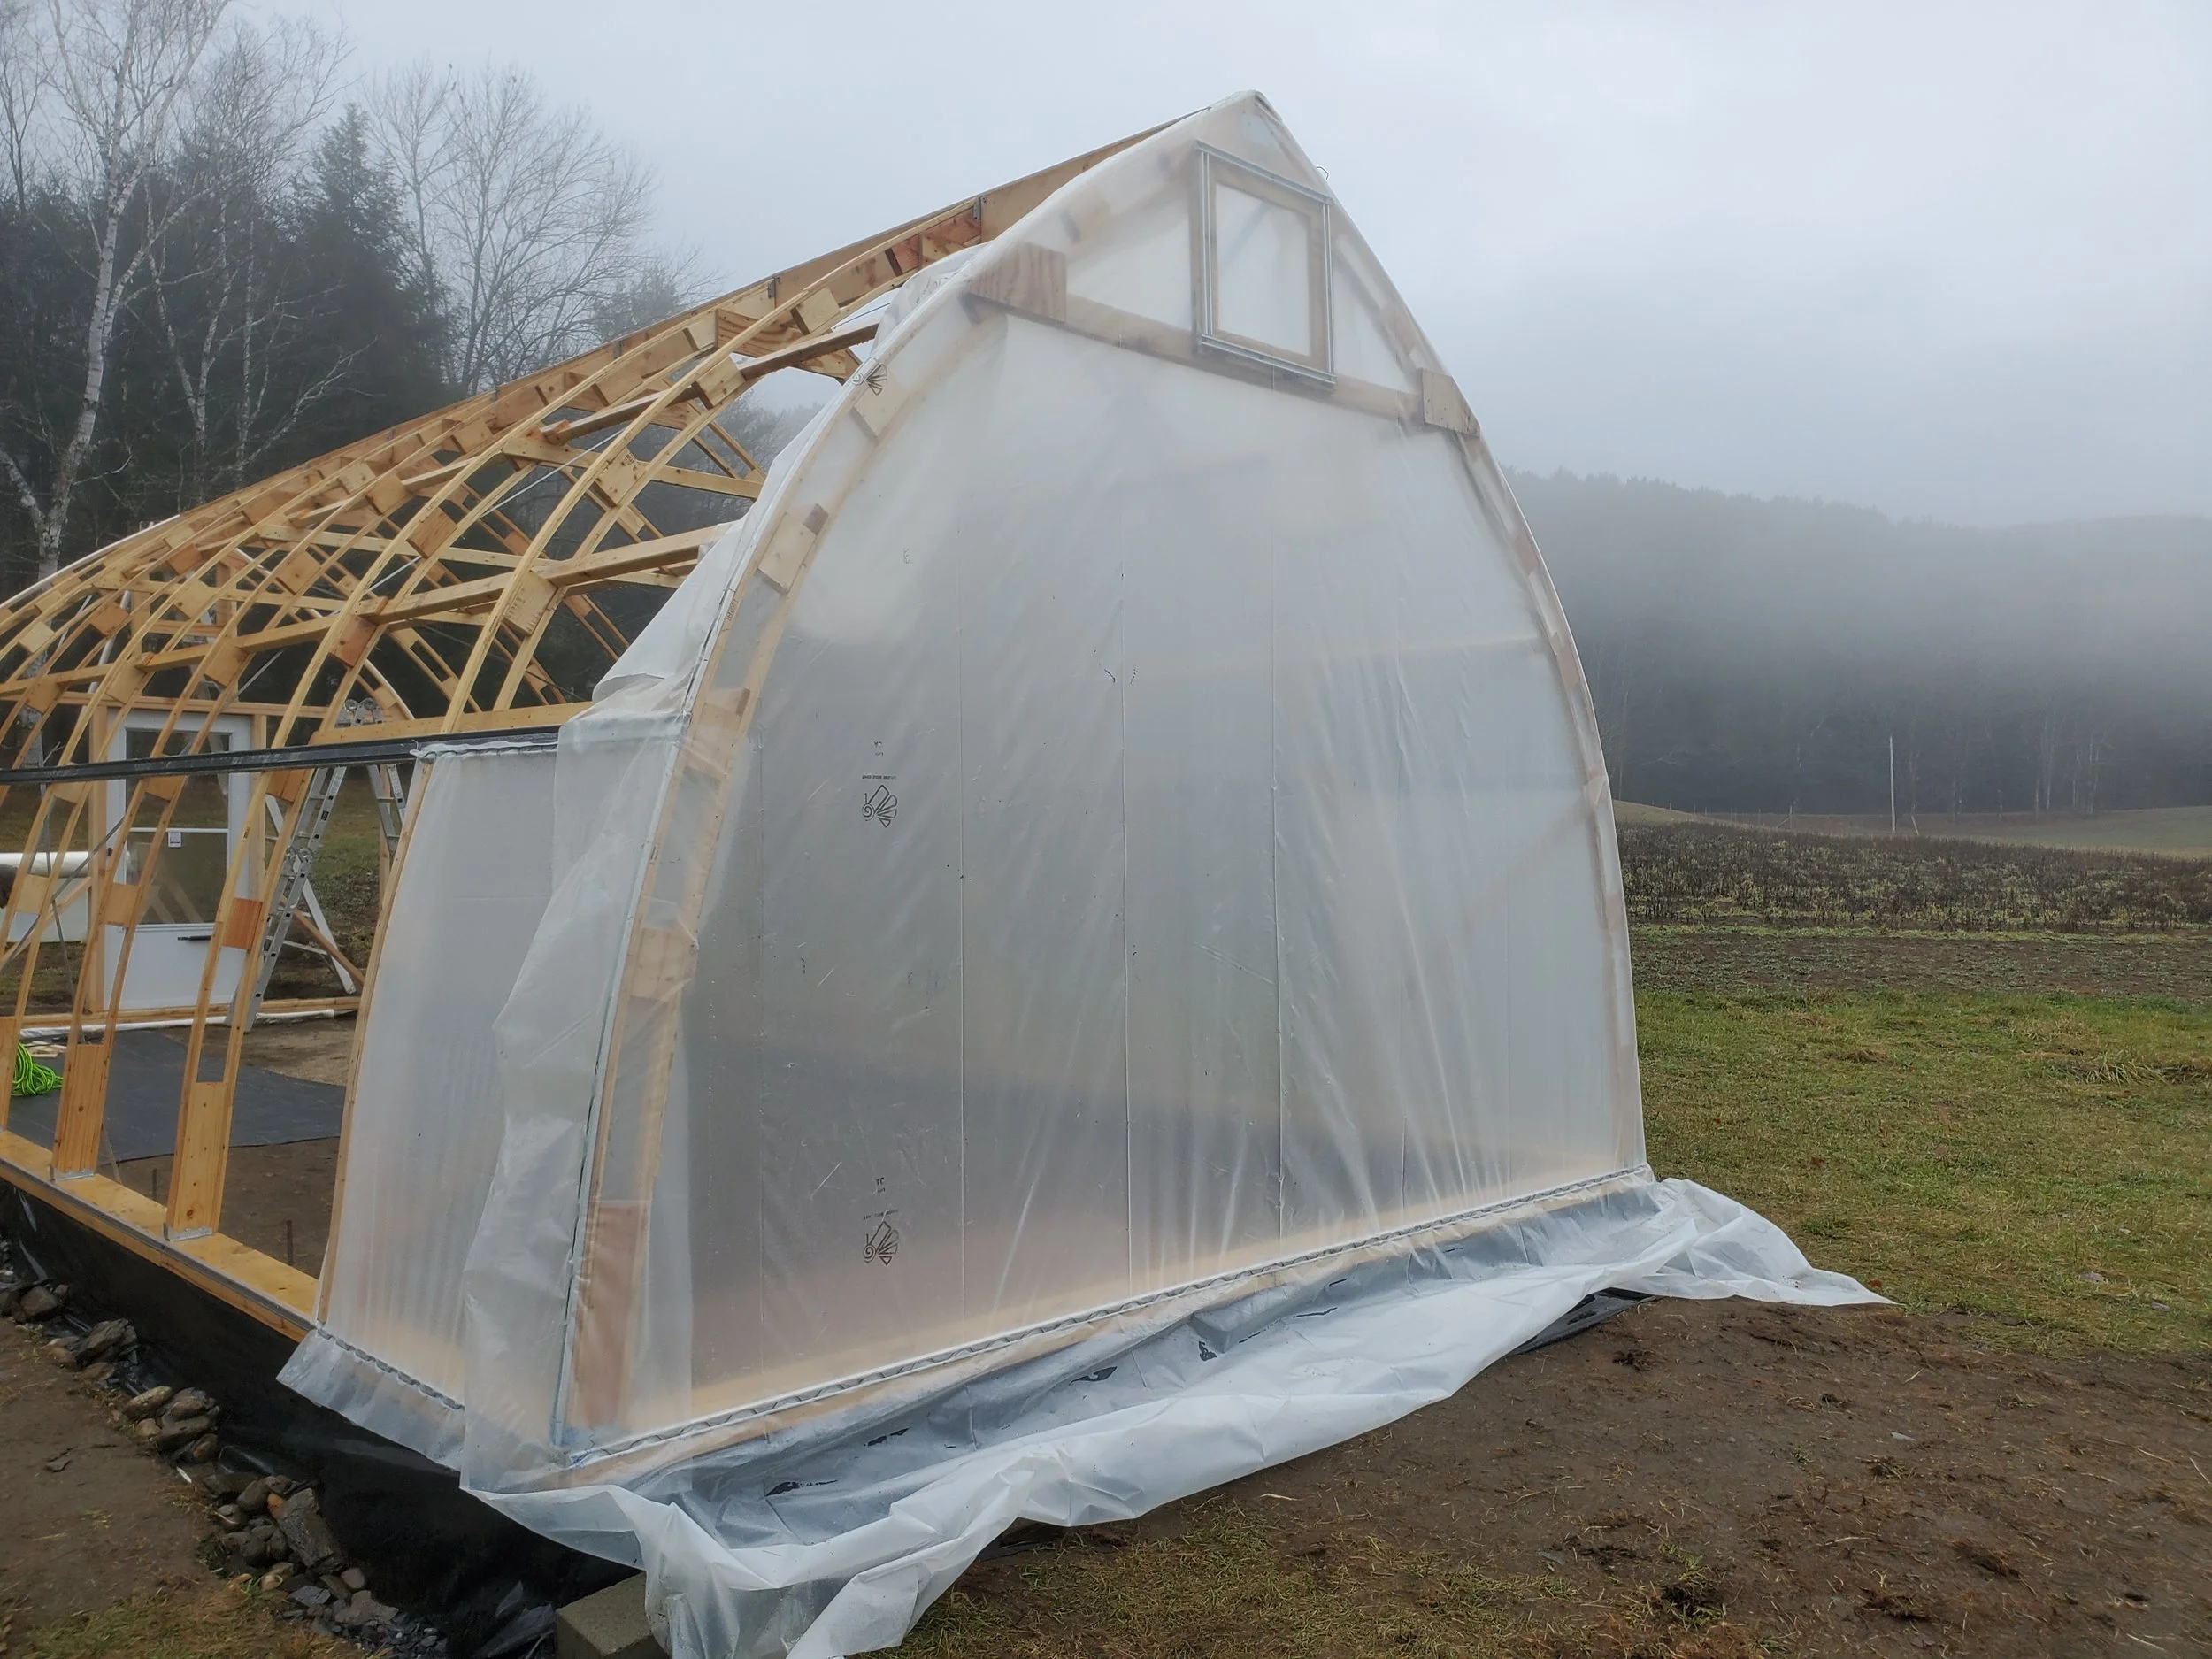
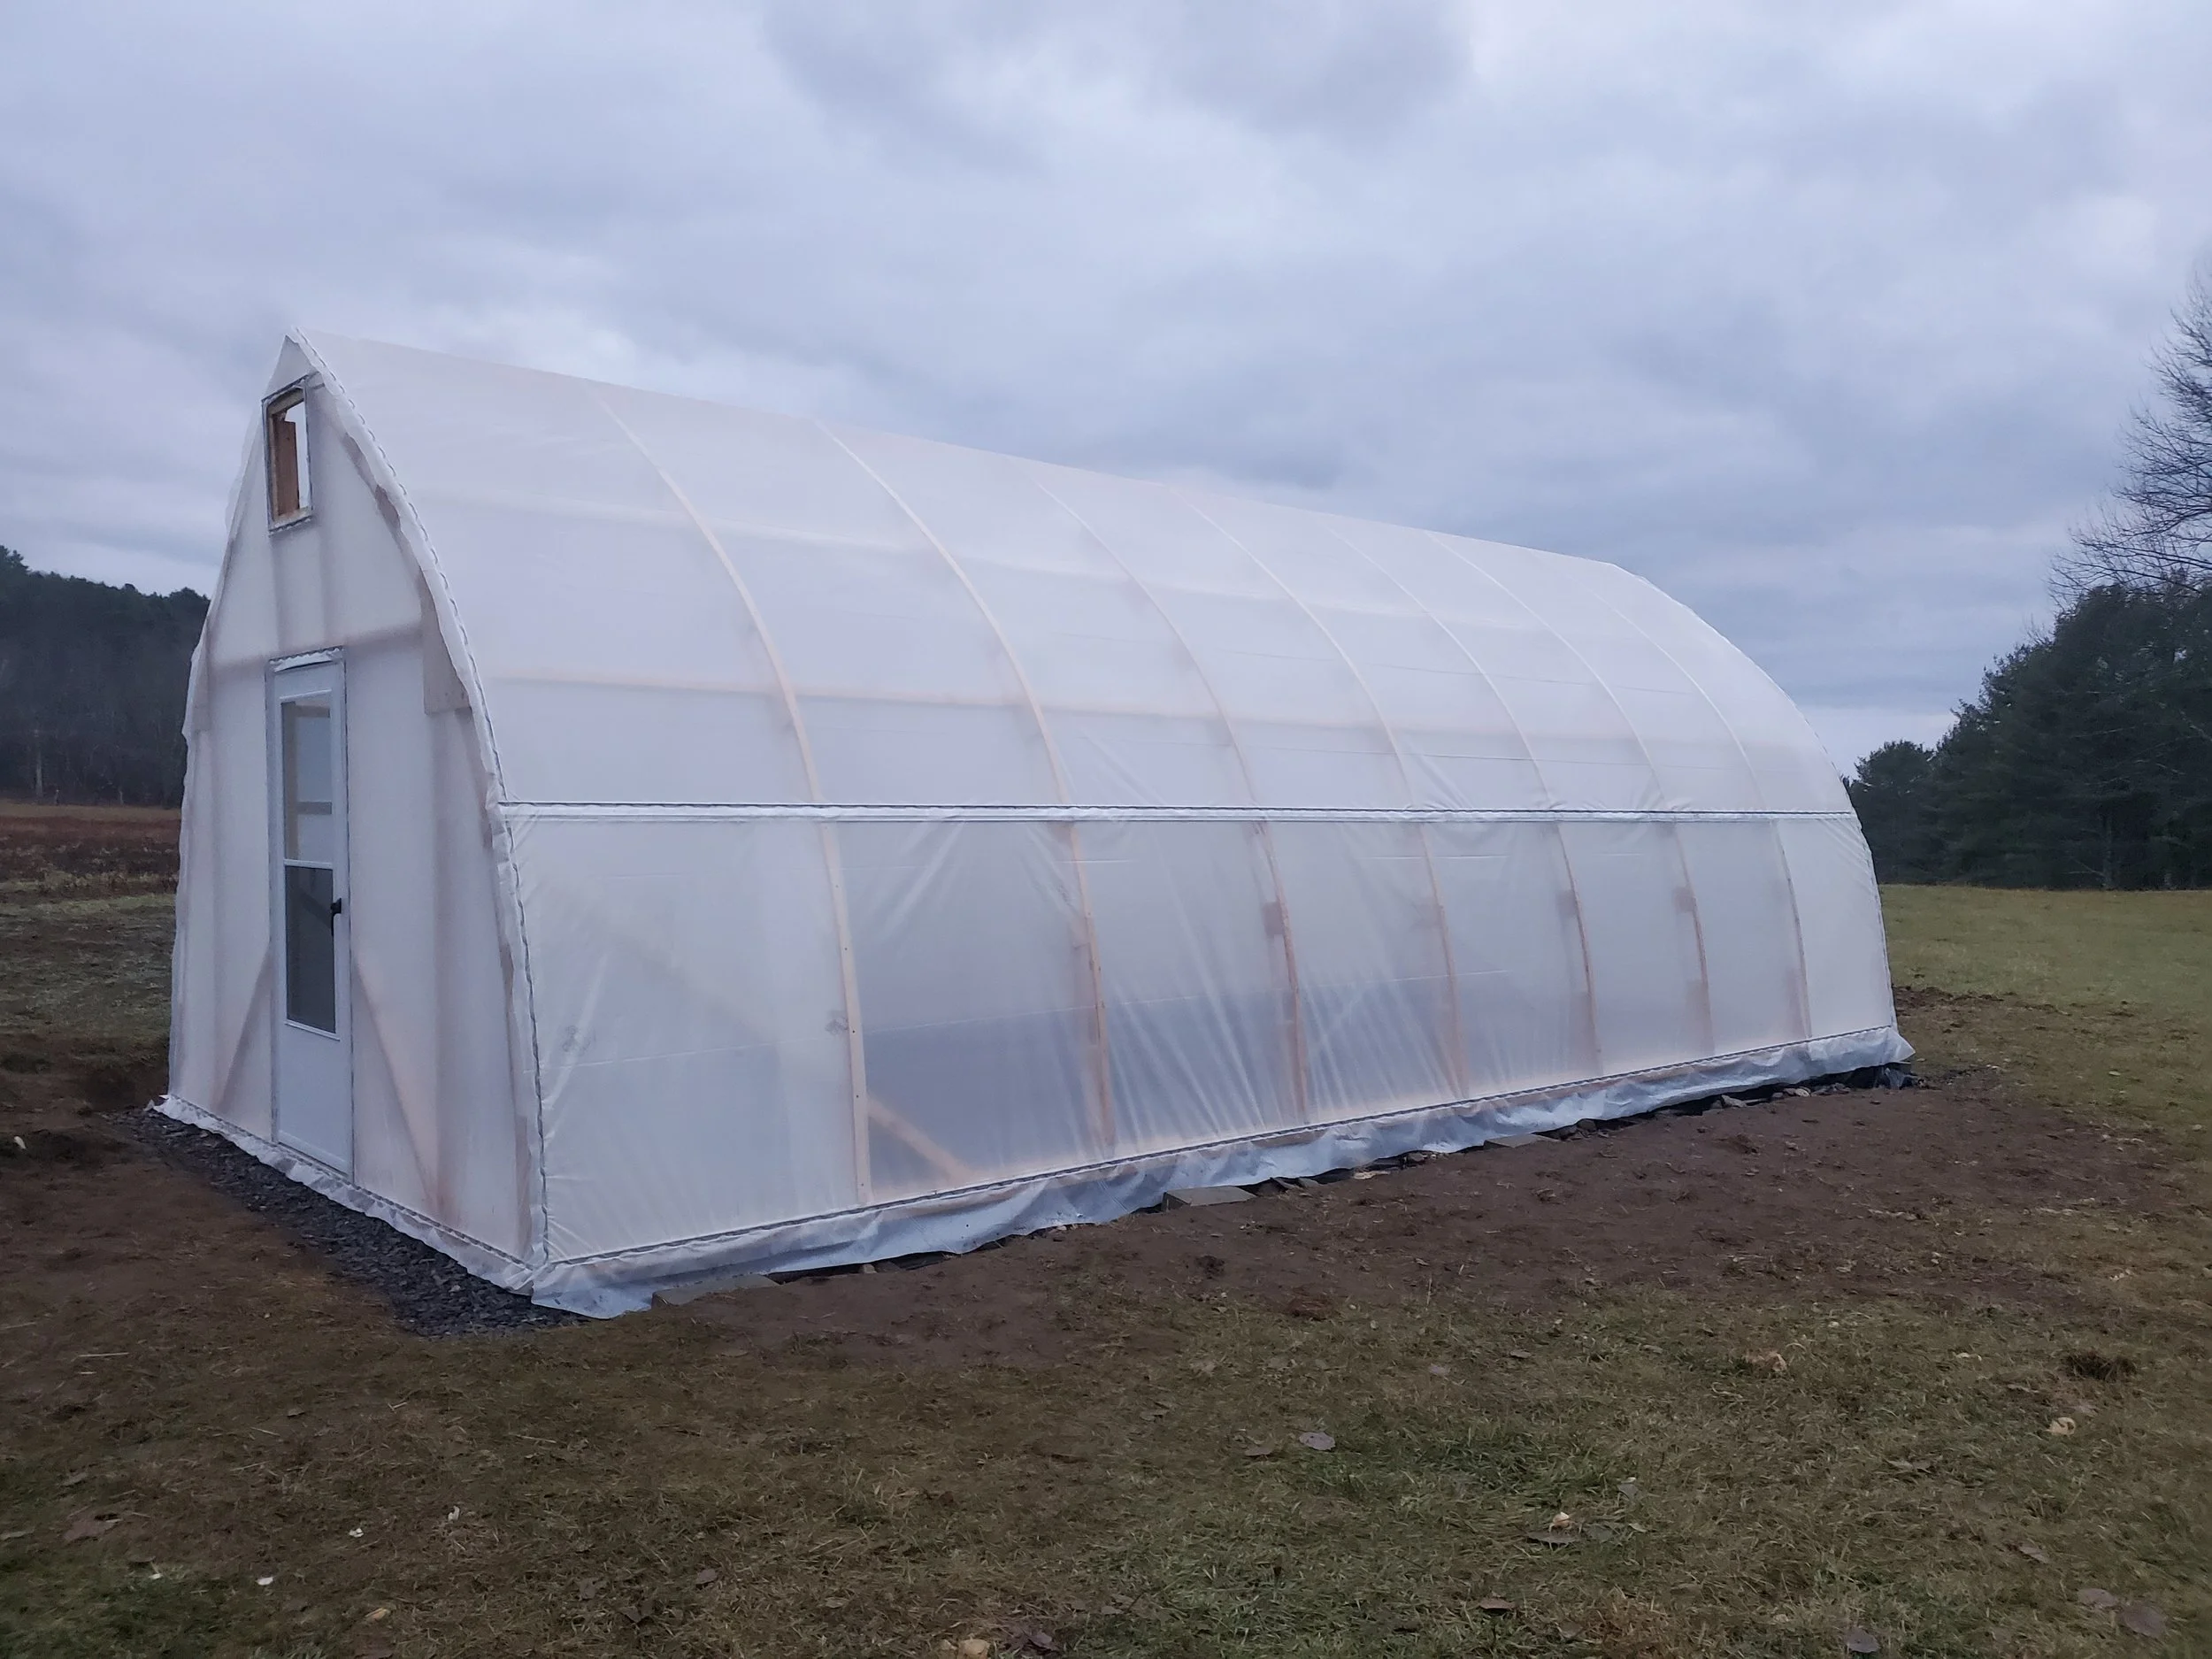
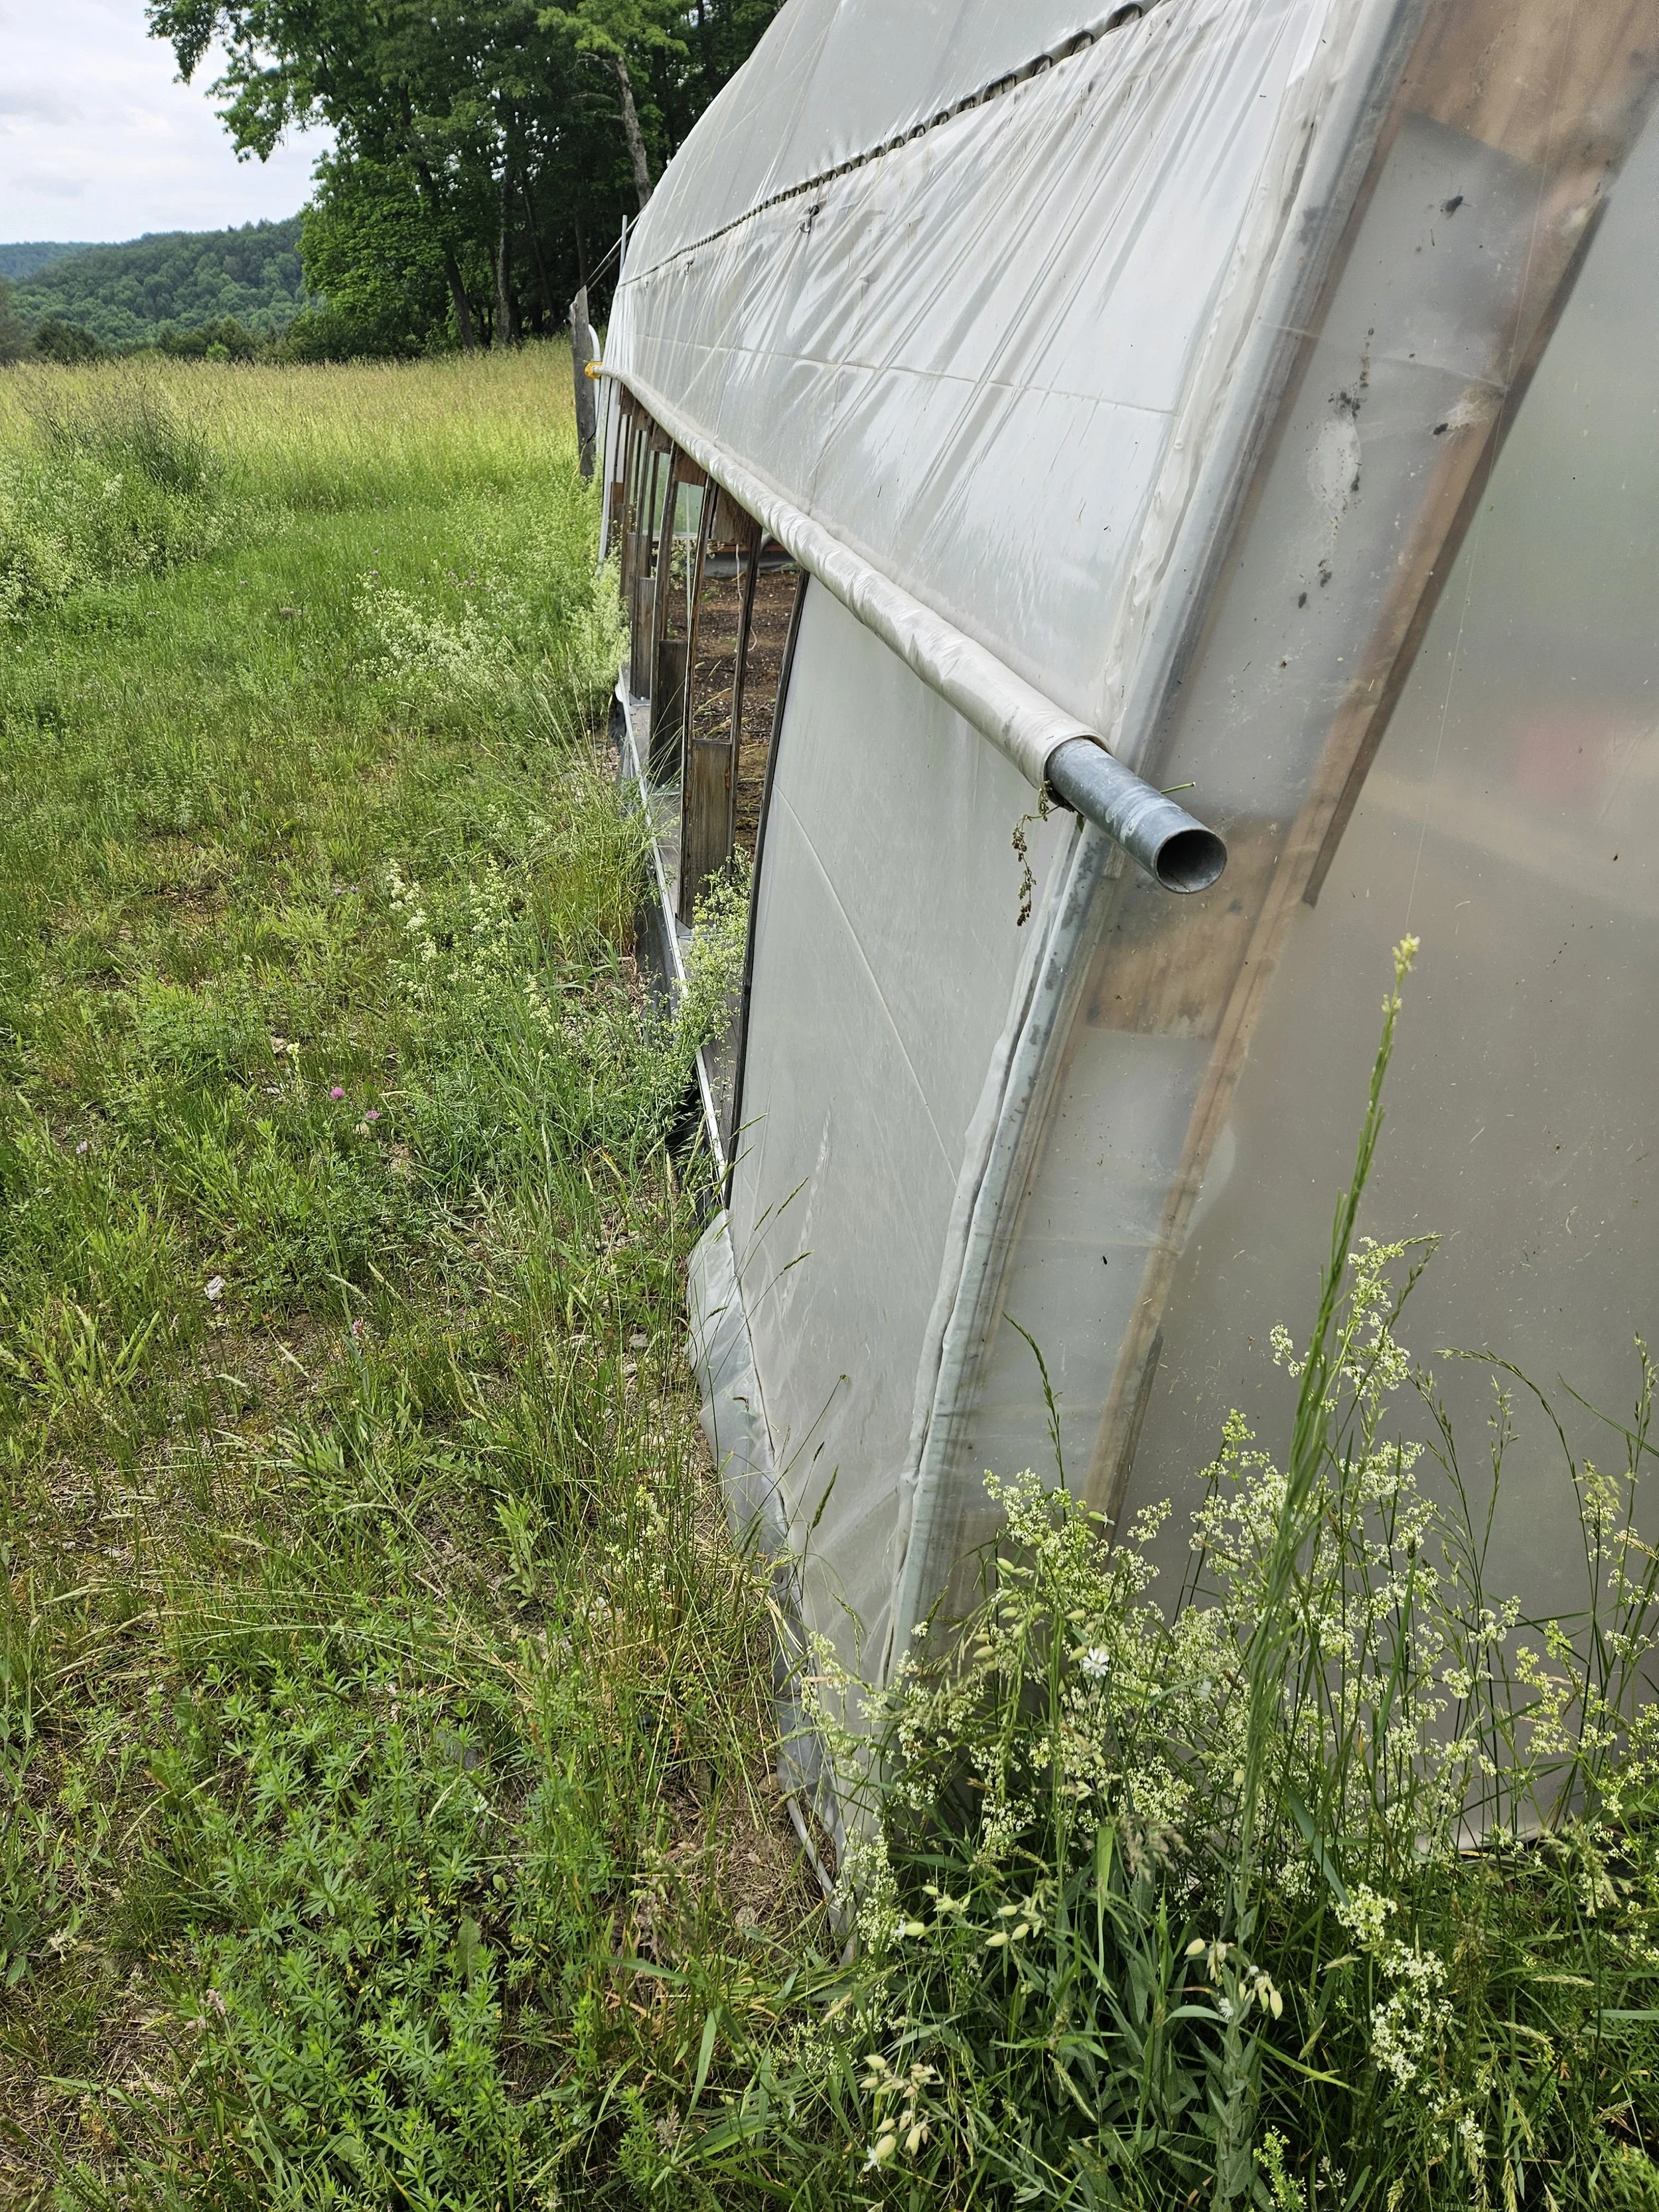
Attaching the plastic was the final step before winter set in. This was accomplished by attaching “wiggle wire” channel slots on the end ribs, the bottom board and a dual channel slot at the 6’ high stringer to accomodate replaceable roll-up side curtains. Similarly, wiggle wire slots were installed on the end faces of the greenhouse around any open or exposed edge. Installing the plastic sheeting was easy on the day we chose - the day before Thanksgiving! - as we had little wind and favorable conditions. Simply pulling the sheet over the greenhouse using a set of ropes made it happen and we affixed the plastic using 4’ lengths of wiggle wire. Good thing it was good conditions and we were able to finish it out in a day, since our first real snow arrived Thanksgiving weekend! Everything was bundled up and ready for Spring.
All of the spreader pieces cut and ready for assembly
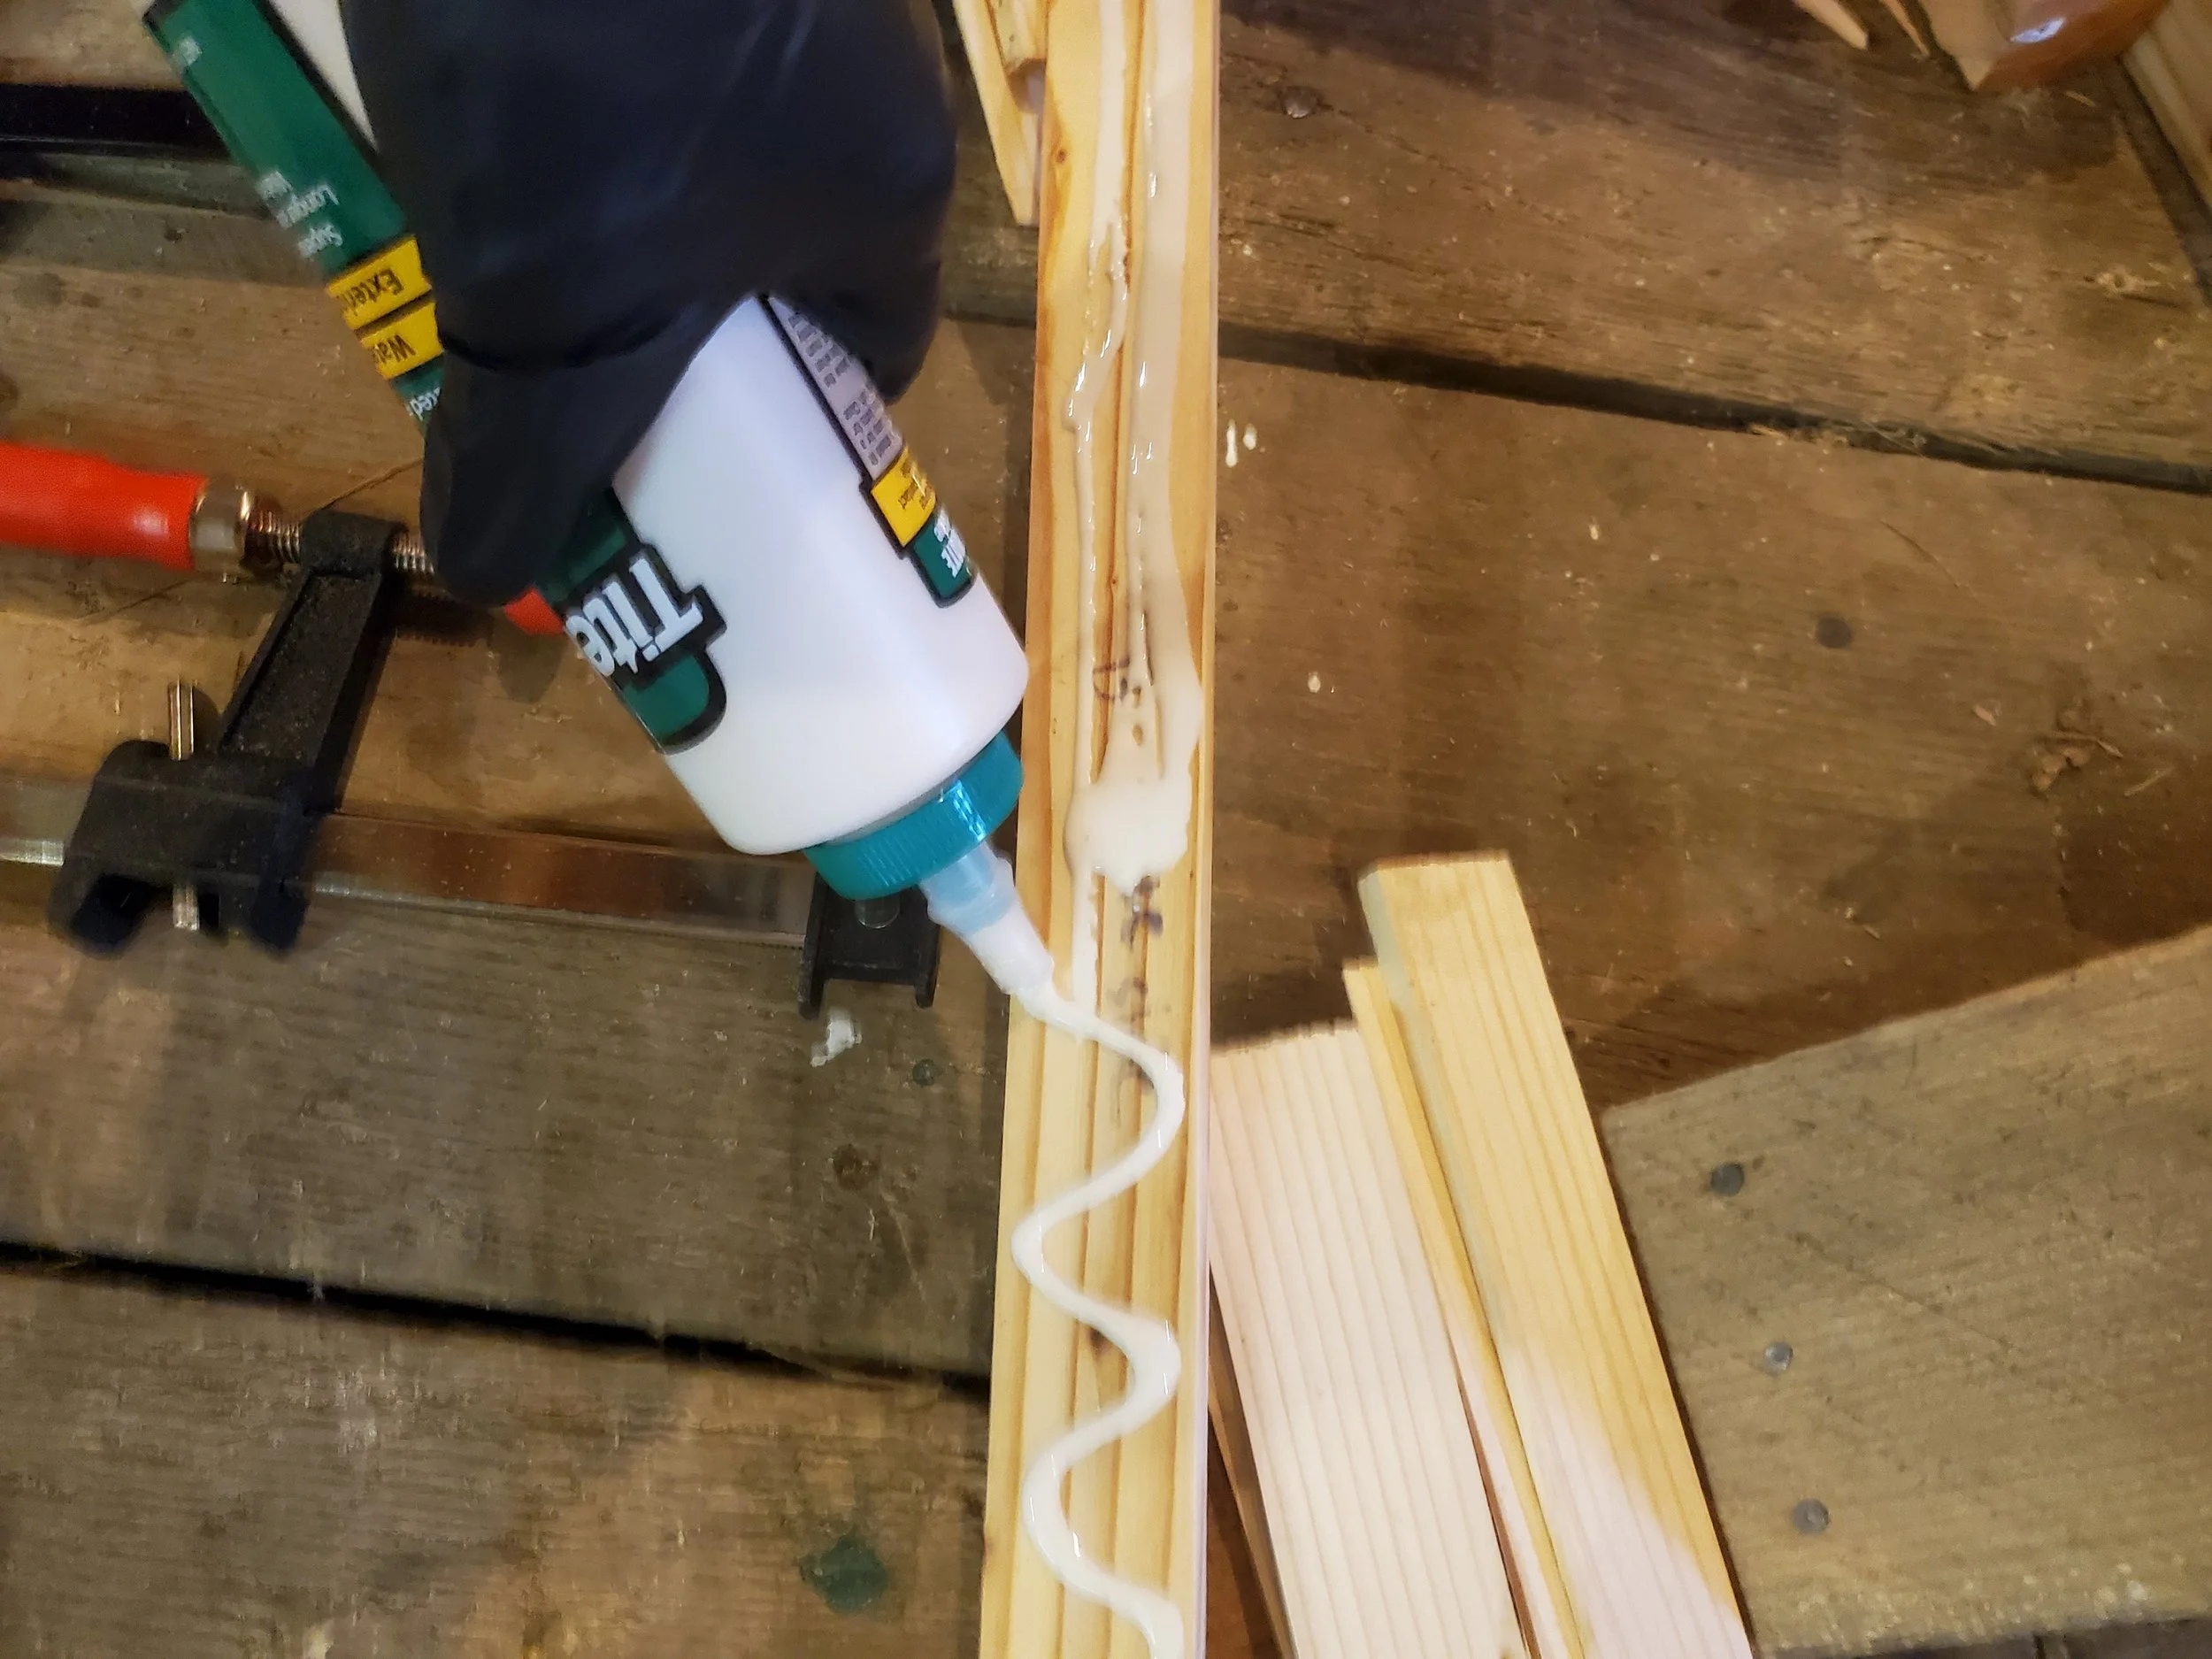
Applying a healthy amount of glue to the lamination side
Laying down the inner lamination piece into the "form"
Clamping the first lamination piece
Ensuring that the butt-end joints of the laminations are supported by the frame and offset between lamination layers
Adding a spreader block
Clamping to ensure a tight fit on the bend
Securing the spreader block with screws
Building one half of the rib from base to top
Finishing out interior lamination gluing/clamping/screwing
One half of the rib lamination is set
Outer lamination is attached to the rib assembly
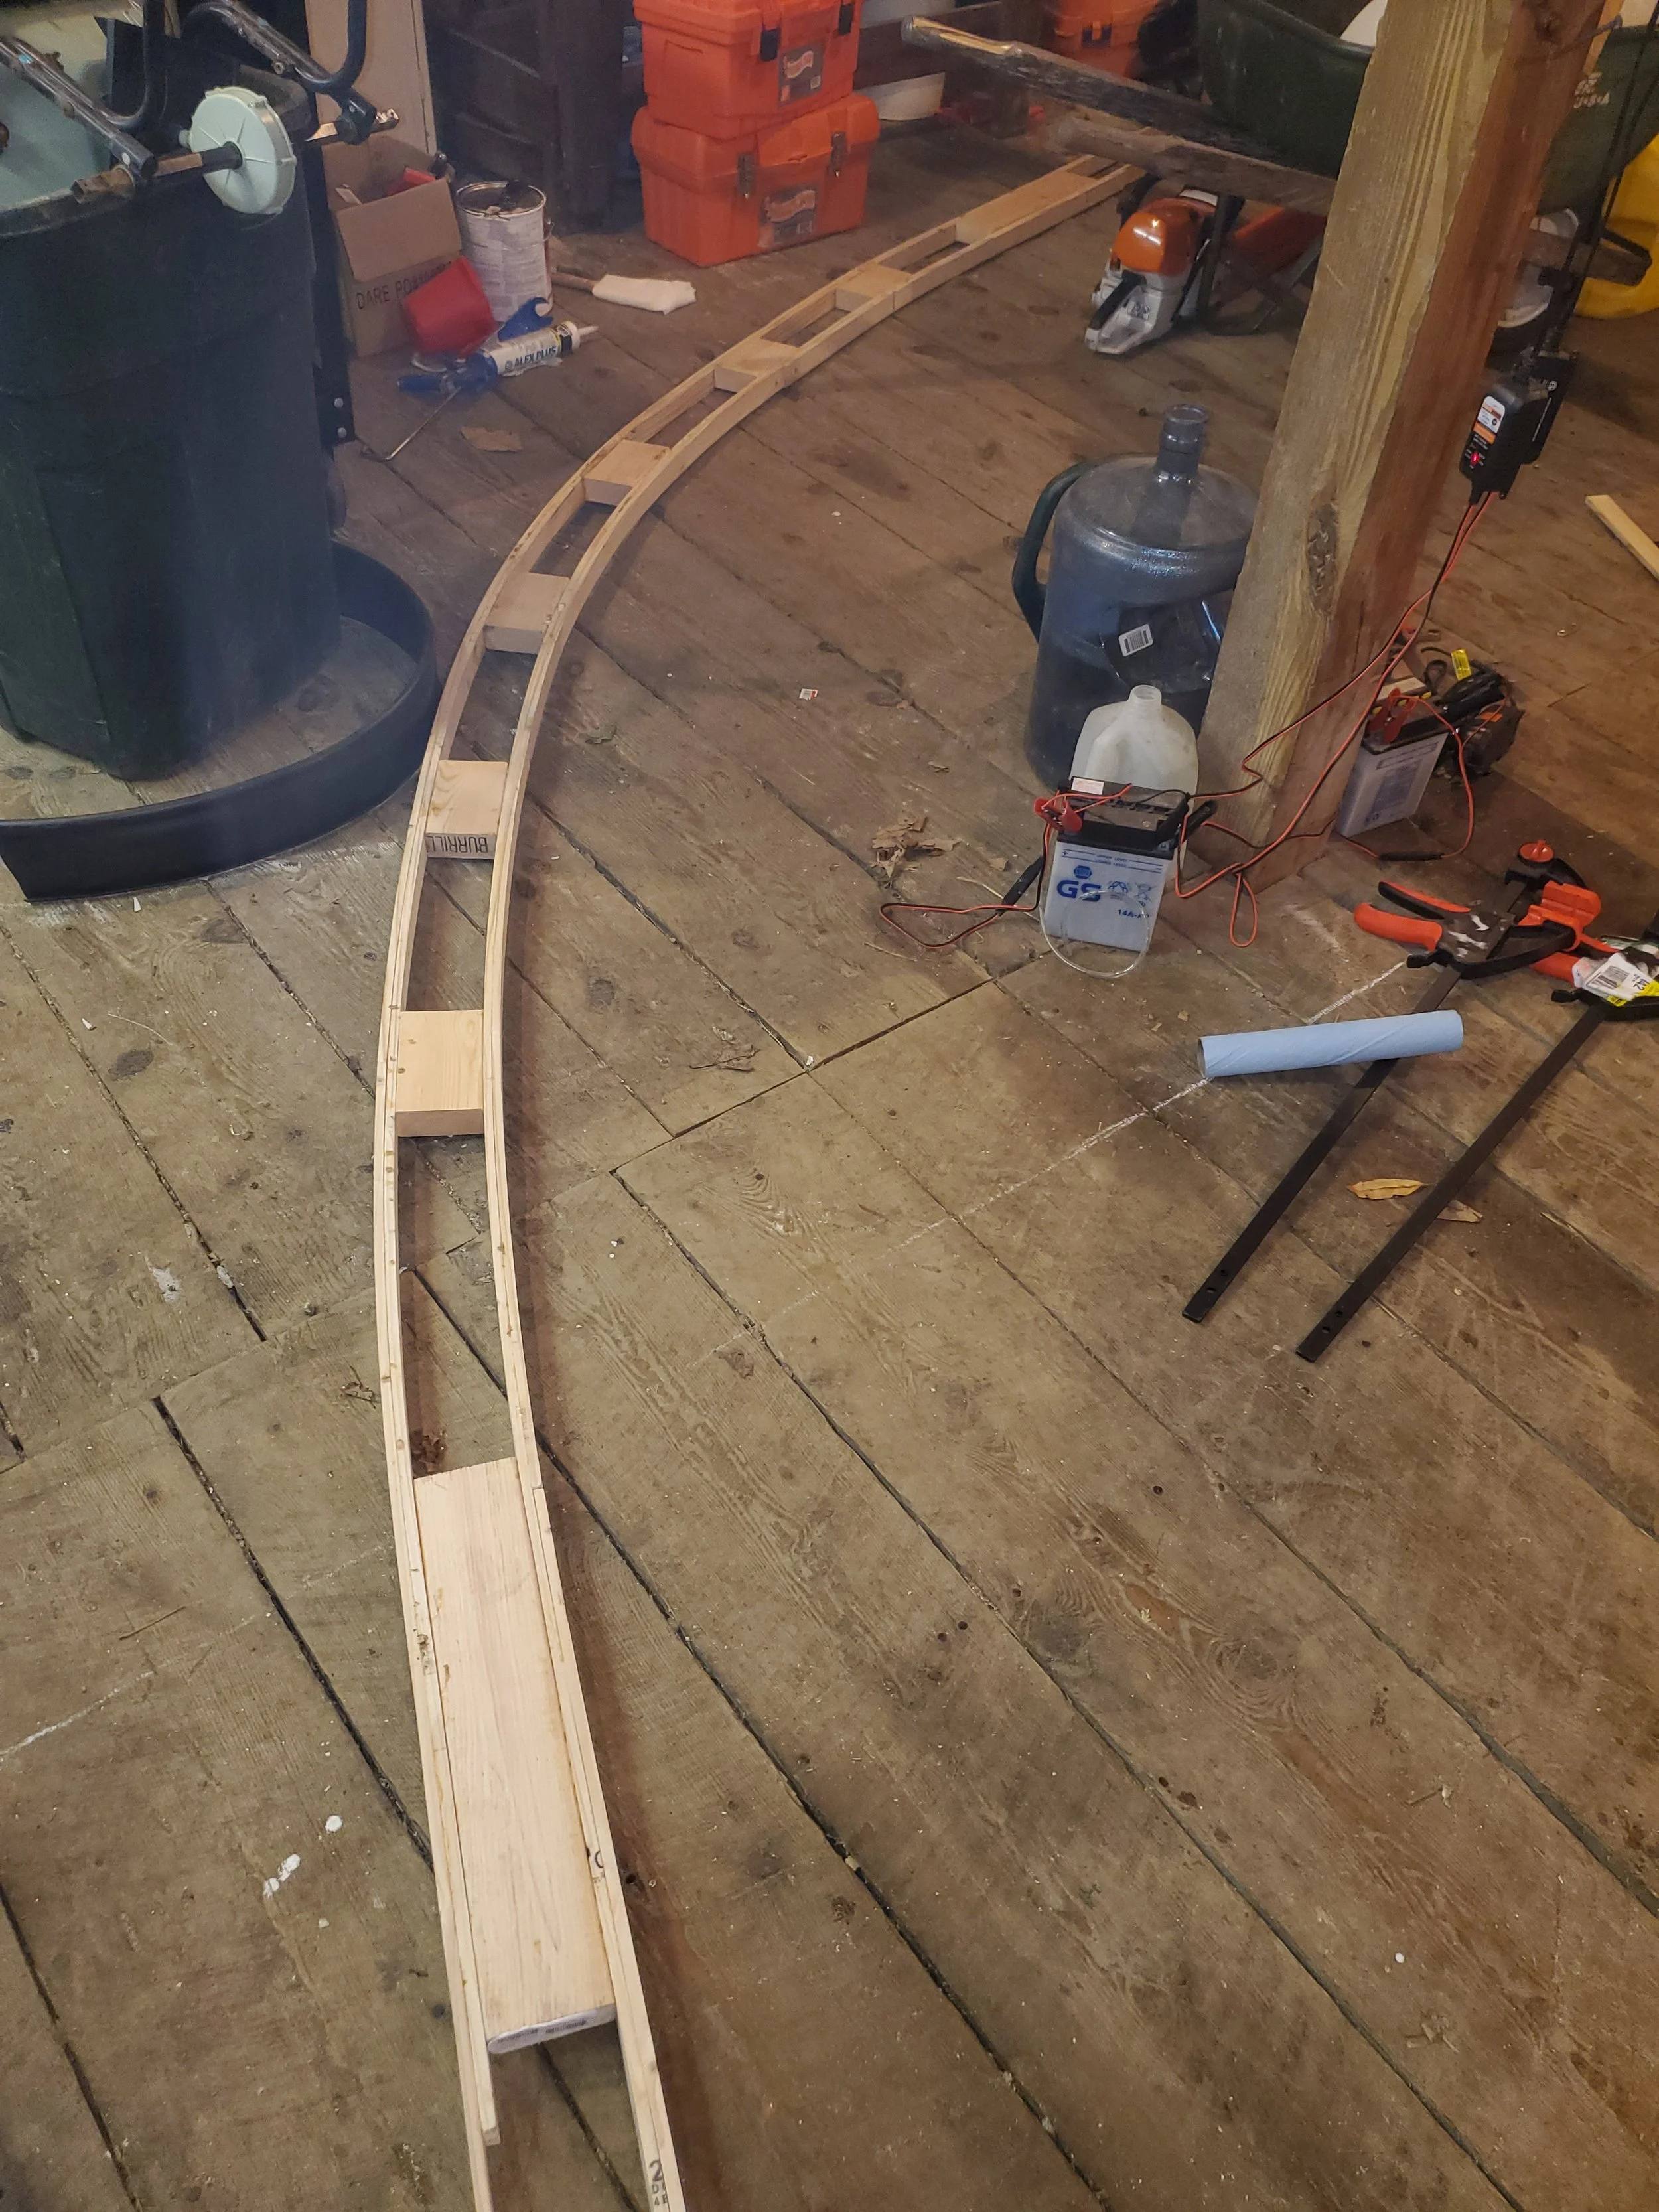
Rib removed from the form after screwing and glue (partially) set
Curing the glue in the main house (note plastic wrap covering the rib to minimize glue mess)
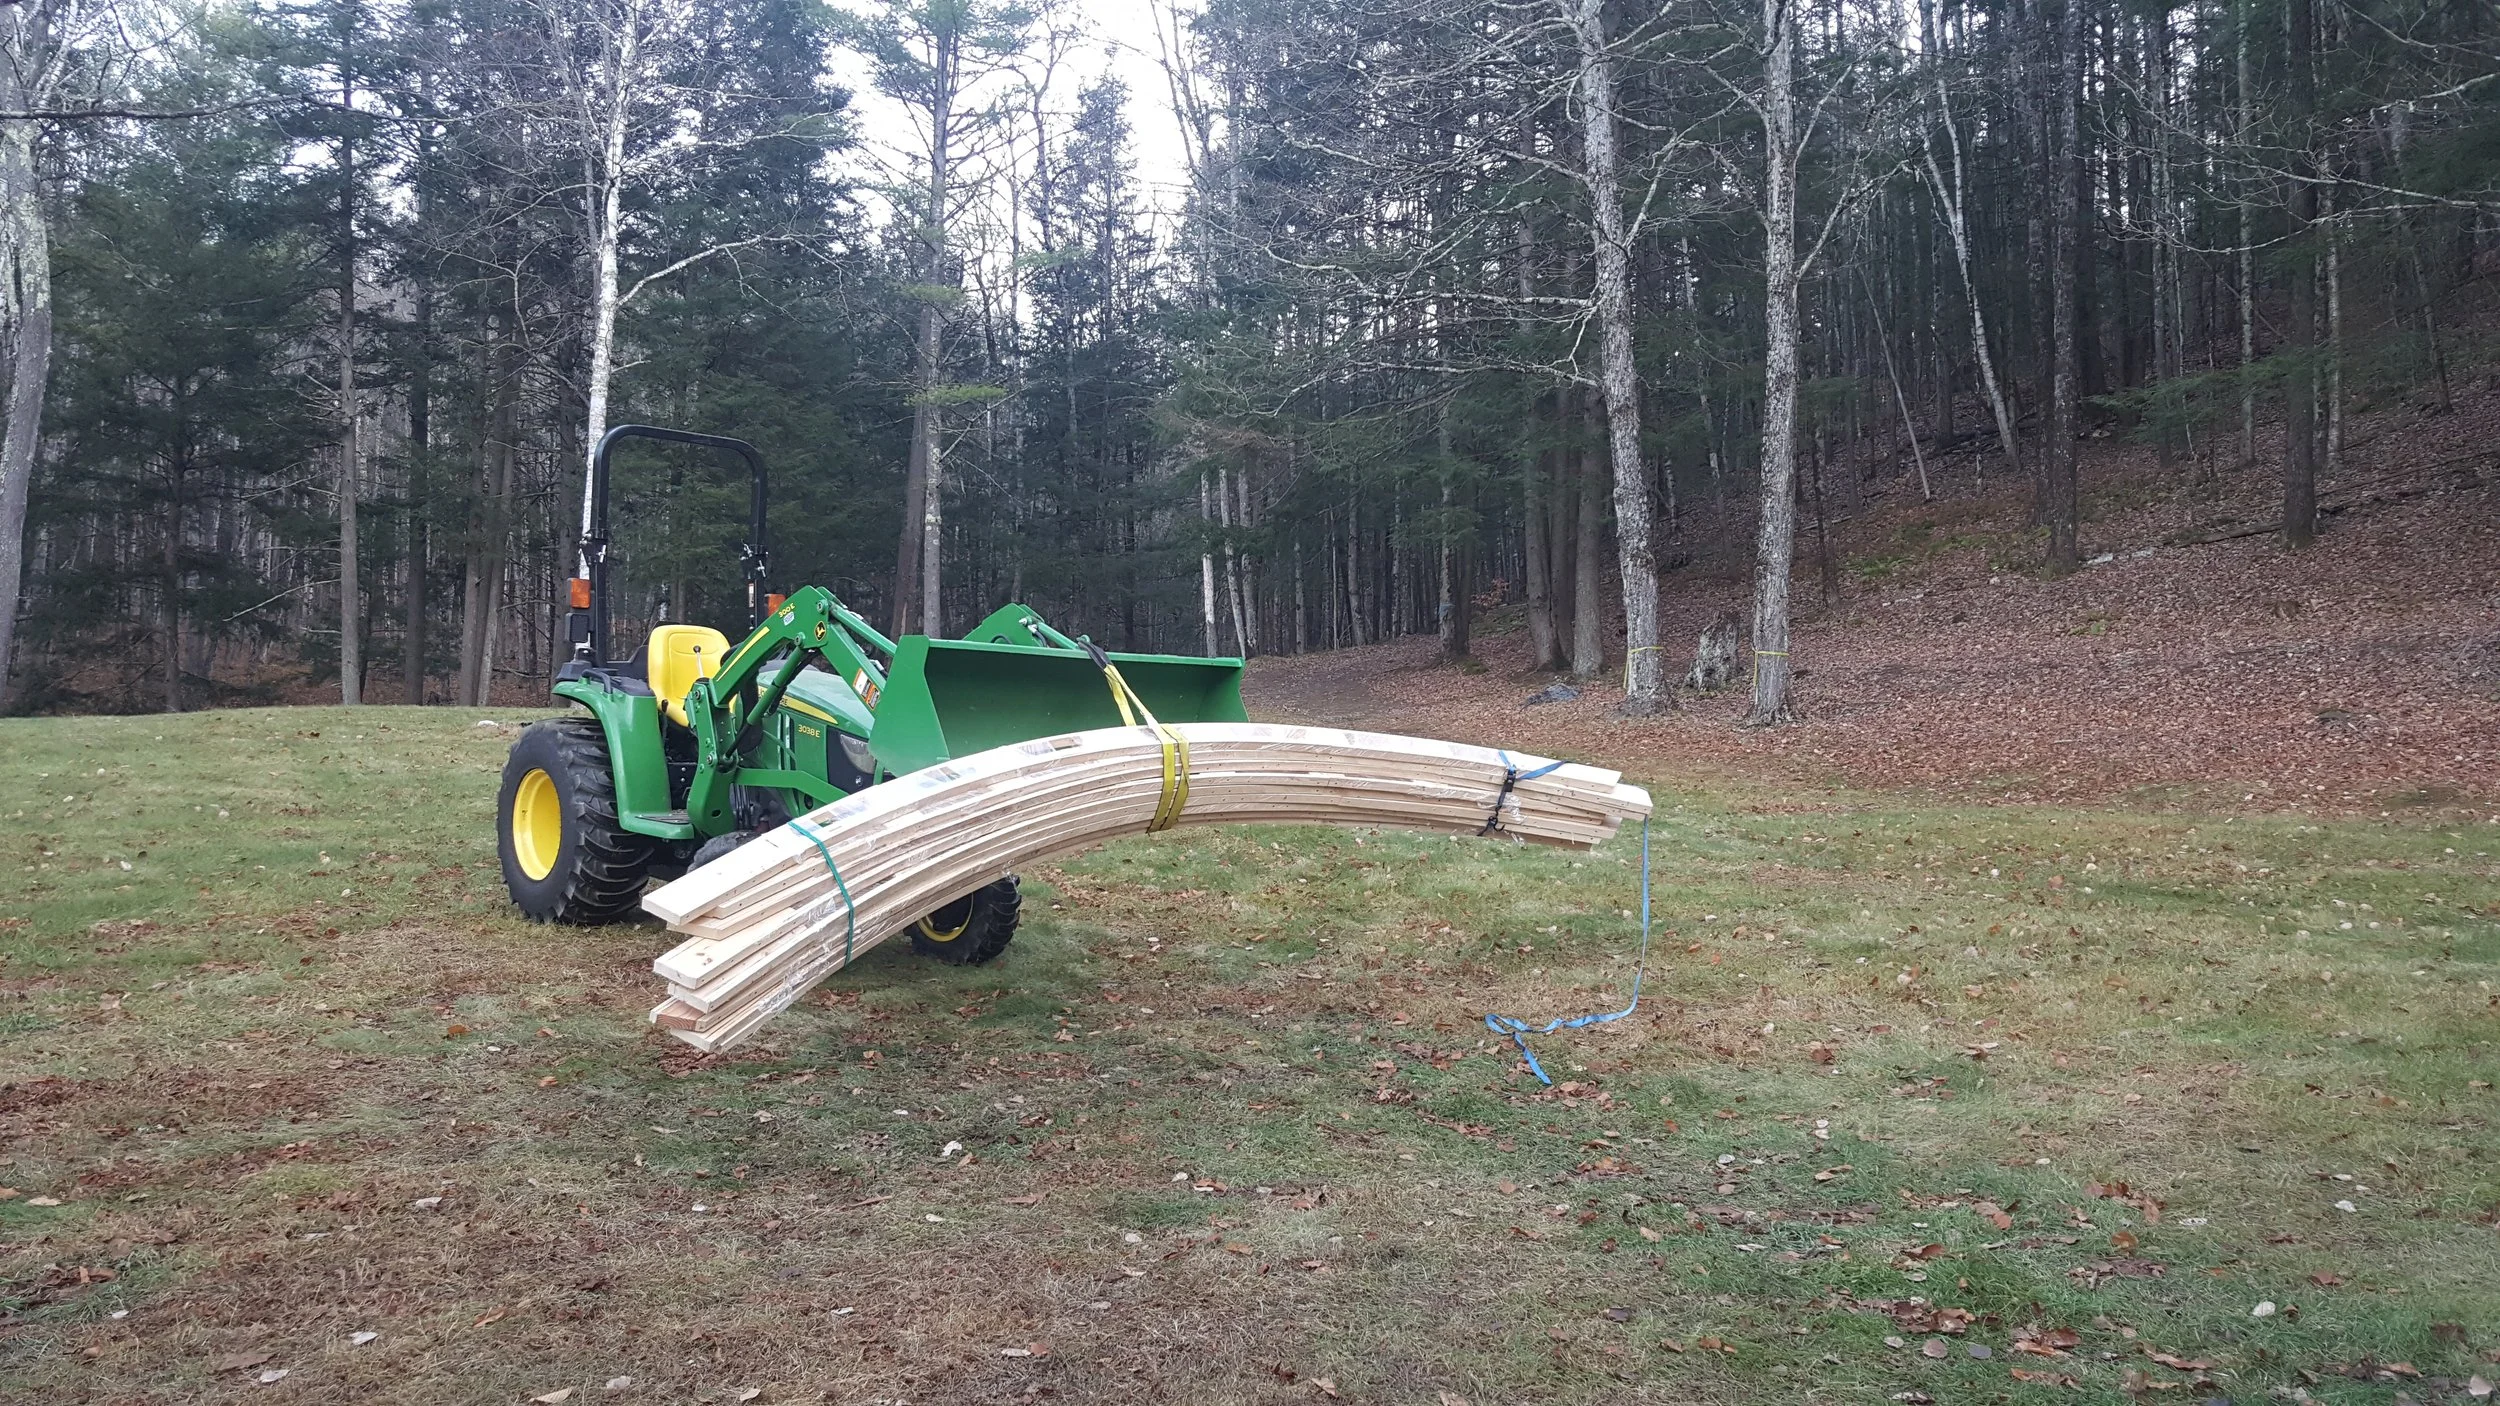
Transporting the finished ribs to the greenhouse site
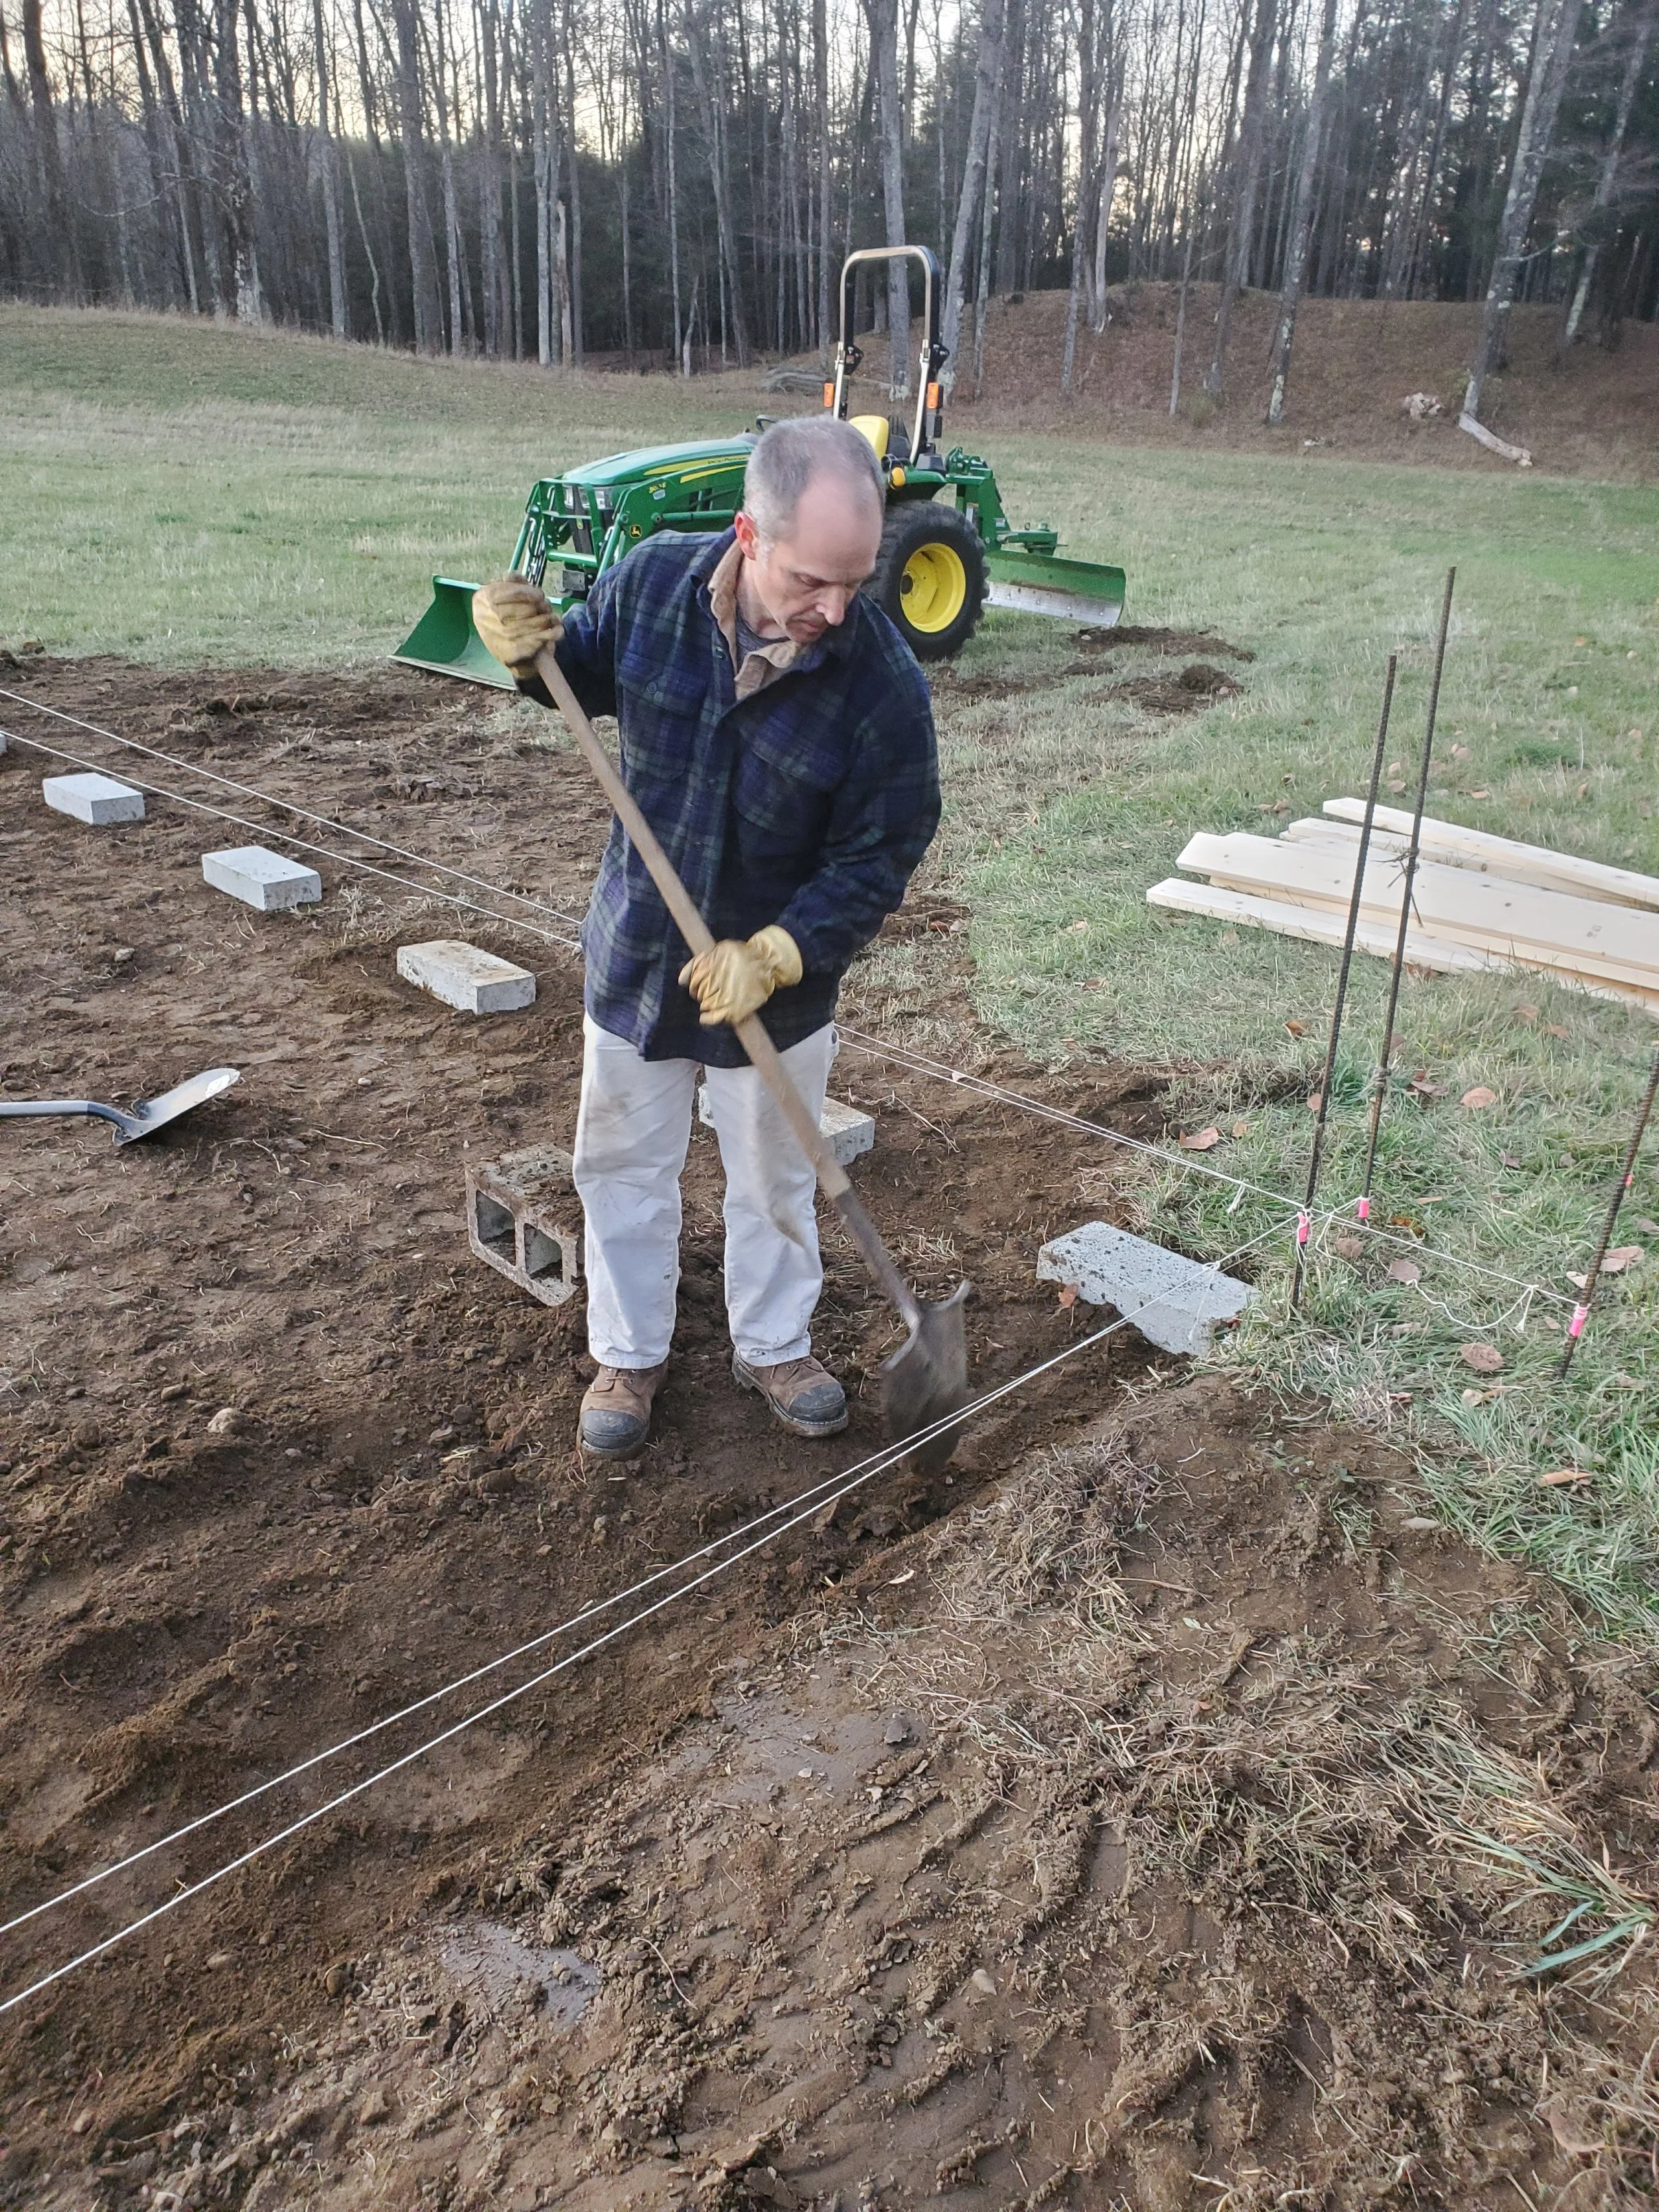
Leveling the ground and setting the foundation cinder blocks

Digging out and leveling the front entrance section
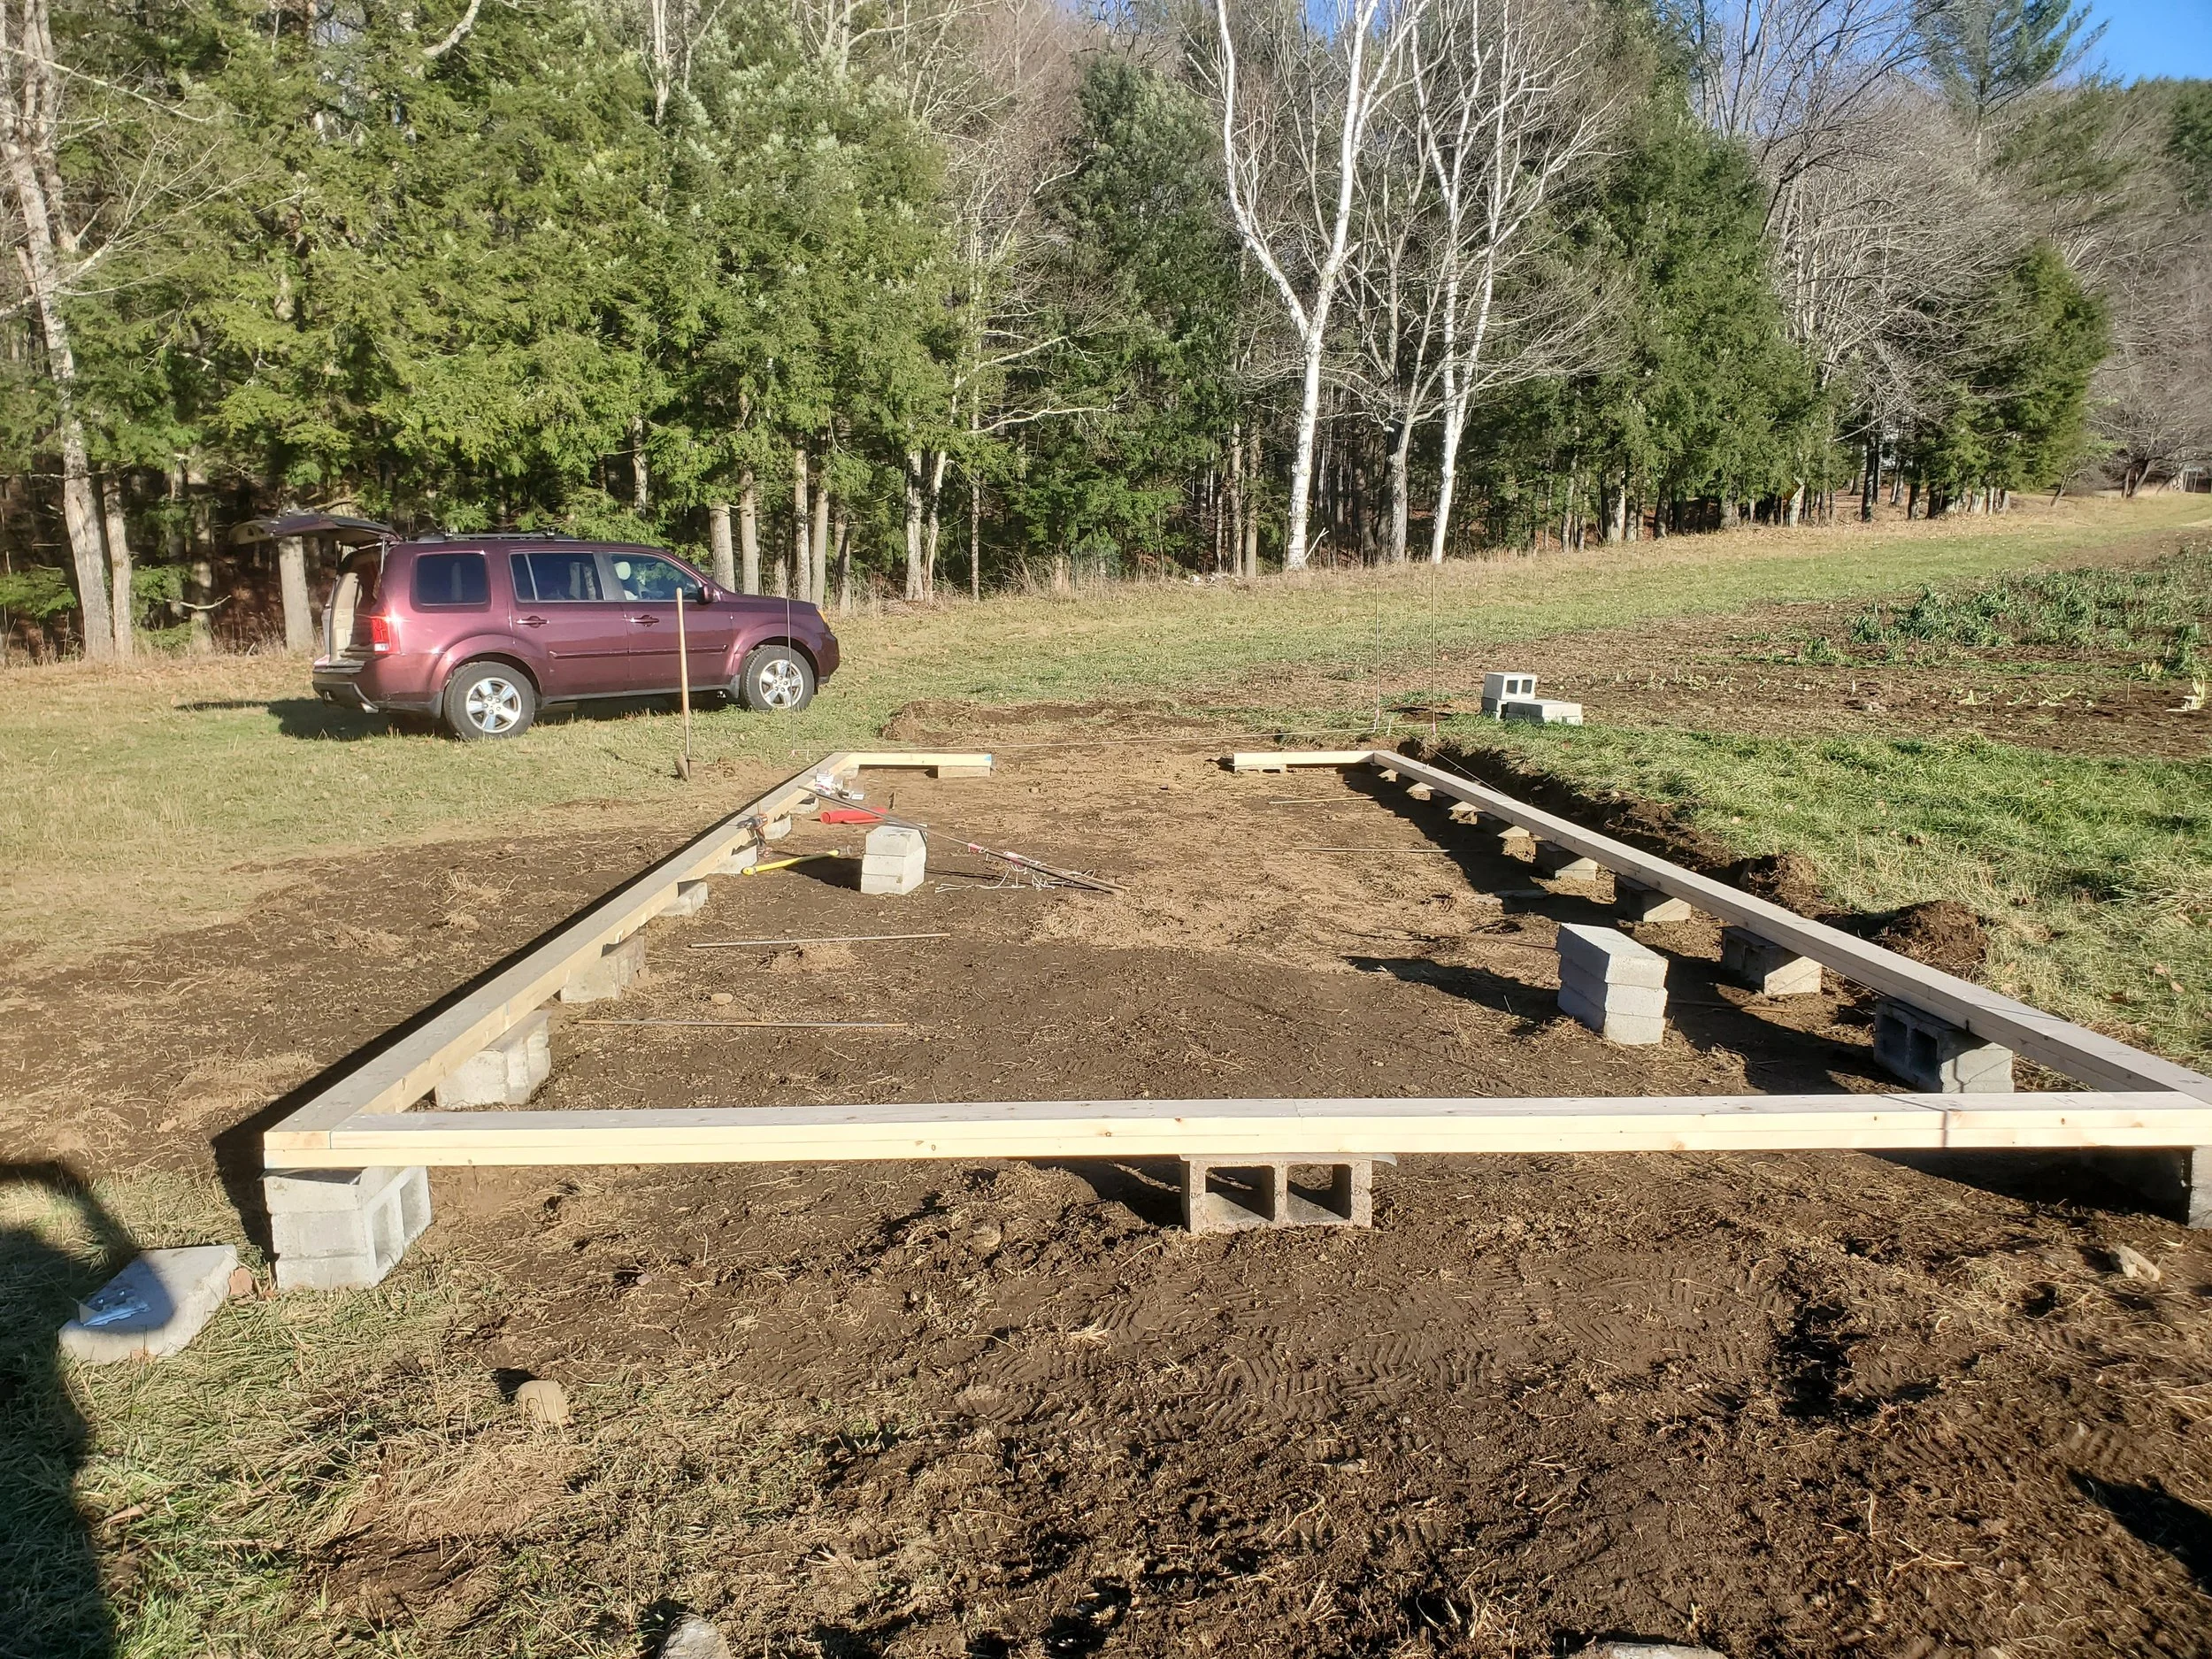
Foundation with footing in place
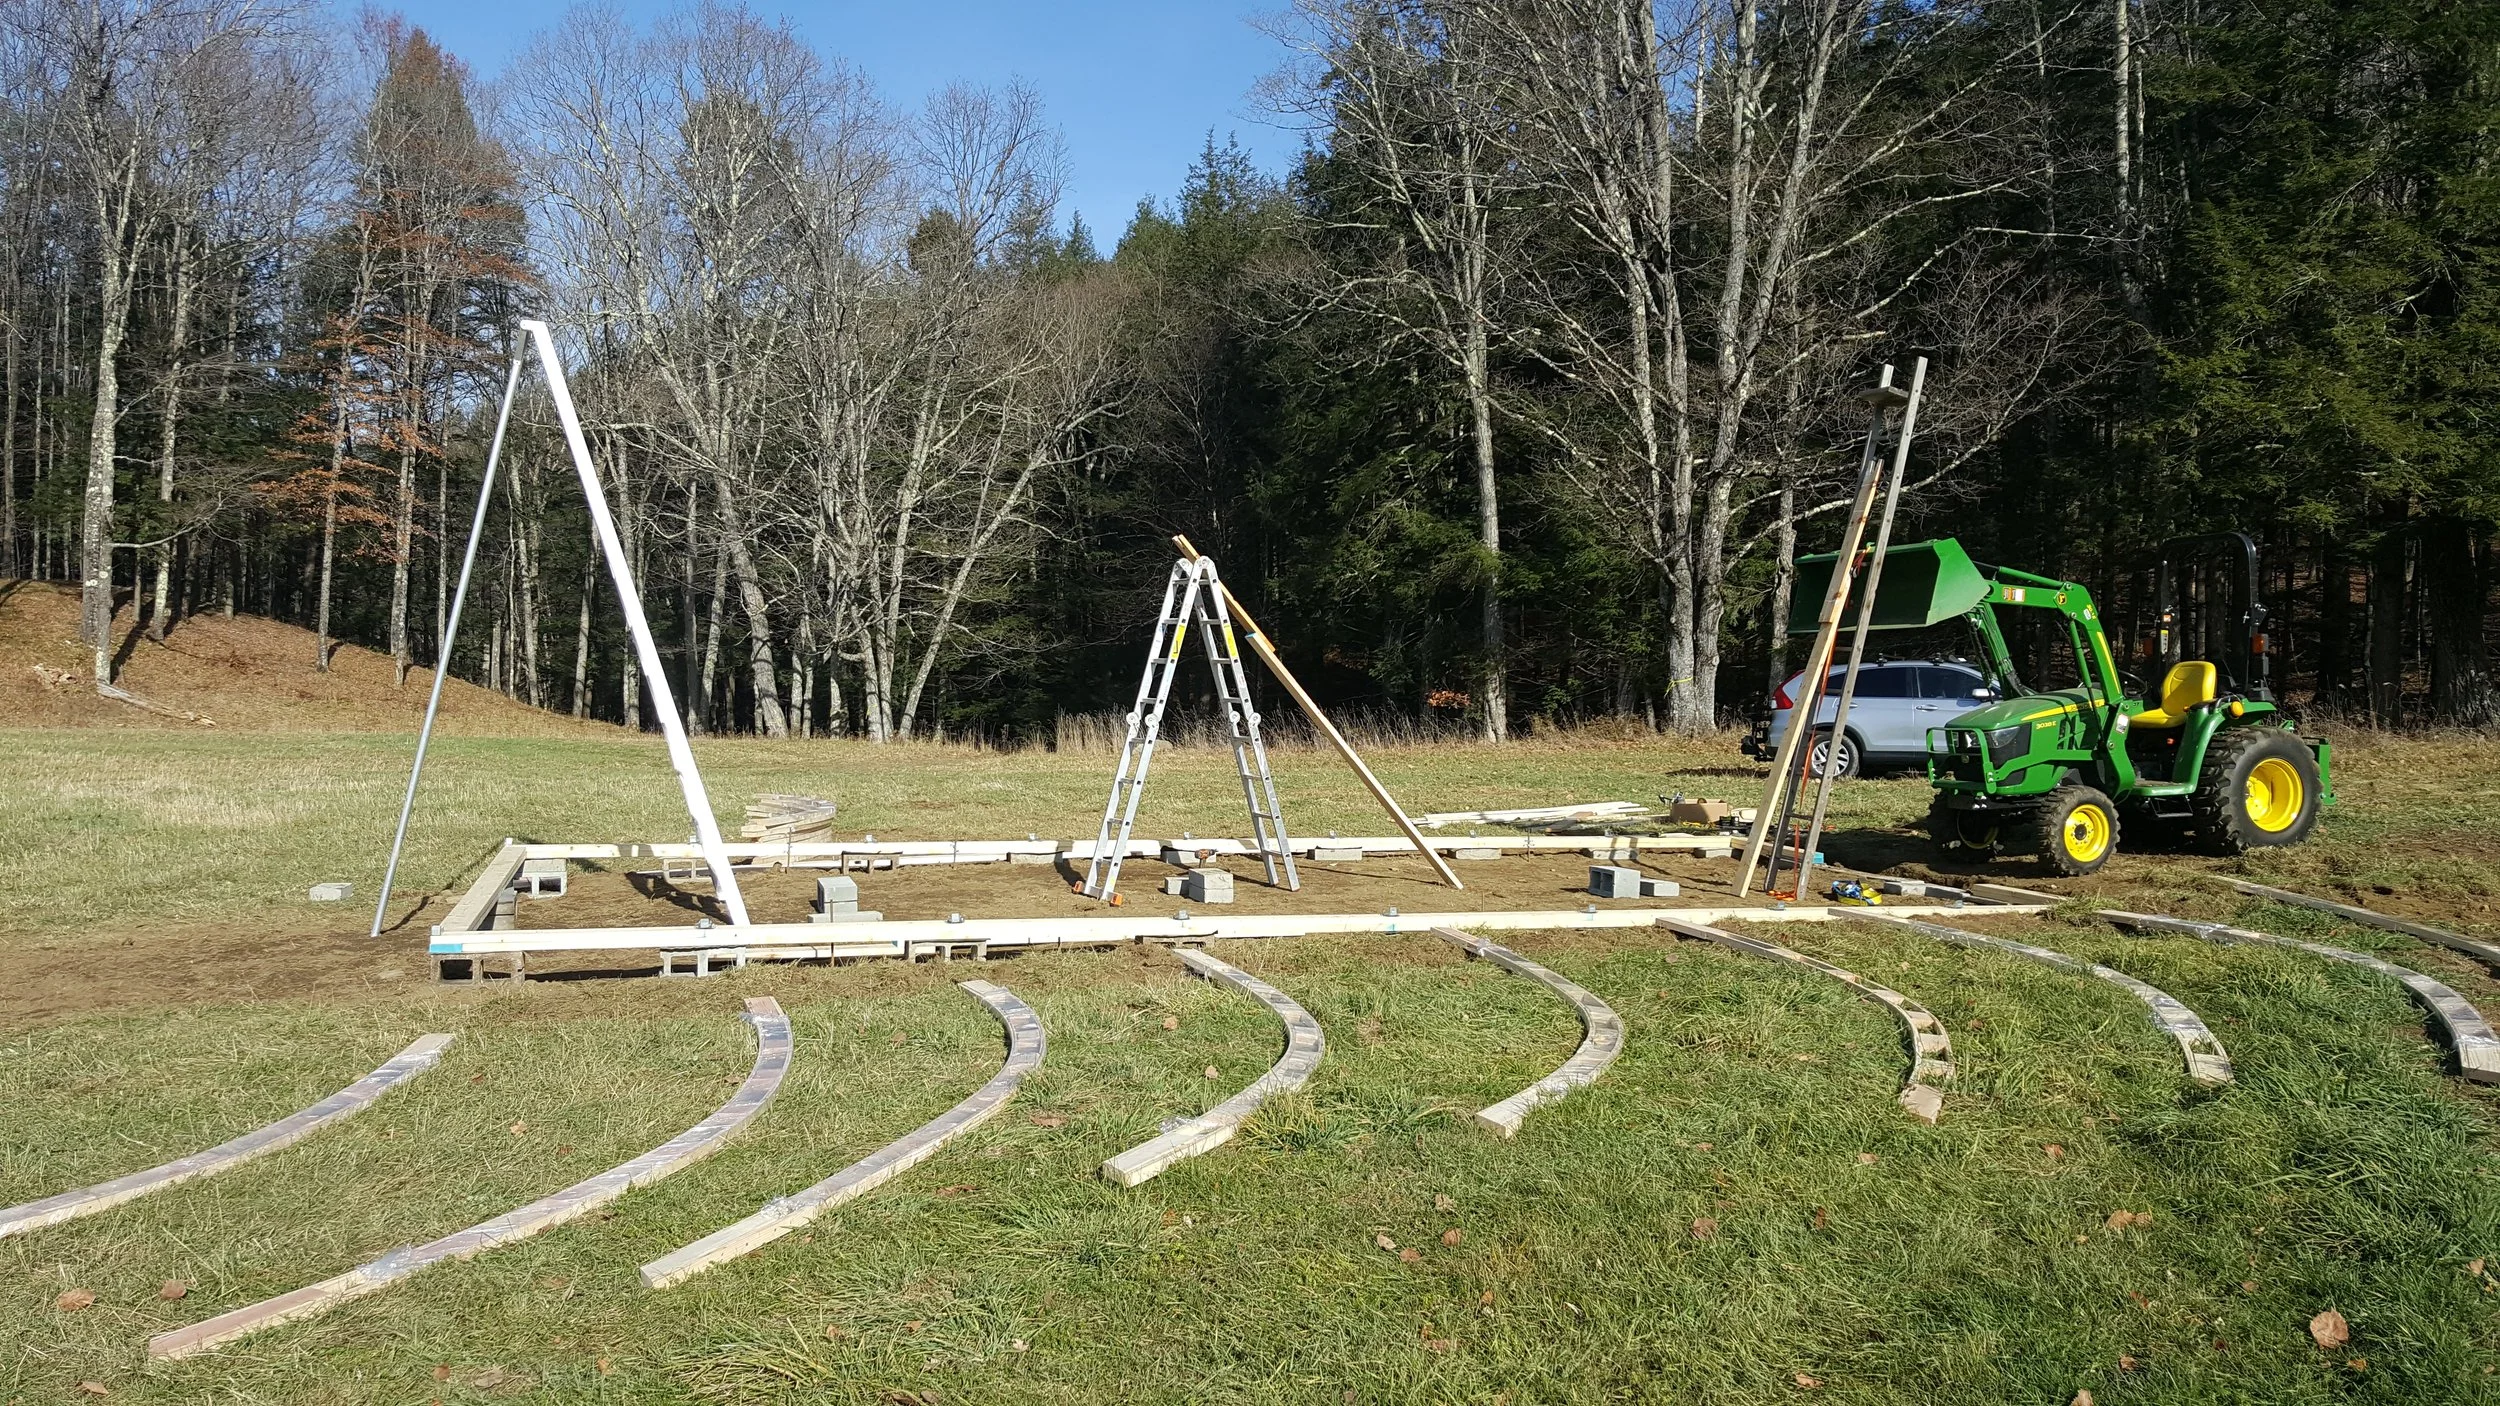
Foundation finished and laying out the ribs and top-beam sections
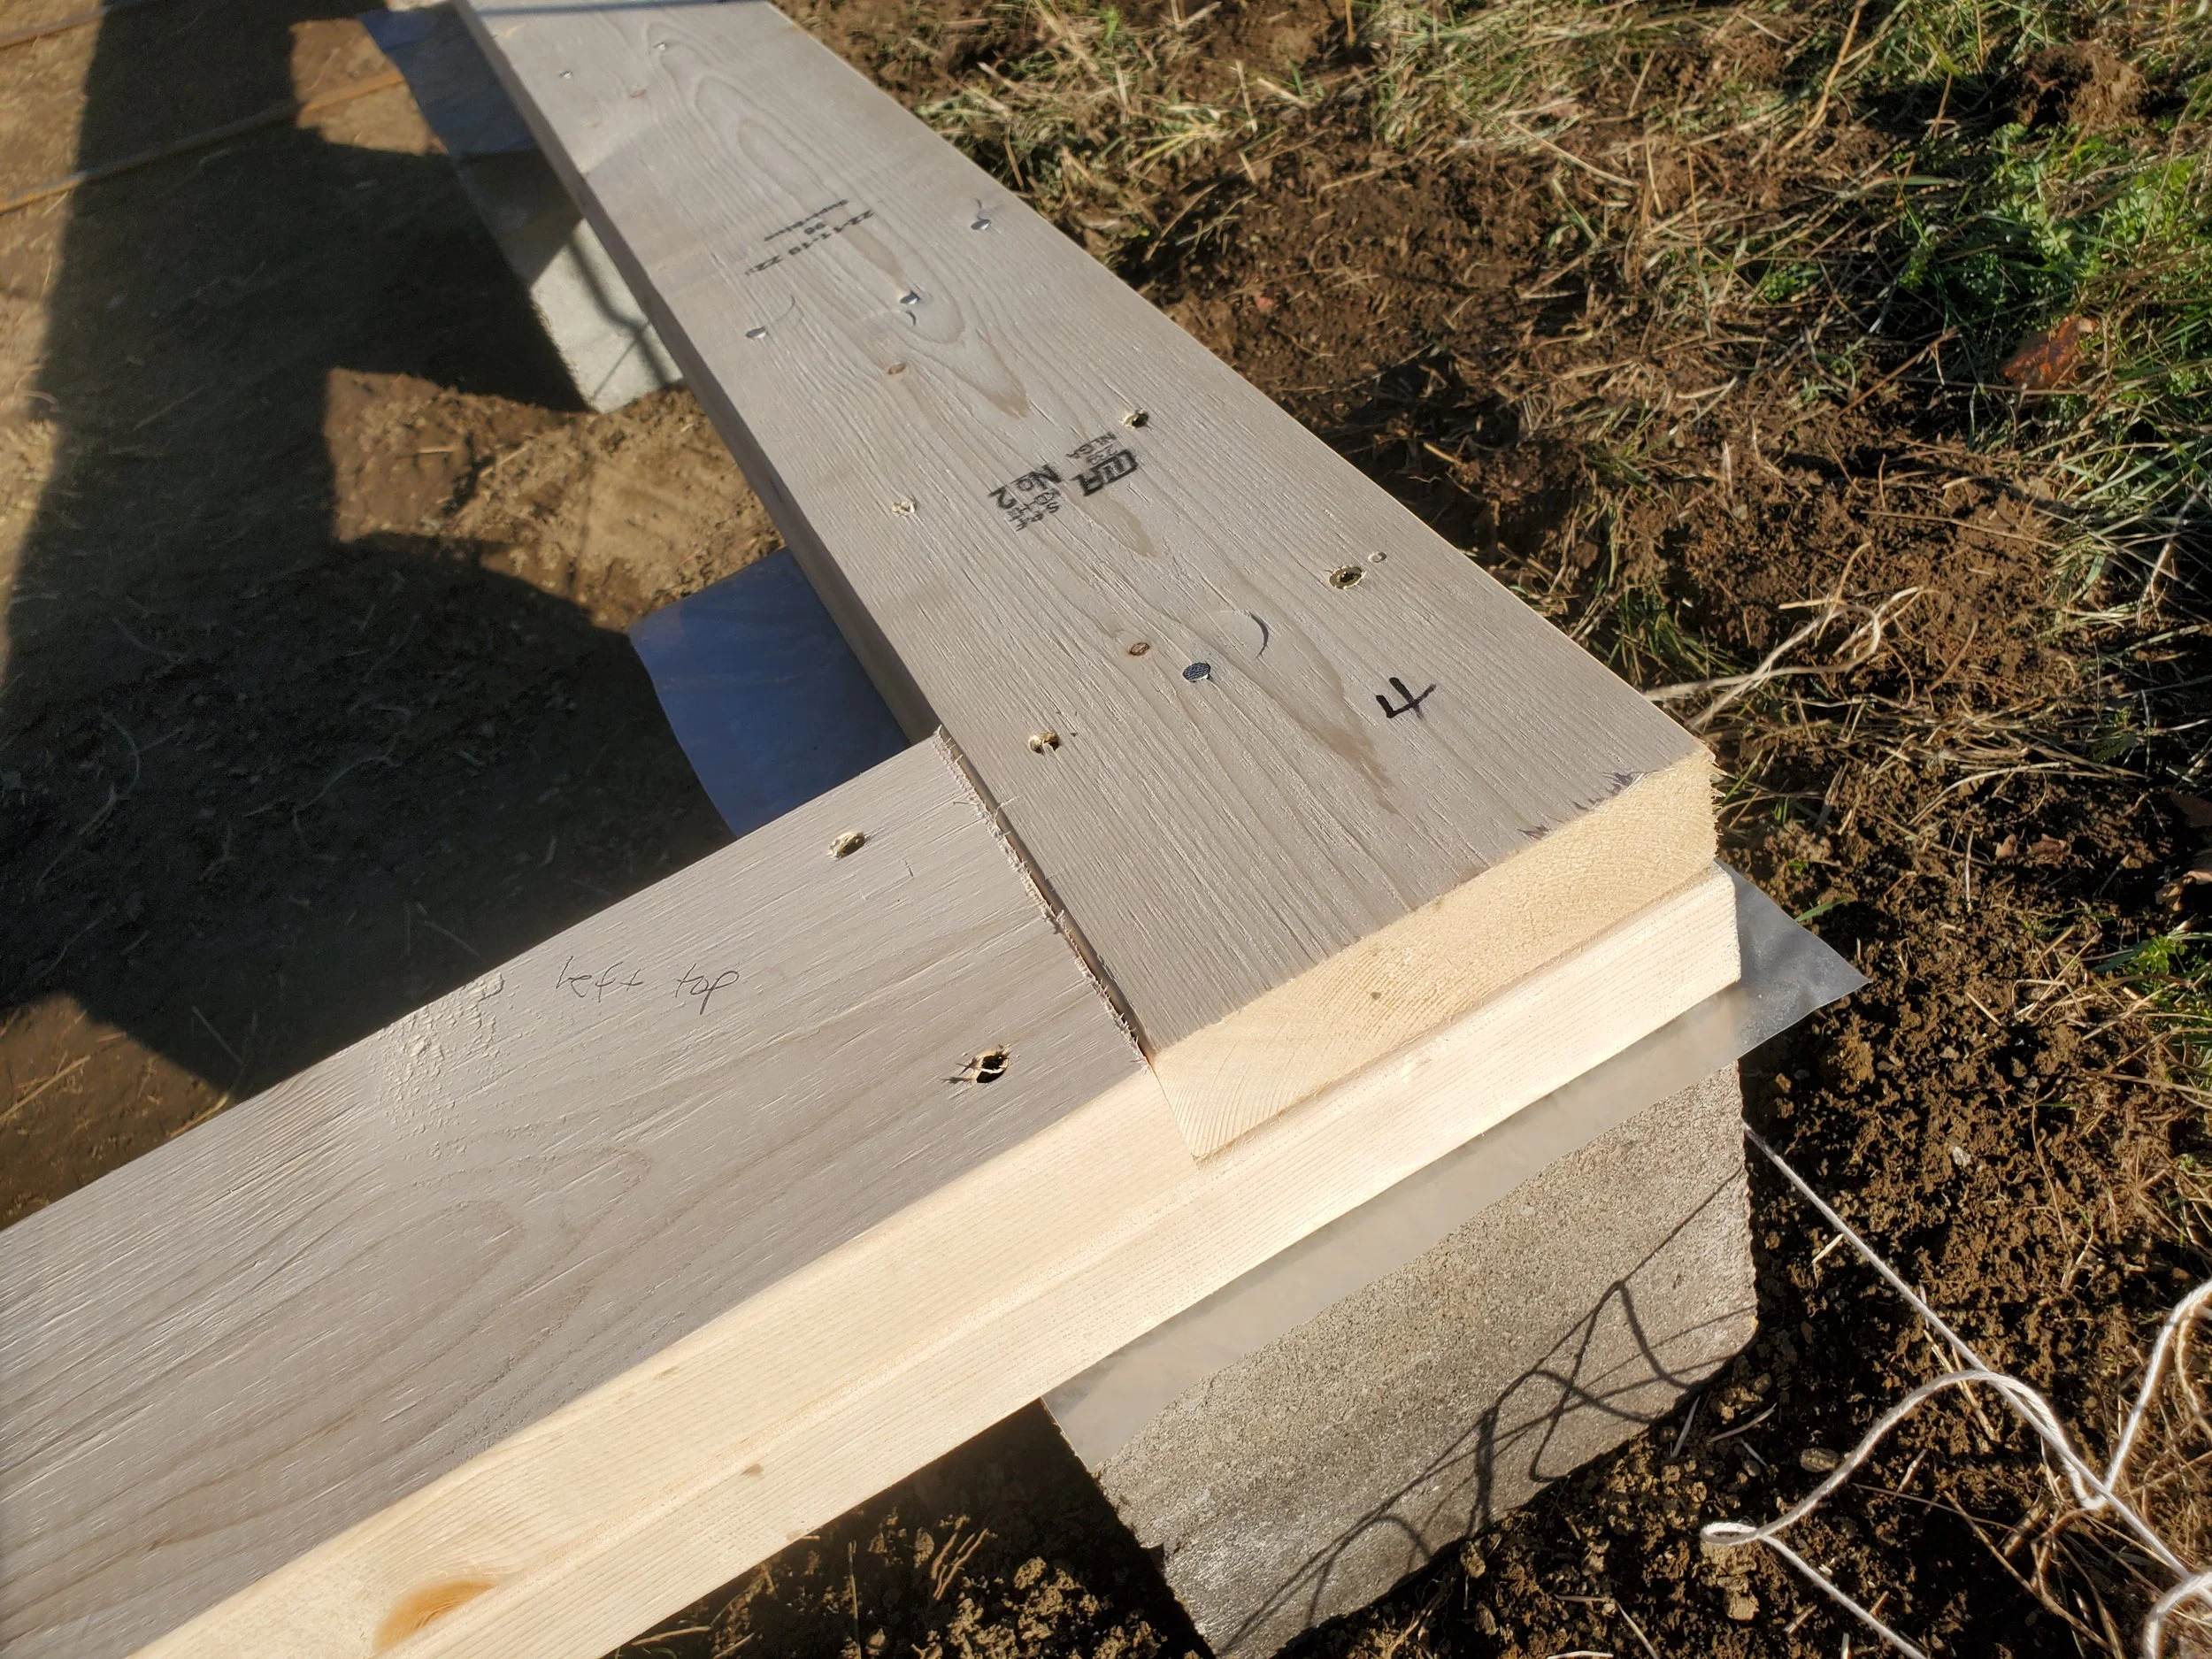
Close up view of the foundation corner (note interleaved footers)
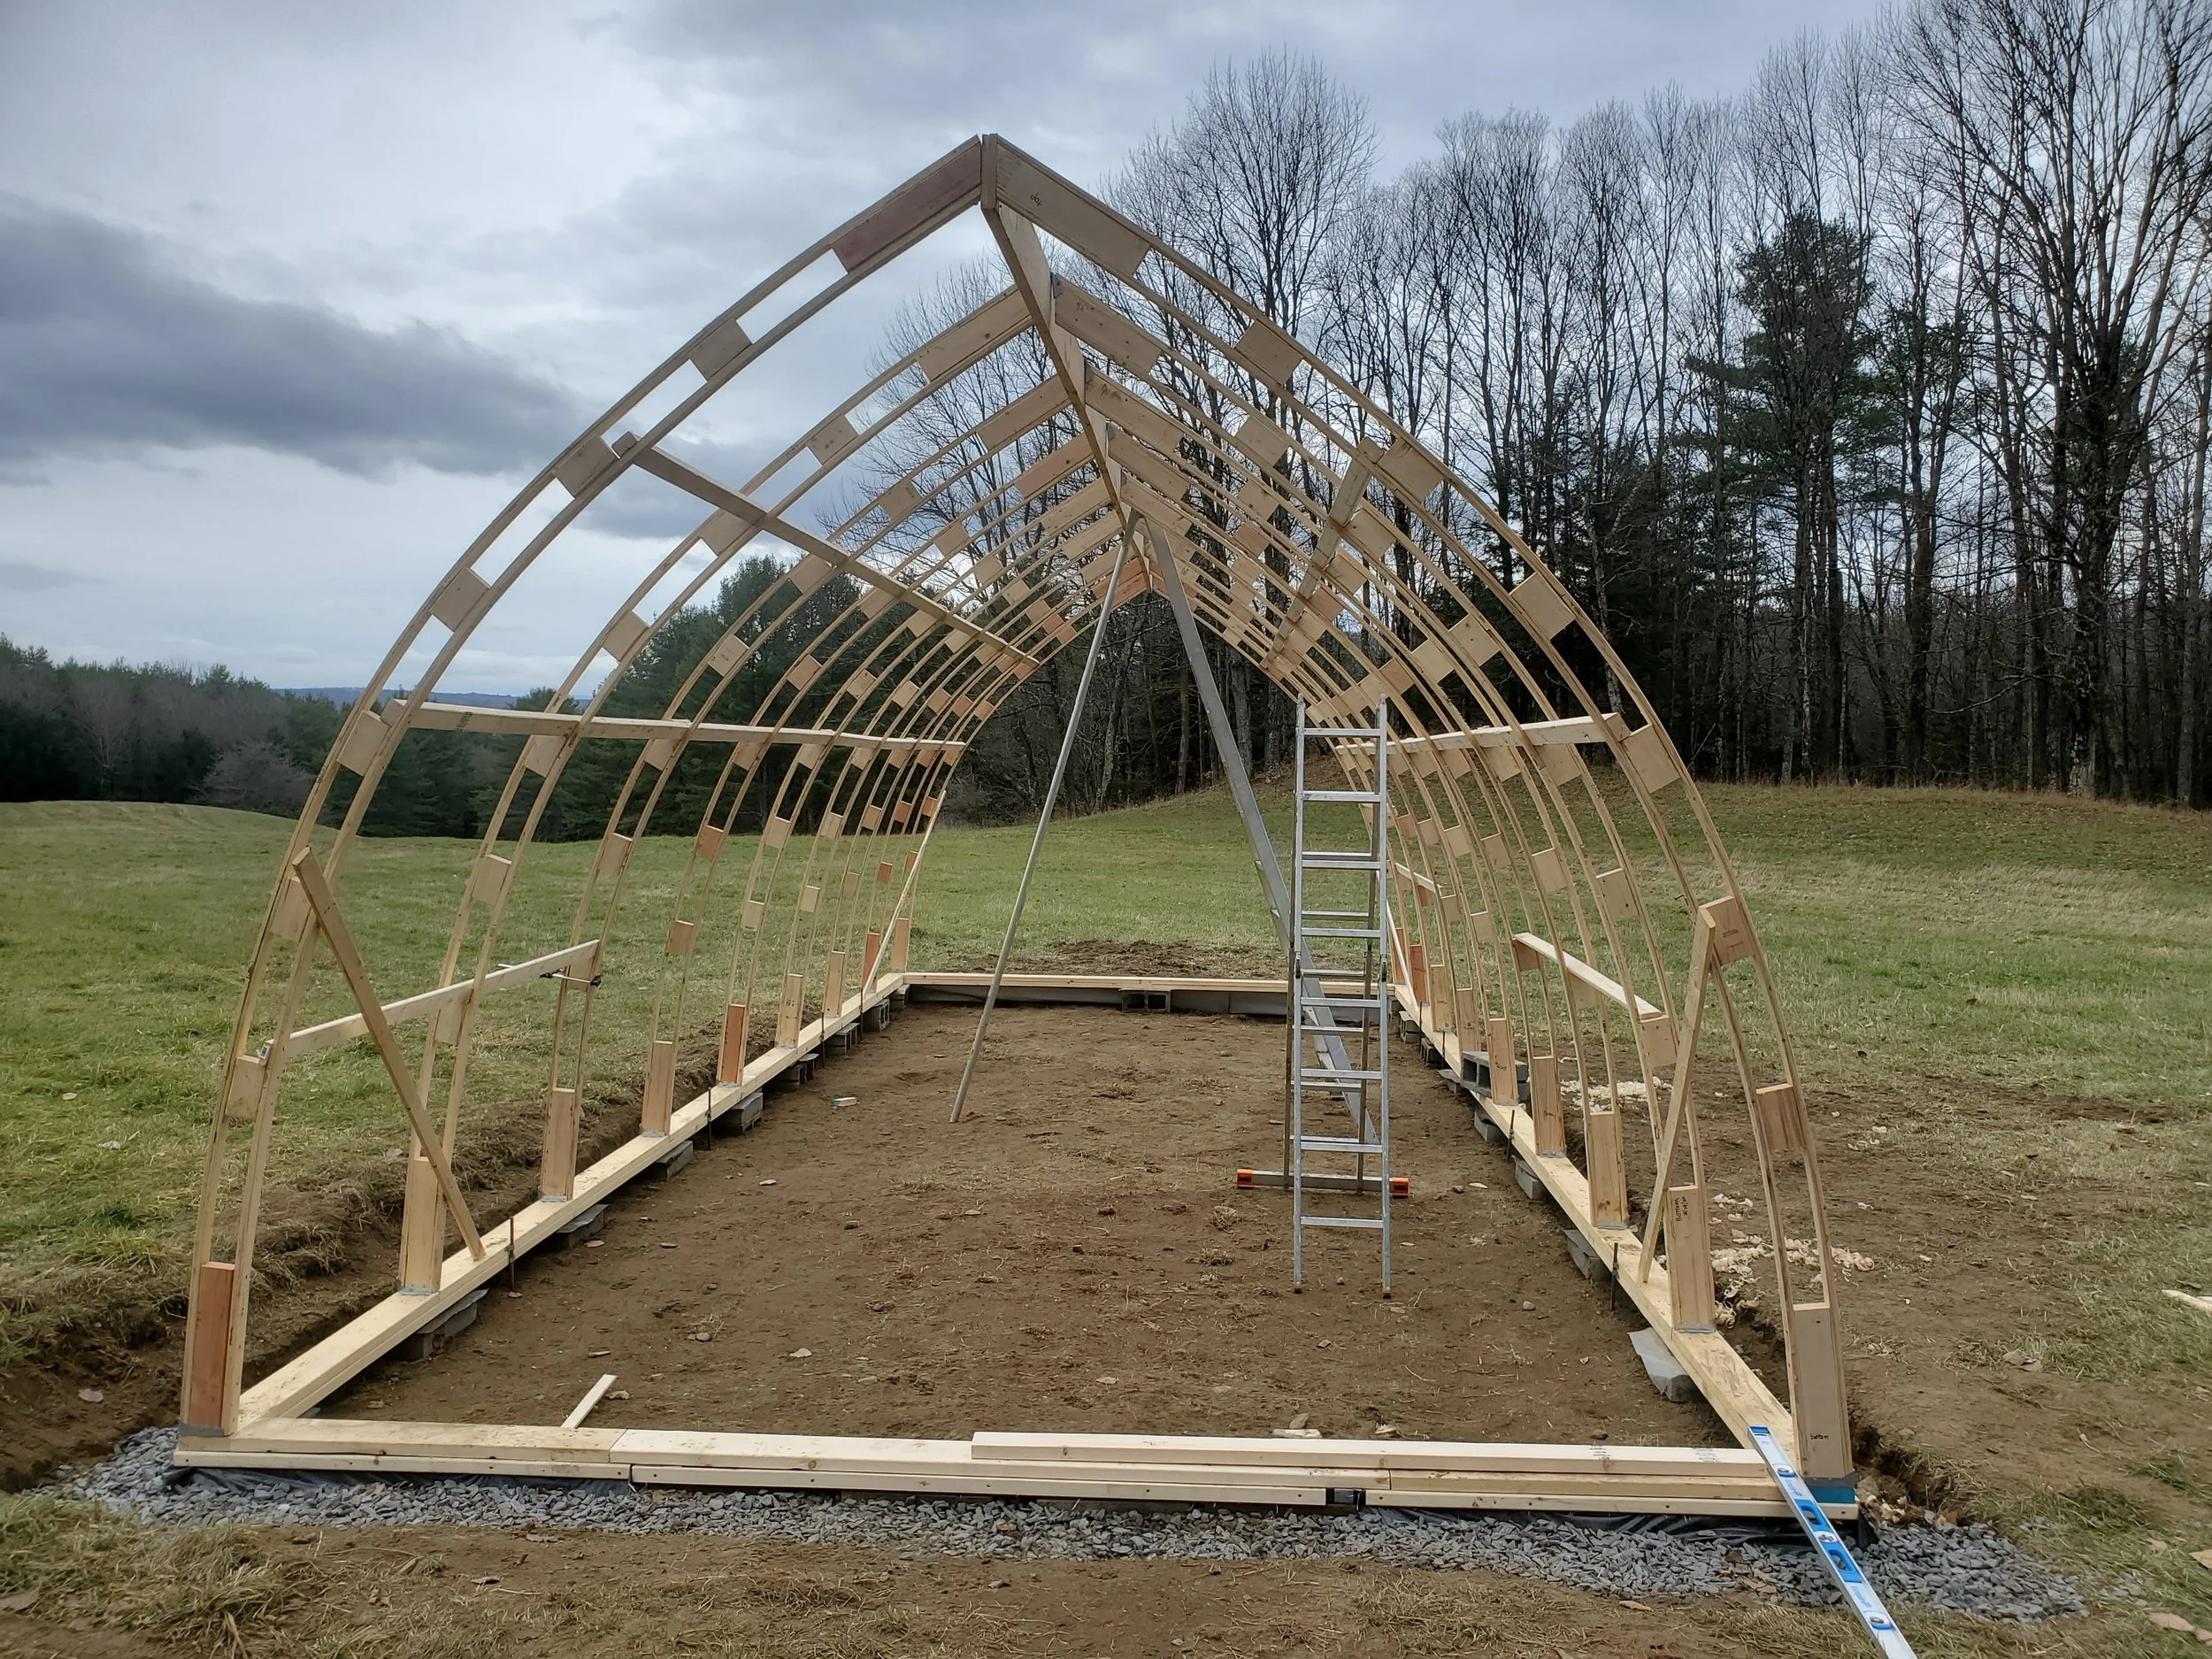
Initial skeleton is free standing
Side view of the skeleton
Plywood reinforcement of the eave joints at each rib
Rear view of the finished skeleton
Front door and eave vent is framed in and "wiggle wire" track is installed around all edges
Wiggle wire tracks installed on the skeleton

Everything is framed in, now on to the plastic!
Another rear view of the greenhouse with stringers installed
Plastic sheeting on end panels to minimize cross breezes of side curtains
Plastic installed on rear of greenhouse (note that eave vent hole has not been cut out)
Plastic sheeting installed throughout
Inside view of the entrance end framing for door and eave vent
Detailed view of rib construction, with weathering after 4 years of use
Automation is life.
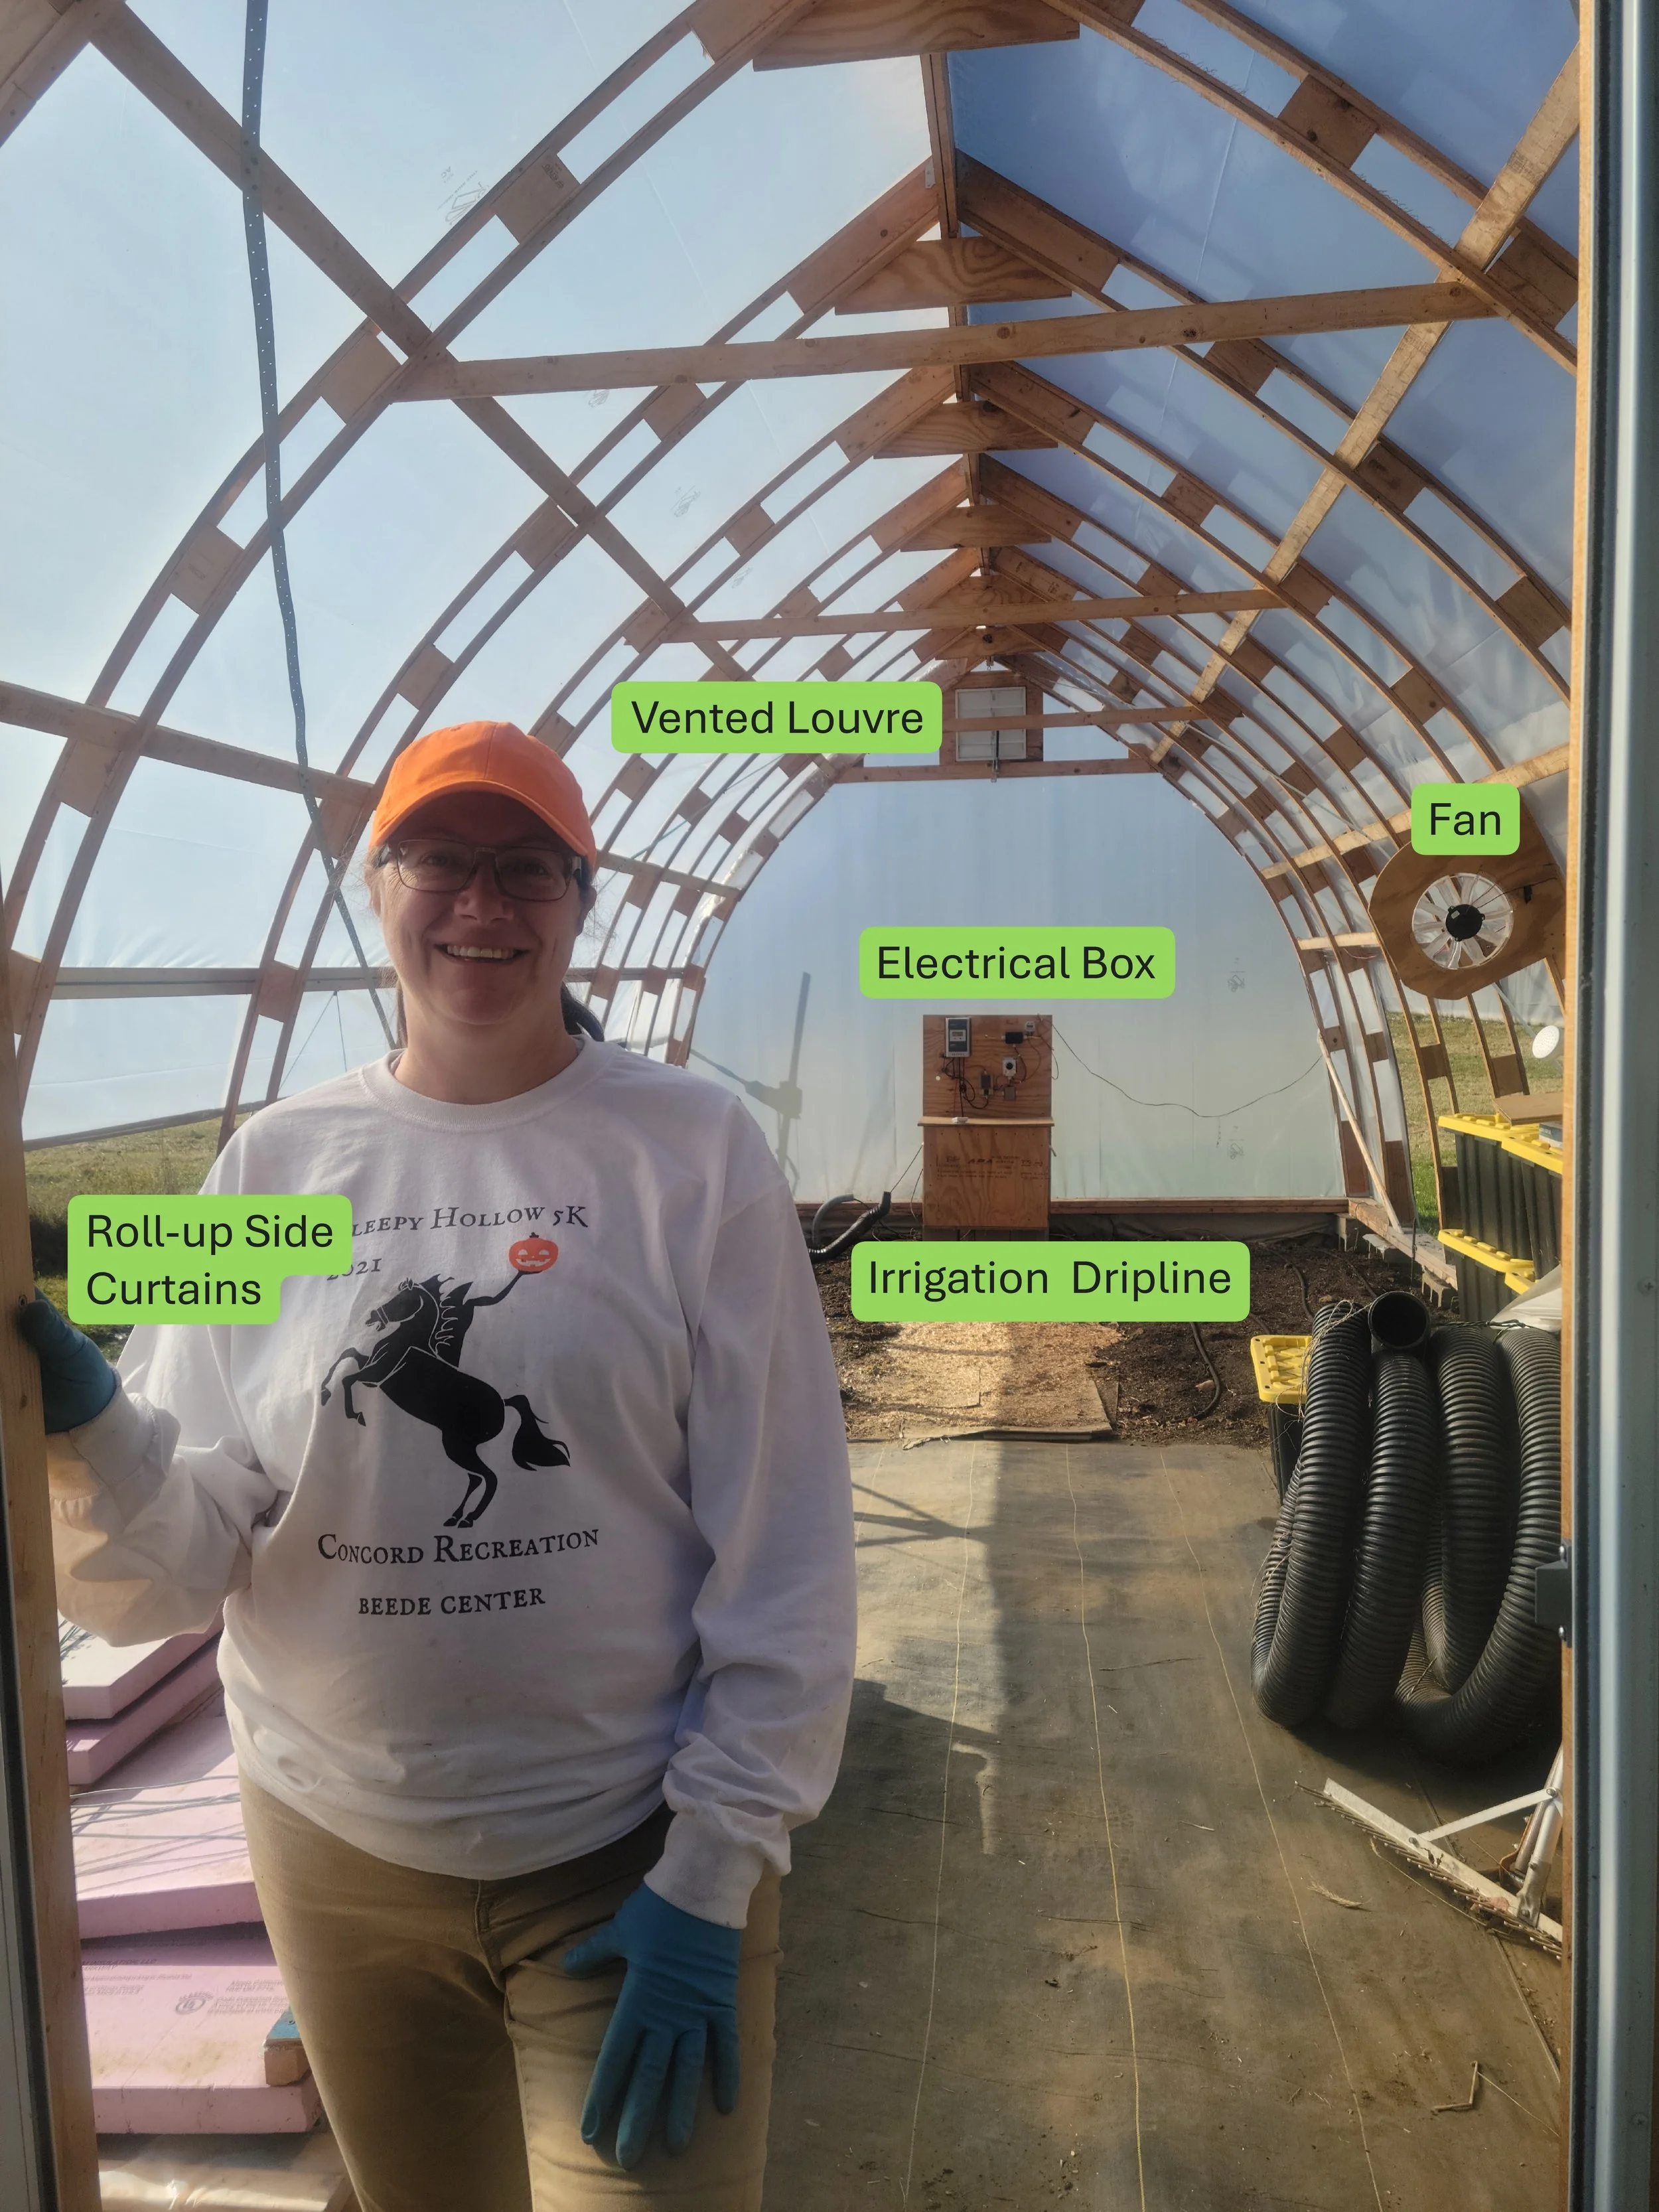
Our greenhouse works great but, like all unheated high tunnels, it requires a lot of care and attention to keep the temperature regulated properly through the day. This is particularly true on sunny days in the early and late seasons, where the outside temperatures are moderate, but ambient temperatures within the greenhouse can soar quickly. Venting the house is relatively straightforward, since the sides of the can be rolled up, thereby allowing a full-length cross breeze. Once cooled, the sides can be rolled down again to trap the heat and warm the interior. The physics are great, but the challenge is that manual control of the house temperature requires a lot of time and attention; two things that are in short supply when the asparagus field needs weeding and it is time to get the seedlings started! Further, in addition to temperature regulation, we noted two other challenges with growing crops in the off-grid greenhouse: adequate air movement to stimulate strong plant growth and irrigation to keep the soil moist - it is all covered with plastic, of course!
After a season of nervously watching the greenhouse temperatures on an hourly basis and ferrying water in jugs for handwatering, we realized that we needed automation to solve these issues. We wanted a fully functional, walk-away greenhouse that would regulate temperature through automated side curtain roll-up systems (and eave vents), and have a solar-system to power a fan for air circulation and a timer-based, drip irrigation system fed by a continuous supply of water from a nearby stream. After many hours of internet scrolling, we could not find an affordable off-the-shelf system that would work for us. So, we built the system you see in the picture below. Now, in our third season, we can attest that this system is very reliable and affordable - it has literally transformed our view of the greenhouse! It is now about as close as you can find to “plant seedlings, walk away, pick produce”.
Step 1. Solar Panels and Fan
IMPORTANT NOTE ABOUT SOLAR PANELS!!! The size and number of solar panels and batteries you need is determined by how much power you need to run the greenhouse motors, the fan and the irrigation pump, etc. and how many hours they run per day. Your needs may be different from ours. We found a really helpful guide for sizing the solar panels, charge controller and number of batteries at a website called Solar Town. I recommend you find an engineer friend (or pay somebody) who can check your numbers. In particular, make sure your charge controller can handle the current load from your batteries - if it’s too small you can end up setting your greenhouse on fire.
For our system, we found that 3 x 100W solar panels (300W total) and three batteries (3 x 100Ah deep cycle marine batteries) worked well. We use 12 or 24 volts for everything.
NOTE ABOUT FANS!! The strength of a fan is measured in CFM (cubic feet per minute). Conventional wisdom is that you need seven times the square footage of your greenhouse to ventilate your greenhouse, which for us would be 3,136 CFM. However, a fan that big uses too much electricity to be run off a reasonably priced solar system. So instead, we rely on the roll-up sides for ventilation along with eave vents which are opened by automatic vent openers. The fan we actually have is only 920 CFM, and its function is to keep the air moving around at night and when the sides are closed on cold days.
Solar system equipment:
Solar panels and charge controller: ACOPOWER 300 Watt Solar Panel Kit, 3 Pcs 100W Polycrystalline Off-Grid System for RV Home Marine with 30A MPPT Charger, at Amazon for $464
Framework for mounting solar panels. We used 4 cedar posts, and metal rails.
Wire cable to link solar panels to the charge controller: from Home Depot. Make sure your cable is rated for underground installation and is thick enough to carry the power you are generating and minimize the run length of your cable to reduce current loss.
Underground Conduit: used to bury the wire safely from the solar panels to the greenhouse. Bought at Home Depot.
Batteries: Weize Deep Cycle AGM 12 Volt 100Ah Battery, Maintenance-Free. From Amazon, $541
Battery Cable: From Amazon, $17 each ($34 total) two Spartan Power Battery Cable 1 Foot or 12 Inch 2 Gauge AWG Wire Set 5/16" M8
Battery Cut-off switch; from Amazon, $21 Cllena 300A High Current Battery Disconnect Switch, 12V-48V Battery Cut Off Kill Switch Heavy-Duty Power On/Off
Fuse Box: From Amazon, $10 6 Way Fuse Block W/Negative Bus - ATC/ATO 6 Circuit Fuse Box with Ground, with Negative Bus & Protection Cover, Bolt Connect Terminals, 70 pcs Stick Label, for 12V/24V Vehicle Car Boat Marine Auto
The Fan:
Timer: Inexpensive 12V Timer Switch. Not the greatest, but cheap and - once programmed - reliable. From Amazon ($13)
Fan Dometic Blade Motor Assembly. This fan is 920 CFM, draws 3A, runs on 12V. Note that this did have to be replaced after 18 mo., probably because it was mounted vertically instead of horizontally.
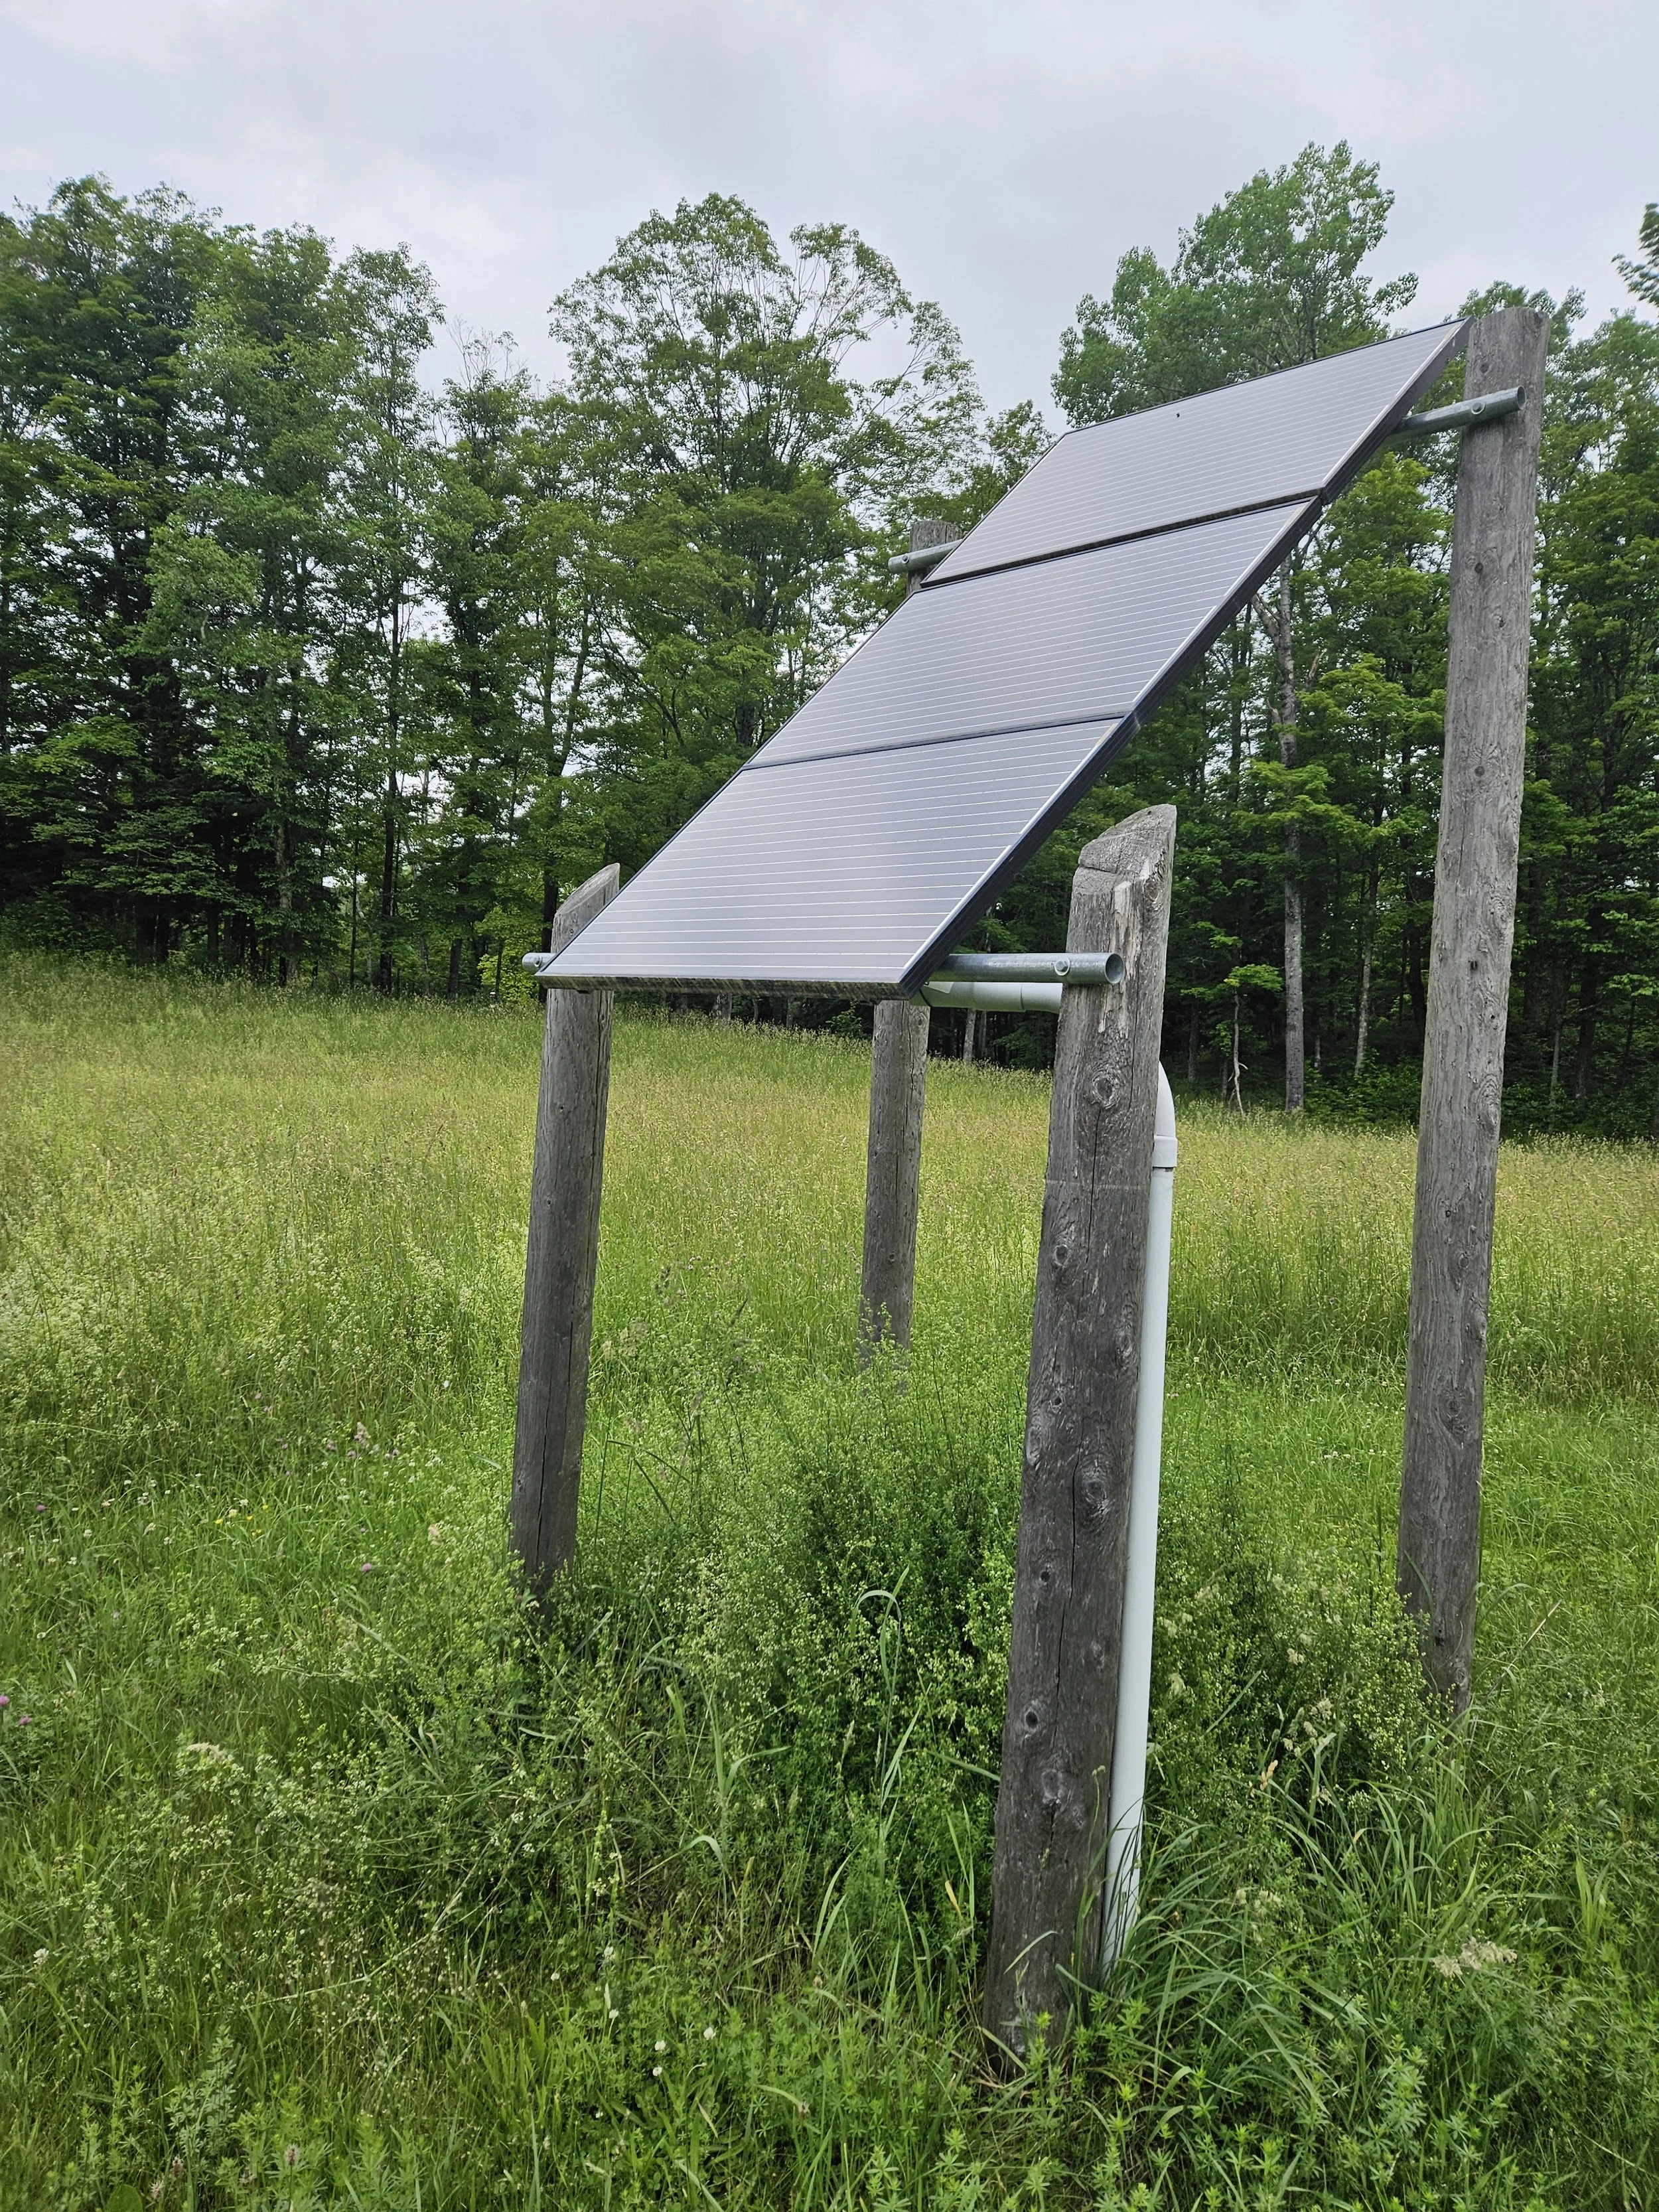
Solar panels (front view, see PVC electrical conduit on front post)
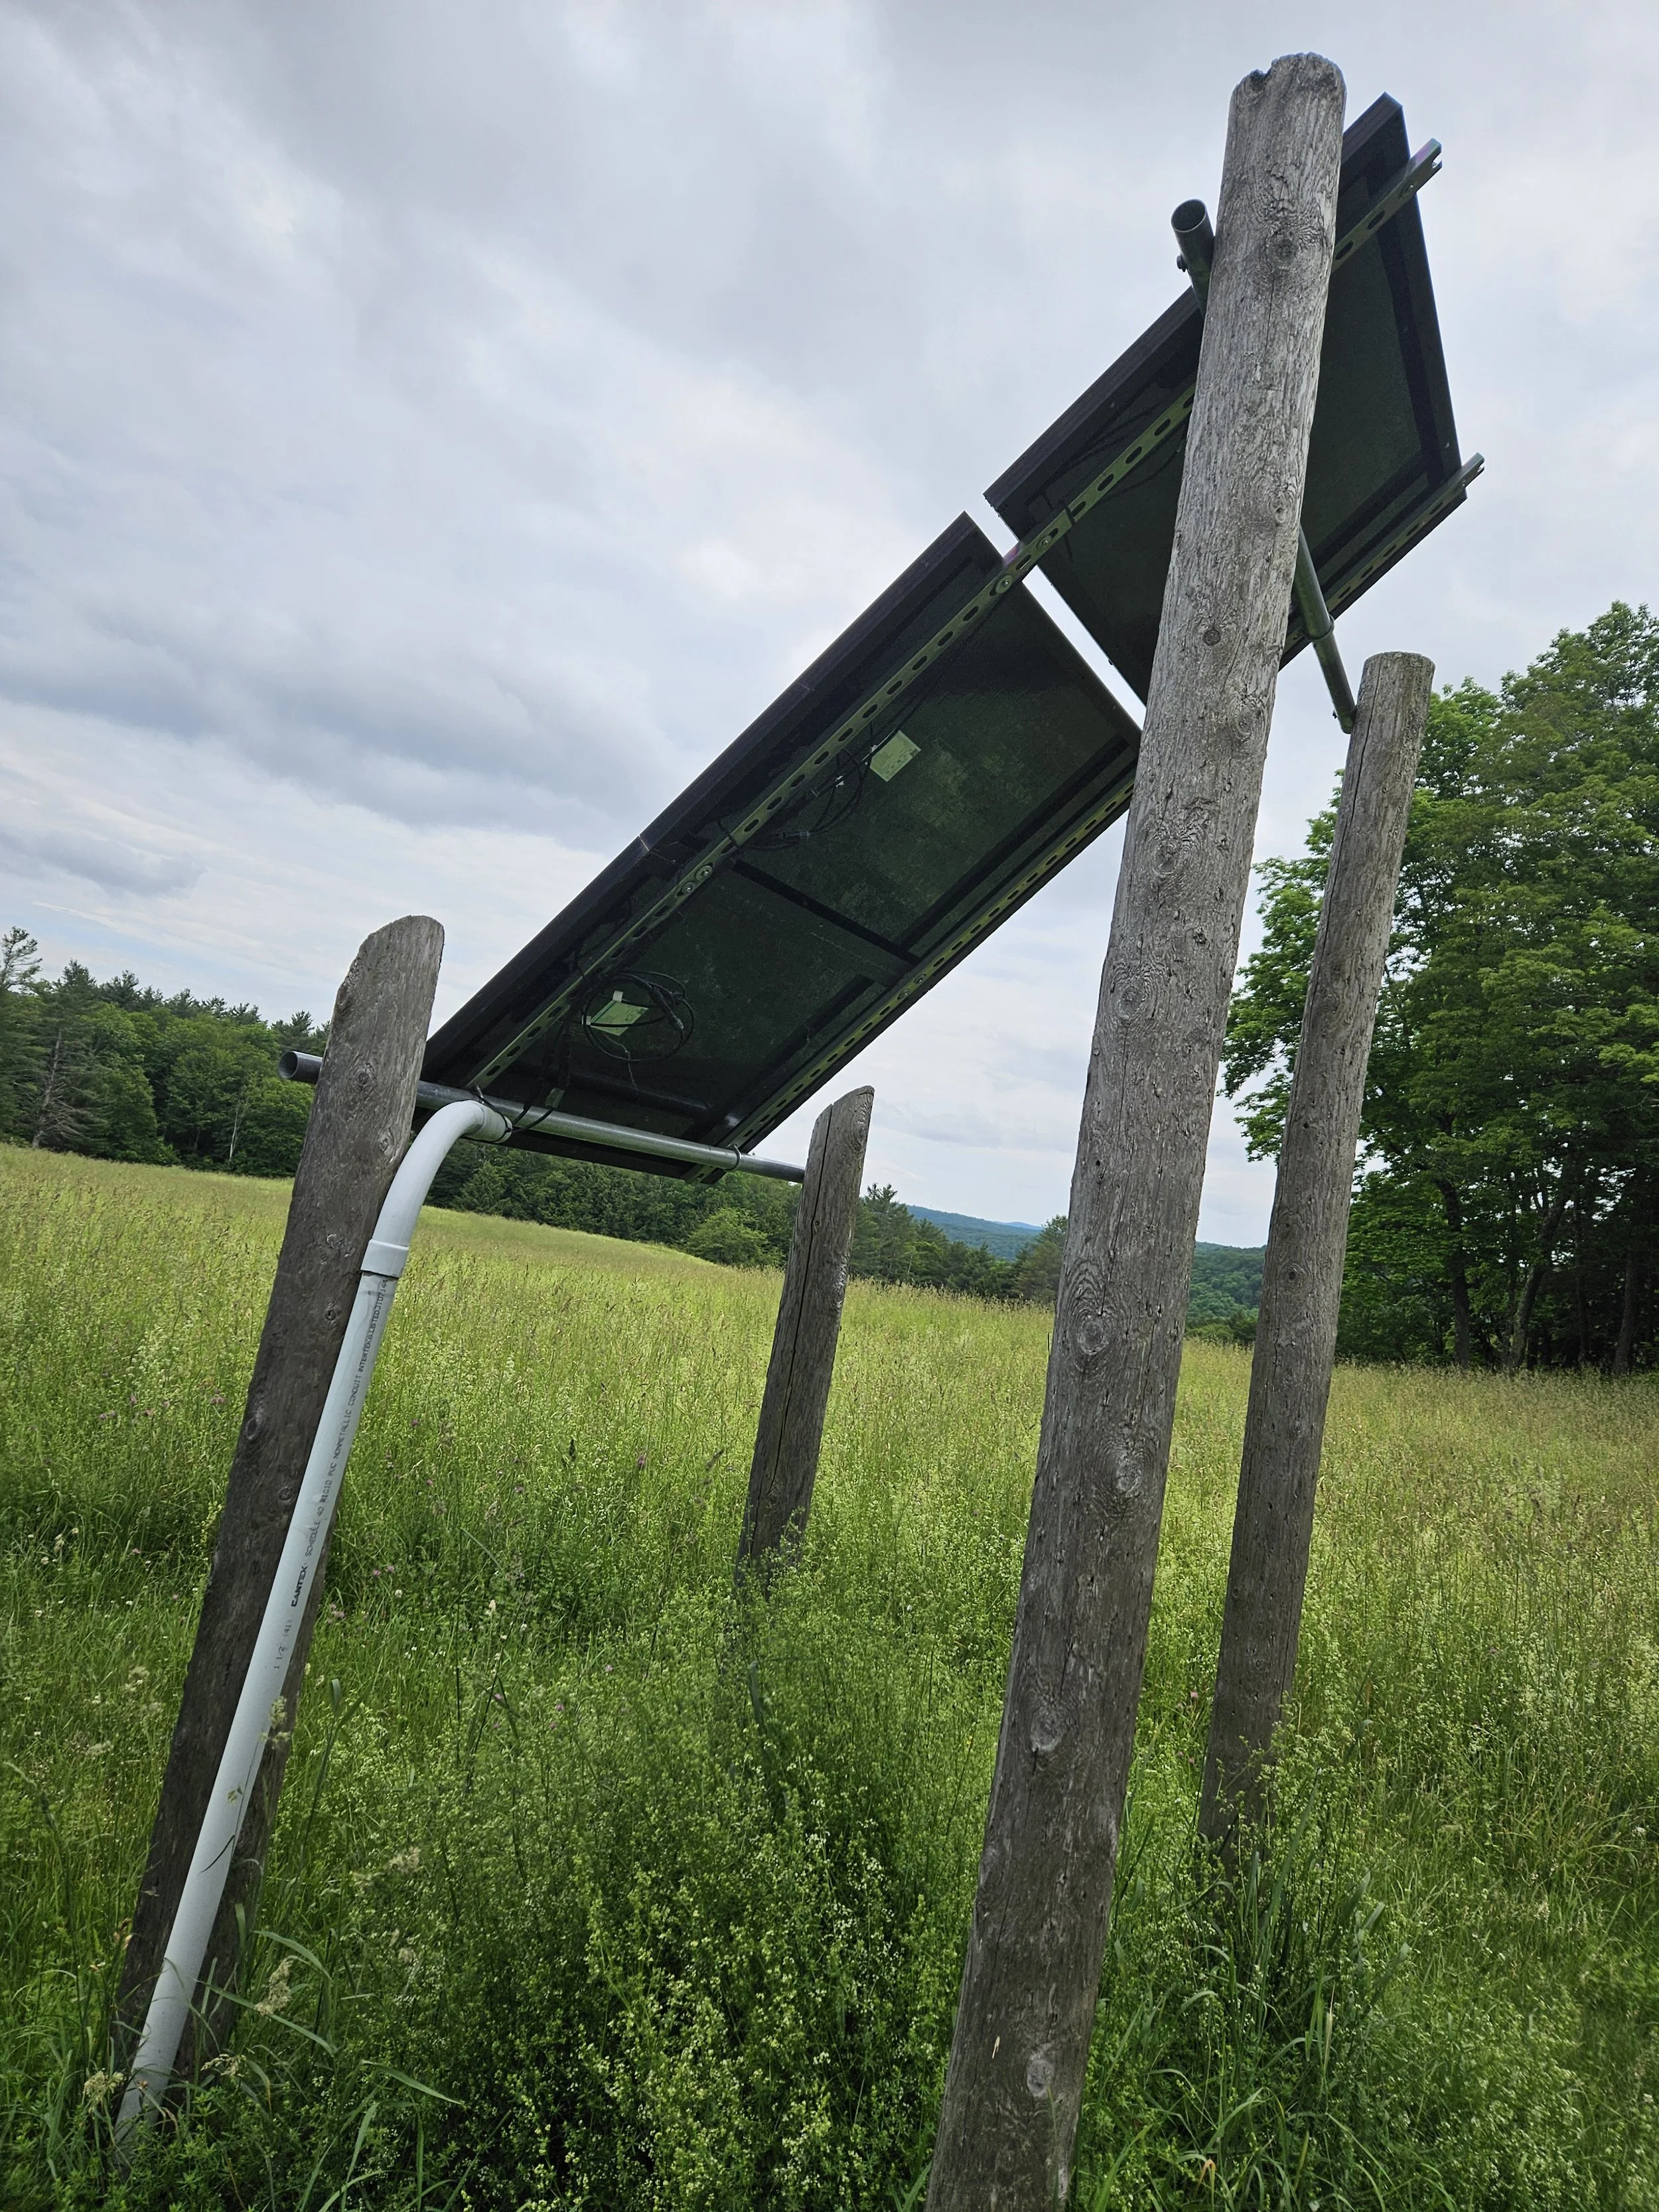
Solar panels (rear view)
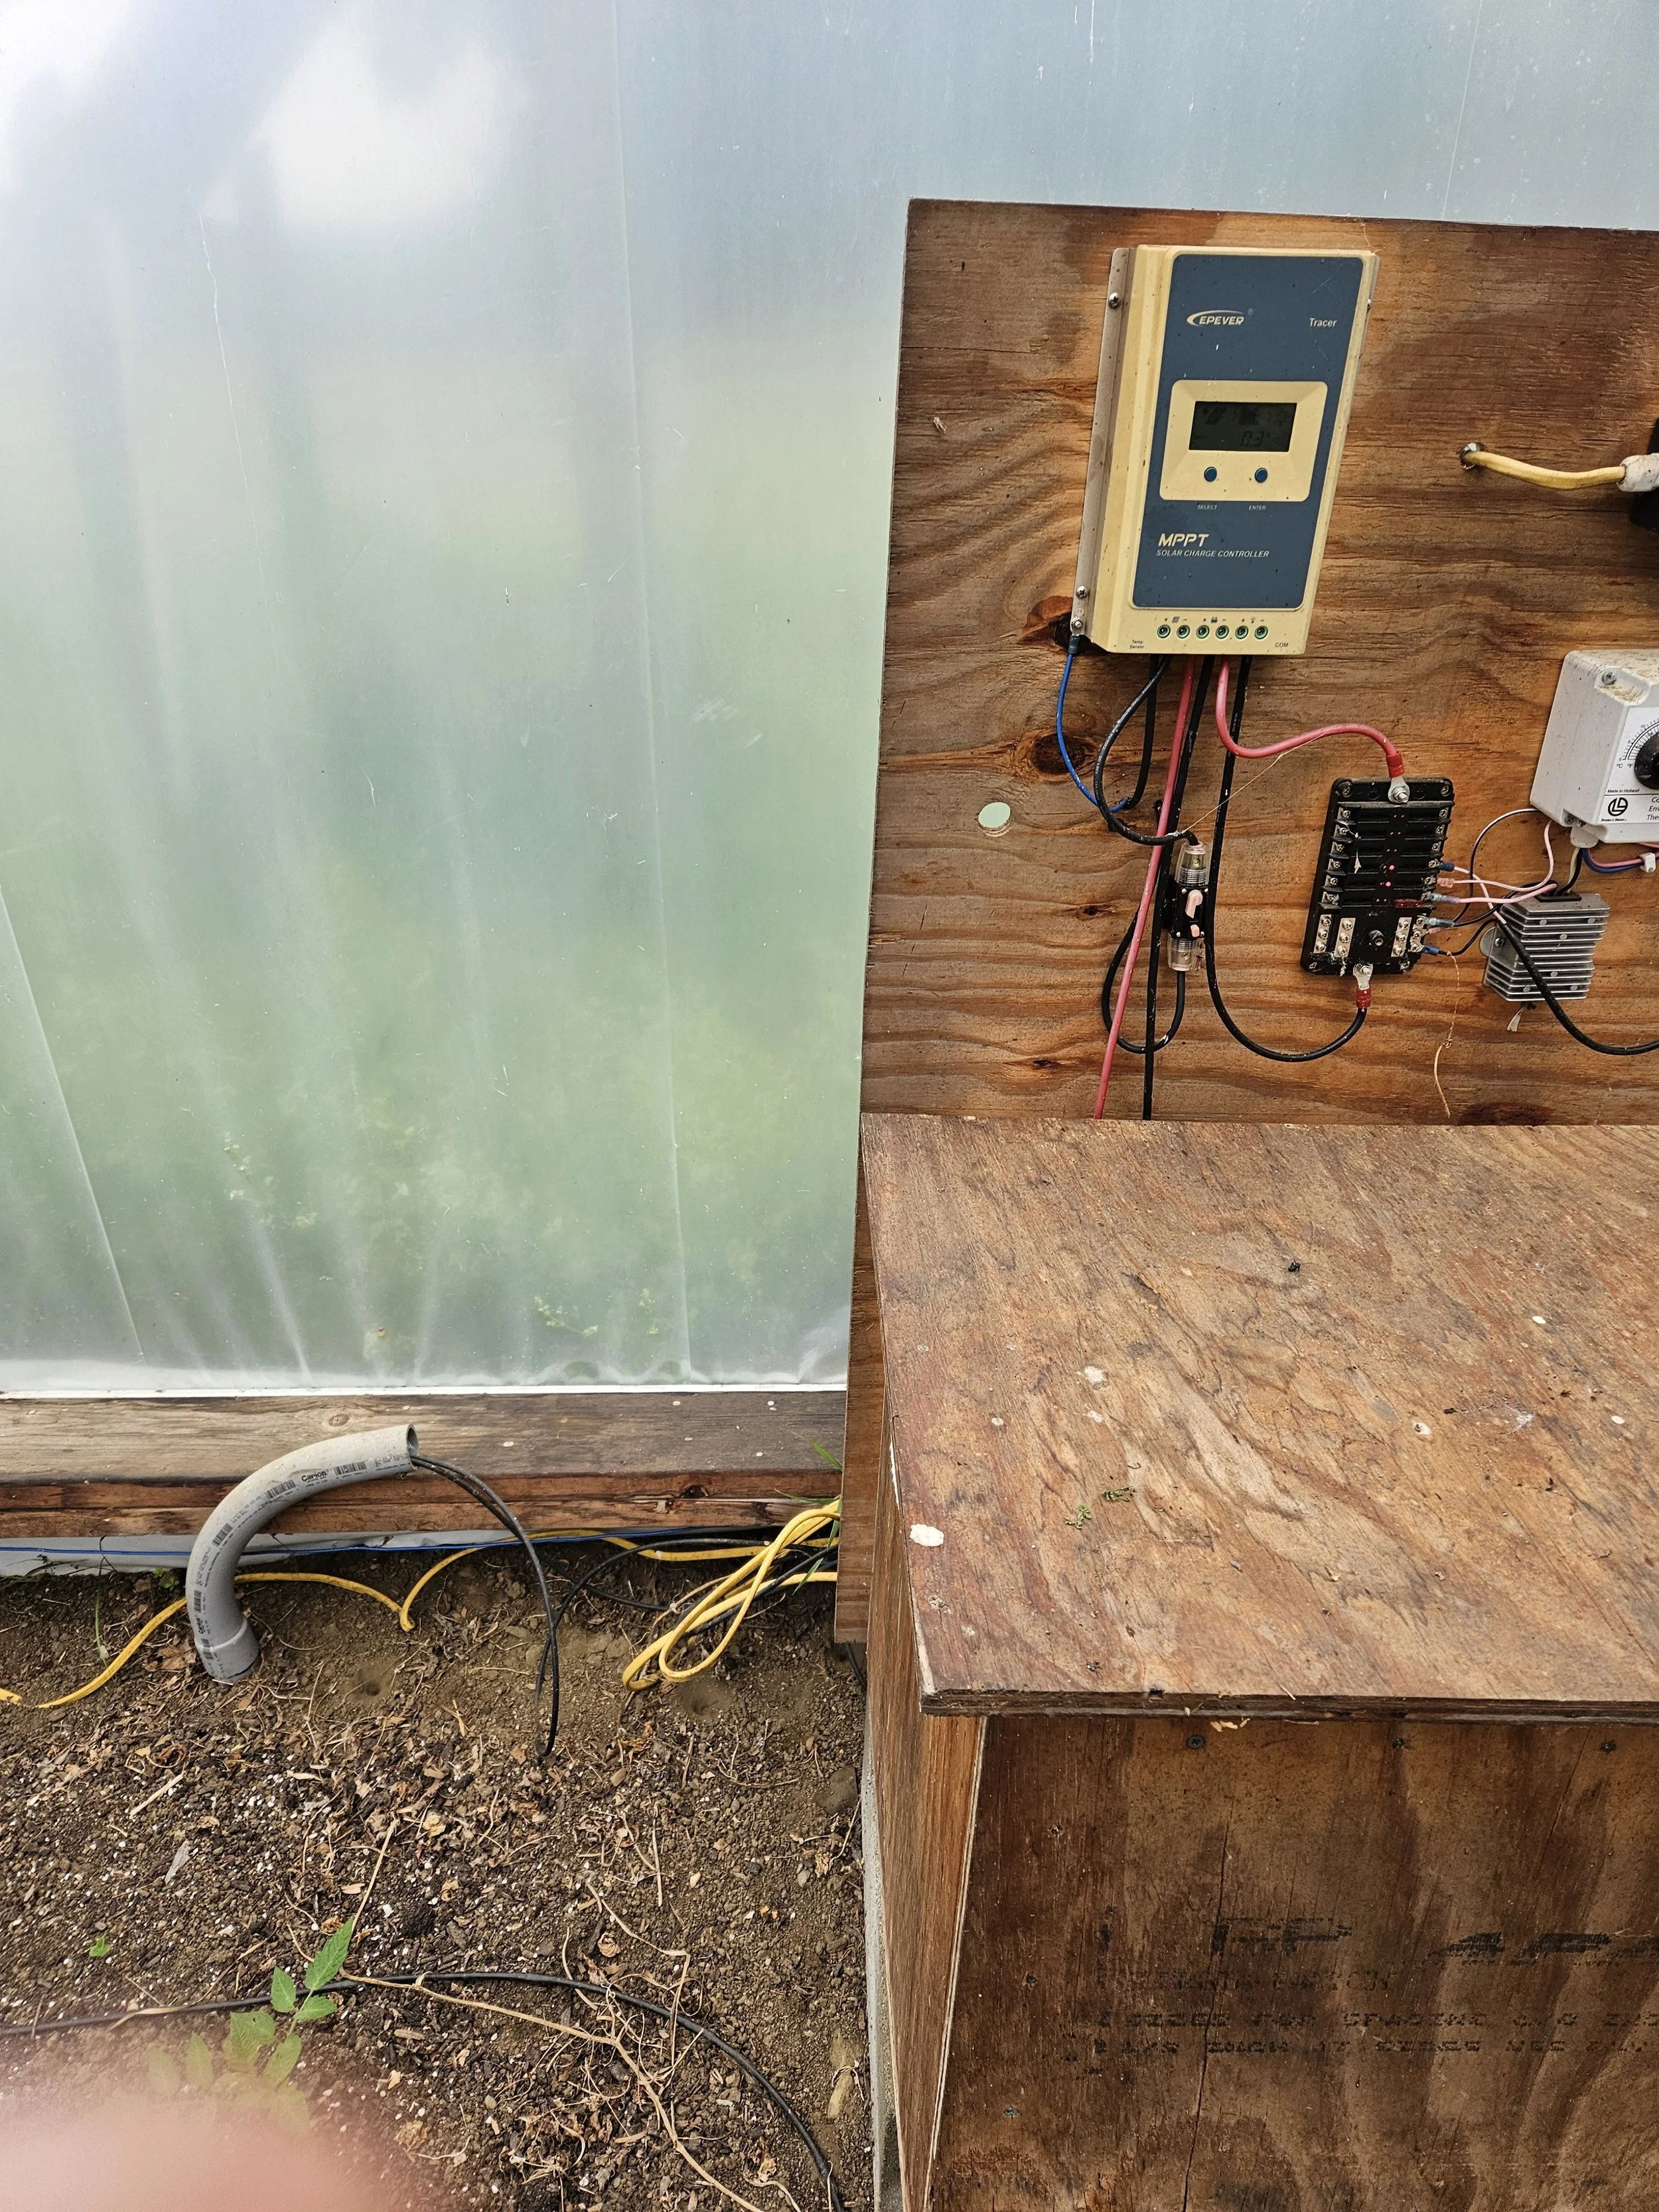
Solar panel input to main box - see conduit elbow
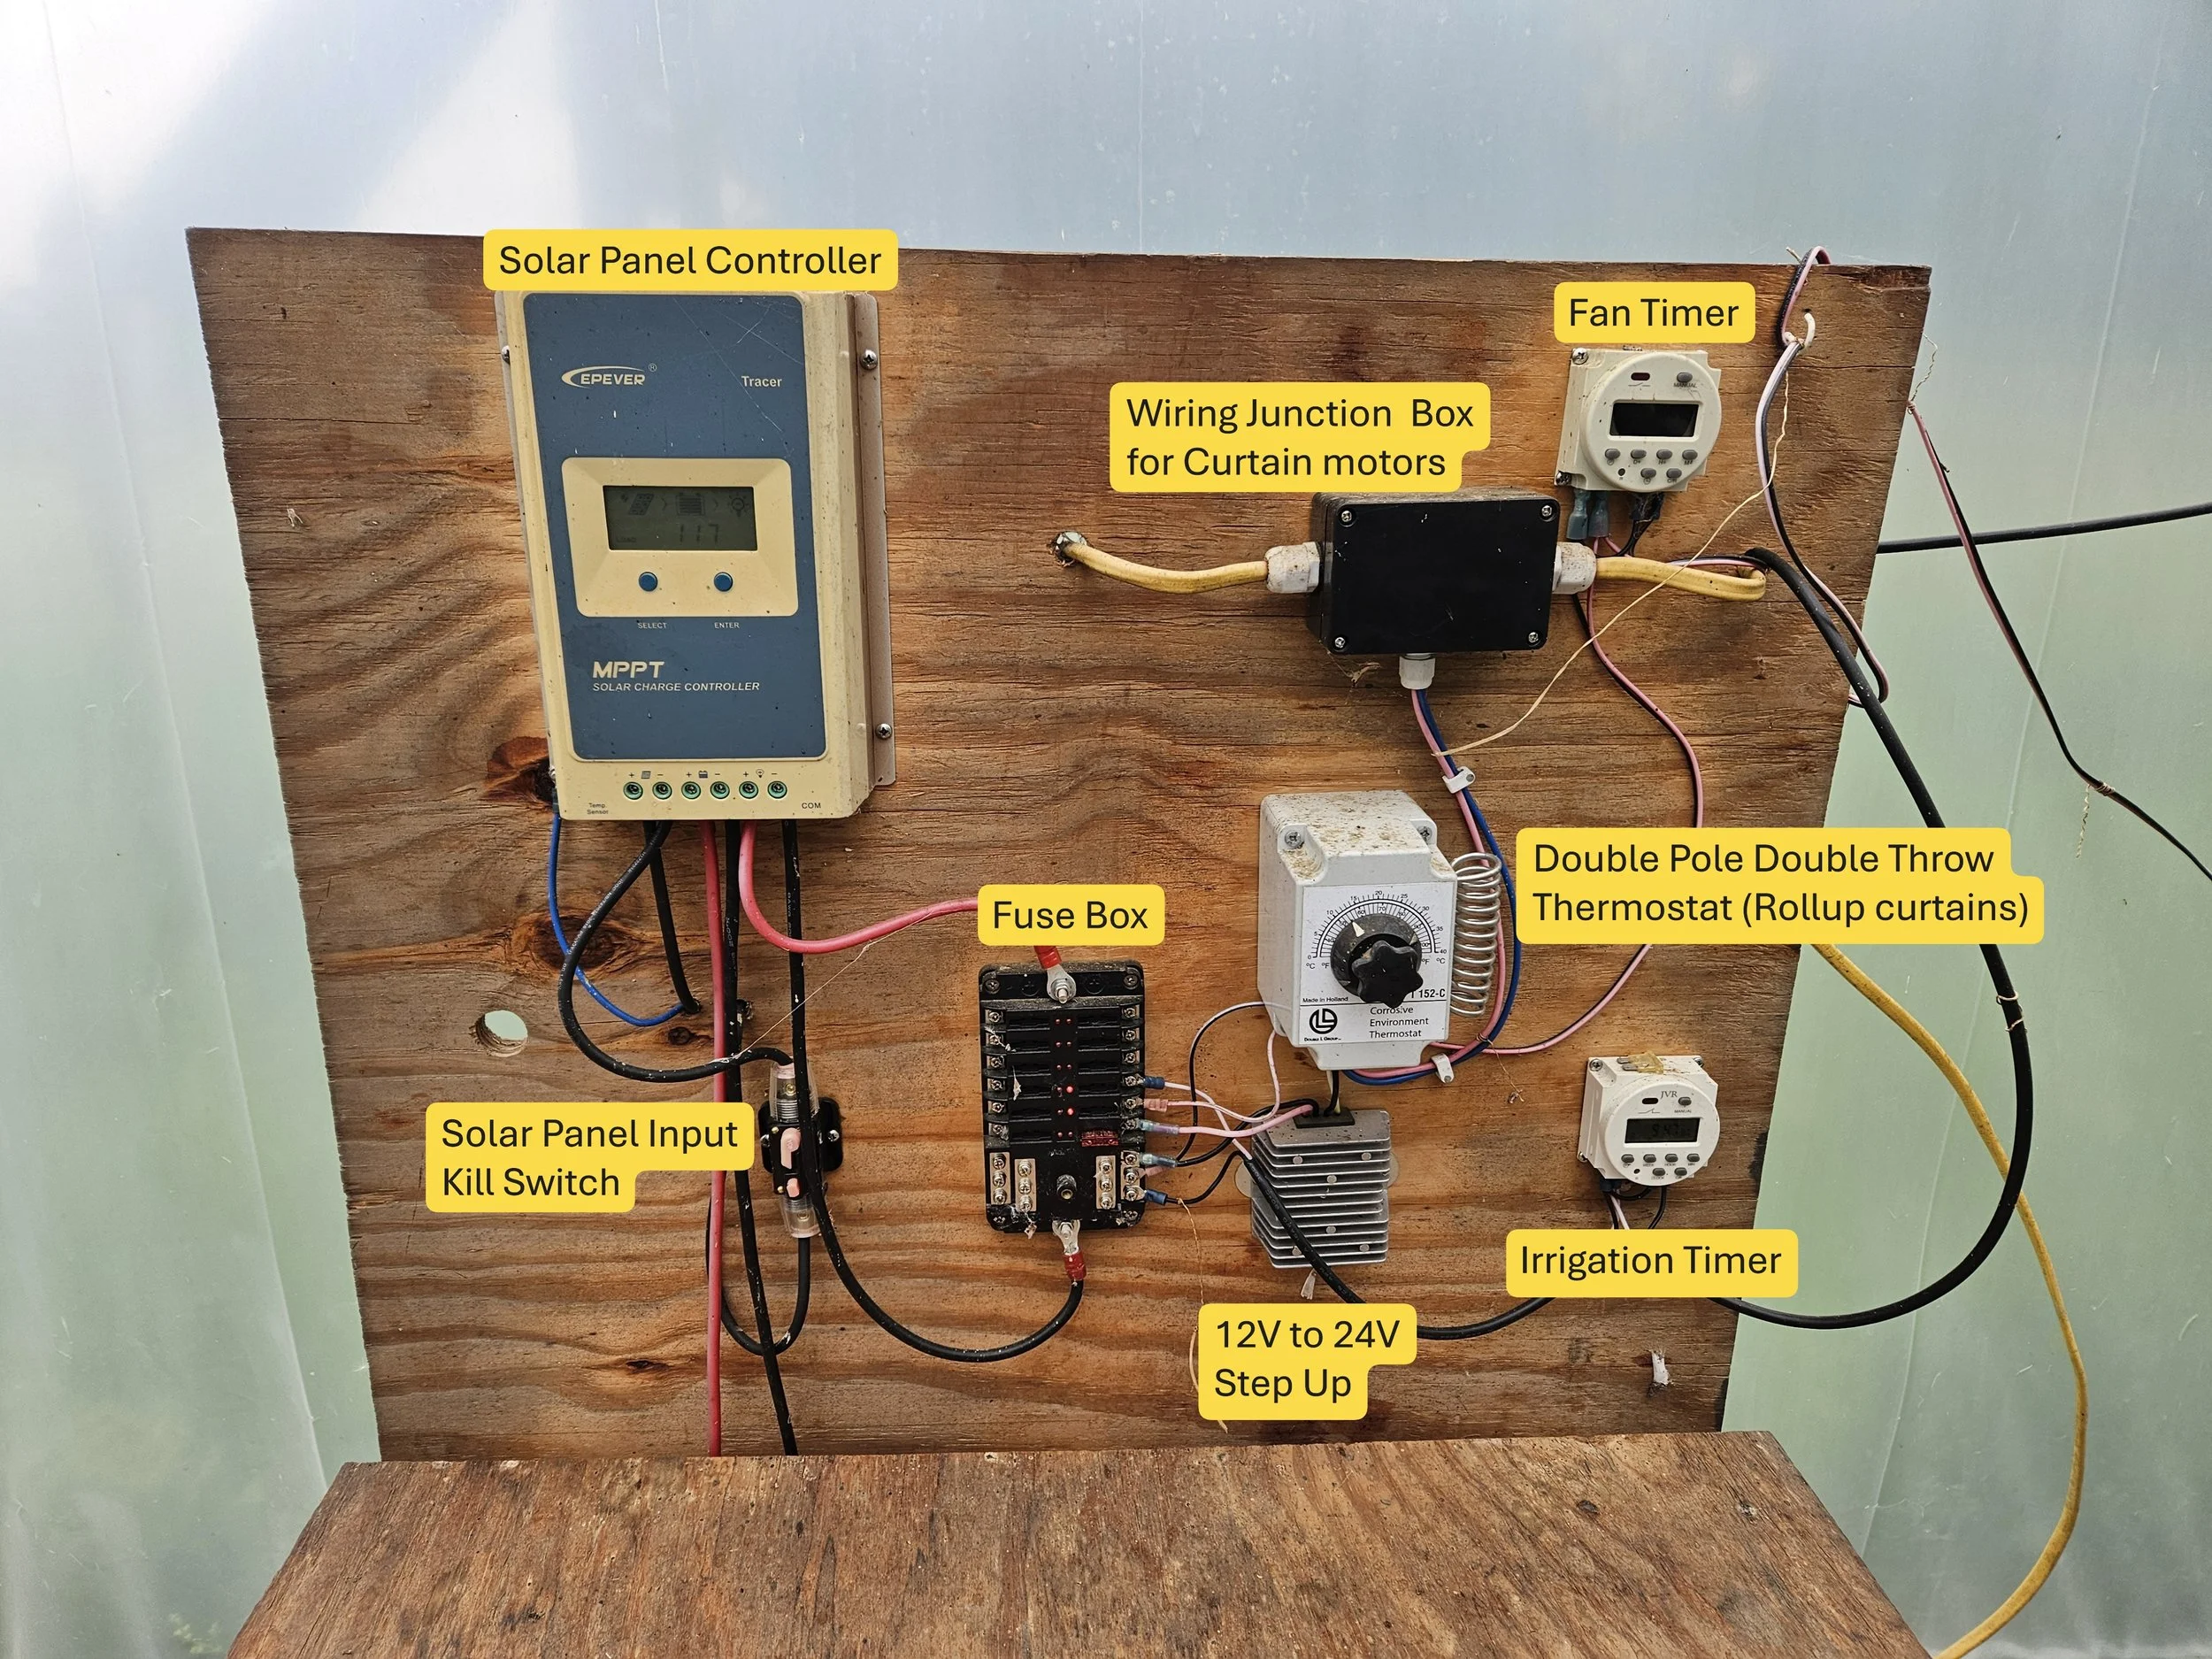
Electrical system control panel and wiring
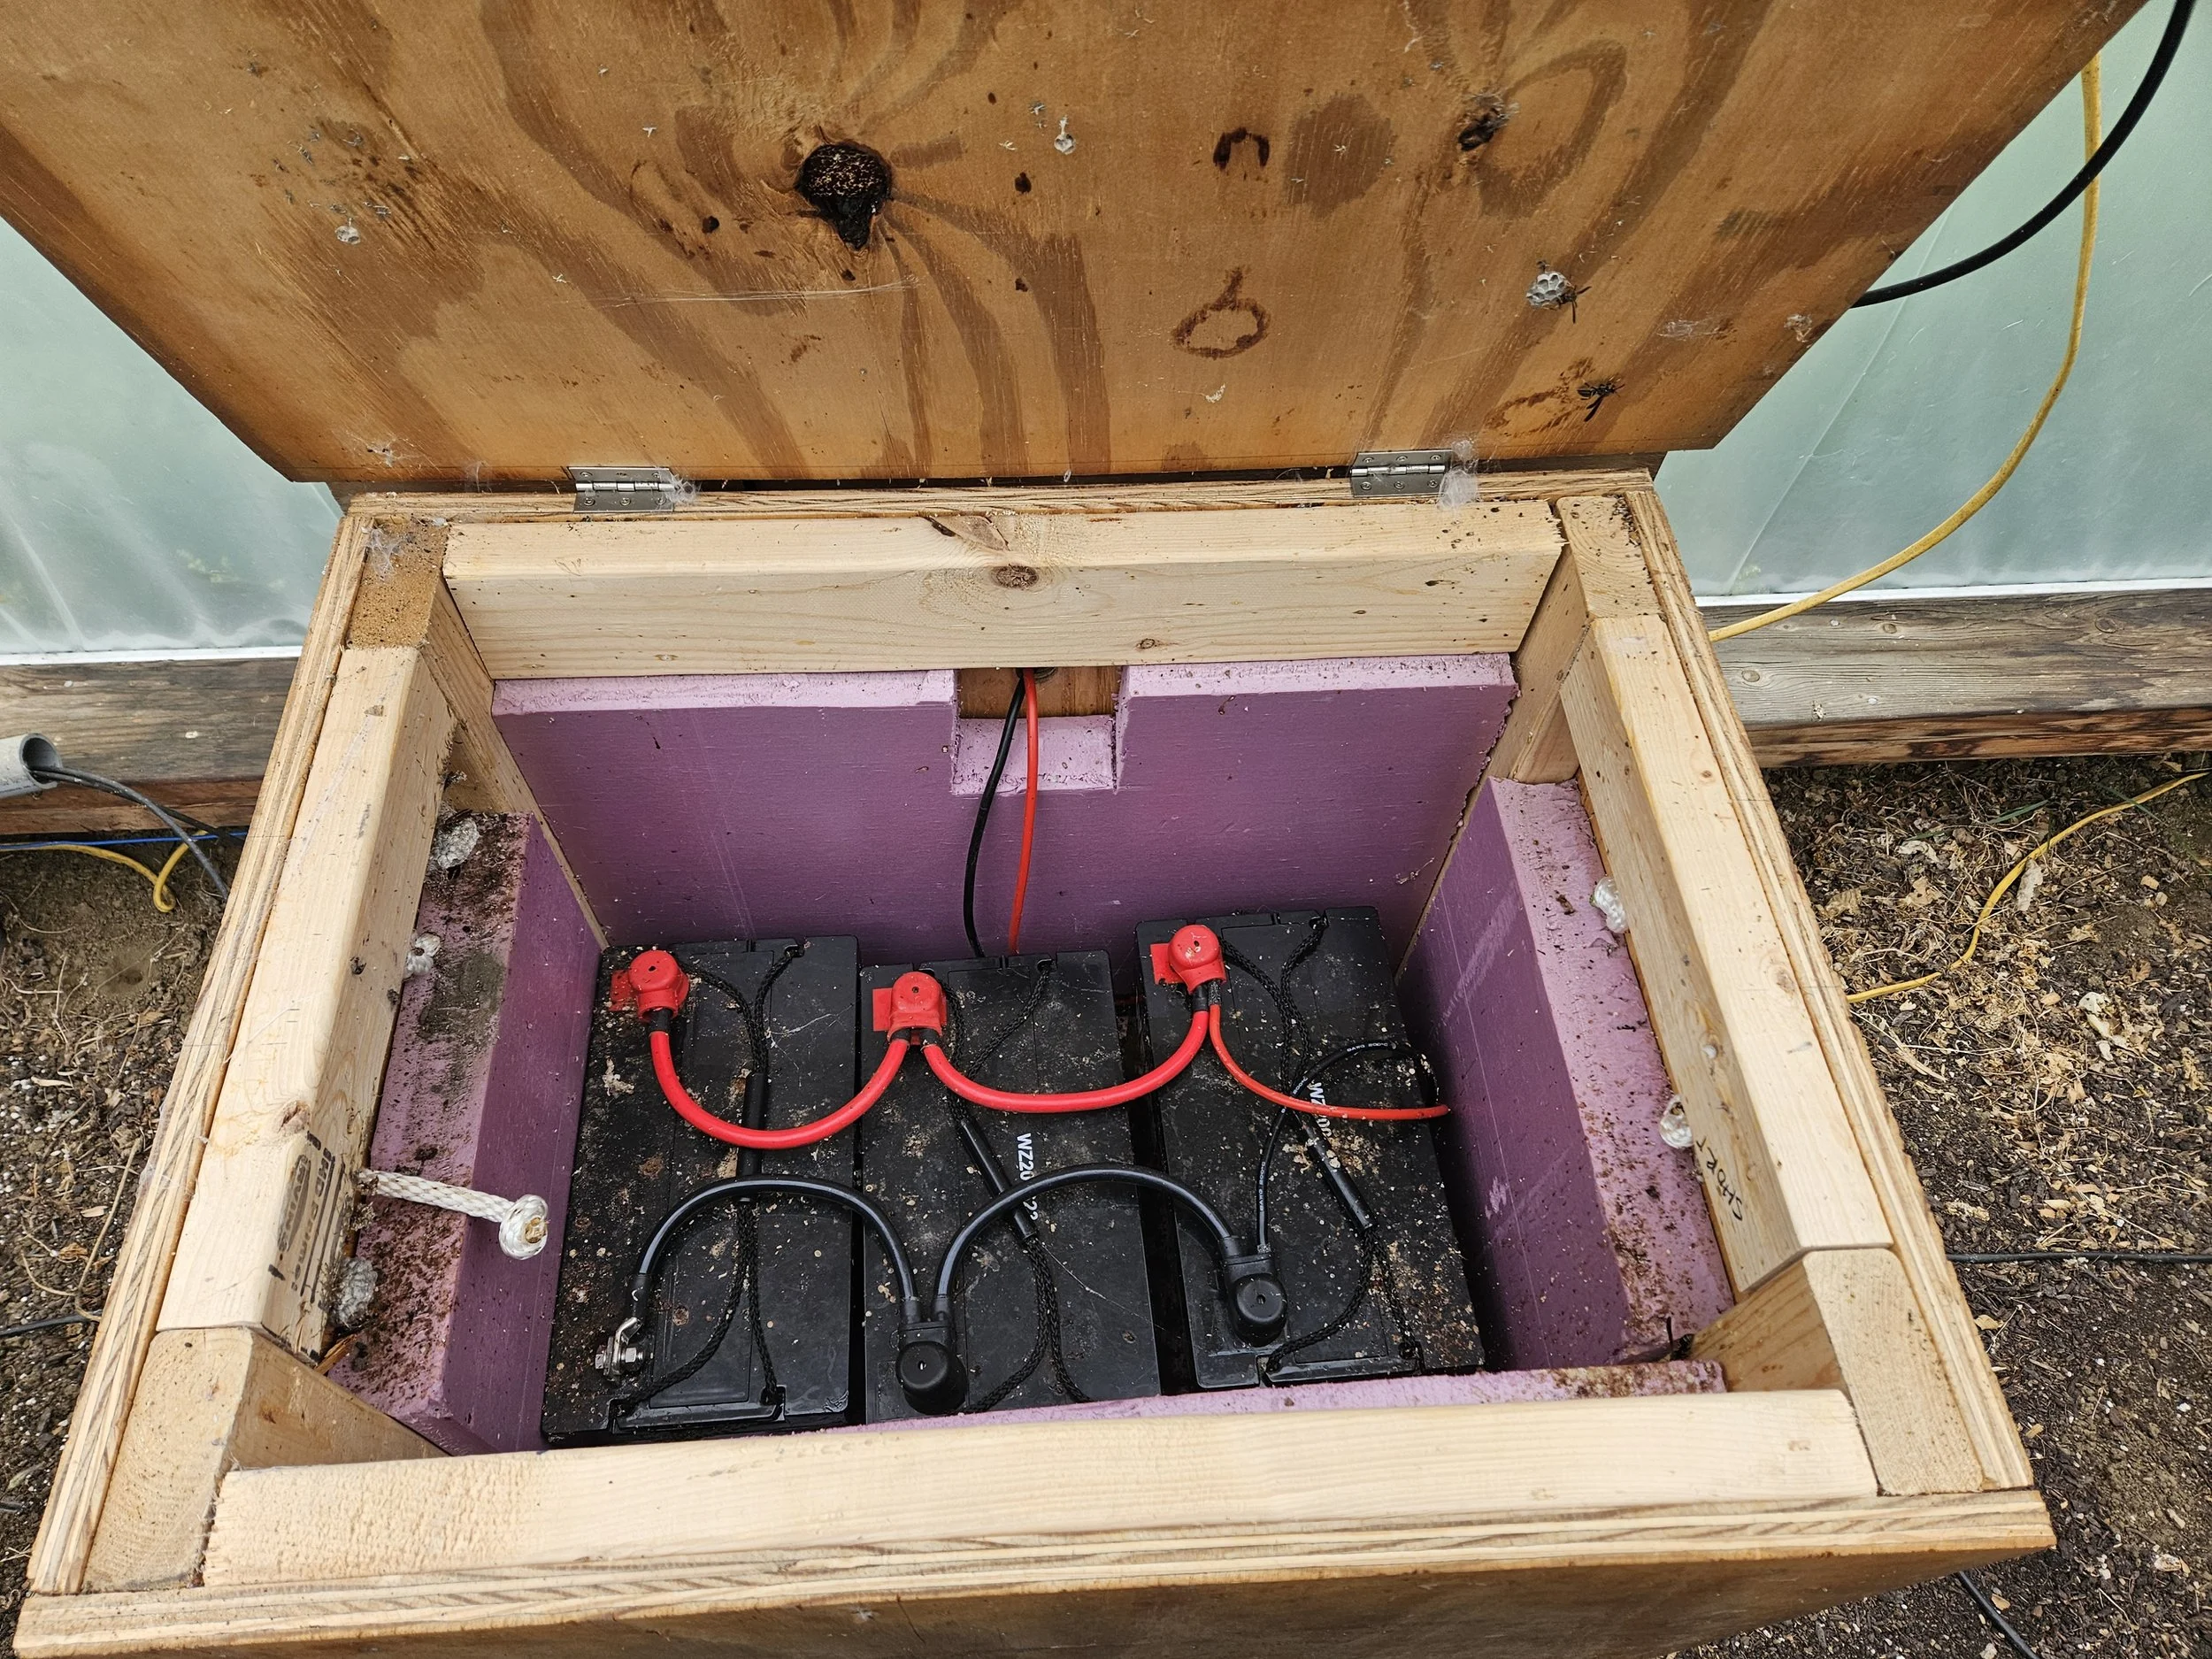
Battery bank in box
Side curtain view (front)
Side curtain view (rear)
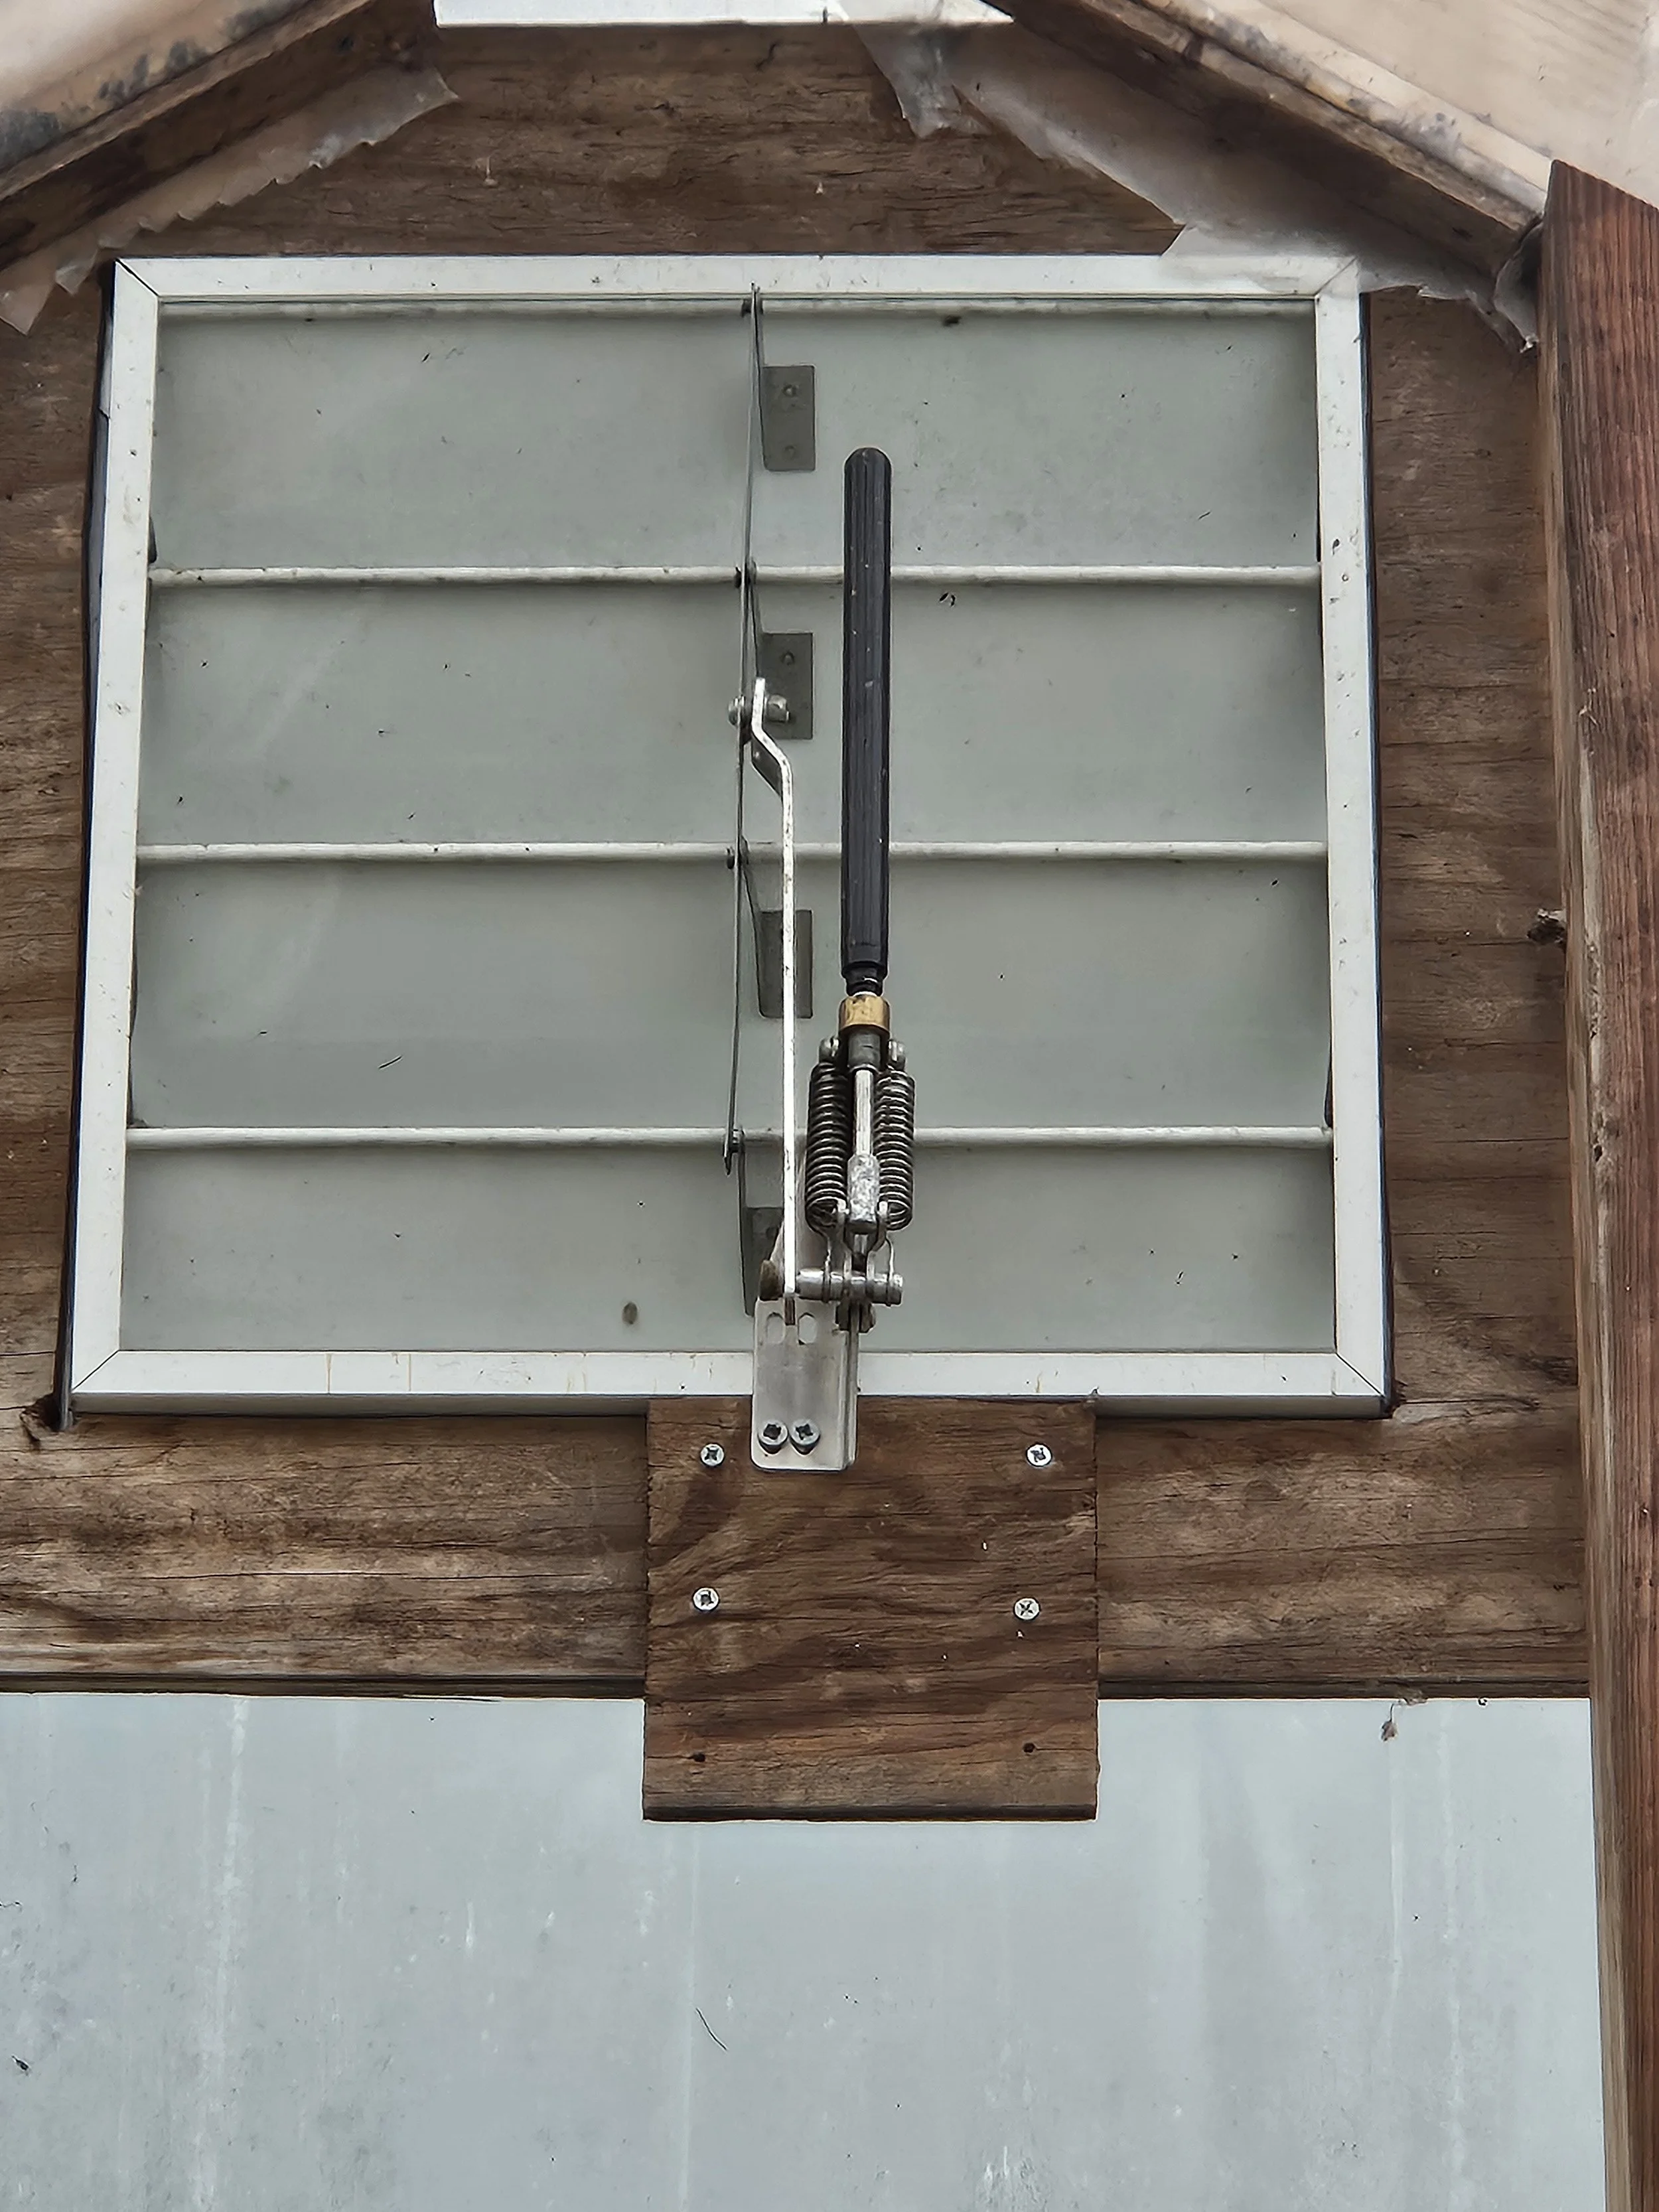
Eave vent with wax cylinder controller
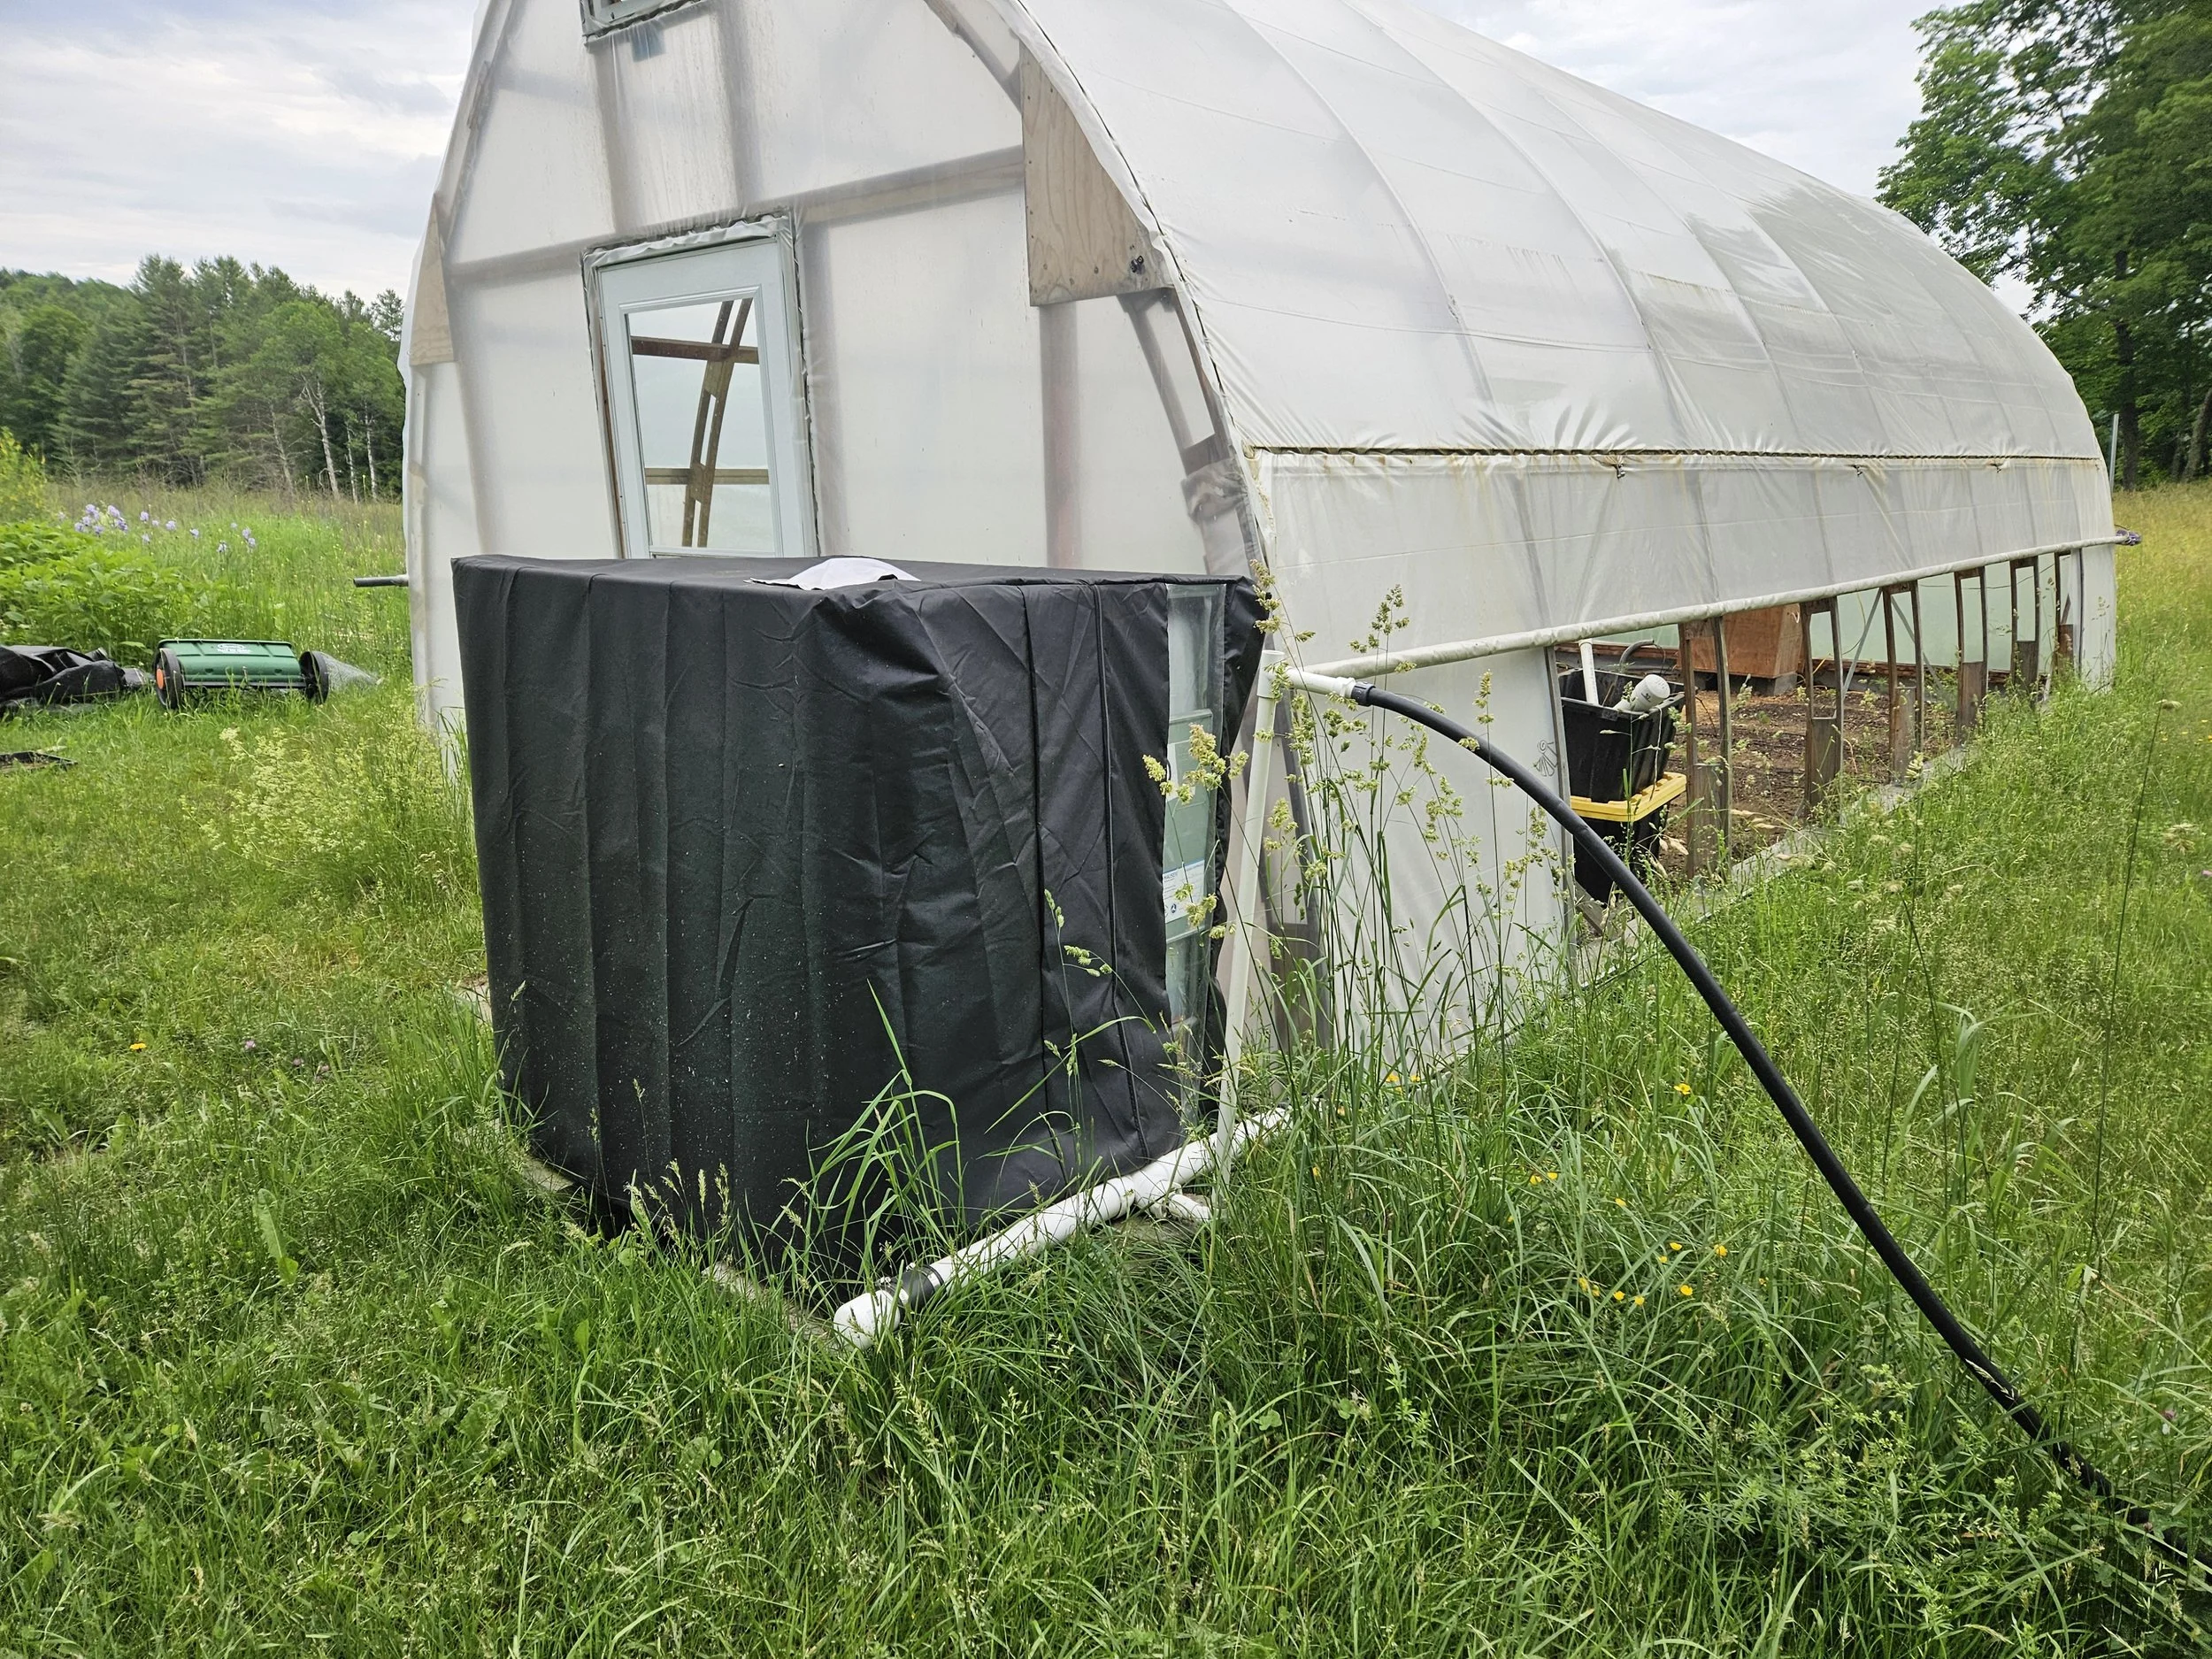
IBC water storage tank and view of side curtain (raised)
Irrigation pump assembly (white hose on left is input from IBC tank, output black hose on right goes to irrigation mains)
Drip line feeders in each bed off of 3/4" irrigation mains
Ram pump that feeds IBC storage tank
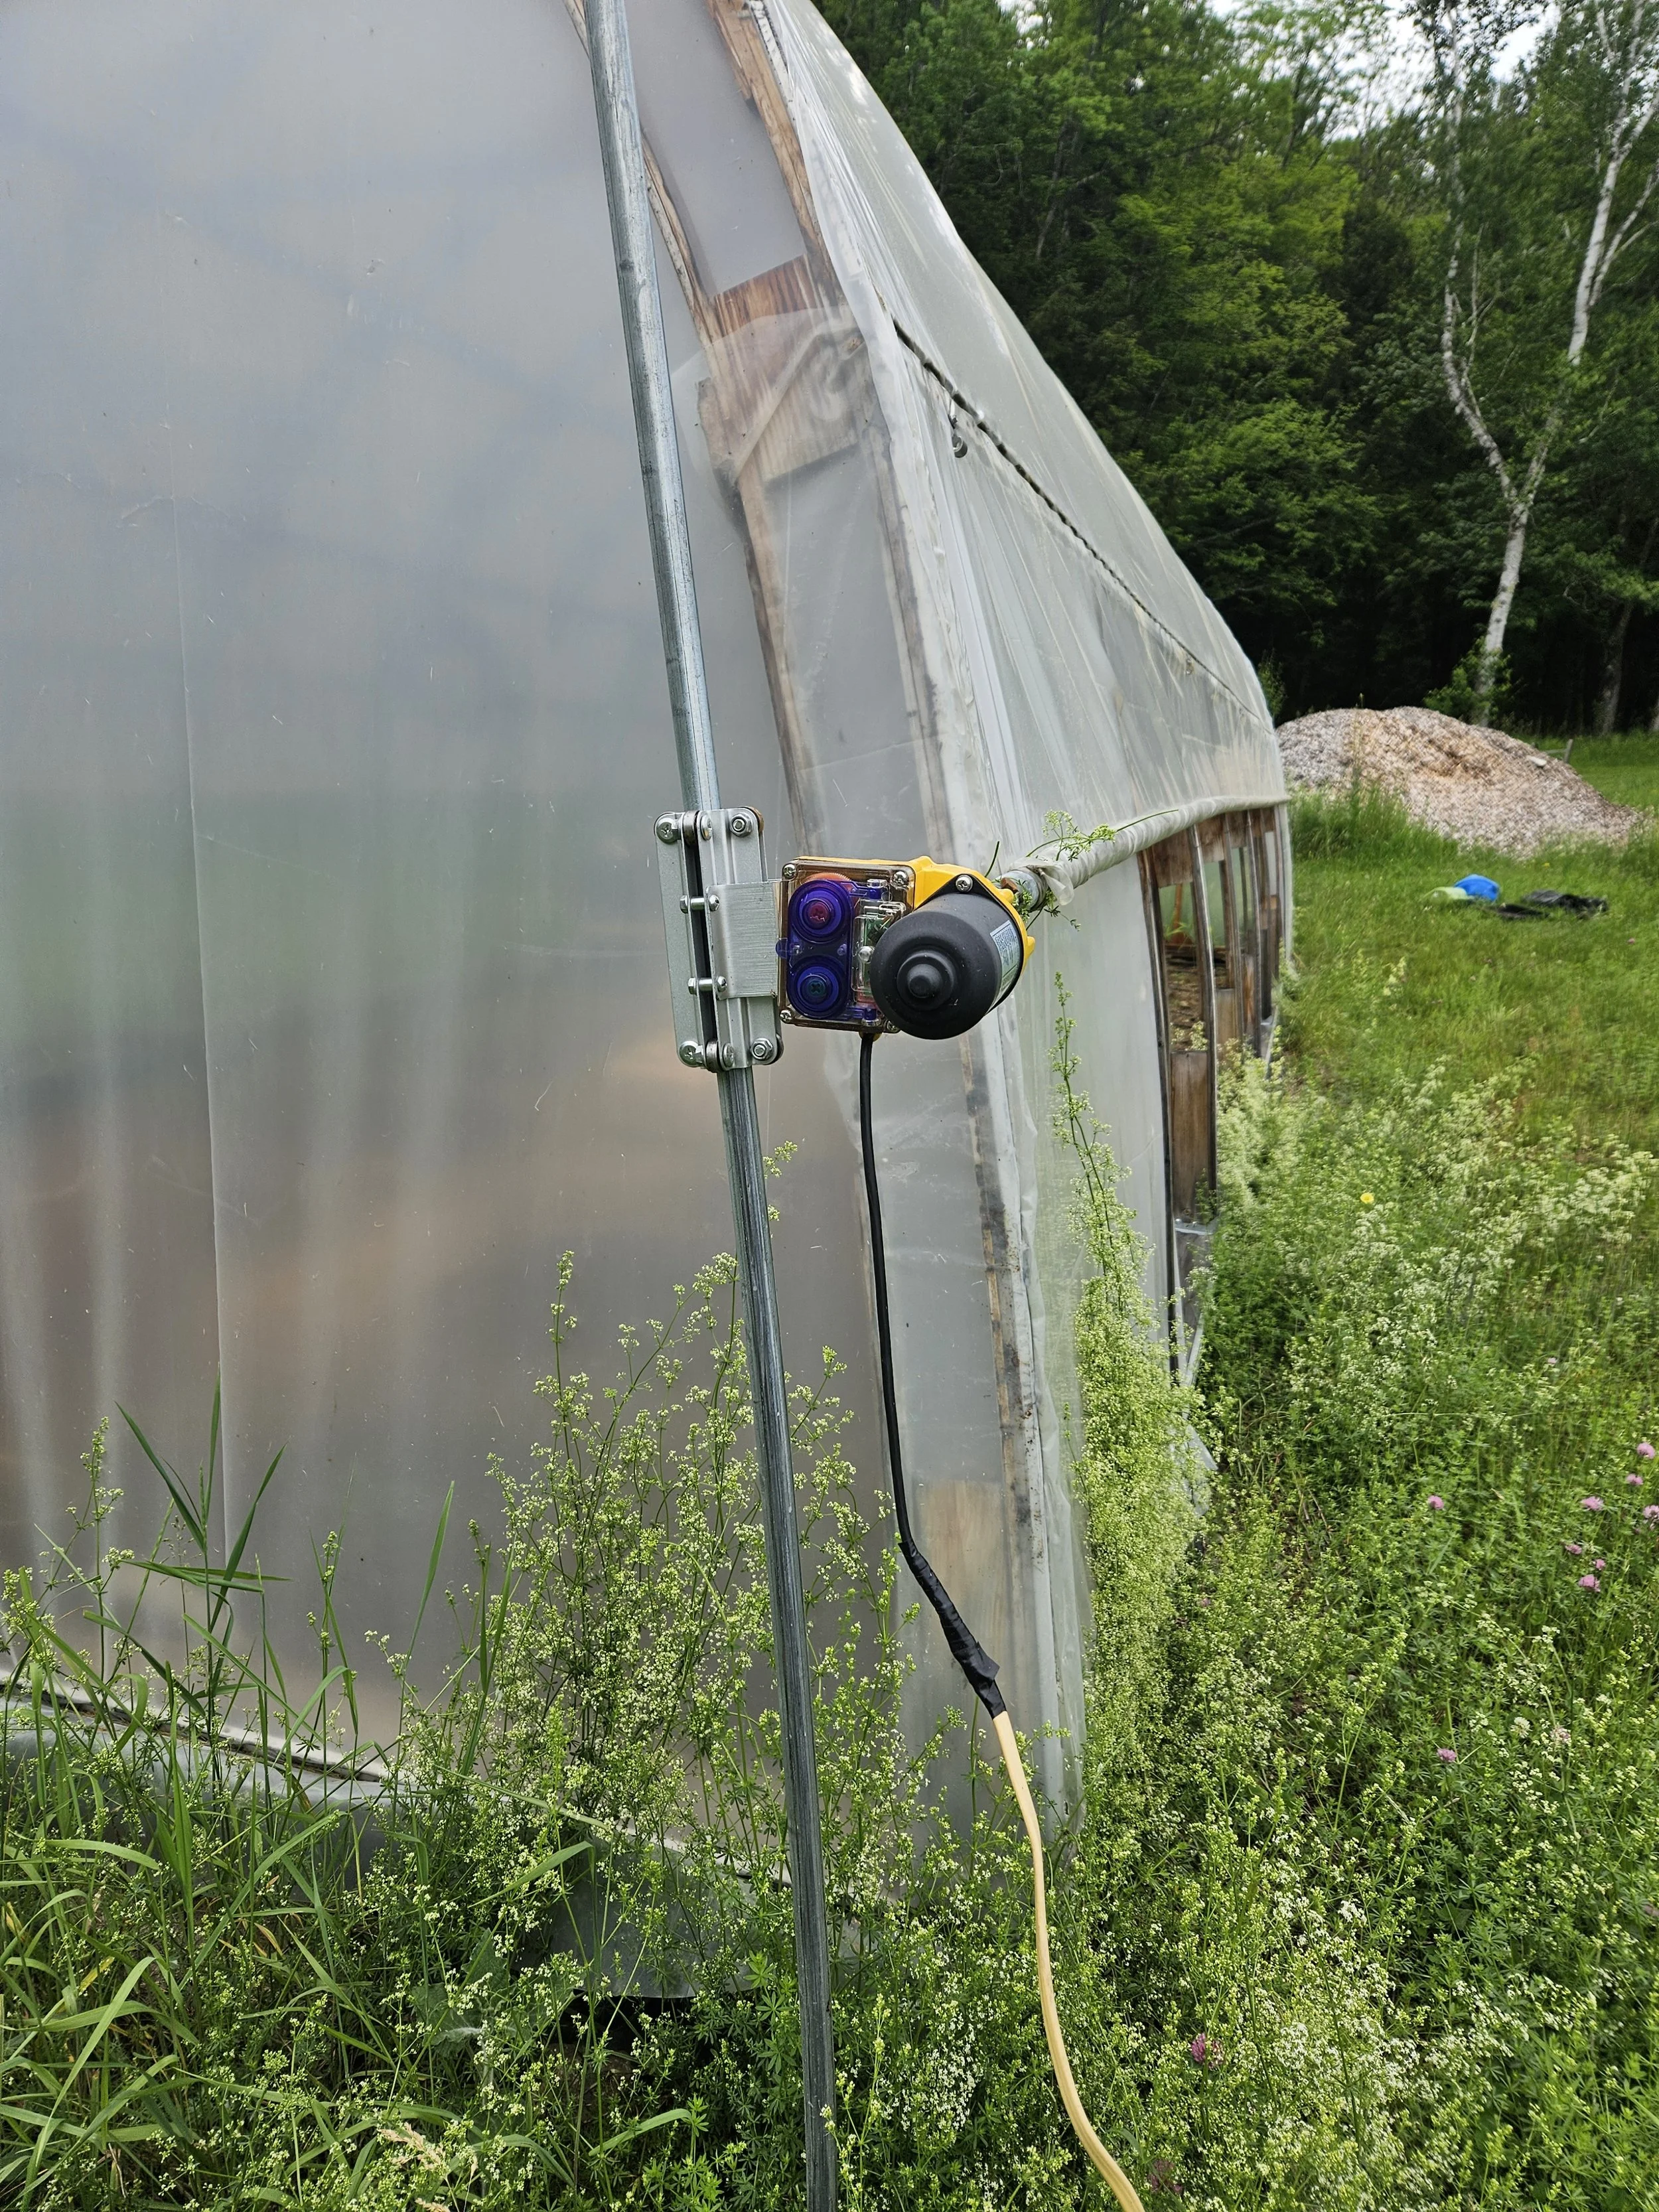
Step 2. Thermoregulated Roll-Up Side Curtains
To make the basic roll up sides, we followed the instructions from Tunnel Vision Hoops; then we installed the greenhouse motors on the ends following the directions in the motor packaging. Because the motors were 24V we installed a 12V to 24V step-up converter in the electrical circuit.
Chain link fence top rail - enough to cover 32 feet on both sides.
Self tapping screws
Plastic clamps - got these from Tunnel Vision.
Two 10 foot long 1/2 “ electrical conduit. These act as guides for the motors to glide up and down.
Two greenhouse motors: From Amazon.com: Premility 24V Greenhouse Film Roll-up motor, currently $89 each
Thermostat: T 152-C Two Stage Corrosive Environment Thermostat, from AgriSales, $122
12V to 24V step up converter 10A 240W: From Amazon, $18
Note that the wiring of the double-throw, double pole thermostat can be tricky. Credits to Farmer Keith for working out this challenge and posting an excellent video to solve this issue.
Optional: Eave Ventillation
Two Univent Automatic vent opener: Sold at Johnny’s Selected Seeds for $59.50 each. There are cheaper ones online but these are reliable. I need to replace the wax cylinders every other year or so when they stop working.
Step 3. Irrigation System
Overview: Our water source is a stream that runs down the side of our property. We use a ram pump (which is a water-powered pump) to bring the water from the stream up to a storage tank made from an IBC tote. From there, we have a solar-powered pump, on a timer, that hooks up to a drip-irrigation system. We found that the solar-powered pump was very important to ensure even pressure throughout the greenhouse. We initially tried a gravity based system, using PVC pipe with holes drilled into it to deliver the water. It was very simple and inexpensive but we didn’t have enough height in our water supply to get the pressure needed to water evenly and it requires a very level planting area to avoid pooling. If you are considering this option, we have some insights. For example, it's difficult to find a timer valve that will work at low water pressures. You can contact us if you would like more info.
In the greenhouse, we use the timer to turn on the pump and turn it off electronically (natural state is OFF) because there is no pressure in the system.
Timer: Inexpensive 12V Timer Switch. (Amazon, $13). Not the greatest, but cheap and - once programmed - reliable.
Pump: SeaFlo 33 series Self-Priming pump (Amazon, $70).
Pre-filter: (Amazon, $25). The pump comes with a small pre-filter, but we opted for this inexpensive add-on to minimize wear on the pump and clogged driplines over time.
Plumbing adaptors: this is the usual plumbing nightmare of making sure that you have the correct fittings to connect from your water tank, pump, and irrigation tubing. Basically, we had to switch from garden hose pipe fitting to normal pipe fitting, to barbed fitting.
Irrigation tubing and drip-line: We used 3/4” irrigation tubing for the main line around the greenhouse and 1/4” drip line spurs into the beds.
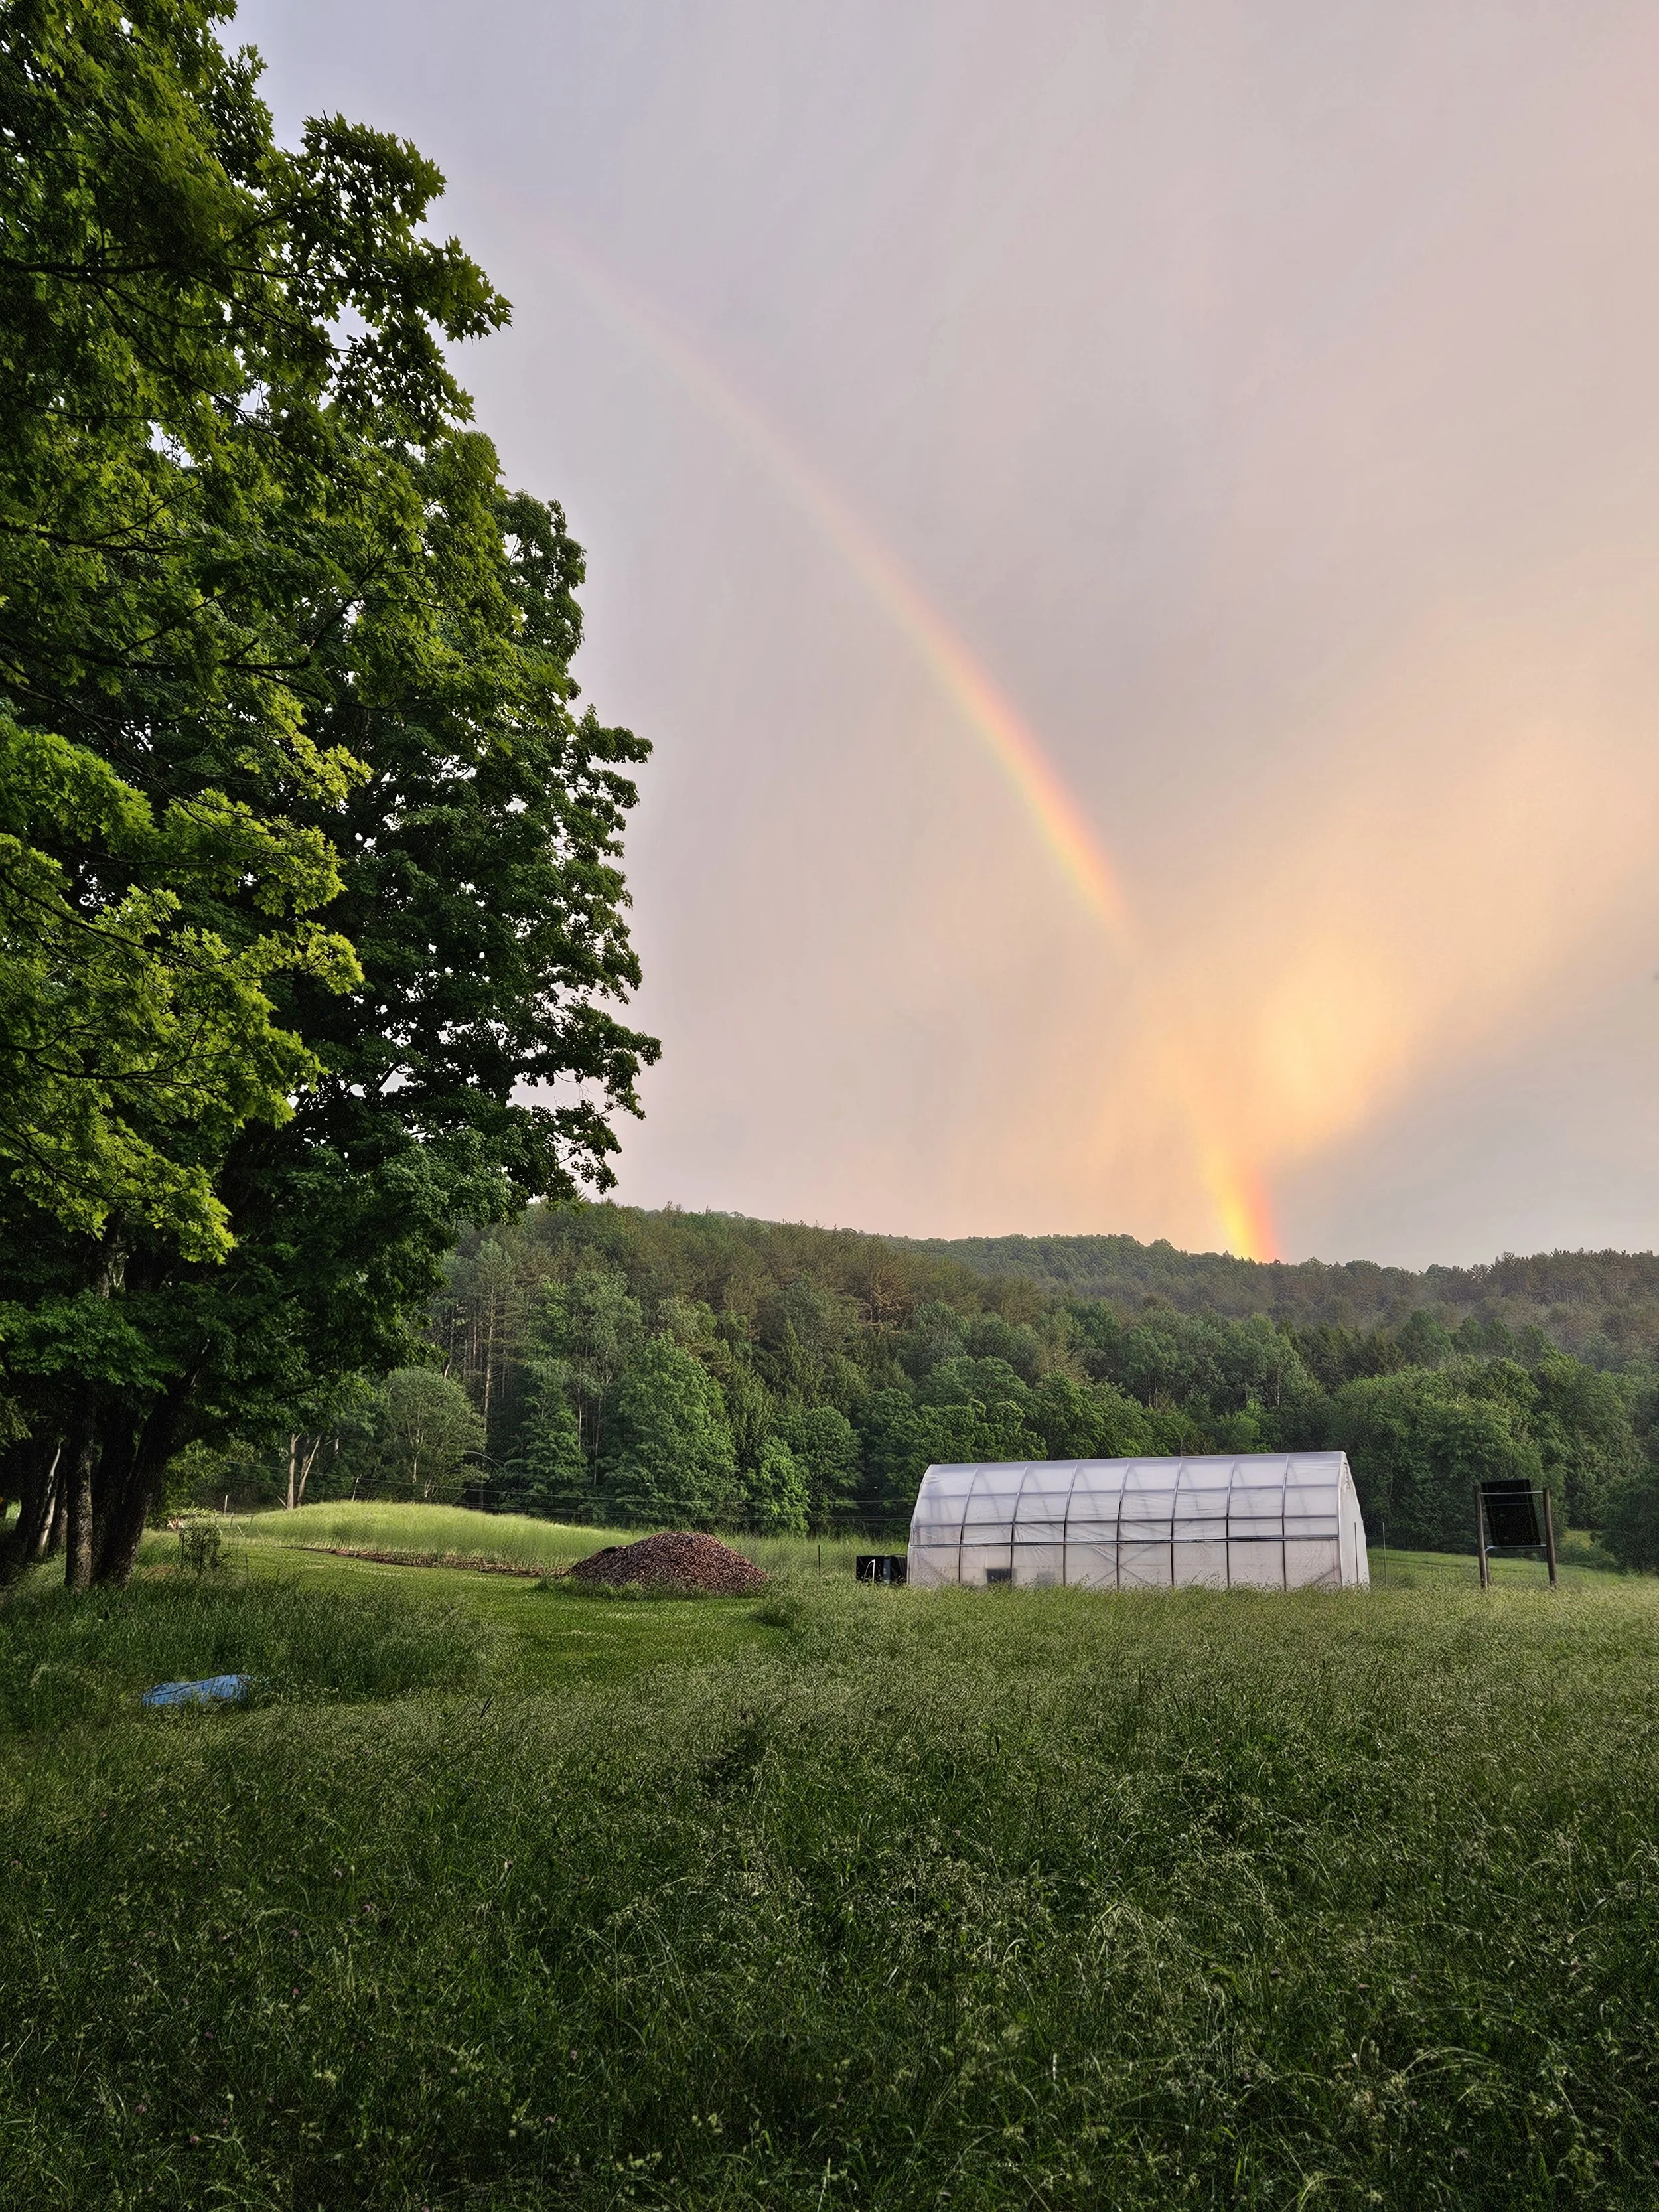
Gallery of photos from the greenhouse follows!
Early greens!
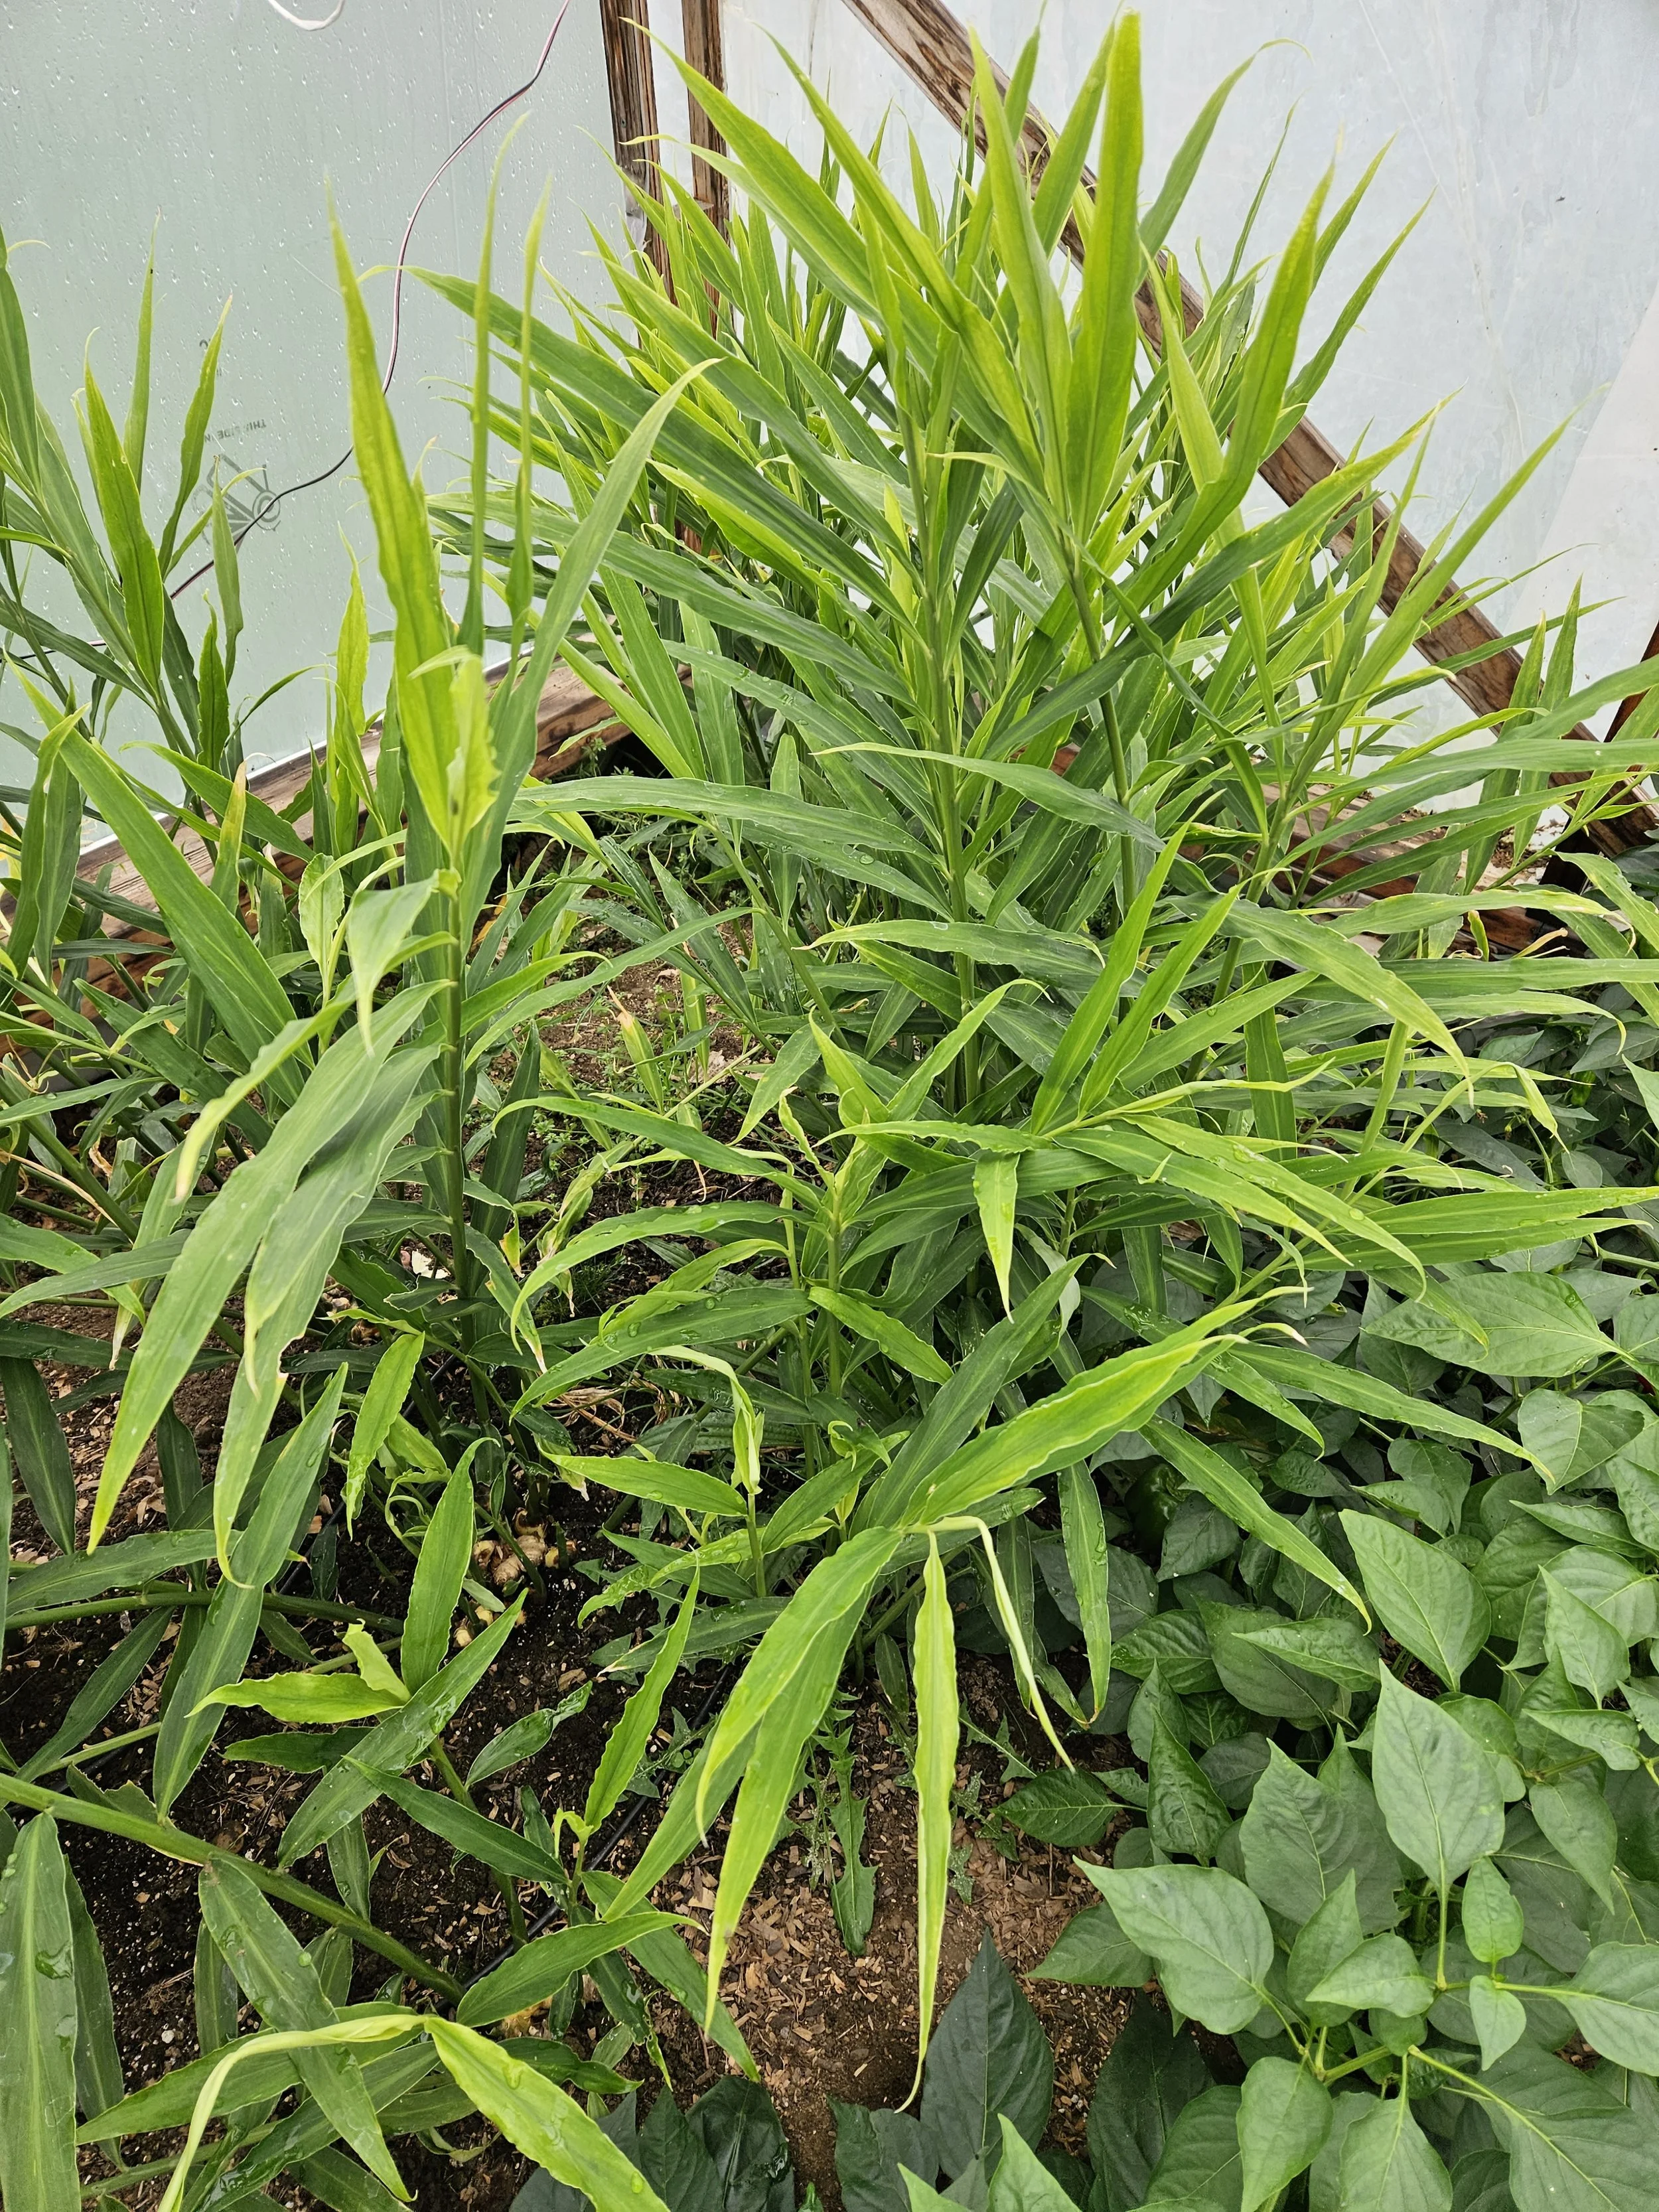
Ginger
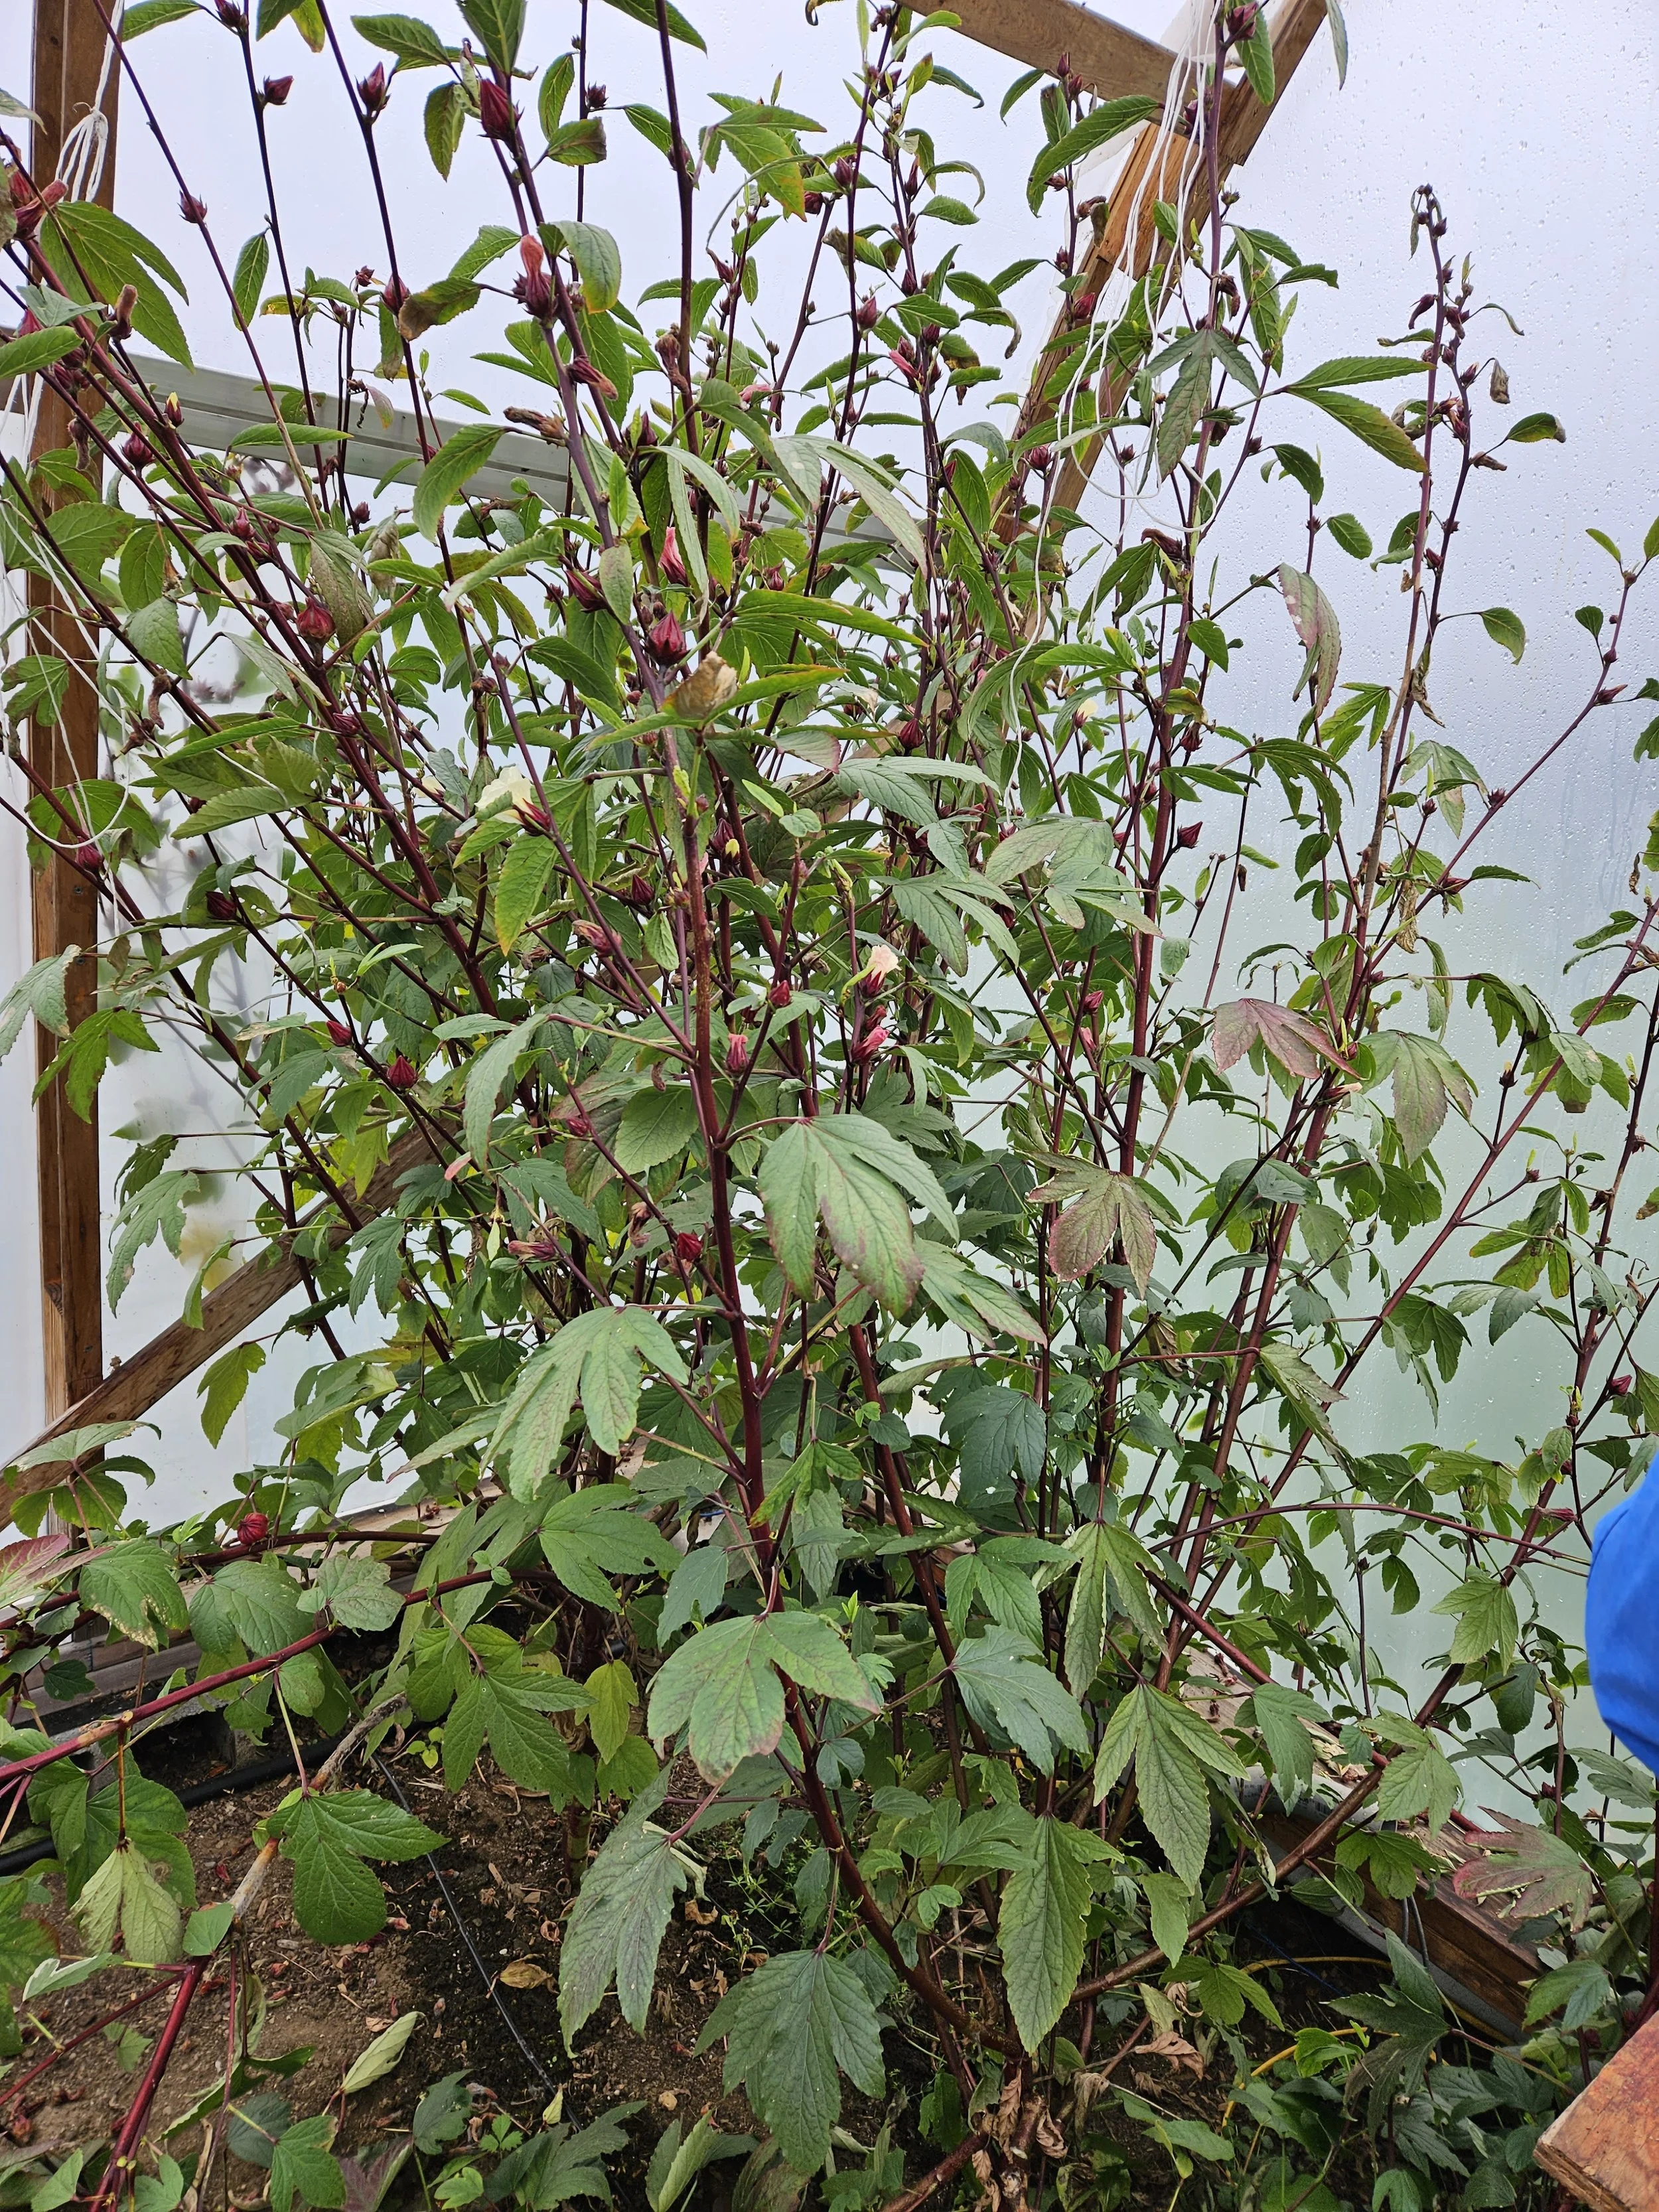
Hibiscus
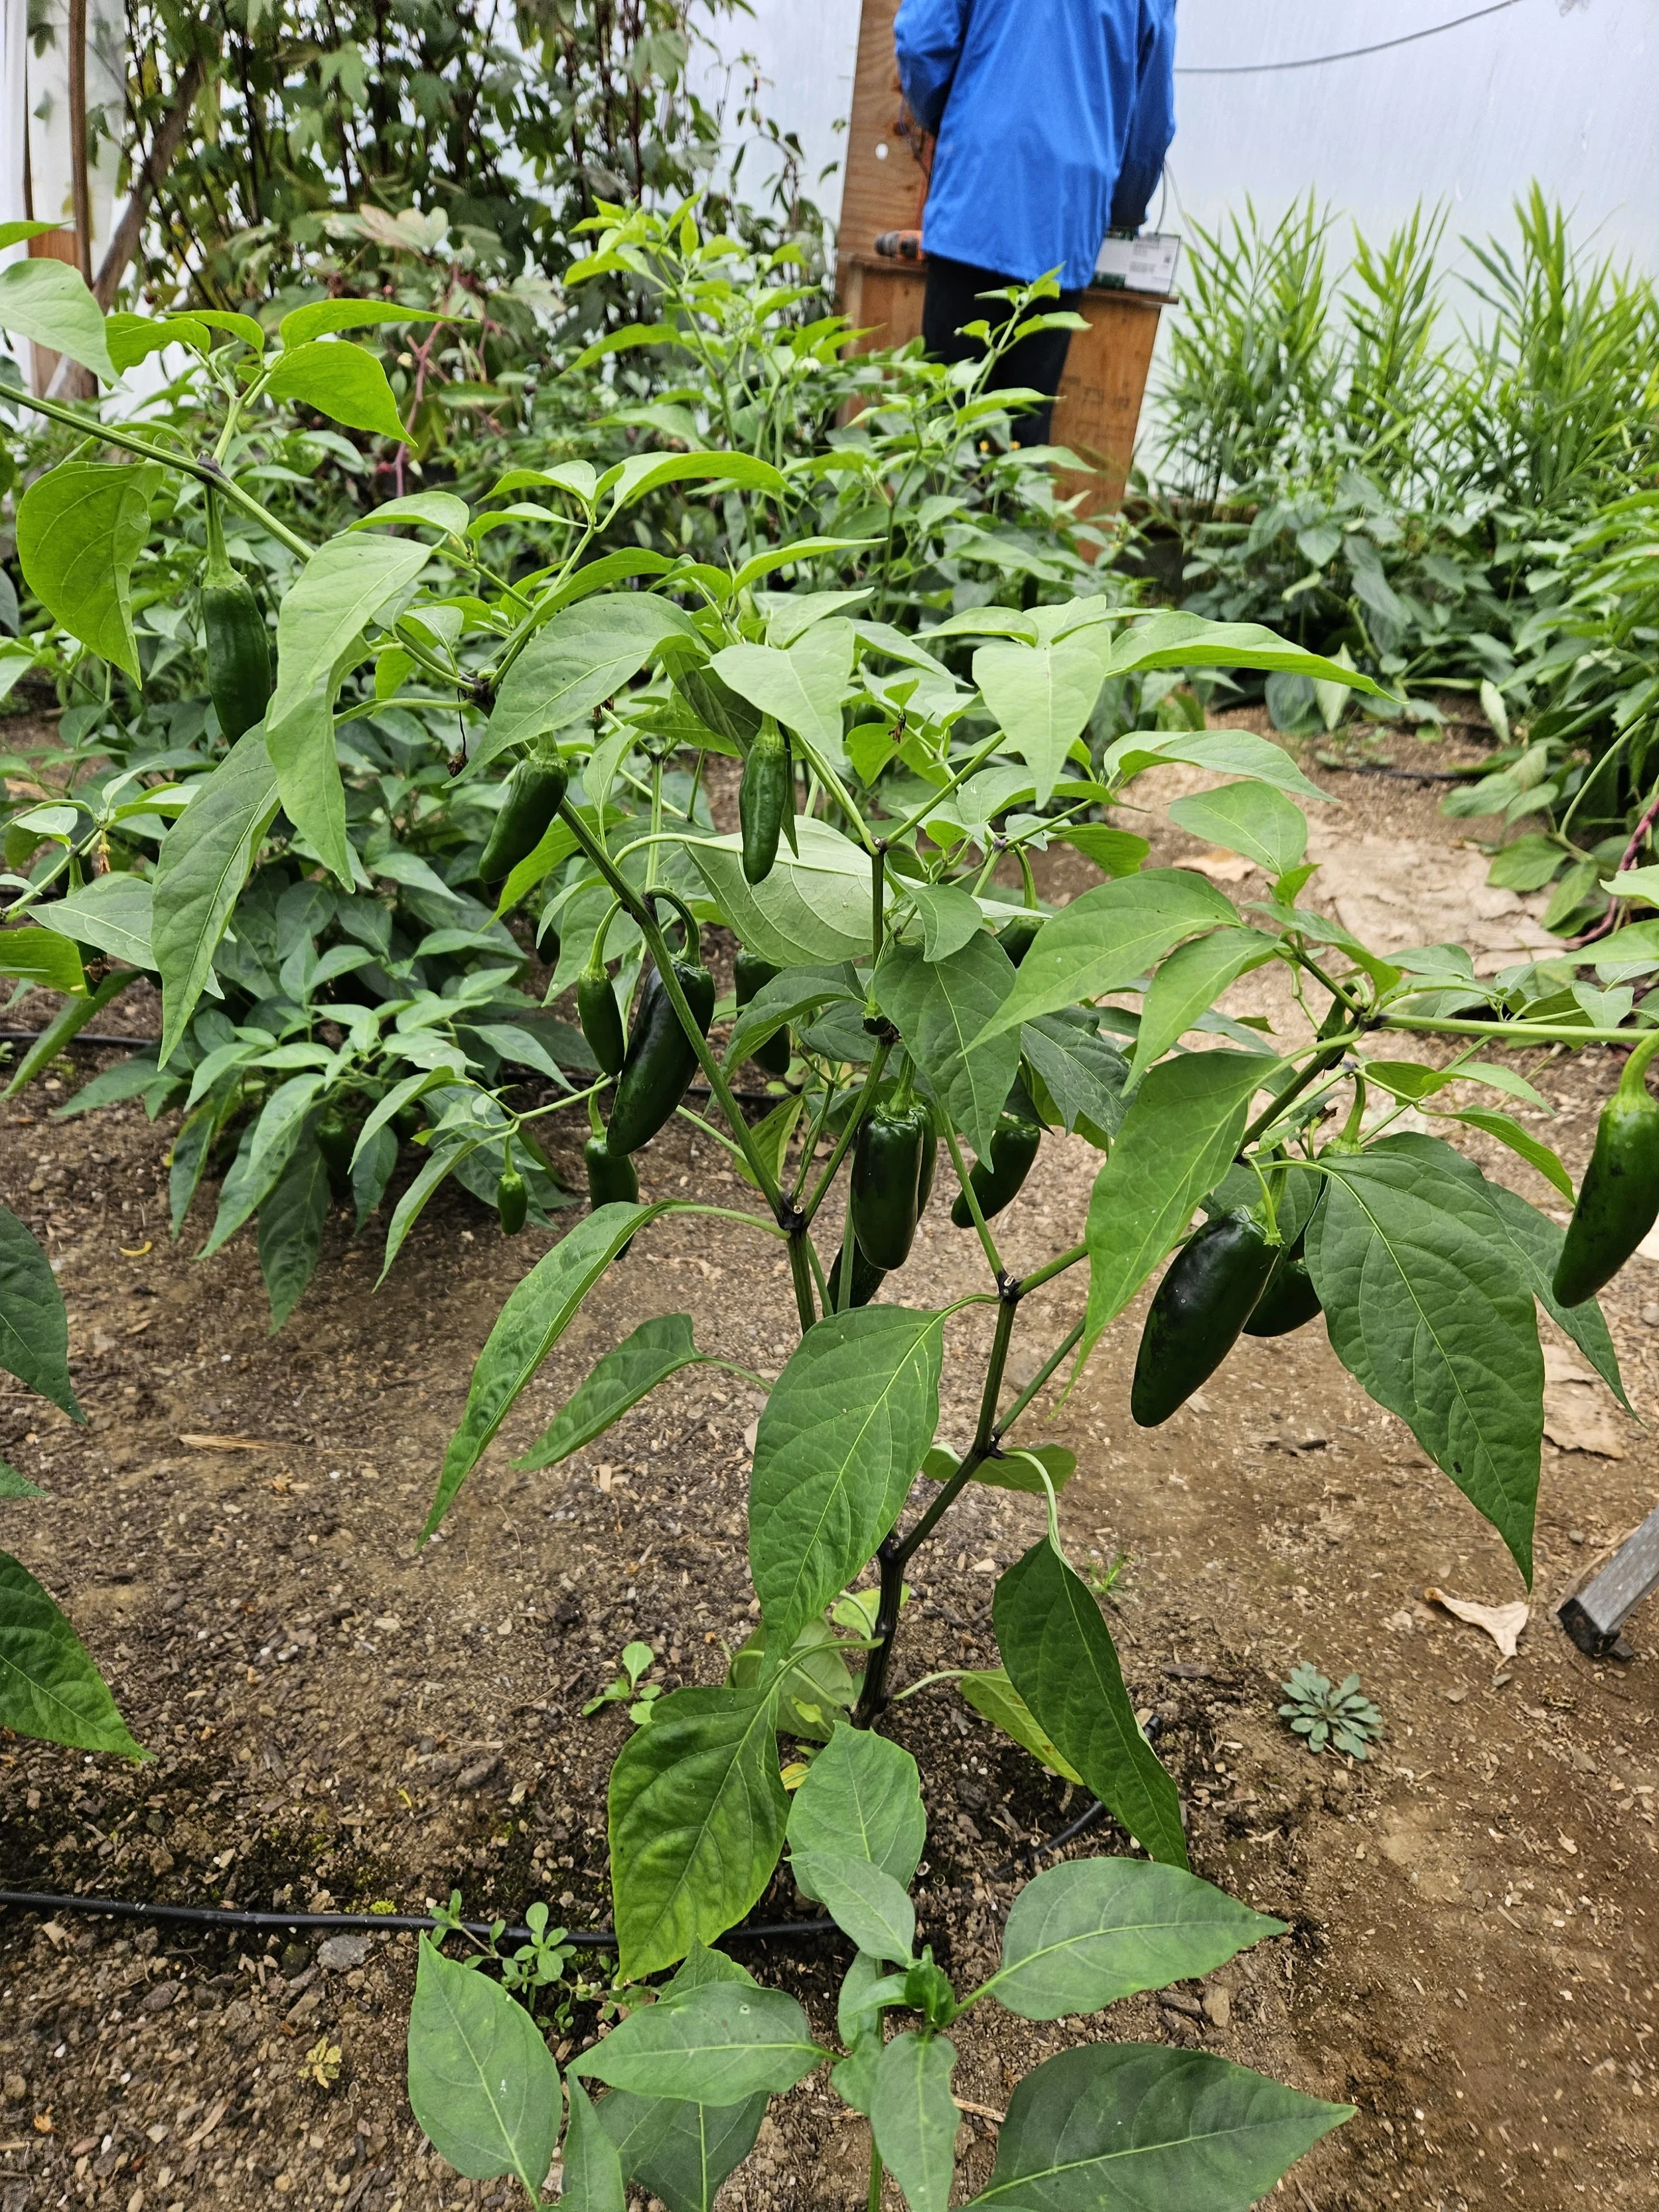
Jalapeno peppers
Mid-summer bounty!